HP 3-port 12V User Guide
HP 3-port 12V Manual
 |
View all HP 3-port 12V manuals
Add to My Manuals
Save this manual to your list of manuals |
HP 3-port 12V manual content summary:
- HP 3-port 12V | User Guide - Page 1
User Guide SUMMARY This guide provides basic information for using and upgrading this product, including topics such as components, features, networks, and HP resources. - HP 3-port 12V | User Guide - Page 2
such products and services. Nothing herein should be construed as constituting an additional warranty. HP shall not be liable for technical or editorial errors or omissions contained herein. First Edition: February 2023 Document Part Number: N37535-001 Product Notice This guide describes features - HP 3-port 12V | User Guide - Page 3
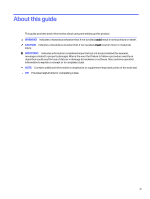
About this guide This guide provides basic information about using and setting up this product. WARNING! Indicates a hazardous situation that, if not avoided, could result in serious injury or death. - HP 3-port 12V | User Guide - Page 4
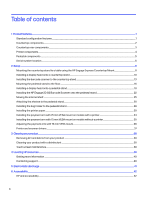
and debris from your product ...38 Cleaning your product with a disinfectant ...38 Touch screen maintenance...39 4 Locating HP resources ...40 Getting more information ...40 Contacting support...40 5 Electrostatic discharge ...41 6 Accessibility ...42 HP and accessibility...42 iv - HP 3-port 12V | User Guide - Page 5
(WCAG)...44 Legislation and regulations...45 Useful accessibility resources and links ...45 Organizations...45 Educational institutions ...45 Other disability resources ...46 HP links ...46 Contacting support...46 Index...47 v - HP 3-port 12V | User Guide - Page 6
1 Product features This chapter provides you with an overview of your product's features. Standard configuration features To identify a typical product configuration, read this section. Features vary depending on the model. NOTE: Display head sold separately. Pedestal stand Countertop stand - HP 3-port 12V | User Guide - Page 7
● Display panel (wide-aspect ratio); FHD 1920 × 1080 resolution, antiglare, antismudge, available in landscape or portrait orientation in the following sizes: NOTE: Display sold separately. For more information, refer to the documentation for your product. - 39.6 cm (15.6 in), 400 nits - 49.5 cm (19 - HP 3-port 12V | User Guide - Page 8
NOTE: Display head sold separately. Table 1-1 Identifying the countertop components Countertop components 1 Display head 5 Payment arm4 2 Printer drawer pin hole1 6 Indicator light5 3 Custom Modus 3 Printer2 7 HP Engage 2D G2 Barcode Scanner 4 Payment device3 8 HP Engage Express - HP 3-port 12V | User Guide - Page 9
Table 1-2 Identifying the countertop rear components Countertop rear components Pro VESA hub (sold separately) 1 RJ-45 (network) connector 4 Powered USB 12 V port 2 Power connector 5 USB Type-C® port 3 Powered USB 24 V port 6 USB SuperSpeed 5 Gbps ports (3) HP Engage Express Mini Hub 7 4- - HP 3-port 12V | User Guide - Page 10
Table 1-3 Identifying the printer components Printer components 1 Printer presenter1 5 Printer drawer 2 Custom Modus3 Printer2 6 Payment arm adjustment screw 3 Paper roll 7 Payment arm3 4 Countertop stand 8 Payment device4 1 Prevents paper jams 2 Printer only available installed from - HP 3-port 12V | User Guide - Page 11
stand has a unique serial number and a product ID number that are located near the top of the product. Keep these numbers available when contacting customer service for assistance. 6 Chapter 1 Product features - HP 3-port 12V | User Guide - Page 12
Serial number location 7 - HP 3-port 12V | User Guide - Page 13
2 Setup Product configuration varies. Not all components are available on all configurations. Mounting the countertop stand to a table using the HP Engage Express Countertop Mount To mount the countertop stand to a table, use these procedures and illustrations. NOTE: The HP Engage Express Countertop - HP 3-port 12V | User Guide - Page 14
2. Place the mounting bracket on the table (1), and then secure it with four Phillips screws (2). NOTE: Mounting screws not included. 3. Place the countertop stand onto the bracket. 4. Place the bracket over the mounting hole (1), and then install three Allen head screws (2). Mounting the countertop - HP 3-port 12V | User Guide - Page 15
Installing a display head onto a countertop stand To install a display head to a countertop stand, use these procedures and illustrations. To install a display head to a countertop stand: 1. Insert the key into the slot (1), and then pull the cover off the countertop unit (2). 2. Pull the bottom of - HP 3-port 12V | User Guide - Page 16
3. Place the display head into the top of the countertop stand (1), and then install four Phillips screws (2). 4. Connect the power cable (1) and USB cable (2) to the VESA hub on back of the display head. Installing a display head onto a countertop stand 11 - HP 3-port 12V | User Guide - Page 17
5. Route the power cable under and up through the hole in the countertop base (1), plug the cable into the top of the power board (2), and then plug the power cord into an AC outlet (3). 6. Insert the top rear cover into the top of the countertop stand (1), and then rotate the bottom of the cover - HP 3-port 12V | User Guide - Page 18
7. Insert the bottom rear cover into the countertop stand under the top rear cover (1), and then rotate the cover into place (2). Installing the barcode scanner to the countertop stand To install the barcode scanner, use these procedures and illustrations. To install the barcode scanner: 1. Insert - HP 3-port 12V | User Guide - Page 19
2. Determine the location and orientation to install the scanner. 3. Depending on desired location and orientation, place the metal plate on the bottom of the barcode scanner cradle (1), and then install four 7 mm nuts (2). 4. Place the cradle on the bottom of the countertop stand (1), and then - HP 3-port 12V | User Guide - Page 20
5. Place the scanner onto the cradle (1), and then route the cable through the hole in the countertop base (2). 6. Position the countertop stand upright. Installing the barcode scanner to the countertop stand 15 - HP 3-port 12V | User Guide - Page 21
7. Connect the barcode scanner cable to one of the USB connectors on the mini hub at the bottom of the countertop stand. 8. Insert the bottom rear cover into the countertop stand under the top rear cover (1), and then rotate the cover into place (2). Mounting the pedestal stand to the floor To mount - HP 3-port 12V | User Guide - Page 22
2. Bolt the pedestal stand to the floor. Use this illustration to determine mounting dimensions and screw size. 3. Replace the mounting hole caps. Mounting the pedestal stand to the floor 17 - HP 3-port 12V | User Guide - Page 23
Installing a display head onto a pedestal stand To install a display head to a pedestal stand, use these procedures and illustrations. To install a display head to a pedestal stand: 1. Insert the key into the slot (1), and then pull the middle cover off the pedestal stand (2). 2. Lift from the - HP 3-port 12V | User Guide - Page 24
3. Insert the key into the slot (1), and then pull the bottom rear cover off the pedestal stand (2). 4. Place the display head into the top of the pedestal stand (1), and then install four Phillips screws (2). Installing a display head onto a pedestal stand 19 - HP 3-port 12V | User Guide - Page 25
5. Connect the power cable (1) and USB cable (2) to the VESA hub on back of the display head. 6. Route the power cable under and up through the hole in the pedestal stand base (1), insert the power brick into the cavity in the pedestal stand (2), plug the cable into the top of the power board (3), - HP 3-port 12V | User Guide - Page 26
8. Insert the middle rear cover into the pedestal stand under the top rear cover (1), and then rotate the cover into place (2). 9. Insert the bottom rear cover onto the pedestal stand (1), and then rotate the cover into place (2). Installing a display head onto a pedestal stand 21 - HP 3-port 12V | User Guide - Page 27
Installing the HP Engage 2D G2 Barcode Scanner onto the pedestal stand To install the HP Engage 2D G2 Barcode Scanner onto the pedestal stand, use these procedures and illustrations. NOTE: The HP Engage Express Pedestal Barcode Scanner Cradle is available only on the right side of the stand and must - HP 3-port 12V | User Guide - Page 28
4. Insert the barcode scanner cable into the hole underneath the holder. 5. Connect the cable to one of the USB ports on the mini hub. Installing the HP Engage 2D G2 Barcode Scanner onto the pedestal stand 23 - HP 3-port 12V | User Guide - Page 29
6. Insert the top rear cover into the top of the pedestal stand (1), and then rotate the bottom of the cover into place (2). 7. Insert the middle rear cover into the pedestal stand under the top rear cover (1), and then rotate the cover into place (2). 8. Insert the bottom rear cover onto the - HP 3-port 12V | User Guide - Page 30
Moving the internal shelf To reposition the internal shelf in the pedestal stand, use this procedure and illustration. You can place the internal shelf in three different positions inside the pedestal stand. To reposition the internal shelf: 1. Remove the rubber strip from the front of both sides of - HP 3-port 12V | User Guide - Page 31
2. Remove the shelf by rotating it 90° (1), and then pulling it out of the pedestal stand (2). 3. Remove the mounting screw from both sides of the rod that holds the shelf in place. 26 Chapter 2 Setup - HP 3-port 12V | User Guide - Page 32
4. Slide the rod into the new position. 5. Install the mounting screw into both sides of the rod. Moving the internal shelf 27 - HP 3-port 12V | User Guide - Page 33
6. Insert the shelf into the pedestal stand. Attaching the shelves to the pedestal stand To attach the shelves to the pedestal stand, use these procedures and illustrations. NOTE: The left and right shelves are specific to each side of the pedestal stand. To attach the shelves: 1. Remove the rubber - HP 3-port 12V | User Guide - Page 34
2. Insert the tabs on the shelves into the slots in the pedestal stand (1), and then press the shelves downward into place (2). Installing the bag holder to the pedestal stand To install the bag holder to the pedestal stand, use these procedures and illustrations. To install the bag holder: ■ Insert - HP 3-port 12V | User Guide - Page 35
Installing the printer paper To install the printer paper, use these procedures and illustrations. To install the printer paper: 1. Insert the key into the slot (1), and then pull the printer drawer out (2). 2. You can adjust the location of the spindle to accommodate different paper roll sizes. a. - HP 3-port 12V | User Guide - Page 36
b. To install the spindle, insert the flat part of the end of the spindle in the hole in the printer (1), and then install the Phillips screw (2). 3. Insert the paper roll onto the spindle. Installing the printer paper 31 - HP 3-port 12V | User Guide - Page 37
4. Lift the printer latch. 5. Place the end of the paper onto the paper feed. 32 Chapter 2 Setup - HP 3-port 12V | User Guide - Page 38
6. Close the printer latch. 7. Push the printer into the countertop model. Installing the printer paper 33 - HP 3-port 12V | User Guide - Page 39
Installing the payment arm with 75 mm VESA mount on models with a printer To install the payment arm on models with a printer, use these procedures and illustrations. The payment arm offers a 75 mm VESA® mount. To install the payment arm: 1. Insert the key into the slot (1), and then pull the - HP 3-port 12V | User Guide - Page 40
3. On the inside of the printer drawer, install two 8 mm nuts to secure the payment arm. Installing the payment arm with 75 mm VESA mount on models without a printer To install the payment arm on models without a printer, use these procedures and illustrations. The payment arm offers a 75 mm VESA - HP 3-port 12V | User Guide - Page 41
2. On the back of the stand, install two 8 mm nuts to secure the payment arm. Adjusting the payment arm with 75 mm VESA mount To adjust the payment arm, use this procedure and illustration. To adjust the payment arm: ■ On the bottom of the payment arm, use a Phillips screwdriver to loosen or tighten - HP 3-port 12V | User Guide - Page 42
index.php?code=915LF02015T300&qrcode, and then select Drivers. To download the presentation scanner driver, go to https://www.datalogic.com/eng/support-service/downloads-dw-82.html, select Search by product, select Magellan 1500i, and then select Search. Scroll down to Software & Utilities, and then - HP 3-port 12V | User Guide - Page 43
3 Cleaning your product Cleaning your product regularly removes dirt and debris so that your device continues to operate at its best. Use the following information to safely clean the external surfaces of your product. Removing dirt and debris from your product Here are the recommended steps to - HP 3-port 12V | User Guide - Page 44
1. Wear disposable gloves made of latex (or nitrile gloves, if you are latex-sensitive) when cleaning the surfaces. 2. Turn off your device and unplug the power cord and other connected external devices. CAUTION: To prevent electric shock or damage to components, never clean a product while it is - HP 3-port 12V | User Guide - Page 45
.com) provides product news and software updates. Contacting support If you cannot solve a problem, you might need to contact support. For the fastest possible resolution of your problem, have the following information available when you contact support: NOTE: The serial number and other information - HP 3-port 12V | User Guide - Page 46
. IMPORTANT: To prevent damage to the product, damage to a drive, or loss of information, observe these precautions: ● If removal or installation instructions direct you to unplug the product, first be sure that it is properly grounded. ● Keep components in their electrostatic-safe containers until - HP 3-port 12V | User Guide - Page 47
is committed to providing products and services that are accessible for people with disabilities. This commitment supports the company's diversity objectives and helps seven key objectives to guide HP actions. All HP managers and employees are expected to support these objectives and their - HP 3-port 12V | User Guide - Page 48
, HP joined to participate with other organizations to advance the field of accessibility. This commitment supports HP's accessibility goal of designing, producing, and marketing products and services that people with disabilities can effectively use. IAAP will make the profession strong by globally - HP 3-port 12V | User Guide - Page 49
disabilities. These regulations are historically applicable to telecommunications products and services, PCs and printers with certain communications and video playback features, their associated user documentation, and their customer support. Standards The US Access Board created Section 508 of the - HP 3-port 12V | User Guide - Page 50
Legislation and regulations Accessibility of IT and information has become an area of increasing legislative importance. These links provide information about key legislation, regulations, and standards. ● United States ● Canada ● Europe ● Australia Useful accessibility resources and links These - HP 3-port 12V | User Guide - Page 51
that relates to disabilities and age-related limitations. HP comfort and safety guide HP public sector sales Contacting support HP offers technical support and assistance with accessibility options for customers with disabilities. NOTE: Support is in English only. ● Customers who are deaf or hard of - HP 3-port 12V | User Guide - Page 52
3, 6 installing to countertop stand 10 installing to pedestal stand 18 E electrostatic discharge 41 H HP Assistive Policy 42 HP Help and Support 40 I indicator light, illustrated 3 installing bag holder 29 barcode scanner to countertop stand 13 barcode scanner to pedestal stand 22 display head - HP 3-port 12V | User Guide - Page 53
T touch screen maintenance 39 U USB SuperSpeed 5 Gbps ports, illustrated 4 USB Type-C port, illustrated 4 48 Index
-
 1
1 -
 2
2 -
 3
3 -
 4
4 -
 5
5 -
 6
6 -
 7
7 -
8
-
9
-
10
-
11
-
12
-
13
-
14
-
15
-
16
-
17
-
18
-
19
-
20
-
21
-
22
-
23
-
24
-
25
-
26
-
27
-
28
-
29
-
30
-
31
-
32
-
33
-
34
-
35
-
36
-
37
-
38
-
39
-
40
-
41
-
42
-
43
-
44
-
45
-
46
-
47
-
48
-
49
-
50
-
51
-
52
-
53
 |
 |

User Guide
SUMMARY
This guide provides basic information for using and upgrading this product, including topics such as
components, features, networks, and HP resources.