HP 410 HP Digital Copier printer 410 - (English) Setup Poster
HP 410 - Digital Copier Printer Manual
 |
UPC - 844844844303
View all HP 410 manuals
Add to My Manuals
Save this manual to your list of manuals |
HP 410 manual content summary:
- HP 410 | HP Digital Copier printer 410 - (English) Setup Poster - Page 1
hp digital copier printer 410 Poster d'installation copieur/imprimante numérique hp 410 www.hp.com/support HP Digital Copier Printer 410 to a computer, see the Printing Guide. Remarque : pour relier votre copieur/imprimante numérique hp 410 à un ordinateur, consultez le Guide print cartridge with
-
 1
1
 |
 |
www.hp.com/support
Copyright Hewlett-Packard Company 2003
11
English
12
Español
13
Français
14
Deutsch
15
Português
16
Nederlands
17
Italiano
18
Dansk
19
Suomi
20
Norsk
21
Svenska
4
5
3
6
2
1
e
d
a
b
c
b
a
b
a
b
a
b
a
a
b
b
c
a
d
d
d
d
e
b
c
a
d
*Q1645-90101*
*Q1645-90101*
Q1645-90101
Insérez les deux ergots du capot dans les deux
ouvertures situées sur le copieur.
Rabattez le capot et appuyez fermement dessus.
Assurez-vous que les ergots s'enclenchent et que
le capot ne dépasse pas.
Installez l'extension du bac
d'alimentation automatique de
documents (ADF) sur la partie
supérieure du copieur. Alignez les
taquets gris sur les ouvertures noires.
Saisissez le code correspondant à votre langue sur le
clavier, puis confirmez votre sélection.
Saisissez le code de votre pays/région, puis confirmez
votre sélection.
Mettez le capot en place
Installez l'extension ADF
Retirez le plateau de sortie et chargez du papier blanc ordinaire
Sélectionnez votre langue et votre pays/région
Branchez le cordon d'alimentation et allumez le copieur
Imprimé aux Etats-Unis
Soulevez la porte d'accès
au chariot d'impression.
Attendez que le chariot
d'impression se déplace et
soit visible. Soulevez les
loquets bleu et gris.
Retirez la bande
adhésive rose apposée
sur les cartouches
d'impression. Ne touchez
pas les contacts en cuivre
et ne remettez pas la
bande adhésive sur les
cartouches.
Tenez la cartouche d'impression noir l'étiquette
orientée vers le haut. Insérez-la dans le
compartiment de droite (loquet gris) du chariot
d'impression.
Tenez la cartouche d'impression 3 couleurs
l'étiquette orientée vers le haut. Insérez-la dans le
compartiment de gauche (loquet bleu) du chariot
d'impression.
Tirez l'extrémité du loquet gris vers
vous, appuyez dessus jusqu'à ce qu'il
soit mis en place. Assurez-vous que le
loquet s'insère sous les taquets
inférieurs. Suivez la même procédure
pour le loquet bleu. Rabattez la porte
du chariot d'impression.
Appuyez sur Entrée pour
lancer l'alignement.
Lorsqu'une page s'imprime,
l'alignement est terminé.
Jetez ou recyclez cette
page. L'installation est
maintenant terminée.
Remarque :
pour relier votre
copieur/imprimante numérique hp 410 à un
ordinateur, consultez le Guide d'impression.
Cartouche noir (56)
Cartouche 3 couleurs (57)
Insérez et alignez les cartouches d'impression
Poster d'installation
copieur/imprimante
numérique
hp
410
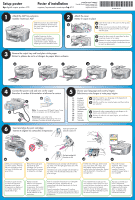
Attach the ADF tray extension
Connect the power cord and turn on the copier
Choose your language and country/region
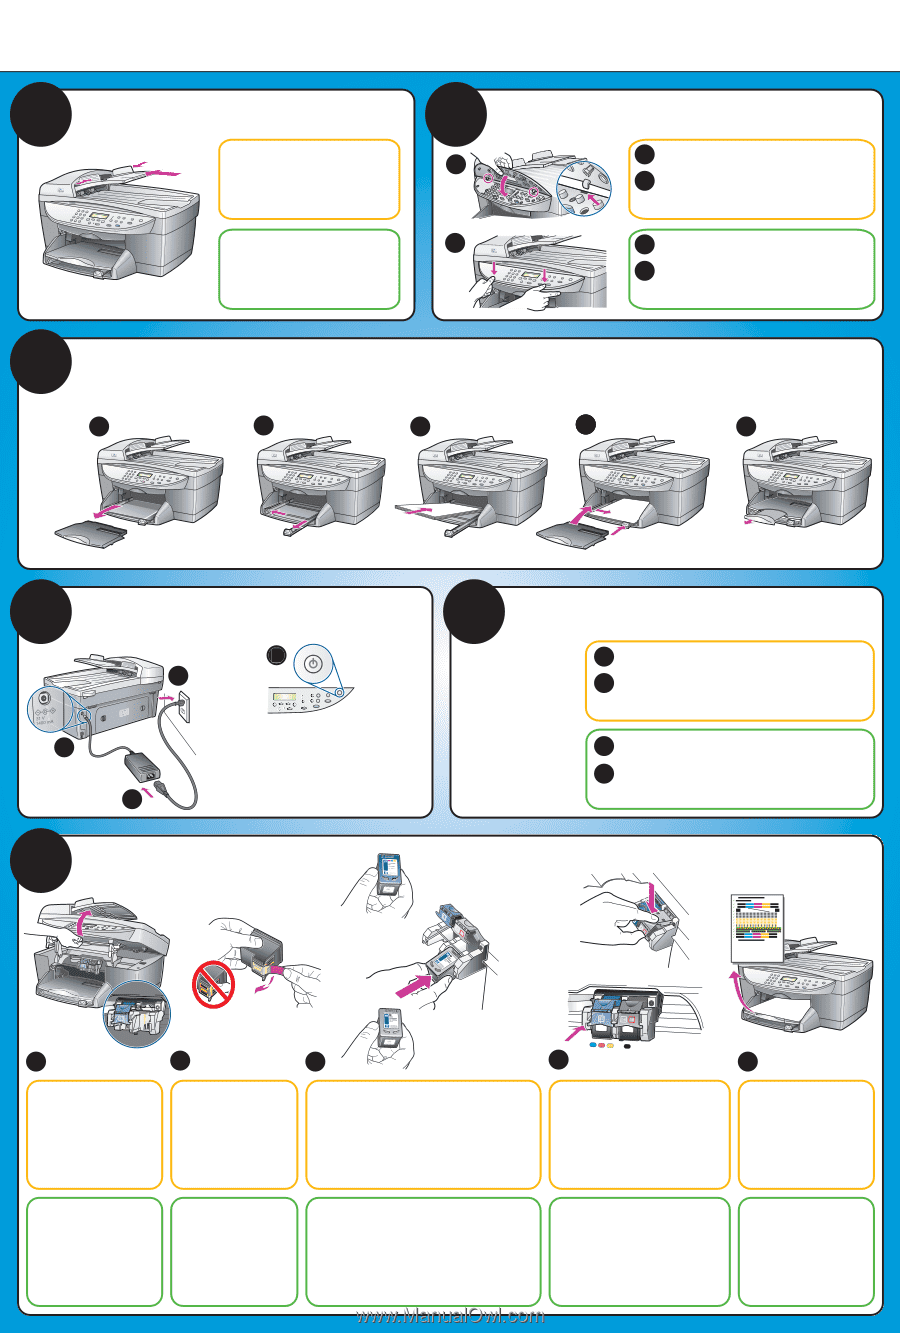
Insert and align the print cartridges
Black print cartridge (56)
Tricolor print cartridge (57)
Attach the cover
Remove the output tray and load plain white paper
Insert the two tabs on the cover into the top slots
on the copier.
Tilt the cover down and press firmly. Make sure
the tabs lock into place and the cover is flush
with the copier.
Slide the automatic document feeder
(ADF) tray extension into the top of
the copier. Match the gray tabs with
the black slots.
Enter the code for your language on the keypad and
then confirm your selection.
Enter the code for your country/region and then confirm
your selection.
Remove the bright pink
tape from the print
cartridges. Do not touch
the gold-colored contacts
or retape the cartridges.
Hold the black print cartridge with the label on
top. Slide it into the right (gray latch) side of the
print carriage.
Hold the tricolor print cartridge with the label on
top. Slide it into the left (blue latch) side of the
print carriage.
Pull the end of the gray latch toward
you, press down until it stops, and
then release. Make sure the latch
catches below the bottom tabs. Repeat
with the blue latch. Close the print
carriage door.
Printed in United States
Press Enter to begin
alignment. After a page
prints, alignment is
complete. Discard or
recycle this page. Setup is
now complete.
Lift the print cartridge door
up until it catches. Wait for
the print carriage to move
into view. Lift the blue and
gray latches.
Note:
To connect your HP Digital Copier Printer
410 to a computer, see the Printing Guide.
Setup poster
hp
digital copier printer 410