HP 4100n HP LaserJet 4100 Series - User Guide - Page 116
System Is Full, Flash Device
 |
View all HP 4100n manuals
Add to My Manuals
Save this manual to your list of manuals |
Page 116 highlights
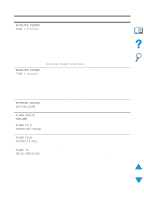
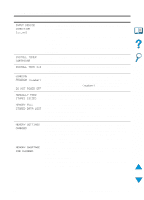
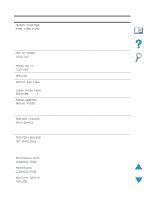
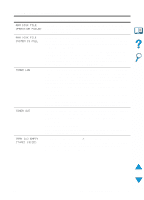
Printer messages (continued) Message Explanation or recommended action ENVELOPE FEEDER SIZE = [xxxxx] ENVELOPE FEEDER TYPE = [xxxxx] EXTERNAL DEVICE INITIALIZING FLASH DEVICE FAILURE FLASH FILE OPERATION FAILED FLASH FILE SYSTEM IS FULL FLASH IS WRITE PROTECTED The printer is asking what size of envelopes has been loaded in the envelope feeder. In response, you can take either of the following actions: • press SELECT to accept the current envelope size • press -VALUE+ to change the size and then press SELECT to accept the new size If you do not press any buttons, the message disappears in about 1 minute. Note Changing the size here changes the default for envelope size in the envelope feeder in the Paper Handling Menu (see the description of "ENVELOPE FEEDER SIZE=COM10" on page 210). The printer has received a job under the following conditions: • the envelope type requested by the job is not available in the printer • envelopes have just been placed in the envelope feeder (thus triggering the paper sensor) You can take either of the following actions: • press SELECT to accept the paper type and then press GO • press +VALUE- to change the type, press SELECT to accept the new type, and then press GO to continue When an external paper handling device is connected to the printer, it must initialize after the computer boots or after coming out of PowerSave mode. The flash DIMM had a critical failure and no longer can be used. Remove the flash DIMM and replace it with a new one. The requested operation could not be performed. You might have attempted an illegal operation, such as trying to download a file to a non-existent directory. Delete files from the flash DIMM. Use HP Resource Manager to download or delete files and fonts. (See the software help for more information.) The flash DIMM is protected and no new files can be written to it. Disable the write protection through HP Resource Manager. 114 Chapter 4 - Problem solving EN
-
 1
1 -
2
-
3
-
4
-
5
-
6
-
7
-
8
-
9
-
10
-
11
-
12
-
13
-
14
-
15
-
16
-
17
-
18
-
19
-
20
-
21
-
22
-
23
-
24
-
25
-
26
-
27
-
28
-
29
-
30
-
31
-
32
-
33
-
34
-
35
-
36
-
37
-
38
-
39
-
40
-
41
-
42
-
43
-
44
-
45
-
46
-
47
-
48
-
49
-
50
-
51
-
52
-
53
-
54
-
55
-
56
-
57
-
58
-
59
-
60
-
61
-
62
-
63
-
64
-
65
-
66
-
67
-
68
-
69
-
70
-
71
-
72
-
73
-
74
-
75
-
76
-
77
-
78
-
79
-
80
-
81
-
82
-
83
-
84
-
85
-
86
-
87
-
88
-
89
-
90
-
91
-
92
-
93
-
94
-
95
-
96
-
97
-
98
-
99
-
100
-
101
-
102
-
103
-
104
-
105
-
106
-
107
-
108
-
109
-
110
-
 111
111 -
 112
112 -
 113
113 -
 114
114 -
 115
115 -
 116
116 -
 117
117 -
 118
118 -
 119
119 -
 120
120 -
 121
121 -
122
-
123
-
124
-
125
-
126
-
127
-
128
-
129
-
130
-
131
-
132
-
133
-
134
-
135
-
136
-
137
-
138
-
139
-
140
-
141
-
142
-
143
-
144
-
145
-
146
-
147
-
148
-
149
-
150
-
151
-
152
-
153
-
154
-
155
-
156
-
157
-
158
-
159
-
160
-
161
-
162
-
163
-
164
-
165
-
166
-
167
-
168
-
169
-
170
-
171
-
172
-
173
-
174
-
175
-
176
-
177
-
178
-
179
-
180
-
181
-
182
-
183
-
184
-
185
-
186
-
187
-
188
-
189
-
190
-
191
-
192
-
193
-
194
-
195
-
196
-
197
-
198
-
199
-
200
-
201
-
202
-
203
-
204
-
205
-
206
-
207
-
208
-
209
-
210
-
211
-
212
-
213
-
214
-
215
-
216
-
217
-
218
-
219
-
220
-
221
-
222
-
223
-
224
-
225
-
226
-
227
-
228
-
229
-
230
-
231
-
232
-
233
-
234
-
235
-
236
-
237
-
238
-
239
-
240
-
241
-
242
-
243
-
244
-
245
-
246
-
247
-
248
-
249
-
250
-
251
-
252
-
253
-
254
-
255
-
256
-
257
-
258
-
259
-
260
-
261
-
262
-
263
-
264
-
265
-
266
-
267
-
268
-
269
-
270
-
271
-
272
-
273
-
274
-
275
-
276
-
277
-
278
 |
 |