HP 4100n HP LaserJet 4100 Series - User Guide - Page 66
CON CUSTOM PAPER=YES, TRAY 1 MODE=CASSETTE, TRAY 1 SIZE=CUSTOM, From the Printing Menu set
 |
View all HP 4100n manuals
Add to My Manuals
Save this manual to your list of manuals |
Page 66 highlights
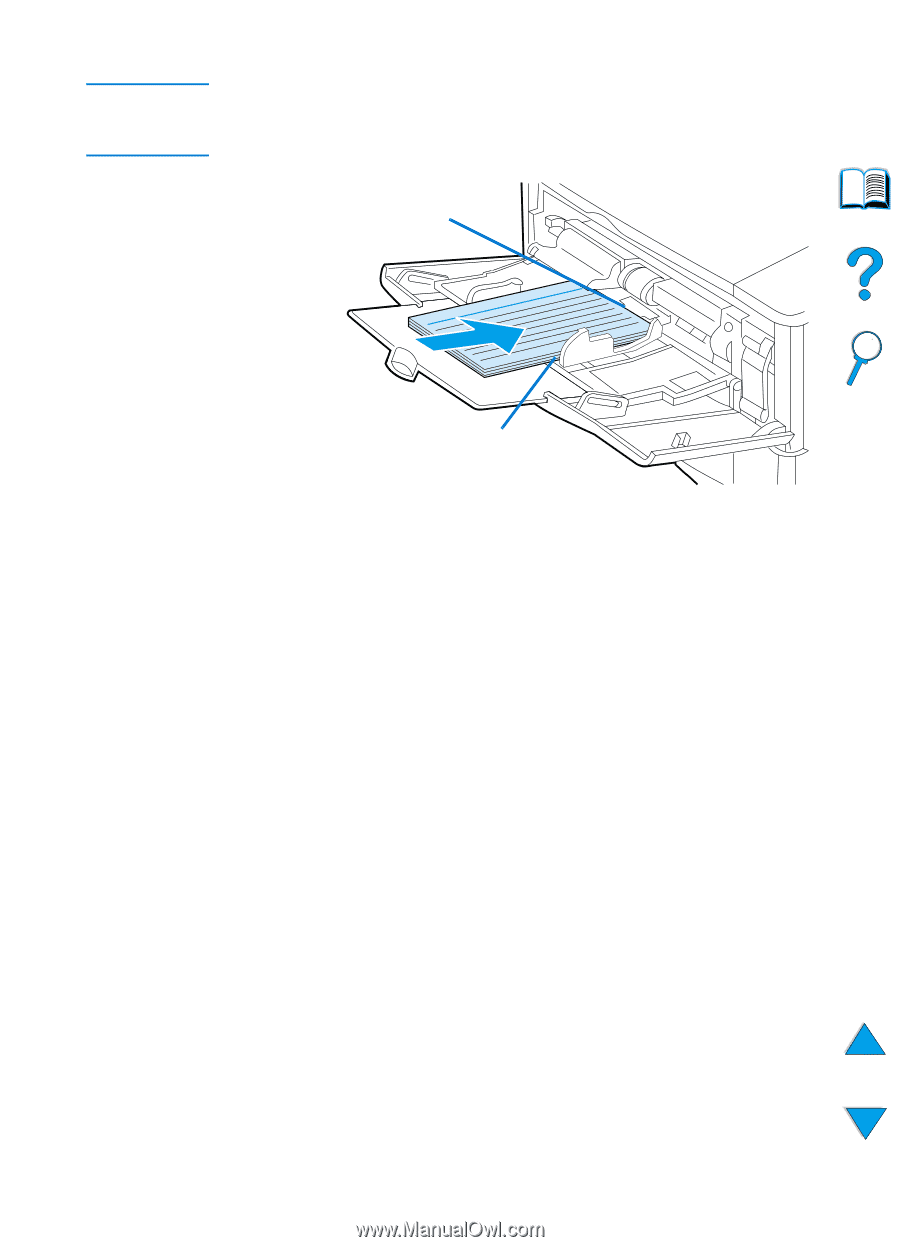
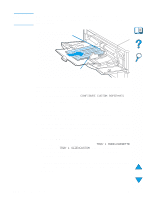
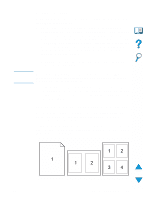
Note Settings in the printer driver and software application override control panel settings. (Software application settings generally override printer driver settings.) X (front edge) Feed short edge first Y (side edge) If the settings are not available from the software, set the custom paper size from the control panel: 1 From the Printing Menu set CONFIGURE CUSTOM PAPER=YES. 2 From the Printing Menu, select inches or millimeters as the unit of measurement. 3 From the Printing Menu, set the X dimension (the front edge of the paper) as shown in the figure above. The X dimension can be 76 to 216 mm (3 to 8.5 in). 4 Set the Y dimension (the side edge of the paper) as shown in the figure above. The Y dimension can be 127 to 356 mm (5 to 14 in). For example, if the custom paper is 203 by 254 mm (8 by 10 in), set X=203 mm and Y=254. 5 If custom paper is loaded into tray 1, set TRAY 1 MODE=CASSETTE and then set TRAY 1 SIZE=CUSTOM from the Paper Handling Menu in the printer control panel. See "Customizing tray 1 operation" on page 69. If custom paper is loaded in tray 2, 3, or 4, be sure the paper size slider is set to Custom (see "Loading trays 2, 3, and 4" on page 47). 64 Chapter 2 - Printing tasks EN
-
 1
1 -
2
-
3
-
4
-
5
-
6
-
7
-
8
-
9
-
10
-
11
-
12
-
13
-
14
-
15
-
16
-
17
-
18
-
19
-
20
-
21
-
22
-
23
-
24
-
25
-
26
-
27
-
28
-
29
-
30
-
31
-
32
-
33
-
34
-
35
-
36
-
37
-
38
-
39
-
40
-
41
-
42
-
43
-
44
-
45
-
46
-
47
-
48
-
49
-
50
-
51
-
52
-
53
-
54
-
55
-
56
-
57
-
58
-
59
-
60
-
 61
61 -
 62
62 -
 63
63 -
 64
64 -
 65
65 -
 66
66 -
 67
67 -
 68
68 -
 69
69 -
 70
70 -
 71
71 -
72
-
73
-
74
-
75
-
76
-
77
-
78
-
79
-
80
-
81
-
82
-
83
-
84
-
85
-
86
-
87
-
88
-
89
-
90
-
91
-
92
-
93
-
94
-
95
-
96
-
97
-
98
-
99
-
100
-
101
-
102
-
103
-
104
-
105
-
106
-
107
-
108
-
109
-
110
-
111
-
112
-
113
-
114
-
115
-
116
-
117
-
118
-
119
-
120
-
121
-
122
-
123
-
124
-
125
-
126
-
127
-
128
-
129
-
130
-
131
-
132
-
133
-
134
-
135
-
136
-
137
-
138
-
139
-
140
-
141
-
142
-
143
-
144
-
145
-
146
-
147
-
148
-
149
-
150
-
151
-
152
-
153
-
154
-
155
-
156
-
157
-
158
-
159
-
160
-
161
-
162
-
163
-
164
-
165
-
166
-
167
-
168
-
169
-
170
-
171
-
172
-
173
-
174
-
175
-
176
-
177
-
178
-
179
-
180
-
181
-
182
-
183
-
184
-
185
-
186
-
187
-
188
-
189
-
190
-
191
-
192
-
193
-
194
-
195
-
196
-
197
-
198
-
199
-
200
-
201
-
202
-
203
-
204
-
205
-
206
-
207
-
208
-
209
-
210
-
211
-
212
-
213
-
214
-
215
-
216
-
217
-
218
-
219
-
220
-
221
-
222
-
223
-
224
-
225
-
226
-
227
-
228
-
229
-
230
-
231
-
232
-
233
-
234
-
235
-
236
-
237
-
238
-
239
-
240
-
241
-
242
-
243
-
244
-
245
-
246
-
247
-
248
-
249
-
250
-
251
-
252
-
253
-
254
-
255
-
256
-
257
-
258
-
259
-
260
-
261
-
262
-
263
-
264
-
265
-
266
-
267
-
268
-
269
-
270
-
271
-
272
-
273
-
274
-
275
-
276
-
277
-
278
 |
 |