HP 4100n HP LaserJet 4100 Series - User Guide - Page 74
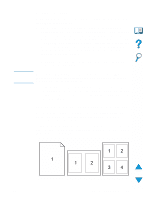
Job retention features, Quick copying a job
 |
View all HP 4100n manuals
Add to My Manuals
Save this manual to your list of manuals |
Page 74 highlights
Job retention features CAUTION To use the job retention features listed below, you must install a hard disk accessory in the printer and properly configure the drivers. To support job retention features for complex jobs, HP recommends that you install additional memory (see "Ordering information" on page 22). Make sure to identify your jobs in the printer driver before printing. Using default names may override previous jobs with the same default name or cause the job to be deleted. Quick copying a job The quick copy feature prints the requested number of copies of a job and stores a copy on the printer's hard disk accessory. Additional copies of the job can be printed later. This feature can be turned off from the driver. For more information about specifying the number of quick copy jobs that can be stored, see the QUICK COPY JOBS control panel item described in "Quick Copy Jobs Menu" on page 206. Printing additional copies of a quick copy job To print additional copies of a job stored on the printer's hard disk accessory from the control panel: 1 Press MENU repeatedly until QUICK COPY JOBS MENU appears. 2 Press ITEM until the desired user or job name appears. 3 For Macintosh computers only: The user name appears on the first line of the display and the job name appears on the second line of the display. After you have selected the desired user name using ITEM, press -VALUE+ until the desired job name appears. 4 Press SELECT to select the job. COPIES=1 appears. 5 Press -VALUE+ until the desired number of copies appears. 6 Press SELECT to print the job. 72 Chapter 2 - Printing tasks EN
-
 1
1 -
2
-
3
-
4
-
5
-
6
-
7
-
8
-
9
-
10
-
11
-
12
-
13
-
14
-
15
-
16
-
17
-
18
-
19
-
20
-
21
-
22
-
23
-
24
-
25
-
26
-
27
-
28
-
29
-
30
-
31
-
32
-
33
-
34
-
35
-
36
-
37
-
38
-
39
-
40
-
41
-
42
-
43
-
44
-
45
-
46
-
47
-
48
-
49
-
50
-
51
-
52
-
53
-
54
-
55
-
56
-
57
-
58
-
59
-
60
-
61
-
62
-
63
-
64
-
65
-
66
-
67
-
68
-
 69
69 -
 70
70 -
 71
71 -
 72
72 -
 73
73 -
 74
74 -
 75
75 -
 76
76 -
 77
77 -
 78
78 -
 79
79 -
80
-
81
-
82
-
83
-
84
-
85
-
86
-
87
-
88
-
89
-
90
-
91
-
92
-
93
-
94
-
95
-
96
-
97
-
98
-
99
-
100
-
101
-
102
-
103
-
104
-
105
-
106
-
107
-
108
-
109
-
110
-
111
-
112
-
113
-
114
-
115
-
116
-
117
-
118
-
119
-
120
-
121
-
122
-
123
-
124
-
125
-
126
-
127
-
128
-
129
-
130
-
131
-
132
-
133
-
134
-
135
-
136
-
137
-
138
-
139
-
140
-
141
-
142
-
143
-
144
-
145
-
146
-
147
-
148
-
149
-
150
-
151
-
152
-
153
-
154
-
155
-
156
-
157
-
158
-
159
-
160
-
161
-
162
-
163
-
164
-
165
-
166
-
167
-
168
-
169
-
170
-
171
-
172
-
173
-
174
-
175
-
176
-
177
-
178
-
179
-
180
-
181
-
182
-
183
-
184
-
185
-
186
-
187
-
188
-
189
-
190
-
191
-
192
-
193
-
194
-
195
-
196
-
197
-
198
-
199
-
200
-
201
-
202
-
203
-
204
-
205
-
206
-
207
-
208
-
209
-
210
-
211
-
212
-
213
-
214
-
215
-
216
-
217
-
218
-
219
-
220
-
221
-
222
-
223
-
224
-
225
-
226
-
227
-
228
-
229
-
230
-
231
-
232
-
233
-
234
-
235
-
236
-
237
-
238
-
239
-
240
-
241
-
242
-
243
-
244
-
245
-
246
-
247
-
248
-
249
-
250
-
251
-
252
-
253
-
254
-
255
-
256
-
257
-
258
-
259
-
260
-
261
-
262
-
263
-
264
-
265
-
266
-
267
-
268
-
269
-
270
-
271
-
272
-
273
-
274
-
275
-
276
-
277
-
278
 |
 |