HP 5100 HP LaserJet 5100 Series - Printer Maintenance Kit - Page 19
Removing the Tray 2 separation pad and spring bottom view, If necessary
 |
UPC - 808736092500
View all HP 5100 manuals
Add to My Manuals
Save this manual to your list of manuals |
Page 19 highlights
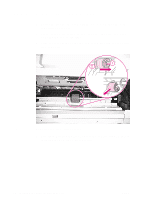
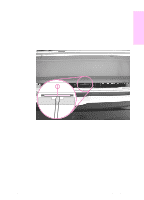
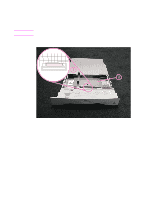
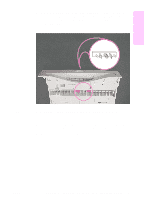
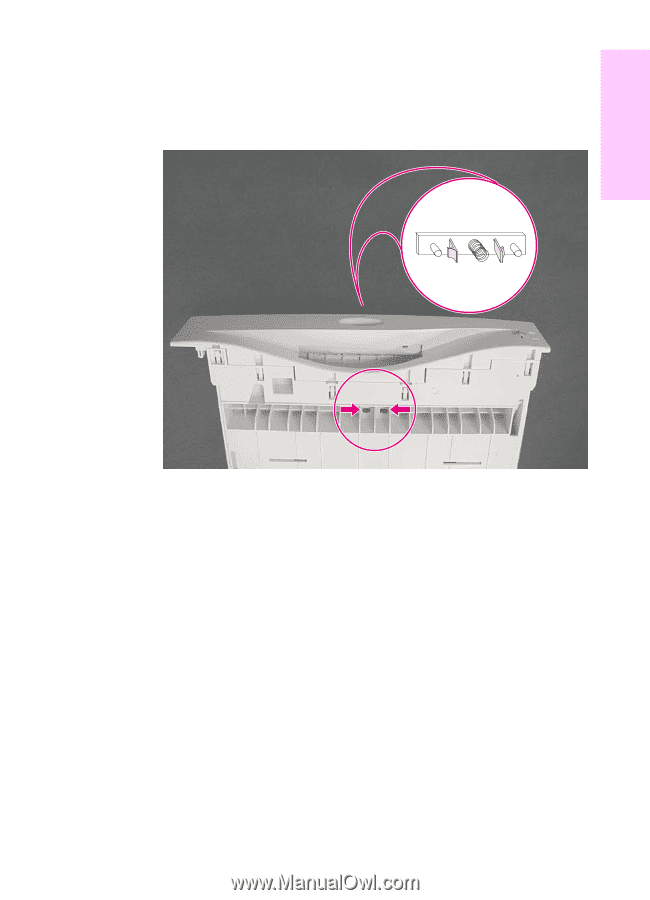
2 While pressing down on the paper lift plate (Figure 10, item 2), reach under the front of the tray and squeeze the black tabs to release the separation pad from the tray. (See Figure 10, item 1, and Figure 11.) English Figure 11 Removing the Tray 2 separation pad and spring (bottom view) 3 If necessary, pull the spring off of the old separation pad, and then insert the spring onto the new separation pad. 4 Replace the separation pad. ENWW Replace the Tray 2 and optional 250-sheet tray separation pad 17
-
 1
1 -
2
-
3
-
4
-
5
-
6
-
7
-
8
-
9
-
10
-
11
-
12
-
13
-
 14
14 -
 15
15 -
 16
16 -
 17
17 -
 18
18 -
 19
19 -
 20
20 -
 21
21 -
 22
22 -
 23
23 -
 24
24 -
25
-
26
-
27
-
28
-
29
-
30
-
31
-
32
-
33
-
34
-
35
-
36
-
37
-
38
-
39
-
40
-
41
-
42
-
43
-
44
-
45
-
46
-
47
-
48
-
49
-
50
-
51
-
52
-
53
-
54
-
55
-
56
-
57
-
58
-
59
-
60
-
61
-
62
-
63
-
64
-
65
-
66
-
67
-
68
-
69
-
70
-
71
-
72
-
73
-
74
-
75
-
76
-
77
-
78
-
79
-
80
-
81
-
82
-
83
-
84
-
85
-
86
-
87
-
88
-
89
-
90
-
91
-
92
-
93
-
94
-
95
-
96
-
97
-
98
-
99
-
100
-
101
-
102
-
103
-
104
-
105
-
106
-
107
-
108
-
109
-
110
-
111
-
112
-
113
-
114
-
115
-
116
-
117
-
118
-
119
-
120
-
121
-
122
-
123
-
124
-
125
-
126
-
127
-
128
-
129
-
130
-
131
-
132
-
133
-
134
-
135
-
136
-
137
-
138
-
139
-
140
-
141
-
142
-
143
-
144
-
145
-
146
-
147
-
148
-
149
-
150
-
151
-
152
-
153
-
154
-
155
-
156
-
157
-
158
-
159
-
160
-
161
-
162
-
163
-
164
-
165
-
166
-
167
-
168
-
169
-
170
-
171
-
172
-
173
-
174
-
175
-
176
-
177
-
178
-
179
-
180
-
181
-
182
-
183
-
184
-
185
-
186
 |
 |
ENWW
Replace the Tray 2 and optional 250-sheet tray separation pad
17
English
2
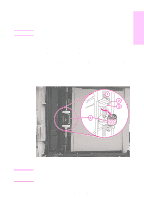
While pressing down on the paper lift plate (Figure 10, item 2),
reach under the front of the tray and squeeze the black tabs to
release the separation pad from the tray. (See Figure 10, item 1,
and Figure 11.)
Figure 11
Removing the Tray 2 separation pad and spring (bottom view)
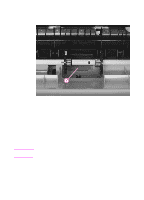
3
If necessary, pull the spring off of the old separation pad, and
then insert the spring onto the new separation pad.
4
Replace the separation pad.