HP 5100 HP LaserJet 5100 Series - Printer Maintenance Kit - Page 8
Before you begin, Replacing printer parts, Removing loose toner - maintenance kit
 |
UPC - 808736092500
View all HP 5100 manuals
Add to My Manuals
Save this manual to your list of manuals |
Page 8 highlights
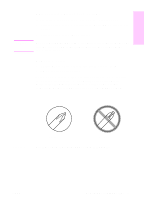
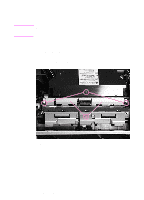
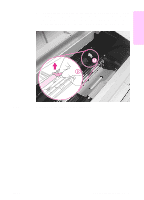
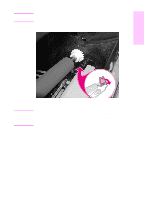
Before you begin Before you begin to install the printer maintenance kit, perform the following steps: 1 Turn off the printer. 2 Unplug the power cord from the power outlet. WARNING! Severe injury can result if you attempt to service the printer while it is plugged into a power outlet. 3 Remove all paper-handling accessories (such as an optional duplexer and any optional trays) and interface cables from the printer. 4 Remove the print cartridge and store it in a dark location until you have installed the printer maintenance kit. WARNING! To avoid possible burns from the fuser, turn off the printer to allow the fuser to cool for 30 minutes before removing it from the printer. This printer has some sharp, sheet-metal edges which can cause injury. Also, you might want to remove jewelry that might snag on parts inside the printer. Replacing printer parts Replacement is generally the reverse of removal. Occasionally, information is included to provide direction for difficult or critical replacement procedures. Removing loose toner Loose toner might be present inside the printer, on printer parts, or on the print cartridge. If toner gets on your clothing, wipe it off with a dry cloth and wash clothing in cold water. CAUTION Hot water sets toner into fabric. 6 Installing the printer maintenance kit ENWW
-
 1
1 -
2
-
 3
3 -
 4
4 -
 5
5 -
 6
6 -
 7
7 -
 8
8 -
 9
9 -
 10
10 -
 11
11 -
 12
12 -
 13
13 -
14
-
15
-
16
-
17
-
18
-
19
-
20
-
21
-
22
-
23
-
24
-
25
-
26
-
27
-
28
-
29
-
30
-
31
-
32
-
33
-
34
-
35
-
36
-
37
-
38
-
39
-
40
-
41
-
42
-
43
-
44
-
45
-
46
-
47
-
48
-
49
-
50
-
51
-
52
-
53
-
54
-
55
-
56
-
57
-
58
-
59
-
60
-
61
-
62
-
63
-
64
-
65
-
66
-
67
-
68
-
69
-
70
-
71
-
72
-
73
-
74
-
75
-
76
-
77
-
78
-
79
-
80
-
81
-
82
-
83
-
84
-
85
-
86
-
87
-
88
-
89
-
90
-
91
-
92
-
93
-
94
-
95
-
96
-
97
-
98
-
99
-
100
-
101
-
102
-
103
-
104
-
105
-
106
-
107
-
108
-
109
-
110
-
111
-
112
-
113
-
114
-
115
-
116
-
117
-
118
-
119
-
120
-
121
-
122
-
123
-
124
-
125
-
126
-
127
-
128
-
129
-
130
-
131
-
132
-
133
-
134
-
135
-
136
-
137
-
138
-
139
-
140
-
141
-
142
-
143
-
144
-
145
-
146
-
147
-
148
-
149
-
150
-
151
-
152
-
153
-
154
-
155
-
156
-
157
-
158
-
159
-
160
-
161
-
162
-
163
-
164
-
165
-
166
-
167
-
168
-
169
-
170
-
171
-
172
-
173
-
174
-
175
-
176
-
177
-
178
-
179
-
180
-
181
-
182
-
183
-
184
-
185
-
186
 |
 |