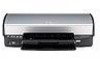
HP 5940 User Guide
HP 5940 - Deskjet Color Inkjet Printer Manual
 |
View all HP 5940 manuals
Add to My Manuals
Save this manual to your list of manuals |
HP 5940 manual content summary:
- HP 5940 | User Guide - Page 1
HP Deskjet 5900 series User's guide - HP 5940 | User Guide - Page 2
used in this user's guide. Terms The HP Deskjet printer is also referred to as the HP printer or printer. Cautions and warnings A Caution indicates possible damage to the HP Deskjet printer or to other equipment. For example: Caution Do not touch the print cartridge ink nozzles or copper contacts - HP 5940 | User Guide - Page 3
and lights 7 Paper trays...11 Print cartridges...14 Ink-backup mode 15 Automatic paper-type sensor 16 4 Connect to the printer 17 USB...17 Networking...17 5 Print photos...18 Print borderless photos 18 Print photos with a border 20 HP Real Life technologies 22 Photo print cartridge 22 - HP 5940 | User Guide - Page 4
63 Print a test page 63 View estimated ink levels 64 Maintain the printer body 64 Remove ink from your skin and clothing 64 Manually clean print cartridges 65 Maintain print cartridges 66 Printer Toolbox...67 11 Troubleshooting 68 Printer does not print 68 Paper jam...69 Paper problems...70 - HP 5940 | User Guide - Page 5
Contents 12 Supplies...92 Paper...92 USB cables...92 13 Specifications...93 Printer specifications 93 14 Environmental information 94 Environmental statement 94 Print cartridge recovery 95 Index...97 User's guide 3 - HP 5940 | User Guide - Page 6
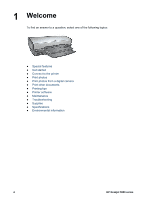
topics: ● Special features ● Get started ● Connect to the printer ● Print photos ● Print photos from a digital camera ● Print other documents ● Printing tips ● Printer software ● Maintenance ● Troubleshooting ● Supplies ● Specifications ● Environmental information 4 HP Deskjet 5900 series - HP 5940 | User Guide - Page 7
purchased an HP Deskjet printer that is equipped with several exciting features: ● Borderless printing: Use the entire page surface when printing photos and brochures with the borderless printing feature. ● Six-ink upgradeable printing: Enhance photo printing with a photo print cartridge (purchased - HP 5940 | User Guide - Page 8
and lights ● Paper trays ● Print cartridges ● Ink-backup mode ● Automatic paper-type sensor Printer features The printer has several features to make printing easier and more efficient. 1 Buttons and lights 2 Print Cartridge Status lights 3 PictBridge port 4 Paper trays 6 HP Deskjet 5900 series - HP 5940 | User Guide - Page 9
1 Automatic paper-type sensor 2 Print cartridges 3 Ink-backup mode 1 USB port Buttons and lights Use the printer buttons to turn the printer on and off, cancel a print job, and restart a job. The printer lights give you visual cues about the status of the printer. User's guide 7 - HP 5940 | User Guide - Page 10
a power strip, surge protector, or a wall-mounted switch to turn the printer on and off might cause printer failure. Print Cartridge Status lights The Print Cartridge Status lights indicate the status of the print cartridges. The lights are located in the center of the control panel. 8 HP Deskjet - HP 5940 | User Guide - Page 11
is installed in the right side of the print cartridge cradle. - The light is on and solid when the black or photo print cartridge is low on ink. - The light flashes when the black or photo print cartridge needs to be serviced. PictBridge lights Plug a PictBridge-enabled camera into the printer - HP 5940 | User Guide - Page 12
Print Cancel button 2 Resume button and light Pressing the Print Cancel button cancels the current print job. The Resume light flashes when an action is required, such as loading paper or clearing a paper jam. When the problem is solved, press the Resume button to continue printing. 10 HP Deskjet - HP 5940 | User Guide - Page 13
Paper trays For information about the paper trays, select one of these topics. Unfold the paper trays Follow these steps to unfold the paper trays: 1. Lower the In tray. 2. Lower the Out tray. 3. Pull out the Out-tray extension. In tray The In tray holds paper or other media. User's guide 11 - HP 5940 | User Guide - Page 14
3 1 In tray Paper guide Print on different sizes of media by sliding the paper guide to the right or to the left. Out tray Printed pages are deposited in the Out tray. 1 Out tray Raise the Out tray to load paper or other media. Lower the Out tray before printing. 12 HP Deskjet 5900 series - HP 5940 | User Guide - Page 15
out the Out-tray extension. If you are printing in the FastDraft mode, unfold the Out-tray extension stop. 1 Out-tray extension 2 Out-tray extension stop Fold the paper trays Follow these steps to fold the paper trays: 1. Remove paper or other media from the paper trays. 2. If the Out-tray extension - HP 5940 | User Guide - Page 16
vibrant colors when printing color photographs or other special documents, remove the black print cartridge and install a photo print cartridge. The photo print cartridge, in combination with the tri-color print cartridge, provides you with virtually grain-free photos. 14 HP Deskjet 5900 series - HP 5940 | User Guide - Page 17
in ink-backup mode slows the printer and affects the quality of printouts. Installed print cartridge Black print cartridge Tri-color print cartridge Photo print cartridge Result Colors print as grayscale. Colors print but black is grayed and is not a true black. Colors print as grayscale. Note HP - HP 5940 | User Guide - Page 18
Chapter 3 Exit ink-backup mode Install two print cartridges in the printer to exit ink-backup mode. For instructions about installing a print cartridge, see the print cartridge installation page. Automatic paper-type sensor The HP automatic paper-type sensor detects the paper in your printer, and - HP 5940 | User Guide - Page 19
be connected to a network by using an HP Jetdirect print server. For instructions about using an HP Jetdirect print server, see the printer software CD and the documentation that came with the print server. Note HP Jetdirect print servers are not available in all countries/regions. User's guide 17 - HP 5940 | User Guide - Page 20
tri- color print cartridge. ● Do not print borderless photos in ink-backup mode. Always have two print cartridges installed in the printer. ● Open the file in a software program such as HP Image Zone or Adobe Photoshop and assign the photo size. Ensure that the size corresponds to the paper size on - HP 5940 | User Guide - Page 21
printer. 5. Slide the paper guide firmly against the edge of the paper. 1 Small photos 2 Large photos Note Some panoramic paper sizes might extend beyond the edge of the In tray. 6. Lower the Out tray. Print Note If your software program includes a photo printing feature, follow the instructions - HP 5940 | User Guide - Page 22
a border Follow these instructions to print photos with a white border. Guidelines ● For high-quality results, use a photo print cartridge in combination with the tri- color print cartridge. ● For maximum fade resistance, use HP Premium Plus Photo Paper. ● Open the file in a software program such as - HP 5940 | User Guide - Page 23
. Print Note If your software program includes a photo printing feature, follow the instructions that are provided with the software program. Otherwise, follow these instructions. 1. Open the photo in an application that allows editing, such as HP Image Zone or Adobe Photoshop. 2. Open the Printer - HP 5940 | User Guide - Page 24
image. Click Automatic to allow the printer software to set the level of smoothing for the image automatically. Note If you installed the HP Image Zone software, you can use it to edit and further enhance digital photos. Photo print cartridge The photo print cartridge, when used in conjunction with - HP 5940 | User Guide - Page 25
is not included with your printer. Install the photo print cartridge To install the photo print cartridge, remove the black print cartridge from the printer, and then install the photo print cartridge in the right side of the print cartridge cradle. Note To protect a print cartridge when it is not - HP 5940 | User Guide - Page 26
is selected in the printer software, the tri-color print cartridge prints in the 4800 x 1200 optimized dpi mode (up to 4800 x 1200 optimized dpi color and 1200-input dpi). If a photo print cartridge is also installed, the print quality is enhanced. A photo print cartridge can be purchased separately - HP 5940 | User Guide - Page 27
list, click Normal, Best, or Maximum dpi. 6. Select any other print settings that you want, and then click OK. The printer software automatically optimizes the printed image. Store and handle photo paper Follow these instructions to maintain the quality of HP brand photo paper. User's guide 25 - HP 5940 | User Guide - Page 28
Create photo album pages and flyers ● Share photos with friends and family Share photos with friends and family If you performed the default typical installation of the printer software, you also installed the HP Image Zone software. If you have installed HP Image Zone, see the 26 HP Deskjet 5900 - HP 5940 | User Guide - Page 29
HP Image Zone help to learn about how you can use the software to easily select and share images by e-mail without the use of large file attachments. User's guide 27 - HP 5940 | User Guide - Page 30
PictBridge devices communicate, they provide only the services that they have in common. For example, some cameras might allow photos formatted as either TIFFs or JPEGs to be printed over a PictBridge connection, but, since the printer does not support TIFFs over a PictBridge connection, only JPEGs - HP 5940 | User Guide - Page 31
is not PictBridge-compatible or is not in PictBridge mode, the Error light flashes. 1 Connection light 2 Error light After you successfully connect the camera to the printer, you can print your photos. Be sure the size of the paper loaded in the printer matches the setting on your User's guide 29 - HP 5940 | User Guide - Page 32
Chapter 6 camera. Refer to the documentation that came with your camera for detailed information on printing from the camera. 30 HP Deskjet 5900 series - HP 5940 | User Guide - Page 33
your printouts with printing tips. Printer software: Learn about the printer software. E-mail To print an e-mail, use the Printing Shortcuts tab. Guidelines Do not exceed the In tray capacity: 100 sheets of plain paper. Prepare to print 1. Raise the Out tray. 2. Slide the paper guide all the way - HP 5940 | User Guide - Page 34
the paper in the In tray, pushing the paper into the printer until it stops. Note If you are using letterhead paper, verify that the letterhead is facing down and toward the interior of the printer. 4. Slide the paper guide firmly against the edge of the paper stack. 32 HP Deskjet 5900 series - HP 5940 | User Guide - Page 35
. ● Do not exceed the In tray capacity: 100 sheets of paper. Prepare to print 1. Raise the Out tray. 2. Slide the paper guide all the way to the left. 3. Place plain paper in the In tray, pushing the paper into the printer until it stops. 4. Slide the paper guide firmly against the edge of the - HP 5940 | User Guide - Page 36
any other print settings that you want, and then click OK. Use the What's This? help to learn about the features that appear in the Printer Properties dialog box. Envelopes To print envelopes, use the Paper/Quality tab. You can print a single envelope or multiple envelopes. 34 HP Deskjet 5900 - HP 5940 | User Guide - Page 37
. Use the What's This? help to learn about the features that appear in the Printer Properties dialog box. Brochures To print a borderless brochure, use the Paper/Quality tab. To print a brochure with borders, use the Printing Shortcuts tab. For great results, use HP brochure paper. User's guide 35 - HP 5940 | User Guide - Page 38
7 Guidelines ● Do not print borderless documents in ink-backup mode. Always have two print cartridges installed in the printer. ● Open the file in a software program and assign the brochure size. Ensure that the size corresponds to the paper size on which you want to print the brochure. ● Do not - HP 5940 | User Guide - Page 39
the cards into the printer until they stop. 6. Slide the paper guide firmly against the edge of the cards. 7. Lower the Out tray. Print Note If your software program includes a greeting card printing feature, follow the instructions that are provided with the software program. Otherwise, follow the - HP 5940 | User Guide - Page 40
the short edge should point toward the printer. 4. Push the cards into the printer until they stop. 5. Slide the paper guide firmly against the edge of the cards. 6. Lower the Out tray. Print 1. Open the Printer Properties dialog box. 2. Click the Paper/Quality tab, and then specify the following - HP 5940 | User Guide - Page 41
paper size 4. Select any other print settings that you want, and then click OK. Use the What's This? help to learn about the features that appear on the Printer Properties dialog box. Labels To print labels, use the Printing Shortcuts tab. For great results, use HP Address Labels. User's guide - HP 5940 | User Guide - Page 42
Push the sheets into the printer until they stop. 6. Slide the paper guide firmly against the edge of the sheets. 7. Lower the Out tray. Print Note If your software program includes a label printing feature, follow the instructions that are provided with the software program. Otherwise, follow the - HP 5940 | User Guide - Page 43
the short edge should point toward the printer. 4. Push the cards into the printer until they stop. 5. Slide the paper guide firmly against the edge of the cards. 6. Lower the Out tray. Print 1. Open the Printer Properties dialog box. 2. Click the Paper/Quality tab, and then specify the following - HP 5940 | User Guide - Page 44
tray capacity: 100 sheets of paper. Prepare to print 1. Raise the Out tray. 2. Slide the paper guide all the way to the left. 3. Place plain paper in the In tray, pushing the paper into the printer until it stops. 4. Slide the paper guide firmly against the edge of the paper stack. 5. Lower the Out - HP 5940 | User Guide - Page 45
. ● Do not exceed the In tray capacity: 100 sheets of paper. Prepare to print 1. Raise the Out tray. 2. Slide the paper guide all the way to the left. 3. Place plain paper in the In tray, pushing the paper into the printer until it stops. 4. Slide the paper guide firmly against the edge of the - HP 5940 | User Guide - Page 46
to print 1. Raise the Out tray, and then remove all paper from the In tray. 2. Slide the paper guide all the way to the left. 3. Place the iron-on transfer paper in the In tray, with the side to be printed on facing down. 4. Push the paper into the printer until it stops. 44 HP Deskjet 5900 - HP 5940 | User Guide - Page 47
the paper guide firmly against the edge of the paper stack. 6. Lower the Out tray. Print Note If your software program includes an iron-on transfer printing feature, follow the instructions that are provided with the software program. Otherwise, follow the instructions below. 1. Open the Printer - HP 5940 | User Guide - Page 48
sets for documents that you often print. ● Set the order that the pages print. Save money ● Use Fast/economical printing. ● Print multiple pages on a single sheet of paper. ● Print a two-sided document. ● Use HP Everyday Photo Paper to save money and ink when printing photos. Enhance the quality of - HP 5940 | User Guide - Page 49
grayscale: Use this option for photos and other highquality printouts. - Print in black-only grayscale: Use this option for fast, economical printing. 5. Select any other print settings that you want, and then click OK. Set default settings for the printer The printer uses the default settings for - HP 5940 | User Guide - Page 50
appropriate setting for most documents. - Best: Provides high-quality printing. - Maximum dpi: Provides the highest quality printing, but requires longer to print than Best and requires a large amount of disk space. Note Maximum dpi is available on the Paper/Quality tab. 48 HP Deskjet 5900 series - HP 5940 | User Guide - Page 51
OK. Print multiple pages on a single sheet of paper Use the printer software to print multiple pages of a document on a single sheet of paper. The printer software automatically resizes the document text and images to fit on the printed page. Follow these steps to print multiple pages of a document - HP 5940 | User Guide - Page 52
click Print to HP Deskjet to print the document. - Click File and then click Cancel Printing to cancel the print job. Adjust the print settings as needed before trying to print the document again. Set a custom paper size Use the Custom paper size dialog box to print on a special paper size. Note - HP 5940 | User Guide - Page 53
that contains the paper size, print quality, and orientation setting that you normally use for envelopes. After creating the print task, simply select it when printing on envelopes rather than setting each of the print settings separately. Note The printer software can save up to 25 print task quick - HP 5940 | User Guide - Page 54
pages have been printed, reload the printed pages with the printed side facing up. 7. Click Continue to print the even-numbered pages. Create a bound two-sided document Select the type of binding that you want for the two-sided document, and then follow the steps for that binding. 52 HP Deskjet - HP 5940 | User Guide - Page 55
been printed, reload the printed pages with the printed side facing up. 7. Click Continue to print the even-numbered pages. Tablet binding Follow these steps to print a two-sided document with a tablet binding: 1. Open the Printer Properties dialog box. 2. Click the Finishing tab. User's guide 53 - HP 5940 | User Guide - Page 56
The printer prints the odd-numbered pages first. 5. After the odd-numbered pages have been printed, reload the printed pages, with the printed side facing up according to the document orientation, portrait or landscape. Portrait Landscape 6. Click Continue to print the even-numbered pages. 54 HP - HP 5940 | User Guide - Page 57
Resize a document Use the printer software for either of these tasks: ● Print a document on a paper size different from the size for which it is formatted. ● Shrink or enlarge text and graphics on the printed page. Print on a different paper size Use this feature to print a document that is - HP 5940 | User Guide - Page 58
the watermark to appear on all printed pages, leave the First page only check box clear. 5. Print the document according to the instructions for the paper type. Create or change a watermark Follow these steps to create or change a watermark: 1. Open the Printer Properties dialog box. 2. Click the - HP 5940 | User Guide - Page 59
ink level of each print cartridge. ● Download printer software updates for the latest features and improvements. Printer Properties dialog box The printer is controlled by software that is installed on your computer. Use the printer software, also known as the printer driver, to change the print - HP 5940 | User Guide - Page 60
the printer software installed, a software update appears in the HP Software Update window. 4. If a software update is available, select the check box beside the update name. 5. Click Install. 6. Follow the onscreen instructions. Download HP Image Zone software Installing the printer software update - HP 5940 | User Guide - Page 61
the print cartridges ● Calibrate color ● Automatically clean print cartridges ● Print a test page ● View estimated ink levels ● Maintain the printer body ● Remove ink from your skin and clothing ● Manually clean print cartridges ● Maintain print cartridges ● Printer Toolbox Install print cartridges - HP 5940 | User Guide - Page 62
environment. Ink-backup mode The printer can operate with only one print cartridge installed. For more information, see Ink-backup mode. Installation instructions Follow these steps to install a print cartridge: 1. Verify that the printer is turned on. 2. Load Letter or A4 plain, white paper in the - HP 5940 | User Guide - Page 63
so that the copper strips are on the bottom and facing toward the printer. 1 Remove plastic tape Caution Do not touch the print cartridge ink nozzles or copper contacts. Touching these parts will result in clogs, ink failure, and bad electrical connections. Do not remove the copper strips. They are - HP 5940 | User Guide - Page 64
print cartridges The printer automatically aligns the print cartridges after a new print cartridge is installed. You can also align the print cartridges at other times to ensure optimal print quality. To align print cartridges: 1. Load Letter or A4 plain, white paper in the In tray. 62 HP Deskjet - HP 5940 | User Guide - Page 65
print cartridges. Caution Clean print cartridges only when necessary. Unnecessary cleaning wastes ink and shortens the life of the cartridge. Note This feature might not be available in your operating environment. Print a test page Follow these instructions to print a test page: 1. Open the printer - HP 5940 | User Guide - Page 66
ink levels Follow these instructions to view the estimated ink levels of the print cartridges that are installed in the printer: 1. Open the printer Toolbox. 2. Click the Estimated Ink Levels tab. Note If the print cartridges were used before being installed in the printer, the estimated ink - HP 5940 | User Guide - Page 67
and is idle and quiet. 3. Remove the print cartridges and place them on a piece of paper, with the copper strips facing up. Caution Do not leave the print cartridges outside the printer for more than 30 minutes. Cleaning instructions 1. Lightly moisten a cotton swab with distilled water and squeeze - HP 5940 | User Guide - Page 68
ink nozzles until you are ready to install the print cartridge in the printer. If the plastic tape has been removed from the print cartridge, do not attempt to reattach it. Reattaching the tape damages the print cartridge. Follow these instructions to store print cartridges. Store print cartridges - HP 5940 | User Guide - Page 69
auto-off function ● Align the print cartridges ● Calibrate color ● Clean the print cartridges ● Print a test page ● View estimated ink levels Use the Toolbox Follow these instructions to use the printer Toolbox: 1. Open the Printer Properties dialog box. 2. Click the Services tab, and then click the - HP 5940 | User Guide - Page 70
not print ● Paper jam ● Paper problems ● Paper mismatch ● Printer is stalled ● Print cartridge problems ● Photos do not print correctly ● PictBridge problems ● Print quality is poor ● Document is misprinted ● Problems with borderless documents ● Error messages ● Printer lights are on or flashing - HP 5940 | User Guide - Page 71
, click Start, click Settings, and then click Printers. For Windows XP, click Start, and then click Printers and Faxes. 2. Double-click the name of the HP Deskjet printer. 3. Click the Printer menu, and then click Pause Printing. 4. Click the Printer menu again, and then click Cancel all documents - HP 5940 | User Guide - Page 72
from the print cartridges. ● If you are printing a borderless document and the Resume light and a Print Cartridge Status light are flashing, you might be trying to print a borderless document with only the black print cartridge installed. When printing a borderless 70 HP Deskjet 5900 series - HP 5940 | User Guide - Page 73
, always have the tri-color print cartridge and a black or photo print cartridge installed. Out-of-paper message If an out-of-paper message appears, follow these guidelines. Paper jam For information about clearing a paper jam, see the paper jam page. Printer prints on multiple sheets at once If - HP 5940 | User Guide - Page 74
black or photo print cartridge is installed in the right side of the cradle. 4. Check for and clear any paper jam. 5. Lower the printer cover. 6. Connect the power cable to the back of the printer, and then turn on the printer. - If the Resume light is not flashing, continue printing the document - HP 5940 | User Guide - Page 75
date has expired, install a new print cartridge. 6. Close the printer cover. If the Print Cartridge Status light stops flashing, then the problem is fixed. If the Print Cartridge Status light continues to flash, visit HP Technical Support at www.hp.com/support. Print cartridge problem message If you - HP 5940 | User Guide - Page 76
print cartridge available. 5. If the Print Cartridge Status light continues to flash after replacing the print cartridge, visit HP Technical Support at www.hp.com/support. "Printing in ink-backup mode" message When the printer detects that only one print cartridge is installed, ink-backup - HP 5940 | User Guide - Page 77
neither print cartridge is low on ink. If neither print cartridge is low on ink, proceed to step 2. 2. Align the print cartridges. 3. Reprint the photo. 4. If colors are still tinted or incorrect, calibrate the color. Both a photo print cartridge and a tri-color print cartridge must be installed for - HP 5940 | User Guide - Page 78
edge of a photo, try the following solutions: ● Install a photo print cartridge and a tri-color print cartridge in the printer. ● Open the Printer Properties dialog box, click the Paper/Quality tab, and then set the Print Quality to Maximum dpi. ● Rotate the image 180°. 76 HP Deskjet 5900 series - HP 5940 | User Guide - Page 79
transfer feature supports: ● EXIF/JPEG ● JPEG Before you connect the digital camera to the PictBridge port on the printer, select some photos on the camera for printing. PictBridge lights are flashing State of the lights Connection light and the Error light are flashing Task The printer has lost - HP 5940 | User Guide - Page 80
be cleaned. Print is faded ● Verify that neither of the print cartridges is low on ink. If a print cartridge is low on ink, consider replacing the print cartridge. For the correct part numbers, see the reference guide that came with the printer. ● Verify that a black print cartridge is installed. If - HP 5940 | User Guide - Page 81
the black print cartridge installed. When printing a borderless document, always have the tricolor print cartridge and a black or photo print cartridge installed. Too much or too little ink appears on the page If too much or too little ink appears on the page, follow these instructions. Too much - HP 5940 | User Guide - Page 82
paper size. Scale to fit: Select this option to scale text and graphics to the paper. If parts of the document are still missing, the printer settings might be overridden by the software program print settings. Select the appropriate print settings from within the software program. 80 HP Deskjet - HP 5940 | User Guide - Page 83
list on the Printing Shortcuts tab. ● Do not print borderless documents in ink-backup mode. Always have two print cartridges installed in the printer when printing borderless documents. Streaks appear in a light portion of a photo If streaks appear in a light portion of a photo, approximately 63 mm - HP 5940 | User Guide - Page 84
11 Horizontal lines appear on a photo If light or dark horizontal lines appear on photos: 1. Clean the print cartridges. 2. Reprint the photo. 3. If the lines still occur, align the print cartridges. 4. Reprint the photo. Image is printed at an angle Verify that no problem exists with the source - HP 5940 | User Guide - Page 85
problem persists, try the following steps: 1. Remove the photo paper, and then load plain paper in the In tray. 2. Press and hold down the Print Cancel button until the printer starts printing a self- test page, and then release the button. 3. Repeat step 2 until the self-test page contains no ink - HP 5940 | User Guide - Page 86
: ● Install a photo print cartridge in the printer. ● Open the Printer Properties dialog box, click the Paper/Quality tab, and then set the Print Quality to Maximum dpi. ● Rotate the image 180°. Photo has an unwanted border The following conditions can create an unwanted border. 84 HP Deskjet 5900 - HP 5940 | User Guide - Page 87
● Align the print cartridges. ● Open the Printer Properties dialog box, click the Paper/Quality tab, and then verify that the selected paper size matches both the paper size that the photo is formatted for and the size of the paper that is loaded in the In tray. ● Verify that no problem exists with - HP 5940 | User Guide - Page 88
match paper size or type selected" If you receive an error message about a paper mismatch, it indicates that the paper size or type selected in the software program or in the printer software does not match the paper in the In tray. Follow these instructions to resolve the problem. 86 HP Deskjet - HP 5940 | User Guide - Page 89
the print cartridge cradle. Always install the tri-color print cartridge in the left print cartridge cradle compartment. Install the black or photo print cartridge in the right print cartridge cradle compartment. "Printing in ink-backup mode" When the printer detects that only one print cartridge is - HP 5940 | User Guide - Page 90
Chapter 11 1 Power light 2 Print Cartridge Status lights 3 Resume light Power light is flashing 1 Power light If the Power light is flashing, the printer is preparing to print. The light stops flashing when the printer has received all data. 88 HP Deskjet 5900 series - HP 5940 | User Guide - Page 91
to clear a paper jam. ● The print cartridges are the correct print cartridges for the printer and are properly installed. ● The printer might be stalled. Follow these instructions to correct a stalled printer. Print Cartridge Status light is on or flashing If a Print Cartridge Status light is on or - HP 5940 | User Guide - Page 92
to flash, replace the print cartridge. If the status and Resume lights are flashing The paper size or type selected in the software program or in the printer software does not match the paper in the In tray. For information about resolving the mismatch, see Paper mismatch. 90 HP Deskjet 5900 - HP 5940 | User Guide - Page 93
more slowly if it is in ink-backup mode. To increase the print speed, use two print cartridges in the printer. Printer software is outdated Outdated printer software might be installed. For information about updating the printer software, see the software update page. Computer does not meet system - HP 5940 | User Guide - Page 94
12 Supplies ● Paper ● USB cables Paper To order media such as HP Premium Paper, HP Premium Inkjet Transparency Film, HP Iron-On Paper, or HP Greeting Cards, go to www.hp.com. Choose your country/region, and then select Buy or Shopping. USB cables C6518A HP USB A-B 2-meter cable 92 HP Deskjet 5900 - HP 5940 | User Guide - Page 95
● Printer specifications Printer specifications See the reference guide that came with your printer for complete printer specifications, including this information: ● Types, sizes, and weights of paper and other printing media that can be used with your printer ● Print speeds and resolutions ● Power - HP 5940 | User Guide - Page 96
● Print cartridge recovery Environmental statement Hewlett-Packard continuously improves the design processes of its deskjet printers to minimize the negative impact on the office environment and on the communities where printers are manufactured, shipped, and used. Reduction and elimination Paper - HP 5940 | User Guide - Page 97
printer power cord from the electrical source. Print cartridge recovery Customers interested in recycling their genuine HP print cartridges can participate in HP's Planet Partner's Program for inkjet cartridges. HP provided on HP's Web site at this address: www.hp.com/recycle. This service is not - HP 5940 | User Guide - Page 98
wire, steel plates, and the precious materials used in electronics. Depending on the model, HP is able to recycle up to 65% of the print cartridge by weight. The remaining parts that cannot be recycled (ink, foam, and composite parts) are disposed of in an environmentally responsible manner. 96 - HP 5940 | User Guide - Page 99
print cartridge lights are flashing 71, 90 Resume light 10 Resume light is flashing 89 low ink 64 M maintenance print cartridges 66 printer body 64 maximum dpi 23 N networking 17 O Other photo projects 26 Out tray 12 P page order, setting 49 paper ejects paper 70 paper guide 12 paper jam 69 paper - HP 5940 | User Guide - Page 100
80 multiple pages print at once 71 out-of-paper message 87 paper jam 69 parts of the document are missing or in wrong place 80 photo printing problems 74 PictBridge problems 77 poor print quality 78 Power light is flashing 88 print cartridge is in the wrong slot message 74 98 HP Deskjet 5900 - HP 5940 | User Guide - Page 101
print cartridge lights are flashing 71, 90 Resume light is flashing 89 streaks and missing lines 78 streaks on photo 81 text and images are misaligned 80 too little ink on the page 79 too much ink on the page 79 unwanted border on photo 84 two-sided printing 52 U updates, download printer software - HP 5940 | User Guide - Page 102
100 HP Deskjet 5900 series
-
 1
1 -
 2
2 -
 3
3 -
 4
4 -
 5
5 -
 6
6 -
 7
7 -
8
-
9
-
10
-
11
-
12
-
13
-
14
-
15
-
16
-
17
-
18
-
19
-
20
-
21
-
22
-
23
-
24
-
25
-
26
-
27
-
28
-
29
-
30
-
31
-
32
-
33
-
34
-
35
-
36
-
37
-
38
-
39
-
40
-
41
-
42
-
43
-
44
-
45
-
46
-
47
-
48
-
49
-
50
-
51
-
52
-
53
-
54
-
55
-
56
-
57
-
58
-
59
-
60
-
61
-
62
-
63
-
64
-
65
-
66
-
67
-
68
-
69
-
70
-
71
-
72
-
73
-
74
-
75
-
76
-
77
-
78
-
79
-
80
-
81
-
82
-
83
-
84
-
85
-
86
-
87
-
88
-
89
-
90
-
91
-
92
-
93
-
94
-
95
-
96
-
97
-
98
-
99
-
100
-
101
-
102
 |
 |

HP Deskjet 5900 series
User's guide