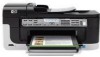
HP 6500 User Guide - Page 25
Error messages, Critical error messages, Change device settings - scan to computer
 |
UPC - 884420425137
View all HP 6500 manuals
Add to My Manuals
Save this manual to your list of manuals |
Page 25 highlights
Error messages Error messages communicate that some action must be performed, such as adding media or clearing a media jam. These messages are usually accompanied by a blinking red Attention light. Take the appropriate action to continue printing. If the error message shows an error code, press the Power button to turn off the device, and then turn it on again. In most situations, this action solves the problem. If the message persists, your device might need service. For more information, see Support and warranty. Critical error messages Critical error messages inform you of a device failure. Some of these messages can be cleared by pressing the Power button to turn off the device, and then turning it on again. If a critical error persists, service is required. For more information, see Support and warranty. Change device settings You can change the device settings from these places: • From the device control panel. • From the HP Solution Center (Windows) or HP Device Manager (Mac OS X). • Embedded Web server, for more information, see Embedded Web server. NOTE: When you are configuring settings in HP Solution Center or in the HP Device Manager, you cannot see the settings that have been configured from the device control panel (such as the scan settings). To change settings from the device control panel 1. At the device control panel, press the menu button for the function you are using (for example, Fax). 2. To reach the option that you want to change, use one of the following methods: • Press a control-panel button, and then use the left or right arrow keys to adjust the value. • Select the option from the menu on the control-panel display. 3. Select the value that you want, and then press OK. To change settings from the HP Solution Center (Windows) ▲ Double-click the HP Solution Center icon on the desktop. - Or Double-click the Digital Imaging Monitor icon in the taskbar. Change device settings 21
-
 1
1 -
2
-
3
-
4
-
5
-
6
-
7
-
8
-
9
-
10
-
11
-
12
-
13
-
14
-
15
-
16
-
17
-
18
-
19
-
 20
20 -
 21
21 -
 22
22 -
 23
23 -
 24
24 -
 25
25 -
 26
26 -
 27
27 -
 28
28 -
 29
29 -
 30
30 -
31
-
32
-
33
-
34
-
35
-
36
-
37
-
38
-
39
-
40
-
41
-
42
-
43
-
44
-
45
-
46
-
47
-
48
-
49
-
50
-
51
-
52
-
53
-
54
-
55
-
56
-
57
-
58
-
59
-
60
-
61
-
62
-
63
-
64
-
65
-
66
-
67
-
68
-
69
-
70
-
71
-
72
-
73
-
74
-
75
-
76
-
77
-
78
-
79
-
80
-
81
-
82
-
83
-
84
-
85
-
86
-
87
-
88
-
89
-
90
-
91
-
92
-
93
-
94
-
95
-
96
-
97
-
98
-
99
-
100
-
101
-
102
-
103
-
104
-
105
-
106
-
107
-
108
-
109
-
110
-
111
-
112
-
113
-
114
-
115
-
116
-
117
-
118
-
119
-
120
-
121
-
122
-
123
-
124
-
125
-
126
-
127
-
128
-
129
-
130
-
131
-
132
-
133
-
134
-
135
-
136
-
137
-
138
-
139
-
140
-
141
-
142
-
143
-
144
-
145
-
146
-
147
-
148
-
149
-
150
-
151
-
152
-
153
-
154
-
155
-
156
-
157
-
158
-
159
-
160
-
161
-
162
-
163
-
164
-
165
-
166
-
167
-
168
-
169
-
170
-
171
-
172
-
173
-
174
-
175
-
176
-
177
-
178
-
179
-
180
-
181
-
182
-
183
-
184
-
185
-
186
-
187
-
188
-
189
-
190
-
191
-
192
-
193
-
194
-
195
-
196
-
197
-
198
-
199
-
200
-
201
-
202
-
203
-
204
-
205
-
206
-
207
-
208
-
209
-
210
-
211
-
212
-
213
-
214
-
215
-
216
-
217
-
218
-
219
-
220
-
221
-
222
-
223
-
224
-
225
-
226
-
227
-
228
-
229
-
230
-
231
-
232
-
233
-
234
-
235
-
236
-
237
-
238
-
239
-
240
-
241
-
242
-
243
-
244
-
245
-
246
-
247
-
248
-
249
-
250
-
251
-
252
-
253
-
254
-
255
-
256
-
257
-
258
-
259
-
260
-
261
-
262
-
263
-
264
-
265
-
266
-
267
-
268
-
269
-
270
-
271
-
272
-
273
-
274
-
275
-
276
-
277
-
278
-
279
-
280
-
281
-
282
-
283
-
284
-
285
-
286
-
287
-
288
-
289
-
290
-
291
-
292
-
293
-
294
 |
 |