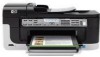
HP 6500 User Guide - Page 49
Scan an original to a computer, Scan an original to a memory device - scanner
 |
UPC - 884420425137
View all HP 6500 manuals
Add to My Manuals
Save this manual to your list of manuals |
Page 49 highlights
Scan an original to a computer You can send a scan to a computer connected directly to the device or a computer on the network. You can also send a scan to a program installed on a computer. To send a scan to a computer from the HP Solution Center 1. On the computer, open the HP Solution Center. 2. See the onscreen Help for further instructions. To send a scan to a computer from the device control panel (direct connect) 1. Load the original on the scanner glass. For more information, see Load originals. 2. Press the Scan button. 3. Press the arrow keys to select the computer that you want to send the document to, and then press OK. 4. Press START SCAN. NOTE: When the scan is complete, the program that you have selected opens and displays the document that you have scanned. Scan an original to a memory device You can send the scanned image as a JPEG, PDF, or TIFF image to the memory card that is currently inserted. You also have other scanning options including quality and paper size settings. To scan to a memory device 1. Insert the memory device. 2. Load your original print-side down in the right-front corner of the glass or in the ADF. 3. Press START SCAN. • The Scan appears, listing various options or destinations. The default destination is whichever one you selected the last time you used this menu. • If your device is directly connected to your computer, the Scan menu appears. 4. Press the arrow keys to highlight Memory Device, and then press OK. 5. Make any scan option changes, then press START SCAN. The device scans the image and saves the file to the memory card. Use Webscan via embedded Web server Webscan is a feature of the embedded Web server that lets you scan photos and documents from your device to your computer using a Web browser. This feature is available even if you did not install the device software on your computer. ▲ Click the Information tab, click Webscan in the left pane, make selections for Image Type and Document Size, and then click Scan or Preview. For more information on the embedded Web server, see Embedded Web server. Use Webscan via embedded Web server 45
-
 1
1 -
2
-
3
-
4
-
5
-
6
-
7
-
8
-
9
-
10
-
11
-
12
-
13
-
14
-
15
-
16
-
17
-
18
-
19
-
20
-
21
-
22
-
23
-
24
-
25
-
26
-
27
-
28
-
29
-
30
-
31
-
32
-
33
-
34
-
35
-
36
-
37
-
38
-
39
-
40
-
41
-
42
-
43
-
 44
44 -
 45
45 -
 46
46 -
 47
47 -
 48
48 -
 49
49 -
 50
50 -
 51
51 -
 52
52 -
 53
53 -
 54
54 -
55
-
56
-
57
-
58
-
59
-
60
-
61
-
62
-
63
-
64
-
65
-
66
-
67
-
68
-
69
-
70
-
71
-
72
-
73
-
74
-
75
-
76
-
77
-
78
-
79
-
80
-
81
-
82
-
83
-
84
-
85
-
86
-
87
-
88
-
89
-
90
-
91
-
92
-
93
-
94
-
95
-
96
-
97
-
98
-
99
-
100
-
101
-
102
-
103
-
104
-
105
-
106
-
107
-
108
-
109
-
110
-
111
-
112
-
113
-
114
-
115
-
116
-
117
-
118
-
119
-
120
-
121
-
122
-
123
-
124
-
125
-
126
-
127
-
128
-
129
-
130
-
131
-
132
-
133
-
134
-
135
-
136
-
137
-
138
-
139
-
140
-
141
-
142
-
143
-
144
-
145
-
146
-
147
-
148
-
149
-
150
-
151
-
152
-
153
-
154
-
155
-
156
-
157
-
158
-
159
-
160
-
161
-
162
-
163
-
164
-
165
-
166
-
167
-
168
-
169
-
170
-
171
-
172
-
173
-
174
-
175
-
176
-
177
-
178
-
179
-
180
-
181
-
182
-
183
-
184
-
185
-
186
-
187
-
188
-
189
-
190
-
191
-
192
-
193
-
194
-
195
-
196
-
197
-
198
-
199
-
200
-
201
-
202
-
203
-
204
-
205
-
206
-
207
-
208
-
209
-
210
-
211
-
212
-
213
-
214
-
215
-
216
-
217
-
218
-
219
-
220
-
221
-
222
-
223
-
224
-
225
-
226
-
227
-
228
-
229
-
230
-
231
-
232
-
233
-
234
-
235
-
236
-
237
-
238
-
239
-
240
-
241
-
242
-
243
-
244
-
245
-
246
-
247
-
248
-
249
-
250
-
251
-
252
-
253
-
254
-
255
-
256
-
257
-
258
-
259
-
260
-
261
-
262
-
263
-
264
-
265
-
266
-
267
-
268
-
269
-
270
-
271
-
272
-
273
-
274
-
275
-
276
-
277
-
278
-
279
-
280
-
281
-
282
-
283
-
284
-
285
-
286
-
287
-
288
-
289
-
290
-
291
-
292
-
293
-
294
 |
 |