HP 6500 User Guide - Page 73
Fax to Pc and Fax to Mac requirements, Activate Fax to PC and Fax to Mac, Fax to PC Setup Wizard
 |
UPC - 884420425137
View all HP 6500 manuals
Add to My Manuals
Save this manual to your list of manuals |
Page 73 highlights
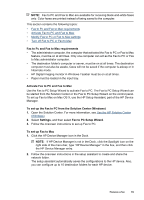
NOTE: Fax to PC and Fax to Mac are available for receiving black-and-white faxes only. Color faxes are printed instead of being saved to the computer. This section contains the following topics: • Fax to Pc and Fax to Mac requirements • Activate Fax to PC and Fax to Mac • Modify Fax to PC or Fax to Mac settings • Turn off Fax to PC or Fax to Mac Fax to Pc and Fax to Mac requirements • The administrator computer, the computer that activated the Fax to PC or Fax to Mac feature, must be on at all times. Only one computer can act as the Fax to PC or Fax to Mac administrator computer. • The destination folder's computer or server, must be on at all times. The destination computer must also be awake, faxes will not be saved if the computer is asleep or in hibernate mode. • HP Digital Imaging monitor in Windows Taskbar must be on at all times. • Paper must be loaded in the input tray. Activate Fax to PC and Fax to Mac Use the Fax to PC Setup Wizard to activate Fax to PC. The Fax to PC Setup Wizard can be started from the Solution Center or the Fax to PC Setup Wizard on the control panel. To set up Fax to Mac on Mac OS X, use the HP Setup Assistant, part of the HP Device Manager. To set up the Fax to PC from the Solution Center (Windows) 1. Open the Solution Center. For more information, see Use the HP Solution Center (Windows). 2. Select Settings, and then select Fax to PC Setup Wizard. 3. Follow the onscreen instructions to set up Fax to PC. To set up Fax to Mac 1. Click the HP Device Manager icon in the Dock. NOTE: If HP Device Manager is not in the Dock, click the Spotlight icon on the right side of the menu bar, type "HP Device Manager" in the box, and then click the HP Device Manager entry. 2. Follow the onscreen instructions in the setup assistant to create and share the network folder. The setup assistant automatically saves the configurations to the HP device. Also, you can configure up to 10 destination folders for each HP device. Receive a fax 69
-
 1
1 -
2
-
3
-
4
-
5
-
6
-
7
-
8
-
9
-
10
-
11
-
12
-
13
-
14
-
15
-
16
-
17
-
18
-
19
-
20
-
21
-
22
-
23
-
24
-
25
-
26
-
27
-
28
-
29
-
30
-
31
-
32
-
33
-
34
-
35
-
36
-
37
-
38
-
39
-
40
-
41
-
42
-
43
-
44
-
45
-
46
-
47
-
48
-
49
-
50
-
51
-
52
-
53
-
54
-
55
-
56
-
57
-
58
-
59
-
60
-
61
-
62
-
63
-
64
-
65
-
66
-
67
-
 68
68 -
 69
69 -
 70
70 -
 71
71 -
 72
72 -
 73
73 -
 74
74 -
 75
75 -
 76
76 -
 77
77 -
 78
78 -
79
-
80
-
81
-
82
-
83
-
84
-
85
-
86
-
87
-
88
-
89
-
90
-
91
-
92
-
93
-
94
-
95
-
96
-
97
-
98
-
99
-
100
-
101
-
102
-
103
-
104
-
105
-
106
-
107
-
108
-
109
-
110
-
111
-
112
-
113
-
114
-
115
-
116
-
117
-
118
-
119
-
120
-
121
-
122
-
123
-
124
-
125
-
126
-
127
-
128
-
129
-
130
-
131
-
132
-
133
-
134
-
135
-
136
-
137
-
138
-
139
-
140
-
141
-
142
-
143
-
144
-
145
-
146
-
147
-
148
-
149
-
150
-
151
-
152
-
153
-
154
-
155
-
156
-
157
-
158
-
159
-
160
-
161
-
162
-
163
-
164
-
165
-
166
-
167
-
168
-
169
-
170
-
171
-
172
-
173
-
174
-
175
-
176
-
177
-
178
-
179
-
180
-
181
-
182
-
183
-
184
-
185
-
186
-
187
-
188
-
189
-
190
-
191
-
192
-
193
-
194
-
195
-
196
-
197
-
198
-
199
-
200
-
201
-
202
-
203
-
204
-
205
-
206
-
207
-
208
-
209
-
210
-
211
-
212
-
213
-
214
-
215
-
216
-
217
-
218
-
219
-
220
-
221
-
222
-
223
-
224
-
225
-
226
-
227
-
228
-
229
-
230
-
231
-
232
-
233
-
234
-
235
-
236
-
237
-
238
-
239
-
240
-
241
-
242
-
243
-
244
-
245
-
246
-
247
-
248
-
249
-
250
-
251
-
252
-
253
-
254
-
255
-
256
-
257
-
258
-
259
-
260
-
261
-
262
-
263
-
264
-
265
-
266
-
267
-
268
-
269
-
270
-
271
-
272
-
273
-
274
-
275
-
276
-
277
-
278
-
279
-
280
-
281
-
282
-
283
-
284
-
285
-
286
-
287
-
288
-
289
-
290
-
291
-
292
-
293
-
294
 |
 |