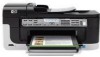
HP 6500 User Guide - Page 97
Monitor the device, HP Printer Utility Mac OS X - ink cartridge
 |
UPC - 884420425137
View all HP 6500 manuals
Add to My Manuals
Save this manual to your list of manuals |
Page 97 highlights
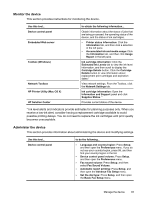
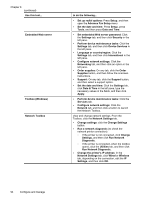
Monitor the device This section provides instructions for monitoring the device. Use this tool... Device control panel Embedded Web server Toolbox (Windows) Network Toolbox HP Printer Utility (Mac OS X) HP Solution Center to obtain the following information... Obtain information about the status of jobs that are being processed, the operating status of the device, and the status of ink cartridges. • Printer status information: Click the Information tab, and then click a selection in the left pane. • Accumulated ink and media usage: Click the Information tab, and then click Usage Report in the left pane. Ink cartridge information: Click the Estimated Ink Levels tab to view the ink-level information, and then scroll to display the Cartridge Details button. Click the Cartridge Details button to view information about replacement print cartridges and expiration dates.* View network settings. From the Toolbox, click the Network Settings tab. Ink cartridge information: Open the Information and Support panel and click Supplies Status. * Provides current status of the device. * Ink level alerts and indicators provide estimates for planning purposes only. When you receive a low-ink alert, consider having a replacement cartridge available to avoid possible printing delays. You do not need to replace the ink cartridges until print quality becomes unacceptable. Administer the device This section provides information about administering the device and modifying settings. Use this tool... Device control panel to do the following... • Language and country/region: Press Setup, and then open the Preferences menu. If you do not see your country/region, press 99, and then find your country/region in the list. • Device control panel volume: Press Setup, and then open the Preferences menu. • Fax sound volume: Press Setup, and then select Fax Sound Volume. • Automatic report printing: Press Setup, and then open the Advance Fax Setup menu. • Set the dial type: Press Setup, and then open the Basic Fax Setup menu. Manage the device 93
-
 1
1 -
2
-
3
-
4
-
5
-
6
-
7
-
8
-
9
-
10
-
11
-
12
-
13
-
14
-
15
-
16
-
17
-
18
-
19
-
20
-
21
-
22
-
23
-
24
-
25
-
26
-
27
-
28
-
29
-
30
-
31
-
32
-
33
-
34
-
35
-
36
-
37
-
38
-
39
-
40
-
41
-
42
-
43
-
44
-
45
-
46
-
47
-
48
-
49
-
50
-
51
-
52
-
53
-
54
-
55
-
56
-
57
-
58
-
59
-
60
-
61
-
62
-
63
-
64
-
65
-
66
-
67
-
68
-
69
-
70
-
71
-
72
-
73
-
74
-
75
-
76
-
77
-
78
-
79
-
80
-
81
-
82
-
83
-
84
-
85
-
86
-
87
-
88
-
89
-
90
-
91
-
 92
92 -
 93
93 -
 94
94 -
 95
95 -
 96
96 -
 97
97 -
 98
98 -
 99
99 -
 100
100 -
 101
101 -
 102
102 -
103
-
104
-
105
-
106
-
107
-
108
-
109
-
110
-
111
-
112
-
113
-
114
-
115
-
116
-
117
-
118
-
119
-
120
-
121
-
122
-
123
-
124
-
125
-
126
-
127
-
128
-
129
-
130
-
131
-
132
-
133
-
134
-
135
-
136
-
137
-
138
-
139
-
140
-
141
-
142
-
143
-
144
-
145
-
146
-
147
-
148
-
149
-
150
-
151
-
152
-
153
-
154
-
155
-
156
-
157
-
158
-
159
-
160
-
161
-
162
-
163
-
164
-
165
-
166
-
167
-
168
-
169
-
170
-
171
-
172
-
173
-
174
-
175
-
176
-
177
-
178
-
179
-
180
-
181
-
182
-
183
-
184
-
185
-
186
-
187
-
188
-
189
-
190
-
191
-
192
-
193
-
194
-
195
-
196
-
197
-
198
-
199
-
200
-
201
-
202
-
203
-
204
-
205
-
206
-
207
-
208
-
209
-
210
-
211
-
212
-
213
-
214
-
215
-
216
-
217
-
218
-
219
-
220
-
221
-
222
-
223
-
224
-
225
-
226
-
227
-
228
-
229
-
230
-
231
-
232
-
233
-
234
-
235
-
236
-
237
-
238
-
239
-
240
-
241
-
242
-
243
-
244
-
245
-
246
-
247
-
248
-
249
-
250
-
251
-
252
-
253
-
254
-
255
-
256
-
257
-
258
-
259
-
260
-
261
-
262
-
263
-
264
-
265
-
266
-
267
-
268
-
269
-
270
-
271
-
272
-
273
-
274
-
275
-
276
-
277
-
278
-
279
-
280
-
281
-
282
-
283
-
284
-
285
-
286
-
287
-
288
-
289
-
290
-
291
-
292
-
293
-
294
 |
 |