HP 8000f Maintenance and Service Guide: HP Compaq 8000f Elite Business PC Ultr - Page 56
Replacing the Optical Drive, Removing the Existing Optical Drive
 |
UPC - 885631750551
View all HP 8000f manuals
Add to My Manuals
Save this manual to your list of manuals |
Page 56 highlights
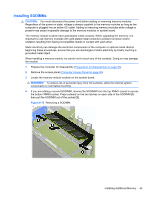
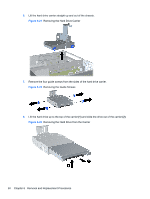
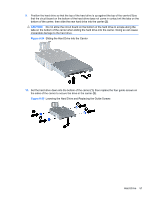
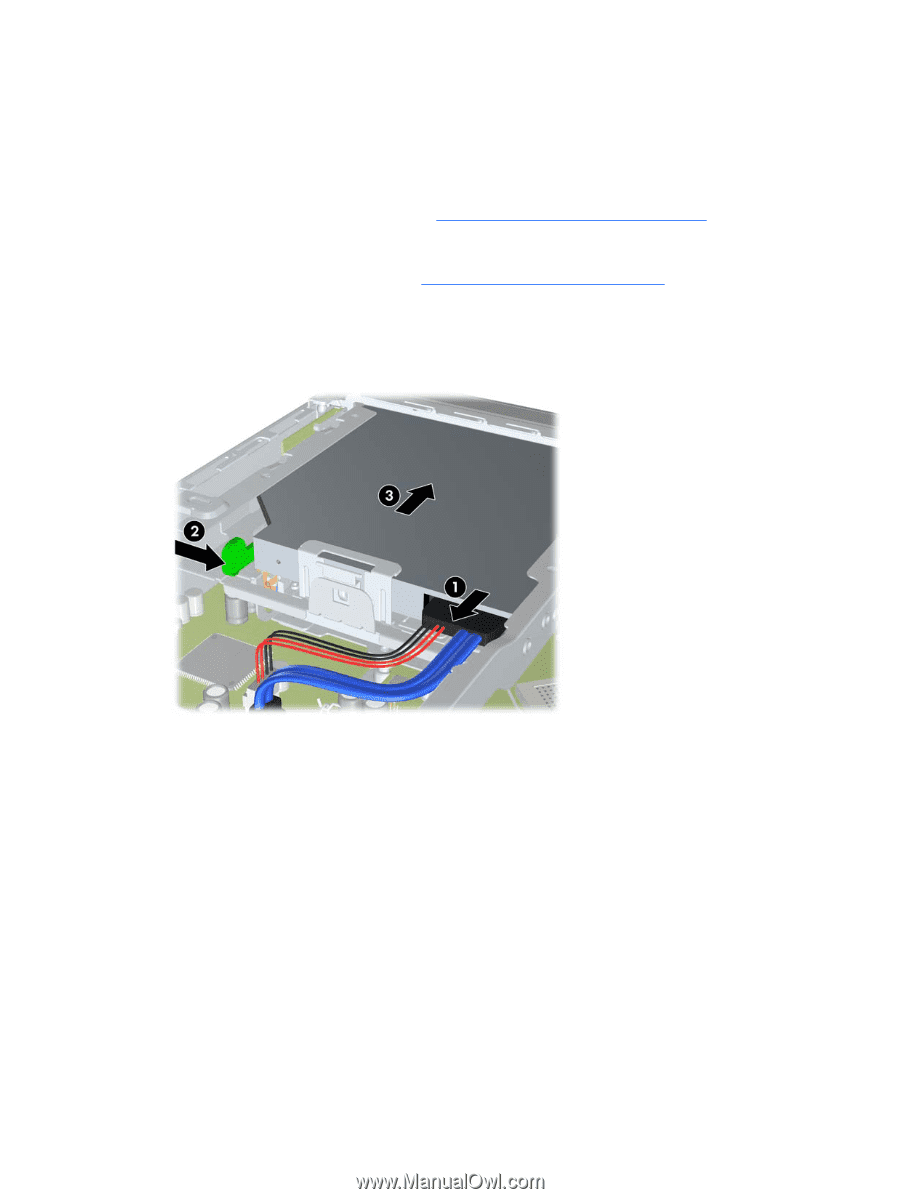
Replacing the Optical Drive The Ultra-Slim Desktop uses a slimline Serial ATA (SATA) optical drive. Removing the Existing Optical Drive 1. Prepare the computer for disassembly (Preparation for Disassembly on page 30). 2. If the computer is on a stand, remove the computer from the stand and lay the computer down. 3. Remove the computer access panel (Computer Access Panel on page 38). 4. Disconnect the cable on the rear of the optical drive (1), push the green release latch on the right rear side of the drive toward the center of the drive (2), then slide the drive forward and out of the bay through the front bezel (3). Figure 6-17 Removing the Optical Drive 46 Chapter 6 Removal and Replacement Procedures
-
 1
1 -
2
-
3
-
4
-
5
-
6
-
7
-
8
-
9
-
10
-
11
-
12
-
13
-
14
-
15
-
16
-
17
-
18
-
19
-
20
-
21
-
22
-
23
-
24
-
25
-
26
-
27
-
28
-
29
-
30
-
31
-
32
-
33
-
34
-
35
-
36
-
37
-
38
-
39
-
40
-
41
-
42
-
43
-
44
-
45
-
46
-
47
-
48
-
49
-
50
-
 51
51 -
 52
52 -
 53
53 -
 54
54 -
 55
55 -
 56
56 -
 57
57 -
 58
58 -
 59
59 -
 60
60 -
 61
61 -
62
-
63
-
64
-
65
-
66
-
67
-
68
-
69
-
70
-
71
-
72
-
73
-
74
-
75
-
76
-
77
-
78
-
79
-
80
-
81
-
82
-
83
-
84
-
85
-
86
-
87
-
88
-
89
-
90
-
91
-
92
-
93
-
94
-
95
-
96
-
97
-
98
-
99
-
100
-
101
-
102
-
103
-
104
-
105
-
106
-
107
-
108
-
109
-
110
-
111
-
112
-
113
-
114
-
115
-
116
-
117
-
118
-
119
-
120
-
121
-
122
-
123
-
124
-
125
-
126
-
127
-
128
-
129
-
130
-
131
-
132
-
133
-
134
-
135
-
136
-
137
-
138
-
139
-
140
-
141
-
142
-
143
-
144
-
145
-
146
-
147
-
148
-
149
-
150
-
151
-
152
-
153
-
154
-
155
-
156
-
157
-
158
-
159
-
160
-
161
-
162
-
163
-
164
-
165
-
166
 |
 |
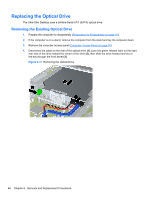
Replacing the Optical Drive
The Ultra-Slim Desktop uses a slimline Serial ATA (SATA) optical drive.
Removing the Existing Optical Drive
1.
Prepare the computer for disassembly (
Preparation for Disassembly
on page
30
).
2.
If the computer is on a stand, remove the computer from the stand and lay the computer down.
3.
Remove the computer access panel (
Computer Access Panel
on page
38
).
4.
Disconnect the cable on the rear of the optical drive
(1)
, push the green release latch on the right
rear side of the drive toward the center of the drive
(2)
, then slide the drive forward and out of
the bay through the front bezel
(3)
.
Figure 6-17
Removing the Optical Drive
46
Chapter 6
Removal and Replacement Procedures