HP 9040mfp HP Embedded Digital Sending - Configuring Embedded LDAP Authenticat
HP 9040mfp - LaserJet B/W Laser Manual
 |
UPC - 829160403649
View all HP 9040mfp manuals
Add to My Manuals
Save this manual to your list of manuals |
HP 9040mfp manual content summary:
- HP 9040mfp | HP Embedded Digital Sending - Configuring Embedded LDAP Authenticat - Page 1
HP Restricted Configuring Embedded LDAP Authentication configure - HP 9040mfp | HP Embedded Digital Sending - Configuring Embedded LDAP Authenticat - Page 2
- HP 9040mfp | HP Embedded Digital Sending - Configuring Embedded LDAP Authenticat - Page 3
Configuring Embedded LDAP Authentication For HP product models: LaserJet 4345mfp, LaserJet 9040mfp, LaserJet 9050mfp, LaserJet 9500mfp, and Digital Sender 9200C - HP 9040mfp | HP Embedded Digital Sending - Configuring Embedded LDAP Authenticat - Page 4
of their respective companies. The only warranties for HP products and services are set forth in the express warranty statements accompanying such products and services. Nothing herein should be construed as constituting an additional warranty. HP shall not be liable for technical or editorial - HP 9040mfp | HP Embedded Digital Sending - Configuring Embedded LDAP Authenticat - Page 5
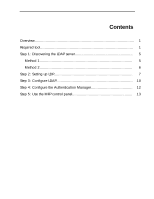
Contents Overview 1 Required tool 1 Step 1: Discovering the LDAP server 5 Method 1 5 Method 2 6 Step 2: Setting up LDP 7 Step 3: Configure LDAP 10 Step 4: Configure the Authentication Manager 12 Step 5: Use the MFP control panel 13 - HP 9040mfp | HP Embedded Digital Sending - Configuring Embedded LDAP Authenticat - Page 6
- HP 9040mfp | HP Embedded Digital Sending - Configuring Embedded LDAP Authenticat - Page 7
ships with the Windows Support Tools contained on the Windows OS media. It allows you to connect, bind, and query an LDAP database. Microsoft LDP can be installed and configured by following these instructions: a. Browse to the root of the OS media, and open the Support folder. b. Open the Tools - HP 9040mfp | HP Embedded Digital Sending - Configuring Embedded LDAP Authenticat - Page 8
c. Double click the SUPTOOLS.MSI file. d. Select Next at the Welcome to the Windows Support Tools Setup Wizard. 2 - configure - HP 9040mfp | HP Embedded Digital Sending - Configuring Embedded LDAP Authenticat - Page 9
e. After reading the licensing agreement, select the I Agree radial button and click Next. f. Enter your name and organization; then click Next. configure - 3 - HP 9040mfp | HP Embedded Digital Sending - Configuring Embedded LDAP Authenticat - Page 10
g. Select Complete for the installation type; then click Next. h. Select Install Now to begin the installation. 4 - configure - HP 9040mfp | HP Embedded Digital Sending - Configuring Embedded LDAP Authenticat - Page 11
i. Click Finish to complete the installation. Step 1: Discovering the LDAP server There are two key methods to discover an available LDAP server on the network. Method 1 a. Open a command window by clicking on Start → Run and typing cmd.exe in the dialog box. Then press Enter or click OK. configure - HP 9040mfp | HP Embedded Digital Sending - Configuring Embedded LDAP Authenticat - Page 12
b. To determine which Windows Active Directory logon server you are logged onto, type the following: echo %logonserver%. This server can be used as the LDAP server. Method 2 The following command can be used to provide a list of DNS servers. n nslookup "name of your domain" (i.e. nslookup AMERICAS. - HP 9040mfp | HP Embedded Digital Sending - Configuring Embedded LDAP Authenticat - Page 13
Step 2: Setting up LDP a. Open LDP by clicking on Start → Run, and typing ldp.exe; then press Enter or click OK. b. From the Ldp menu, select Connection → Connect. c. In the Connect window, input 389 or 3268 as the Port Number; then click OK. w Port 389 is the standard LDAP port. However, it may be - HP 9040mfp | HP Embedded Digital Sending - Configuring Embedded LDAP Authenticat - Page 14
e. In the Bind window, input username, password, and domain name; then click OK. f. On the LDP screen, find and copy the Base DN. w The Base DN is normally listed within "defaultNamingContext." g. From the LDP menu, select Browse → Search. h. In the Search window, paste the Base DN into the Base Dn - HP 9040mfp | HP Embedded Digital Sending - Configuring Embedded LDAP Authenticat - Page 15
w In the Search Options window, remove all entries in Attributes; then click OK. w Back in the Search window, click Run; then click Close. i. On the LDP screen, locate the user DN from the returned results. Copy it for use in the Embedded Web Server (EWS). w The Search Prefix begins after the - HP 9040mfp | HP Embedded Digital Sending - Configuring Embedded LDAP Authenticat - Page 16
Hint Notice how the username is set up on the LDP screen. The username format is defined within the device user DN. This can be viewed in the LDP trace. The format is often in email address format, but can be defined in many different combinations. Step 3: Configure LDAP a. Open the EWS in a web - HP 9040mfp | HP Embedded Digital Sending - Configuring Embedded LDAP Authenticat - Page 17
h. Input cn into the "Match the name entered with the LDAP attribute of" field. i. Find the device user email address in the LDP trace. Copy the attribute defining the email address. w Paste the attribute into the "Retrieve the device user's email address using attribute of" box. j. Find the device - HP 9040mfp | HP Embedded Digital Sending - Configuring Embedded LDAP Authenticat - Page 18
Hint Remember how the username was set up on the LDP screen. The username is defined within the device user DN value in the LDP trace and is not in standard Windows domain account format. The format is often your entire email address, including the @xx.xx. m. The LDAP Authentication screen appears. - HP 9040mfp | HP Embedded Digital Sending - Configuring Embedded LDAP Authenticat - Page 19
Step 5: Use the MFP control panel a. At the MFP, touch any option on the main screen. The screen displays a request for authentication. Hint Remember the username is defined within the device user DN value in the LDP trace and is often your entire email address, including the @xx.xx. b. Use the
-
 1
1 -
 2
2 -
 3
3 -
 4
4 -
 5
5 -
 6
6 -
 7
7 -
8
-
9
-
10
-
11
-
12
-
13
-
14
-
15
-
16
-
17
-
18
-
19
 |
 |

HP Restricted
Configuring
Embedded LDAP
Authentication
configure