HP 950c (English) Windows Connect * User's Guide - C6428-90035 - Page 16
x 6 in., 102 x 152 mm, Photo Paper, 5 x 11 in. or A4 Photo Paper
 |
View all HP 950c manuals
Add to My Manuals
Save this manual to your list of manuals |
Page 16 highlights
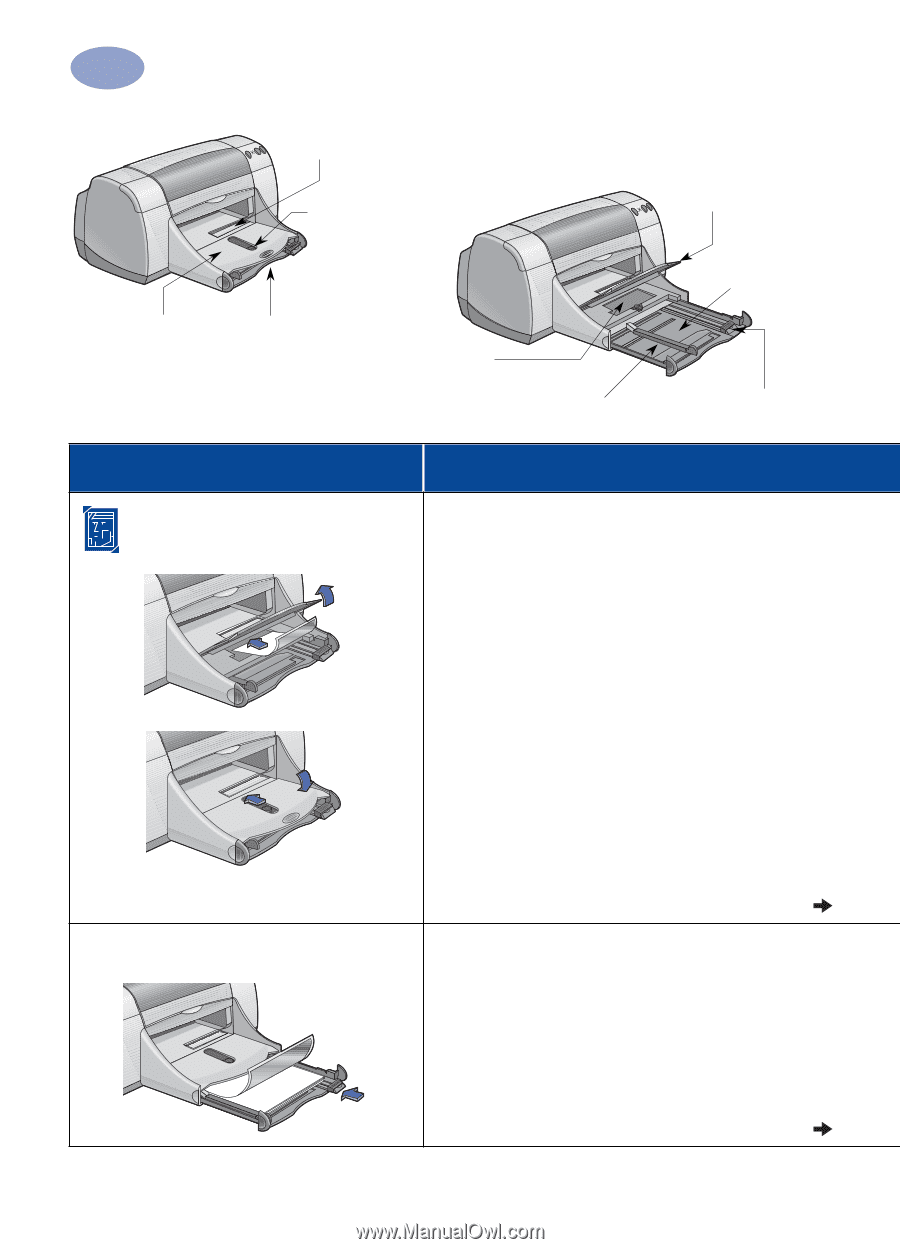
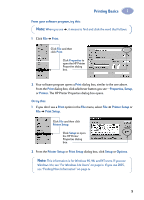
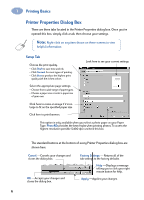
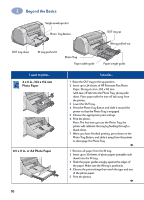
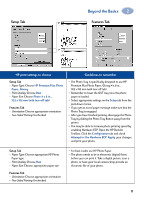
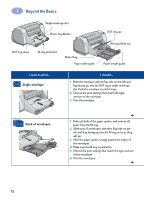
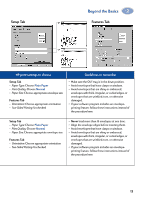
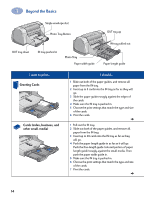
2 Beyond the Basics OUT tray down Single envelope slot Photo Tray Button IN tray pushed in Photo Tray Paper width guide OUT tray up IN tray pulled out Paper length guide I want to print... 4 x 6 in., 102 x 152 mm Photo Paper 8.5 x 11 in. or A4 Photo Paper I should... 1 Raise the OUT tray to the up position. 2 Insert up to 24 sheets of HP Premium Plus Photo Paper, Glossy 4 x 6 in., 102 x 152 mm (with tear-off tab) into the Photo Tray, glossy side down. Place paper with the tear-off tab away from the printer. 3 Lower the OUT tray. 4 Press the Photo Tray Button and slide it toward the printer so that the Photo Tray is engaged. 5 Choose the appropriate print settings. 6 Print the photo. Note: The first time you use the Photo Tray, the printer will calibrate the tray by feeding through a blank sheet. 7 When you have finished printing, press down on the Photo Tray Button, and slide it away from the printer to disengage the Photo Tray. 1 Remove all paper from the IN tray. 2 Insert up to 30 sheets of photo paper (printable side down) into the IN tray. 3 Slide the paper guides snugly against the edges of the paper. Make sure the IN tray is pushed in. 4 Choose the print settings that match the type and size of the photo paper. 5 Print the photos. 10
-
 1
1 -
2
-
3
-
4
-
5
-
6
-
7
-
8
-
9
-
10
-
 11
11 -
 12
12 -
 13
13 -
 14
14 -
 15
15 -
 16
16 -
 17
17 -
 18
18 -
 19
19 -
 20
20 -
 21
21 -
22
-
23
-
24
-
25
-
26
-
27
-
28
-
29
-
30
-
31
-
32
-
33
-
34
-
35
-
36
-
37
-
38
-
39
-
40
-
41
-
42
-
43
-
44
-
45
-
46
-
47
-
48
-
49
-
50
-
51
-
52
-
53
-
54
-
55
-
56
-
57
-
58
-
59
-
60
-
61
-
62
-
63
-
64
-
65
-
66
-
67
-
68
-
69
-
70
-
71
-
72
-
73
-
74
 |
 |