HP A1224n Media Center Software Guide
HP A1224n - Pavilion - 1 GB RAM Manual
 |
View all HP A1224n manuals
Add to My Manuals
Save this manual to your list of manuals |
HP A1224n manual content summary:
- HP A1224n | Media Center Software Guide - Page 1
Media Center Software Guide - HP A1224n | Media Center Software Guide - Page 2
services. Nothing herein should be construed as constituting an additional warranty. HP shall not be liable for technical or editorial errors or omissions contained herein. HP , 2008. Microsoft and Windows are U.S. registered trademarks of Microsoft Corporation. HP supports lawful use of technology - HP A1224n | Media Center Software Guide - Page 3
in HP Photosmart Premier 32 Using supported file types with HP Photosmart Premier 34 Printing Pictures in HP Photosmart 35 Creating a Backup Disc of Your Pictures 35 Using My Pictures in Media Center 36 Adding Pictures to My Pictures 37 Adding picture files from your hard disk drive 37 - HP A1224n | Media Center Software Guide - Page 4
to disc 58 Using muvee autoProducer unPlugged in Media Center ...........58 Selecting videos 59 Selecting pictures 60 Selecting music 60 Setting the style 61 Adjusting audio and video settings 61 Making the movie 62 Upgrading muvee autoProducer 62 Index 63 iv Media Center Software Guide - HP A1224n | Media Center Software Guide - Page 5
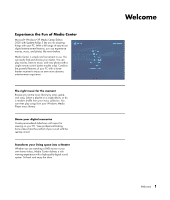
the Fun of Media Center Microsoft® Windows® XP Media Center Edition 2005 with Update Rollup 2 lets you do amazing things with your PC. With a full range of easy-to-use digital entertainment features, you can experience movies, music, and photos like never before. Media Center is simple and - HP A1224n | Media Center Software Guide - Page 6
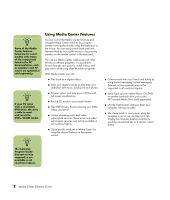
Drive (sold separately). ■ Use the Optimization setting to keep your computer running smoothly. ■ Use Away mode to save power when the computer is not in use, and then you can display the computer desktop instantly by touching a keyboard key or a remote control button. 2 Media Center Software Guide - HP A1224n | Media Center Software Guide - Page 7
window. 4 Click the ? icon at the top of the window to open the Media Center Help. 5 Click the Media Center Start icon at the top of the Media Center window to return to the Media Center Start menu. n For more information about setting up your PC, refer to the setup poster. Using Media Center - HP A1224n | Media Center Software Guide - Page 8
at the top of the window to open the Media Center Help. 6 Press the Media Center Start button to return to the Media Center Start menu. n You can use the Minimize and Resize buttons to switch to the desktop or to run Media Center side-byside with another program. Media Center menu bars When you - HP A1224n | Media Center Software Guide - Page 9
bars. Select the Shut Down icon on the main Media Center window. From this control menu, you can select icons to perform various actions. Icon Action Log off and end your Media Center session and switch users Shut down the PC Restart the PC Put the PC in a power-reduced state - standby mode Using - HP A1224n | Media Center Software Guide - Page 10
is not affected when the PC is in Away mode. Using Media Center Away mode When your computer is in Away mode it appears off, but you can actually still perform tasks such as recording TV programs or music files. Away mode turns off the display and mutes the audio. After you have enabled Away - HP A1224n | Media Center Software Guide - Page 11
control to scroll down to see all the menu items. 3 Select General, Media Center Setup, and then Run Media Center Setup Again. Follow the onscreen instructions to complete the wizard. n You can change your Media Center settings in the Settings menu. Following are some of the items included in - HP A1224n | Media Center Software Guide - Page 12
and Channel Up/Down. See page 14. C Open the Media Center Start menu. See page 3. D Go back one screen. E Open the Media Center Help. F Minimize the Media Center window. G Resize the Media Center window. H Close the Media Center window. Media Center Start menu items Play DVD - Watch DVD movies. See - HP A1224n | Media Center Software Guide - Page 13
/regions. Media Center supports instant messaging (Internet service required) so you can communicate with your friends and family while you are doing something in Media Center. You always have the option to turn this feature on or off. You can use your remote control to log in and type messages - HP A1224n | Media Center Software Guide - Page 14
, access Windows updates, run Media Center setup again, set up remote desktop, and reset Start Page defaults. ■ Automatic Downloads Options to get media information about CDs, DVDs, and movies from the Internet. 10 Media Center Software Guide ■ Optimization to keep your computer running smoothly - HP A1224n | Media Center Software Guide - Page 15
lower front of the PC chassis. To find the online documentation for your product, search for your model number, and then click Manuals. n Information and guides are associated with specific PC model numbers. Some models do not have guides or manuals available on the Web site. Using Media Center 11 - HP A1224n | Media Center Software Guide - Page 16
12 Media Center Software Guide - HP A1224n | Media Center Software Guide - Page 17
in and out of standby mode. ■ Shut down or restart the PC. ■ Log off from Media Center or switch users. The remote control cannot: ■ Navigate the Windows desktop or control other computer programs outside of Media Center. ■ Be used as a VCR, DVD player, or stereo remote control. ■ Turn on or - HP A1224n | Media Center Software Guide - Page 18
4 night and do not want to be disturbed. 5 The PC does not automatically go into in Media Center. 5 Radio - Opens the FM Radio window in Media Center. 6 Record - Records a selected television 7 program and stores it on the hard disk 8 drive. 9 REW REPLAY PAUSE FWD SKIP 21 22 23 24 - HP A1224n | Media Center Software Guide - Page 19
your pictures that you select in the My Pictures window of Media Center. n The PC will not automatically go into standby mode if Media Center is open. It is recommended that you close Media Center before you manually place the PC in standby mode. n If the PC model does not include a TV tuner, some - HP A1224n | Media Center Software Guide - Page 20
16 Media Center Software Guide - HP A1224n | Media Center Software Guide - Page 21
up your music tracks to a DVD or to an HP Personal Media Drive. n You can store your music files in the My Music folder or in other folders on your hard disk drive, but you need to add those files to the Windows Media Player music library for Media Center to be able to find and play them. Playing - HP A1224n | Media Center Software Guide - Page 22
Player program. For more information about adding and deleting music files to the library, use the Windows Media Player Help menu. Adding music files from your hard disk drive 1 Press the Media Center Start button on the remote control, or, with your mouse, click Start on the taskbar, and then - HP A1224n | Media Center Software Guide - Page 23
then click Media Center. 2 Select My Music. 3 Insert a CD into the CD drive. 4 Select Albums. 5 Select the Album CD you want to add to your music library. 6 Select Copy CD. The first time you copy a music CD you must select your copy- protection option and then follow any onscreen instructions - HP A1224n | Media Center Software Guide - Page 24
formats, use Windows Media Player Help and Media Center Help. Only supported audio file types are displayed in the My Music window. Unsupported files won't play. Using supported music file types You can play the following types of digital audio files in My Music. Refer to Windows Media Player Help - HP A1224n | Media Center Software Guide - Page 25
, with your mouse, click Start on the taskbar, and then click Media Center. 2 Select My Music. 3 Insert a music CD into the CD drive. 4 Select Albums. 5 Select the album you want to play. in the Now Playing window to see a visualization while you play a music track. Playing Music Files 21 - HP A1224n | Media Center Software Guide - Page 26
a queue list and save it as a playlist that you can access in Media Center. 1 From the My Music window: ■ Select Songs, use the arrow keys to select a song you want return to the previous window, press Back on the remote control or the Backspace key on the keyboard. 22 Media Center Software Guide - HP A1224n | Media Center Software Guide - Page 27
background music for a slideshow. You can create playlists in Windows Media Player or from within Media Center. To create a playlist: 1 Select My Music, and select Save. n If your PC is connected to the Internet, the CD track titles and cover art appear in Media Center. Playing Music Files 23 - HP A1224n | Media Center Software Guide - Page 28
, click Start on the taskbar, and then click Media Center. 2 Select More Programs. 3 Insert a blank CD-R disc. 4 Select Create CD/DVD. 5 Select a disc format: Audio CD or Data CD, and then select OK. Select Yes. 13 Select OK. 14 Follow the onscreen instructions. 24 Media Center Software Guide - HP A1224n | Media Center Software Guide - Page 29
, you can view, sort, edit, print, and create a CD or DVD of your pictures from the folders you create in the My Pictures directory in Windows Explorer. For more information about using My Pictures, see "Using My Pictures in Media Center" on page 36. Working with Pictures 25 - HP A1224n | Media Center Software Guide - Page 30
to the PC or through a docking station. Most digital picture files you copy or download from the device appear in the My Pictures folder. Windows XP and Media Center detect your external device and display a message asking if you want to view your images. You can display them from the desktop or - HP A1224n | Media Center Software Guide - Page 31
a map of the folders on your hard disk drive. D The Tips window displays helpful hints about using HP Photosmart Premier. E The Preferences button allows you to customize HP Photosmart Premier. The Help menu gives you troubleshooting tips, instructional videos, and other information. F The Image - HP A1224n | Media Center Software Guide - Page 32
window. 5 Select the Albums icon, and then select Create a new album. 6 Type a title using your keyboard, and then click OK. You can now view your albums in Media Center when you open Media Center, select HP Date and Time. 5 Select a date and time, and then click OK. 28 Media Center Software Guide - HP A1224n | Media Center Software Guide - Page 33
Keyword). 5 Type the new HP Photosmart Premier. Or Click Start on the taskbar, choose All Programs, HP, and then click HP Photosmart Premier. The HP Photosmart Premier window center of the cross symbol, click Assign. 8 Click Assign again. 9 Click Close. n There are two ways to move around the HP - HP A1224n | Media Center Software Guide - Page 34
, with your mouse, click Start on the taskbar, and then click Media Center. 2 Select HP Photosmart. 3 Select the Search tab. 4 Select By Date. Select the Year, Month, and Day boxes and then use the number keypad on the remote or the numbers on the keyboard to enter the start and end date range - HP A1224n | Media Center Software Guide - Page 35
6 Select the pictures. 7 Select Slide Show. When Media Center switches to full-screen mode, the inset window disappears, but the music continues to play. Editing Pictures in HP Photosmart Premier Editing pictures in HP Photosmart Premier from the desktop You can make changes to your pictures in - HP A1224n | Media Center Software Guide - Page 36
without downloading any attachments. The Web page is automatically displayed in a language based on the recipient's Web browser settings. The photos can be viewed, printed, and saved to a computer. Before you can share photos in Media Center, you must agree to the license agreement in the desktop - HP A1224n | Media Center Software Guide - Page 37
. The HP Photosmart Premier window opens. 2 Select the HP Share tab. 3 Select E-mail. 4 Select your country/region from the drop- down menu under Select your country/region. 5 Select the I Agree check box, and then select Next. To share photos in Media Center: 1 Press the Media Center Start - HP A1224n | Media Center Software Guide - Page 38
Graphics Portable Network Graphics ■ Only supported image file types are displayed in My Pictures. Unsupported files are skipped in a slideshow. ■ Corrupted and unsupported image file types display a generic image icon but cannot be displayed in Media Center. ■ Some file types are supported only if - HP A1224n | Media Center Software Guide - Page 39
on the taskbar, and then click Media Center. 2 Select HP Photosmart. 3 Select Albums, Months, or window. 3 Select your backup settings, and then click Next. 4 Insert a blank disc. 5 Select the drive and media type, and then click Next. 6 Click Start Backup. 7 Follow any onscreen instructions - HP A1224n | Media Center Software Guide - Page 40
Using My Pictures in Media Center My Pictures is a folder on your hard disk drive in the My Documents folder, and it is a Media Center menu item that allows you to and protecting your digital images. My Pictures in Media Center My Pictures folder in Windows Explorer 36 Media Center Software Guide - HP A1224n | Media Center Software Guide - Page 41
Adding Pictures to My Pictures Adding picture files from your hard disk drive 1 Press the Media Center Start button on the remote control, or, with your mouse, click Start on the taskbar, and then click Media Center. 2 Select My Pictures. 3 Press Ctrl+D on the keyboard or press the i (More - HP A1224n | Media Center Software Guide - Page 42
you organize your pictures in the My Pictures folder in Windows Explorer, open Media Center to view your pictures: 1 Press the Media Center Start button on the remote control, or, with your , location, last modification date, and resolution appears, if available. 38 Media Center Software Guide - HP A1224n | Media Center Software Guide - Page 43
the following types of image files in Media Center. File extension .jpg, .jpeg .tif, .tiff .gif .bmp .wmf .png File type Joint Photographic Experts Group Tagged Image File Format Graphics Interchange Format Bitmap Windows MetaFile Portable Network Graphics ■ Only supported image file types are - HP A1224n | Media Center Software Guide - Page 44
, click Start on the taskbar, and then click Media Center. 2 Select My Pictures. 3 Select the picture My Pictures 1 Press the Media Center Start button on the remote control, or, with , click Start on the taskbar, and then click Media Center. 2 Select My Pictures. 3 Select the picture - HP A1224n | Media Center Software Guide - Page 45
in the previous step. Rotating pictures If your picture appears horizontally or vertically and you want to change the orientation, you can change it in Media Center: 1 Press the Media Center Start button on the remote control, or, with your mouse, click Start on the taskbar, and then click - HP A1224n | Media Center Software Guide - Page 46
also create a LightScribe label for your CD or DVD if you have a LightScribe optical drive and you use LightScribe media discs. Refer to the other documentation that came with your PC. 1 Press the Media Center Start button on the remote control, or, with your mouse, click Start on the taskbar - HP A1224n | Media Center Software Guide - Page 47
Playing Videos The My Videos window in Media Center makes it easy to play home video files you created or video files you downloaded from the Internet. In My Videos you can: ■ Play videos that are stored anywhere on your hard disk drive. ■ Create a CD or DVD of your video files. ■ View your videos - HP A1224n | Media Center Software Guide - Page 48
in Media Center. Other file types are supported if your PC has the correct software installed. File extension .avi .dvr-ms .mpeg, .mpg, .mpe, .m1v, .mp2, .mpv2 .wm, .asf .wmv File type Video file Digital Video Recording - Microsoft (TV file format) Movie file Windows Media file Windows Media AV - HP A1224n | Media Center Software Guide - Page 49
, or, with your mouse, click Start on the taskbar, and then click Media Center. 2 Select More Programs. 3 Insert a writable disc, and then select OK. 4 Select Create CD/DVD. 5 Select the Untitled area, enter the name of your disc by using the numeric keys on the remote control or the keyboard - HP A1224n | Media Center Software Guide - Page 50
46 Media Center Software Guide - HP A1224n | Media Center Software Guide - Page 51
on the taskbar, and then click Media Center. 2 Insert the DVD into the drive. If you have other media playing, Media Center asks if you want to play icon to appear. 6 Click the Resize icon on the taskbar to adjust the window size. n To view more information about a DVD that you are watching, such - HP A1224n | Media Center Software Guide - Page 52
Media Center. 2 Select Settings. 3 Select DVD. 4 Select Audio. The Audio Properties window opens. 5 Select Configuration, and then select your speaker and sound options. Select your speaker output and your channel mode, if applicable. Select Save. 6 Select OK. 48 Media Center Software Guide - HP A1224n | Media Center Software Guide - Page 53
captions you added to your movie and save your movie to your PC hard disk drive, CD, or DVD. 7 Burn to disc: You can burn a video to DVD, VCD, or SVCD only from the desktop muvee autoProducer version. The following sections contain detailed instructions. Creating Movies Using muvee autoProducer 49 - HP A1224n | Media Center Software Guide - Page 54
autoProducer has more features, such as video capture and disc recording. See "Using muvee autoProducer on the Desktop" on page 51. n To view Help files, select the ? and then press OK on the remote control. Or Media Center Press the Media Center Start button on the remote control, or, with - HP A1224n | Media Center Software Guide - Page 55
movie. Open the muvee Title and Credits window to type an opening title and closing credits for your movie. Open the Make muvee window to automatically create and preview the movie. Open the Save muvee window to save the finished movie on your PC hard disk drive in .wmv or .mpeg formats. Open the - HP A1224n | Media Center Software Guide - Page 56
of free space available on your PC hard disk drive. Capturing video can use a large amount of disk space. The amount of free disk space displays on the Capture Video window in muvee autoProducer while you are add captured video files to your movie project. 52 Media Center Software Guide - HP A1224n | Media Center Software Guide - Page 57
hard disk drive: 1 Connect your DV camcorder to the FireWire (IEEE 1394) port on your PC. 2 Turn on the camcorder and set it to VCR mode. Refer to the instructions Pictures window opens. 2 Browse the folders on your hard disk drive to production. 4 You can mark specific scenes in a video clip to - HP A1224n | Media Center Software Guide - Page 58
window opens. 2 Browse the folders on your hard disk drive window. ■ Click the manual button to display two overlapping frames over your picture. ■ Move the frames around to set the start and end points for motion. The arrow in the frames shows the direction of motion. 54 Media Center Software Guide - HP A1224n | Media Center Software Guide - Page 59
desktop: 1 Select the Add Music button in the music area. The Add Music window opens. 2 Browse the folders, as required. 3 Select existing music files on your hard disk drive the style displays in the Preview window. Changing the settings You can adjust audio and video production settings for your - HP A1224n | Media Center Software Guide - Page 60
c Click the Use font button to select the font, style, size, color, and effects from the Font window. d Select a background image for the title. d Select a background image for the ending credits. 4 Click Apply. 5 Click OK to close the muvee Title and Credits window. 56 Media Center Software Guide - HP A1224n | Media Center Software Guide - Page 61
or DVD disc: 1 Click the Save muvee button. The Save muvee window opens. 2 Choose the movie file type to save to your hard disk drive: ■ Computer Playback ■ E-mail ■ DV (camcorder) ■ DVD ■ VCD (video CD) ■ SVCD ■ Web Streaming Click the Change Settings button to change the video and audio settings - HP A1224n | Media Center Software Guide - Page 62
the type of disc you want to burn: DVD, VCD, or SVCD. 7 Click Burn Now to begin burning your movie to disc. To save the current settings for future, click Burn Later. 8 Click OK when the recording is complete. Close the muvee Burner window. Using muvee autoProducer unPlugged in Media Center To - HP A1224n | Media Center Software Guide - Page 63
media analysis and construct your movie production. "Adjusting audio or burn a disc, see "Using muvee autoProducer on the Desktop" on page 51 . Selecting videos To add video files to your movie production: 1 Select the Select Video button to browse through video folders on your PC - HP A1224n | Media Center Software Guide - Page 64
To add music to your movie soundtrack: 1 Select the Select Music button to browse through folders on your PC for music files to use in your movie production. 2 Select a folder with music in it, using the to confirm your music selection and proceed to the next step. 60 Media Center Software Guide - HP A1224n | Media Center Software Guide - Page 65
to confirm your style selection and proceed to the next step. Adjusting audio and video settings You can adjust audio and video production settings for your movie: 1 Select the Settings button. 2 Select Audio to adjust the sound mix level of the music and original soundtrack and check music clip - HP A1224n | Media Center Software Guide - Page 66
hard disk drive. To create a CD or DVD disc in muvee autoProducer unPlugged, copy the saved file using the Windows desktop. Upgrading muvee autoProducer You can purchase an upgraded version of muvee autoProducer with the following enhancements: ■ MPEG-4 and DivX video format support. ■ TIFF audio - HP A1224n | Media Center Software Guide - Page 67
library from the hard disk drive 18 Away mode enabling 6 power setting 2 using 6 B buttons remote control 14 C camcorder capture 52 CDs creating a music CD in My Music 24 playing in My Music 21 D desktop switching from Media Center 4 DV camcorder capture 52 DVD movies changing audio settings 48 - HP A1224n | Media Center Software Guide - Page 68
M magicSpot 54 Media Center navigating 5 playing DVDs 47 resizing window 4 Start menu 8 toolbars 4 using muvee autoProducer unPlugged 58 using with another program open 4 viewing your pictures 38 what you can do in My Music 17 in My Pictures 25 in My Videos 43 memory card reader 26 music library - HP A1224n | Media Center Software Guide - Page 69
pictures 38 viewing with music 38 Start menu Media Center 3 V video capture live 52 recorded video 52 video editing getting started with muvee autoProducer 51 video movies recording movie to disc 58 sorting 44, 45 W Windows Media Player setting as default player 20 types of files 20 Index 65 - HP A1224n | Media Center Software Guide - Page 70
-
 1
1 -
 2
2 -
 3
3 -
 4
4 -
 5
5 -
 6
6 -
 7
7 -
8
-
9
-
10
-
11
-
12
-
13
-
14
-
15
-
16
-
17
-
18
-
19
-
20
-
21
-
22
-
23
-
24
-
25
-
26
-
27
-
28
-
29
-
30
-
31
-
32
-
33
-
34
-
35
-
36
-
37
-
38
-
39
-
40
-
41
-
42
-
43
-
44
-
45
-
46
-
47
-
48
-
49
-
50
-
51
-
52
-
53
-
54
-
55
-
56
-
57
-
58
-
59
-
60
-
61
-
62
-
63
-
64
-
65
-
66
-
67
-
68
-
69
-
70
 |
 |

Media Center Software Guide
Media Center Software Guide