HP AM866A Brocade Troubleshooting and Diagnostics Guide v6.1.0 (53-1000853-01, - Page 119
Specifying a remote server, Enabling the automatic transfer of trace dumps
 |
UPC - 884420064602
View all HP AM866A manuals
Add to My Manuals
Save this manual to your list of manuals |
Page 119 highlights
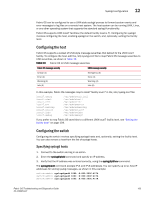
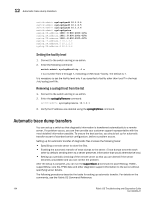
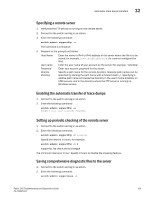
Automatic trace dump transfers 12 Specifying a remote server 1. Verify that the FTP service is running on the remote server. 2. Connect to the switch and log in as admin. 3. Enter the following command: switch:admin> supportftp -s The command is interactive. 4. Respond to the prompts as follows: Host Name Enter the name or IPv4 or IPv6 address of the server where the file is to be stored; for example, 1080::8:800:200C:417A for a server configured for IPv6. User name Password Remote directory Enter the user name of your account on the server; for example, "JohnDoe". Enter your account password for the server. Specify a path name for the remote directory. Absolute path names can be specified by starting the path name with a forward slash (/). Specifying a relative path name will create the directory in the user's home directory on UNIX servers, and in the directory where the FTP server is running on Windows servers. Enabling the automatic transfer of trace dumps 1. Connect to the switch and log in as admin. 2. Enter the following command: switch:admin> supportftp -e Support auto file transfer enabled. Setting up periodic checking of the remote server 1. Connect to the switch and log in as admin. 2. Enter the following command: switch:admin> supportftp -t interval Specify the interval in hours, for example: switch:admin> supportftp -t 4 supportftp: ftp check period changed The minimum interval is 1 hour. Specify 0 hours to disable the checking feature. Saving comprehensive diagnostic files to the server 1. Connect to the switch and log in as admin. 2. Enter the following command: switch:admin> supportsave -c Fabric OS Troubleshooting and Diagnostics Guide 105 53-1000853-01
-
 1
1 -
2
-
3
-
4
-
5
-
6
-
7
-
8
-
9
-
10
-
11
-
12
-
13
-
14
-
15
-
16
-
17
-
18
-
19
-
20
-
21
-
22
-
23
-
24
-
25
-
26
-
27
-
28
-
29
-
30
-
31
-
32
-
33
-
34
-
35
-
36
-
37
-
38
-
39
-
40
-
41
-
42
-
43
-
44
-
45
-
46
-
47
-
48
-
49
-
50
-
51
-
52
-
53
-
54
-
55
-
56
-
57
-
58
-
59
-
60
-
61
-
62
-
63
-
64
-
65
-
66
-
67
-
68
-
69
-
70
-
71
-
72
-
73
-
74
-
75
-
76
-
77
-
78
-
79
-
80
-
81
-
82
-
83
-
84
-
85
-
86
-
87
-
88
-
89
-
90
-
91
-
92
-
93
-
94
-
95
-
96
-
97
-
98
-
99
-
100
-
101
-
102
-
103
-
104
-
105
-
106
-
107
-
108
-
109
-
110
-
111
-
112
-
113
-
 114
114 -
 115
115 -
 116
116 -
 117
117 -
 118
118 -
 119
119 -
 120
120 -
 121
121 -
 122
122 -
 123
123 -
 124
124 -
125
-
126
-
127
-
128
-
129
-
130
-
131
-
132
 |
 |