HP BL2x220c HP ProLiant BL2x220c Generation 5 Server Blade Maintenance and Ser
HP BL2x220c - ProLiant - G5 Server A Manual
 |
View all HP BL2x220c manuals
Add to My Manuals
Save this manual to your list of manuals |
HP BL2x220c manual content summary:
- HP BL2x220c | HP ProLiant BL2x220c Generation 5 Server Blade Maintenance and Ser - Page 1
HP ProLiant BL2x220c Generation 5 Server Blade Maintenance and Service Guide Part Number 468228-002 August 2008 (Second Edition) - HP BL2x220c | HP ProLiant BL2x220c Generation 5 Server Blade Maintenance and Ser - Page 2
Corporation or its subsidiaries in the United States and other countries. Intended audience This guide is for an experienced service technician. HP assumes you are qualified in the servicing of computer equipment and trained in recognizing hazards in products with hazardous energy levels and are - HP BL2x220c | HP ProLiant BL2x220c Generation 5 Server Blade Maintenance and Ser - Page 3
...52 Using the HP c-Class Blade SUV Cable ...52 Connecting locally to a server blade with video and USB devices 52 Diagnostic tools ...55 Troubleshooting resources ...55 HP Insight Diagnostics...55 Integrated Management Log ...55 USB support and functionality ...56 USB support...56 Internal USB - HP BL2x220c | HP ProLiant BL2x220c Generation 5 Server Blade Maintenance and Ser - Page 4
Server A DIMM slots ...62 Server B DIMM slots ...62 Mezzanine connector definitions ...62 System maintenance switch...63 HP c-Class Blade SUV Cable...63 Specifications ...64 Environmental specifications ...64 Server blade specifications ...64 Acronyms and abbreviations...65 Index...67 Contents 4 - HP BL2x220c | HP ProLiant BL2x220c Generation 5 Server Blade Maintenance and Ser - Page 5
period HP (or HP service providers or service partners) identifies that the repair can be accomplished by the use of a CSR part, HP will ship is required, you can call the HP Technical Support Center and a technician will help you over the telephone. HP specifies in the materials shipped with a - HP BL2x220c | HP ProLiant BL2x220c Generation 5 Server Blade Maintenance and Ser - Page 6
pièce défectueuse, HP se réserve le droit de vous facturer les coûts de remplacement. Dans le cas d'une pièce CSR, HP supporte l'ensemble des frais le site Web HP (http://www.hp.com/go/selfrepair). Service de garantie "pièces seules" Votre garantie limitée HP peut inclure un service de garantie "pi - HP BL2x220c | HP ProLiant BL2x220c Generation 5 Server Blade Maintenance and Ser - Page 7
Self Repair ausgelegt. Wenn Sie jedoch den Austausch dieser Teile von HP vornehmen lassen möchten, können bei diesem Service je nach den für Ihr Produkt vorgesehenen Garantiebedingungen zusätzliche Kosten . Wenn Sie Hilfe benötigen, können Sie das HP technische Support Center Customer self repair 7 - HP BL2x220c | HP ProLiant BL2x220c Generation 5 Server Blade Maintenance and Ser - Page 8
CSR-Verfahren zwingend vorgegeben. Wenn Sie den Austausch dieser Teile von HP vornehmen lassen, werden Ihnen die Anfahrt- und Arbeitskosten für diesen Service berechnet. Reparaciones del propio cliente Los productos de HP incluyen muchos componentes que el propio usuario puede reemplazar (Customer - HP BL2x220c | HP ProLiant BL2x220c Generation 5 Server Blade Maintenance and Ser - Page 9
minimum beperkt kan blijven en de flexibiliteit in het vervangen van defecte onderdelen groter is. Deze onderdelen worden CSR-onderdelen (Customer Self Repair) genoemd. Als HP (of een HP Service Partner) bij de diagnose vaststelt dat de reparatie kan worden uitgevoerd met een CSR-onderdeel, verzendt - HP BL2x220c | HP ProLiant BL2x220c Generation 5 Server Blade Maintenance and Ser - Page 10
voor meer informatie over het Customer Self Repair programma van HP. Informatie over Service Partners vindt u op de HP website (http://www.hp.com/go/selfrepair). Garantieservice "Parts Only" Het is mogelijk dat de HP garantie alleen de garantieservice "Parts Only" omvat. Volgens de bepalingen - HP BL2x220c | HP ProLiant BL2x220c Generation 5 Server Blade Maintenance and Ser - Page 11
peças. Segundo os termos do serviço de garantia apenas para peças, a HP fornece as peças de reposição sem cobrar nenhuma taxa. No caso desse serviço, a substituição de peças CSR é obrigatória. Se desejar que a HP substitua essas peças, serão cobradas as despesas de transporte e mão-de-obra do - HP BL2x220c | HP ProLiant BL2x220c Generation 5 Server Blade Maintenance and Ser - Page 12
Customer self repair 12 - HP BL2x220c | HP ProLiant BL2x220c Generation 5 Server Blade Maintenance and Ser - Page 13
Customer self repair 13 - HP BL2x220c | HP ProLiant BL2x220c Generation 5 Server Blade Maintenance and Ser - Page 14
Customer self repair 14 - HP BL2x220c | HP ProLiant BL2x220c Generation 5 Server Blade Maintenance and Ser - Page 15
Customer self repair 15 - HP BL2x220c | HP ProLiant BL2x220c Generation 5 Server Blade Maintenance and Ser - Page 16
Illustrated parts catalog Server blade components Item Description 1 Heatsink 2 Processor a) 3.00-GHz Intel® Xeon® model E5450 quad-core processor** b) 2.83-GHz Intel® Xeon® model E5440 quad-core processor* ** c) 2.66-GHz - HP BL2x220c | HP ProLiant BL2x220c Generation 5 Server Blade Maintenance and Ser - Page 17
* 398648-001 9 HP c-Class Blade SUV Cable* 416003-001 10 Mezzanine card options* - a) Emulex LPe1105-HP 4Gb FC HBA for HP c-Class BladeSystem 405921-001 b) QLogic QMH2462 4Gb FC HBA for HP c-Class BladeSystem 405920-001 c) HP NC325m PCI Express Quad Port Gigabit Server Adapter for c-Class - HP BL2x220c | HP ProLiant BL2x220c Generation 5 Server Blade Maintenance and Ser - Page 18
Item Description g) HP NC373m PCI Express Dual Port Multifunction Gigabit Server Adapter for c-Class BladeSystem h) HP PCIe Mezzanine Pass-thru card 11 Hardware and plastics kit* a) BBWC cable shield b) Cache module battery tray c) Hard drive carrier d) Heatsink blank Spare part number - HP BL2x220c | HP ProLiant BL2x220c Generation 5 Server Blade Maintenance and Ser - Page 19
ser reparados por el usuario. Para que el usuario haga valer su garantía, HP pone como condición que un proveedor de servicios autorizado realice la sustitución de met de garantievoorwaarden moet het onderdeel door een geautoriseerde Service Partner worden vervangen. Deze onderdelen worden in de ge - HP BL2x220c | HP ProLiant BL2x220c Generation 5 Server Blade Maintenance and Ser - Page 20
Illustrated parts catalog 20 - HP BL2x220c | HP ProLiant BL2x220c Generation 5 Server Blade Maintenance and Ser - Page 21
Safety considerations Before performing service procedures, review all the safety information. . This type of damage may reduce the life expectancy of the device. To prevent electrostatic energy, do not remove the server blade access panel and then install the server blade into the enclosure. WARNING: - HP BL2x220c | HP ProLiant BL2x220c Generation 5 Server Blade Maintenance and Ser - Page 22
server blade and/or the system. However, it may be necessary to leave the server blade powered up when performing other operations, such as hot-plug installations or troubleshooting of electric shock hazards. The area contains no user or field serviceable parts. Do not open for any reason. WARNING - HP BL2x220c | HP ProLiant BL2x220c Generation 5 Server Blade Maintenance and Ser - Page 23
. Depending on the Onboard Administrator configuration, use one of the following methods to power down the server blade: • Use the virtual power button selection through iLO 2 for both server A and server B. This method initiates a controlled remote shutdown of applications and the OS before the - HP BL2x220c | HP ProLiant BL2x220c Generation 5 Server Blade Maintenance and Ser - Page 24
For access component identification, see "Access components (on page 59)." To remove the component: 1. Power down the server blade (on page 23). 2. Remove the server blade (on page 23). 3. Place the server blade on a flat, level work surface with the bezel facing away from you. 4. Extend the - HP BL2x220c | HP ProLiant BL2x220c Generation 5 Server Blade Maintenance and Ser - Page 25
Turn jackscrew 1 counterclockwise until the threads are fully disengaged. CAUTION: To prevent damage to the server blade, do not apply pressure to the enclosure connector. 8. Lift server B assembly from server A assembly, and then place it on the work surface with the system board facing up. Install - HP BL2x220c | HP ProLiant BL2x220c Generation 5 Server Blade Maintenance and Ser - Page 26
and the internal system components to cool before touching them. To remove the component: 1. Power down the server blade (on page 23). 2. Remove the server blade (on page 23). 3. Access the internal server components (on page 24). 4. Remove the hard drive assembly. 5. Remove the hard drive from the - HP BL2x220c | HP ProLiant BL2x220c Generation 5 Server Blade Maintenance and Ser - Page 27
DIMMs To remove the component: 1. Power down the server blade (on page 23). 2. Remove the server blade (on page 23). 3. Access the internal server components (on page 24). 4. Open the DIMM slot latches. 5. Remove the DIMM. IMPORTANT: Always install memory in pairs of two identical DIMMs. To replace - HP BL2x220c | HP ProLiant BL2x220c Generation 5 Server Blade Maintenance and Ser - Page 28
spare heatsink. CAUTION: Heatsink retaining screws should be tightened in diagonally opposite pairs (in an "X" pattern). IMPORTANT: When installing the heatsink, align the guide pins on the processor retention bracket with the alignment holes in the heatsink. Removal and replacement procedures 28 - HP BL2x220c | HP ProLiant BL2x220c Generation 5 Server Blade Maintenance and Ser - Page 29
processors with the same part number. CAUTION: To prevent possible server blade overheating, always populate processor socket 2 with a processor and installed. IMPORTANT: When installing the heatsink, align the guide pins on the processor retention bracket with the alignment holes in the - HP BL2x220c | HP ProLiant BL2x220c Generation 5 Server Blade Maintenance and Ser - Page 30
cover if the processor is removed from the socket. To remove the component: 1. Power down the server blade (on page 23). 2. Remove the server blade (on page 23). 3. Access the internal server components (on page 24). 4. Remove the heatsink. 5. Open the processor retaining latch and the processor - HP BL2x220c | HP ProLiant BL2x220c Generation 5 Server Blade Maintenance and Ser - Page 31
install the spare processor. CAUTION: The processor is designed to fit one way into the socket. Use the alignment guides on the processor and socket to properly align the processor with the socket. Refer to the server blade hood label for specific instructions. Removal and replacement procedures 31 - HP BL2x220c | HP ProLiant BL2x220c Generation 5 Server Blade Maintenance and Ser - Page 32
3. Press down firmly until the processor installation tool clicks and separates from the processor, and then remove the processor installation tool. Removal and replacement procedures 32 - HP BL2x220c | HP ProLiant BL2x220c Generation 5 Server Blade Maintenance and Ser - Page 33
even distribution: CAUTION: Heatsink retaining screws should be tightened in diagonally opposite pairs (in an "X" pattern). IMPORTANT: When installing the heatsink, align the guide pins on the processor retention bracket with the alignment holes in the heatsink. Removal and replacement procedures 33 - HP BL2x220c | HP ProLiant BL2x220c Generation 5 Server Blade Maintenance and Ser - Page 34
. Cache module battery To remove the component: 1. Power down the server blade (on page 23). 2. Remove the server blade (on page 23). 3. Access the internal server components (on page 24). 4. Remove the server A USB key, if installed. 5. Disconnect the battery cables from the battery packs. Removal - HP BL2x220c | HP ProLiant BL2x220c Generation 5 Server Blade Maintenance and Ser - Page 35
from the battery tray. To replace the component, reverse the removal procedure. Battery cable To remove the component: 1. Power down the server blade (on page 23). 2. Remove the server blade (on page 23). 3. Access the internal server components (on page 24). Removal and replacement procedures 35 - HP BL2x220c | HP ProLiant BL2x220c Generation 5 Server Blade Maintenance and Ser - Page 36
the component, reverse the removal procedure. Mezzanine card To remove the component: 1. Power down the server blade (on page 23). 2. Remove the server blade (on page 23). 3. Access the internal server components (on page 24). 4. Disconnect any cables connected to the mezzanine card. Removal and - HP BL2x220c | HP ProLiant BL2x220c Generation 5 Server Blade Maintenance and Ser - Page 37
A system board To remove the component: 1. Power down the server blade (on page 23). 2. Remove the server blade (on page 23). 3. Access the internal server components (on page 24). 4. Remove the server A USB key, if installed. 5. If installed, remove one of the following: o Hard drive (on page - HP BL2x220c | HP ProLiant BL2x220c Generation 5 Server Blade Maintenance and Ser - Page 38
10. Open the processor retaining latch and the processor socket retaining bracket. CAUTION: To avoid damage to the processor: • Handle the processor only by the edges. • Do not touch the bottom of the processor, especially the contact area. 11. Using your fingers, remove the processor from the - HP BL2x220c | HP ProLiant BL2x220c Generation 5 Server Blade Maintenance and Ser - Page 39
12. Remove the system board assembly. To replace the system board: 1. Install the spare system board. Be sure the spools on the chassis are fully engaged in the slots in the system board and system board shield. 2. Prepare the processor socket on the spare system board: Removal and replacement - HP BL2x220c | HP ProLiant BL2x220c Generation 5 Server Blade Maintenance and Ser - Page 40
The processor is designed to fit one way into the socket. Use the alignment guides on the processor and socket to properly align the processor with the socket. Refer to the server blade hood label for specific instructions. CAUTION: Always install the processor parallel to the system board to avoid - HP BL2x220c | HP ProLiant BL2x220c Generation 5 Server Blade Maintenance and Ser - Page 41
5. Close the processor retaining latch and the processor socket retaining bracket. 6. Clean the old thermal grease from the heatsink and the top of the processor with the alcohol swab. Allow the alcohol to evaporate before continuing. Removal and replacement procedures 41 - HP BL2x220c | HP ProLiant BL2x220c Generation 5 Server Blade Maintenance and Ser - Page 42
of the following patterns to ensure even distribution: CAUTION: To prevent possible server malfunction, route the BBWC battery cable so that it does not become "X" pattern). IMPORTANT: When installing the heatsink, align the guide pins on the processor retention bracket with the alignment holes - HP BL2x220c | HP ProLiant BL2x220c Generation 5 Server Blade Maintenance and Ser - Page 43
NOT be modified. This option should only be used by qualified service personnel. This value should always match the serial number sticker down the server blade (on page 23). 2. Remove the server blade (on page 23). 3. Access the internal server components (on page 24). 4. Remove the server B USB - HP BL2x220c | HP ProLiant BL2x220c Generation 5 Server Blade Maintenance and Ser - Page 44
8. Open the processor retaining latch and the processor socket retaining bracket. CAUTION: To avoid damage to the processor: • Handle the processor only by the edges. • Do not touch the bottom of the processor, especially the contact area. 9. Using your fingers, remove the processor from the failed - HP BL2x220c | HP ProLiant BL2x220c Generation 5 Server Blade Maintenance and Ser - Page 45
10. Remove the heatsink retainer from the server B assembly. 11. Remove the system board assembly. To replace the system board: Removal and replacement procedures 45 - HP BL2x220c | HP ProLiant BL2x220c Generation 5 Server Blade Maintenance and Ser - Page 46
1. Install the spare system board. 2. Install the heatsink retainer. 3. Prepare the processor socket on the spare system board: Removal and replacement procedures 46 - HP BL2x220c | HP ProLiant BL2x220c Generation 5 Server Blade Maintenance and Ser - Page 47
The processor is designed to fit one way into the socket. Use the alignment guides on the processor and socket to properly align the processor with the socket. Refer to the server blade hood label for specific instructions. CAUTION: Always install the processor parallel to the system board to avoid - HP BL2x220c | HP ProLiant BL2x220c Generation 5 Server Blade Maintenance and Ser - Page 48
6. Close the processor retaining latch and the processor socket retaining bracket. 7. Clean the old thermal grease from the heatsink and the top of the processor with the alcohol swab. Allow the alcohol to evaporate before continuing. Removal and replacement procedures 48 - HP BL2x220c | HP ProLiant BL2x220c Generation 5 Server Blade Maintenance and Ser - Page 49
the heatsink, align the guide pins on the processor retention server serial number and product ID. For the location of the serial number label, see "Server B system board components (on page 61)." 12. Install the server B assembly ("Install server B assembly" on page 25). 13. Install the server blade - HP BL2x220c | HP ProLiant BL2x220c Generation 5 Server Blade Maintenance and Ser - Page 50
service server A and server B when either battery is replaced. If the server blade no longer automatically displays the correct date and time, you may need to replace the battery that provides power to the real-time clock. Under normal use, battery life is 5 to 10 years. WARNING: The computer - HP BL2x220c | HP ProLiant BL2x220c Generation 5 Server Blade Maintenance and Ser - Page 51
5. Remove the battery. IMPORTANT: Replacing the system board battery resets the system ROM to its default configuration. After replacing the battery, reconfigure the system through RBSU. To replace the component, reverse the removal procedure. Removal and replacement procedures 51 - HP BL2x220c | HP ProLiant BL2x220c Generation 5 Server Blade Maintenance and Ser - Page 52
cabling Using the HP c-Class Blade SUV Cable The HP c-Class Blade SUV Cable enables the user to perform server blade administration, configuration, and diagnostic procedures by connecting video and USB devices directly to the server blade. For SUV cable connectors, see "HP c-Class Blade SUV Cable - HP BL2x220c | HP ProLiant BL2x220c Generation 5 Server Blade Maintenance and Ser - Page 53
USB connector. 4. Connect a USB keyboard to the second USB connector. Item 1 2 3 4 5 6 Description Monitor USB mouse HP c-Class Blade SUV Cable Server blade Video connector USB keyboard Accessing a server blade with local media devices Use a USB hub when connecting a USB diskette drive and/or USB - HP BL2x220c | HP ProLiant BL2x220c Generation 5 Server Blade Maintenance and Ser - Page 54
USB connector. 4. Connect the following to the USB hub: o USB CD/DVD-ROM drive o USB keyboard o USB mouse o USB diskette Item 1 2 3 4 5 6 7 Description Monitor USB mouse HP c-Class Blade SUV Cable Server blade USB hub USB keyboard USB CD/DVD-ROM drive or diskette drive Cabling 54 - HP BL2x220c | HP ProLiant BL2x220c Generation 5 Server Blade Maintenance and Ser - Page 55
maintenance on ProLiant servers and server blades. This guide includes problemspecific flowcharts to help you navigate complex troubleshooting processes. To view the guide, select a language: • English (http://www.hp.com/support/ProLiant_TSG_en) • French (http://www.hp.com/support/ProLiant_TSG_fr - HP BL2x220c | HP ProLiant BL2x220c Generation 5 Server Blade Maintenance and Ser - Page 56
not available. Specifically, HP provides legacy USB functionality for: • POST • RBSU • Diagnostics • DOS • Operating environments which do not provide native USB support For more information on ProLiant USB support, refer to the HP website (http://h18004.www1.hp.com/products/servers/platforms/usb - HP BL2x220c | HP ProLiant BL2x220c Generation 5 Server Blade Maintenance and Ser - Page 57
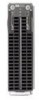
B Power On/Standby button Server B serial label pull tab Server B HP c-Class Blade SUV Cable connector* Server blade handle Server A HP c-Class Blade SUV Cable connector* Server A serial label pull tab Server A Power On/Standby button * The SUV connector and the HP c-Class Blade SUV Cable are for - HP BL2x220c | HP ProLiant BL2x220c Generation 5 Server Blade Maintenance and Ser - Page 58
Front panel LEDs Item 1 2 3 4 5 6 7 Description Server B system power LED Server B UID LED Server B health LED Server B NIC link and activity LED* Server A NIC link and activity LED* Server A health LED Server A UID LED Status Green = On Amber = Standby (auxiliary power available) Off = No power - HP BL2x220c | HP ProLiant BL2x220c Generation 5 Server Blade Maintenance and Ser - Page 59
Green = On Amber = Standby (auxiliary power available) Off = No power available to server * Actual NIC numbers depend on several factors, including the operating system installed on the server blade. Access components CAUTION: The jackscrews control the unseating and seating of critical system - HP BL2x220c | HP ProLiant BL2x220c Generation 5 Server Blade Maintenance and Ser - Page 60
Item 1 2 3 4 5 6 7 8 9 10 11 12 Description Internal USB connector Hard drive connector Processor socket 1 (populated) Processor socket 2 Server A serial number label Signal connector Enclosure connector System maintenance switch Mezzanine connector 1 Mezzanine connector 2 System battery DIMM slots - HP BL2x220c | HP ProLiant BL2x220c Generation 5 Server Blade Maintenance and Ser - Page 61
Server B system board components Item 1 2 3 4 5 6 7 8 9 Description Hard drive connector Processor socket 2 Processor socket 1 (populated) System maintenance switch System battery Signal connector Server B serial number label DIMM slots Internal USB connector Component identification 61 - HP BL2x220c | HP ProLiant BL2x220c Generation 5 Server Blade Maintenance and Ser - Page 62
DIMM slots Mezzanine connector definitions Item PCIe support Server support Mezzanine connector 1 x8, Type I mezzanine card only Server A only Mezzanine connector 2 x8, Type 1 mezzanine card only Server B only A PCIe x8 mezzanine connector supports x16 cards at up to x8 speeds. Component - HP BL2x220c | HP ProLiant BL2x220c Generation 5 Server Blade Maintenance and Ser - Page 63
Position 1 2 3 4 5 6 7 8 Function iLO 2 security override Configuration lock Reserved Reserved Password disabled Reset Be sure to properly configure the server or data loss could occur. HP c-Class Blade SUV Cable Item 1 2 3 4 Connector Server blade Video USB Serial Description For connecting to - HP BL2x220c | HP ProLiant BL2x220c Generation 5 Server Blade Maintenance and Ser - Page 64
humidity of 95% is based on a maximum temperature of 45°C (113°F). Altitude maximum for storage corresponds to a pressure minimum of 70 KPa. Server blade specifications Specification Height Depth Width Weight (maximum) Weight (no drives installed) Value 5.56 cm (2.19 in) 50.95 cm (20.06 in) 18.16 - HP BL2x220c | HP ProLiant BL2x220c Generation 5 Server Blade Maintenance and Ser - Page 65
Acronyms and abbreviations CSR Customer Self Repair FC Fibre Channel HBA host bus adapter HP SIM HP Systems Insight Manager iLO 2 Integrated Lights-Out 2 IML Integrated Management Log PCIe peripheral component interconnect express POST Power-On Self Test RBSU ROM-Based Setup Utility SATA serial ATA - HP BL2x220c | HP ProLiant BL2x220c Generation 5 Server Blade Maintenance and Ser - Page 66
USB universal serial bus Acronyms and abbreviations 66 - HP BL2x220c | HP ProLiant BL2x220c Generation 5 Server Blade Maintenance and Ser - Page 67
replacing 25 hard drives 25 heatsink 27 HP c-Class Blade SUV Cable 52, 63 HP Insight Diagnostics 55 I IML (Integrated server blade 23 removing the system board 37, 43 ROM legacy USB support 56 S safety considerations 21 serial number 37, 43 specifications, environmental 64 specifications, server - HP BL2x220c | HP ProLiant BL2x220c Generation 5 Server Blade Maintenance and Ser - Page 68
board 37, 43, 60 system board battery 50 system board components 60 T temperature 64 temperature ranges (environmental) 64 tools 21, 55 troubleshooting 55 troubleshooting guidelines 55 U USB connectors 63 USB devices 52, 53 USB support 56 utilities 55 V video connector 63 W warnings 21 Index 68
-
 1
1 -
 2
2 -
 3
3 -
 4
4 -
 5
5 -
 6
6 -
 7
7 -
8
-
9
-
10
-
11
-
12
-
13
-
14
-
15
-
16
-
17
-
18
-
19
-
20
-
21
-
22
-
23
-
24
-
25
-
26
-
27
-
28
-
29
-
30
-
31
-
32
-
33
-
34
-
35
-
36
-
37
-
38
-
39
-
40
-
41
-
42
-
43
-
44
-
45
-
46
-
47
-
48
-
49
-
50
-
51
-
52
-
53
-
54
-
55
-
56
-
57
-
58
-
59
-
60
-
61
-
62
-
63
-
64
-
65
-
66
-
67
-
68
 |
 |

HP ProLiant BL2x220c Generation 5 Server
Blade
Maintenance and Service Guide
Part Number 468228-002
August 2008 (Second Edition)