HP Brocade 8/12c Brocade EZSwitchSetup Administrator's Guide v6.2.0 (53-100119
HP Brocade 8/12c Manual
 |
View all HP Brocade 8/12c manuals
Add to My Manuals
Save this manual to your list of manuals |
HP Brocade 8/12c manual content summary:
- HP Brocade 8/12c | Brocade EZSwitchSetup Administrator's Guide v6.2.0 (53-100119 - Page 1
53-1001193-02 December 5, 2008 EZSwitchSetup Administrator's Guide Supporting Fabric OS v6.2.0 Supporting Brocade 200E, 300, 4100, 4900, 5000, 5100, 5300 - HP Brocade 8/12c | Brocade EZSwitchSetup Administrator's Guide v6.2.0 (53-100119 - Page 2
, concerning any equipment, equipment feature, or service offered or to be offered by Brocade. support/oscd. Brocade Communications Systems, Incorporated Corporate and Latin American Headquarters Brocade Communications Systems, Inc. 1745 Technology Drive San Jose, CA 95110 Tel: 1-408-333-8000 - HP Brocade 8/12c | Brocade EZSwitchSetup Administrator's Guide v6.2.0 (53-100119 - Page 3
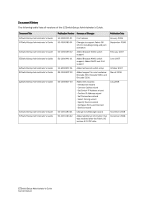
Guide EZSwitchSetup Administrator's Guide EZSwitchSetup Administrator's Guide Publication Number Summary of Changes Publication Date 53-1000121-01 53-1000195-01 53-1000195-02 First release Changes to support Fabric OS v5.2.0, including zoning and port activation Added Brocade 5000 switch support - HP Brocade 8/12c | Brocade EZSwitchSetup Administrator's Guide v6.2.0 (53-100119 - Page 4
EZSwitchSetup Administrator's Guide 53-1001193-02 - HP Brocade 8/12c | Brocade EZSwitchSetup Administrator's Guide v6.2.0 (53-100119 - Page 5
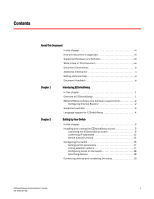
Explorer 2 Supported switches 3 Language support for EZSwitchSetup 4 Chapter 2 Setting Up Your Switch In this chapter 5 Installing and running the EZSwitchSetup wizard 5 Launching the EZSwitchSetup wizard 6 Confirming IP addresses 12 Switch discovery failure 14 Configuring the switch 16 - HP Brocade 8/12c | Brocade EZSwitchSetup Administrator's Guide v6.2.0 (53-100119 - Page 6
Port status 33 Switch Information tab 34 Port information tab 35 Changing switch information 36 Enable inactive ports 36 Managing devices 37 Device connections 38 Assigning and renaming device aliases 39 Zoning management 41 Viewing the zone access map 42 Editing the zoning configuration - HP Brocade 8/12c | Brocade EZSwitchSetup Administrator's Guide v6.2.0 (53-100119 - Page 7
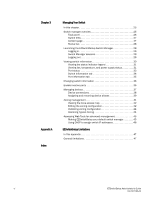
This Document In this chapter •How this document is organized vii •Supported Hardware and Software viii •What's New in This Document viii installation instructions. • Chapter 2, "Setting Up Your Switch", describes how to set up your switch for the first time. • Chapter 3, "Managing Your Switch", - HP Brocade 8/12c | Brocade EZSwitchSetup Administrator's Guide v6.2.0 (53-100119 - Page 8
or parts of procedures documented here apply to some switches but not to others, this guide identifies exactly which switches are supported and which are not. Although many different software and hardware configurations are tested and supported by Brocade Communications Systems, Inc. for Fabric OS - HP Brocade 8/12c | Brocade EZSwitchSetup Administrator's Guide v6.2.0 (53-100119 - Page 9
Identifies the names of user-manipulated GUI elements Identifies keywords narrative portions of this guide are presented in mixed lettercase is often all lowercase. Otherwise, this manual specifically notes those cases in which you or cause damage to hardware, firmware, software, or data. DANGER A - HP Brocade 8/12c | Brocade EZSwitchSetup Administrator's Guide v6.2.0 (53-100119 - Page 10
.com and click Brocade Connect to register at no cost for a user ID and password. For practical discussions about SAN design, implementation, and maintenance, you can obtain Building SANs with Brocade Fabric Switches through: http://www.amazon.com For additional Brocade documentation, visit the - HP Brocade 8/12c | Brocade EZSwitchSetup Administrator's Guide v6.2.0 (53-100119 - Page 11
your switch support supplier for hardware, firmware, and software support, including product repairs and part ordering. To expedite your call, have the following information available: 1. General Information • Switch model • Fabric OS version • Browser and Java Plug-in version • Error numbers and - HP Brocade 8/12c | Brocade EZSwitchSetup Administrator's Guide v6.2.0 (53-100119 - Page 12
xii EZSwitchSetup Administrator's Guide 53-1001193-02 - HP Brocade 8/12c | Brocade EZSwitchSetup Administrator's Guide v6.2.0 (53-100119 - Page 13
•Language support for EZSwitchSetup 4 Overview of EZSwitchSetup EZSwitchSetup is an easy-to-use graphical user interface application for setting up and managing your switch. It has the following components: • EZSwitchSetup wizard (on the installation CD) • EZSwitchSetup switch configuration wizard - HP Brocade 8/12c | Brocade EZSwitchSetup Administrator's Guide v6.2.0 (53-100119 - Page 14
the EZSS installation directory. • 256 MB or more RAM for fabrics containing up to 15 switches. • A minimum of 8 MB of video RAM is also recommended. • An Ethernet port. • If you plan to connect to the serial port on the switch, you need a serial (COM) port. Configuring Internet Explorer Correct - HP Brocade 8/12c | Brocade EZSwitchSetup Administrator's Guide v6.2.0 (53-100119 - Page 15
2 Configuring Internet Explorer 5. Click OK to save the changes. Supported switches You can use EZSwitchSetup with the following switches: • Brocade 200E switch • Brocade 300 switch • Brocade 4100 switch • Brocade 4900 switch • Brocade 5000 switch • Brocade 5100 switch • Brocade 5300 switch Your - HP Brocade 8/12c | Brocade EZSwitchSetup Administrator's Guide v6.2.0 (53-100119 - Page 16
characters • Switch-based information (such as firmware version and switch name) • Some globally accepted industry terms (such as SAN and HBA) • The End User License Agreement (EULA) • System files (such as the summary file, setting file, and log file) 4 EZSwitchSetup Administrator's Guide 53 - HP Brocade 8/12c | Brocade EZSwitchSetup Administrator's Guide v6.2.0 (53-100119 - Page 17
5 •Configuring the switch 16 •Zoning selection options 17 •Connecting devices and completing the setup 19 Installing and running the EZSwitchSetup wizard You can run EZSwitchSetup from a computer you are currently using for SAN administration, or you can use a different computer that is not part - HP Brocade 8/12c | Brocade EZSwitchSetup Administrator's Guide v6.2.0 (53-100119 - Page 18
menu, select Programs > EZSwitchSetup > EZSwitchSetup • On Linux: Navigate to the following path location on the CD-ROM: /CDROM_Installers/Linux/Disk1/InstData/VM/install.bin ATTENTION The Linux installation requires root access. 6 EZSwitchSetup Administrator's Guide 53-1001193-02 - HP Brocade 8/12c | Brocade EZSwitchSetup Administrator's Guide v6.2.0 (53-100119 - Page 19
LAN to set the IP address for the switch. Choose the method you want to use for your installation. You may want switch. Otherwise, the Ethernet connection is generally more convenient and preferred. 2. Click Next. The Connect Cables screen is displayed (Figure 5). EZSwitchSetup Administrator's Guide - HP Brocade 8/12c | Brocade EZSwitchSetup Administrator's Guide v6.2.0 (53-100119 - Page 20
2 Installing and running the EZSwitchSetup wizard FIGURE 5 Connect Cables screen (Ethernet version, without serial cable) Figure 6 shows the cables connecting to the Brocade Fibre Channel switch, setup computer, Ethernet hub or switch, and network. NOTE Not all switches have their serial and - HP Brocade 8/12c | Brocade EZSwitchSetup Administrator's Guide v6.2.0 (53-100119 - Page 21
minutes. See your switch hardware manual for the location of the LEDs. 4. Connect an Ethernet cable from the Brocade switch to the LAN you setup computer to the serial port on the switch, using the serial cable shipped with the switch. If you cannot locate the serial cable that came with the switch - HP Brocade 8/12c | Brocade EZSwitchSetup Administrator's Guide v6.2.0 (53-100119 - Page 22
chassis. - Brocade 300, 4100, 4900, 5000, 5100, and 5300 switches: Look on the switch ID pull-out tab located on the bottom of the port side of the switch. b. From the Screen WWN drop-down list (Figure 7), choose the switch's WWN prefix numbers and then enter the last six alphanumeric digits of your - HP Brocade 8/12c | Brocade EZSwitchSetup Administrator's Guide v6.2.0 (53-100119 - Page 23
IP address. If you have previously enabled DHCP on the switch (refer to "Installing and running the EZSwitchSetup wizard"), you may select No. d. Click Next. EZSwitchSetup attempts to log in using default credentials. If you have already changed your admin password the Set Switch IP Address screen - HP Brocade 8/12c | Brocade EZSwitchSetup Administrator's Guide v6.2.0 (53-100119 - Page 24
or an Ethernet connection. 1. Check the displayed addresses carefully to be sure they are correct. FIGURE 10 EZSwitchSetup Confirm IP Address 2. Click Next to confirm the addresses. The Continue Configuration? screen is displayed (Figure 11). 12 EZSwitchSetup Administrator's Guide 53-1001193-02 - HP Brocade 8/12c | Brocade EZSwitchSetup Administrator's Guide v6.2.0 (53-100119 - Page 25
Installing and running the EZSwitchSetup wizard 2 3. At this point, you can do either of the following. - Click Finish to save the configuration if you want to use EZSwitchSetup as an IP configuration tool, and do not want to use EZSwitchSetup Manager as a management tool for the switch. - Enable - HP Brocade 8/12c | Brocade EZSwitchSetup Administrator's Guide v6.2.0 (53-100119 - Page 26
- only single switch fabric supported. 4. Click OK to start the EZSwitchSetup Manager. A browser window opens and loads, and the Switch Configuration Welcome screen is displayed (Figure 13). This may take a few minutes. If EZSetup does not launch, you must launch it manually by specifying the - HP Brocade 8/12c | Brocade EZSwitchSetup Administrator's Guide v6.2.0 (53-100119 - Page 27
Installing and running the EZSwitchSetup wizard 2 TABLE 2 Symptom Discovery recovery The setup computer COM port is busy. The switch does not respond to commands during a serial connection. The switch does not power up. The switch's serial adapter does not work. Correction The port is being - HP Brocade 8/12c | Brocade EZSwitchSetup Administrator's Guide v6.2.0 (53-100119 - Page 28
of changing your administrative password and zoning. You begin at the Welcome to Switch Configuration screen (Figure 13). FIGURE 13 Switch configuration welcome screen 1. Click Next to begin. The Set Parameters screen is displayed. FIGURE 14 EZSwitchSetup Setup Parameters 16 EZSwitchSetup - HP Brocade 8/12c | Brocade EZSwitchSetup Administrator's Guide v6.2.0 (53-100119 - Page 29
screen is displayed. Zoning selection options The next step in configuring your switch is to select zoning. There are three choices: • Typical Zoning creates a port based zoning scheme based on the connections made on the Configure Ports and Connect Devices screen (Figure 17). This zoning scheme - HP Brocade 8/12c | Brocade EZSwitchSetup Administrator's Guide v6.2.0 (53-100119 - Page 30
page 41. Configuring zones on the switch 1. On the Select Zoning wizard, select Typical Zoning. If you want to use one of the other zone settings, see "Editing the zoning configuration" on page 42 for instructions on configuring Custom zoning; see the Web Tools Administrator's Guide for information - HP Brocade 8/12c | Brocade EZSwitchSetup Administrator's Guide v6.2.0 (53-100119 - Page 31
setup The final step in the switch configuration is to connect your devices to the switch in a way that matches a configured array of connection reservations (HBA or Storage) on the ports. In the interactive switch this screen is not enabled until all non- your mind about the number of devices you - HP Brocade 8/12c | Brocade EZSwitchSetup Administrator's Guide v6.2.0 (53-100119 - Page 32
), then you should re-run the Setup wizard and select Custom Zoning or Advanced Zoning instead of Typical Zoning. Use the following procedure to make the physical connections. 1. Install the small form factor pluggable (SFP) transceivers in the Fibre Channel ports shown onscreen. (See Figure 18 on - HP Brocade 8/12c | Brocade EZSwitchSetup Administrator's Guide v6.2.0 (53-100119 - Page 33
bale FIGURE 18 Installing SFPs 2. Connect Fibre Channel cables from the switch to your host and storage devices. Ensure that the physical connections are exactly as indicated on the Configure Ports and Connect Devices screen. a. Remove any plastic protectors from the Fibre Channel cable ends, and - HP Brocade 8/12c | Brocade EZSwitchSetup Administrator's Guide v6.2.0 (53-100119 - Page 34
2 Install the Fibre Channel cable 3 Brocade switch FIGURE 19 Installing Fibre Channel Cable to an SFP 3. Verify that the connections displayed on the Configure Ports and Connect Devices screen are all green. 4. Click Next. The Finish screen is displayed. 22 EZSwitchSetup Administrator's Guide - HP Brocade 8/12c | Brocade EZSwitchSetup Administrator's Guide v6.2.0 (53-100119 - Page 35
complete the switch setup. You are now ready to configure the storage component of the SAN using the documentation that came with the storage server. If you want to monitor the switch, then you need to launch the EZSwitchSetup Switch Manager. See Chapter 3, "Managing Your Switch" for instructions on - HP Brocade 8/12c | Brocade EZSwitchSetup Administrator's Guide v6.2.0 (53-100119 - Page 36
2 Connecting devices and completing the setup 24 EZSwitchSetup Administrator's Guide 53-1001193-02 - HP Brocade 8/12c | Brocade EZSwitchSetup Administrator's Guide v6.2.0 (53-100119 - Page 37
replacable unit (FRU) status • Manage custom zoning • Perform basic switch configurations • Add Ports On Demand (POD) The Switch Manager works for a single-switch fabric only. It displays only the switch and associated tasks, without fabric information. Figure 21 shows an example of the initial - HP Brocade 8/12c | Brocade EZSwitchSetup Administrator's Guide v6.2.0 (53-100119 - Page 38
User name, IP address, and user role FIGURE 21 EZSwitchSetup Switch Manager Components Task panel The left pane of the Switch Manager is the task panel, which displays all tasks. The tasks are categorized by Switch, Devices, Zoning, and Miscellaneous. The Switch tasks enable you to view the port - HP Brocade 8/12c | Brocade EZSwitchSetup Administrator's Guide v6.2.0 (53-100119 - Page 39
Fabric OS version 6.2.0, the right click menu replaces the Export, Copy, and Search buttons used in earlier releases. FIGURE 22 Content page, Port Information tab NOTE You must accept the Brocade Certificate at the beginning of the login to EZSwitch Manager to enable and allows 24 maximum characters - HP Brocade 8/12c | Brocade EZSwitchSetup Administrator's Guide v6.2.0 (53-100119 - Page 40
installed. For a list of Web browsers compatible with Fabric OS v6.2.0, see Table 1 on page 2. Switch Manager also supports the HTTPS protocol, if that protocol is enabled for the switch. For more information on enabling the HTTPS protocol on your switch, see the Fabric OS Administrator's Guide - HP Brocade 8/12c | Brocade EZSwitchSetup Administrator's Guide v6.2.0 (53-100119 - Page 41
. Switch Manager supports only single-switch fabrics. If your switch is connected to another switch, Switch Manager displays a message and exits. You must disconnect the switch from all other switches and relaunch EZSwitchSetup Switch Manager. 1. Type your user name. 2. Type the password. 3. Click - HP Brocade 8/12c | Brocade EZSwitchSetup Administrator's Guide v6.2.0 (53-100119 - Page 42
View in the task panel under Switch. 2. Click the Switch Information tab to display the Switch View. Figure 23 displays the Switch View for a Brocade 200E switch. FIGURE 23 Graphical View of Switch The Switch View is a real-time view of switch and port status. The display is updated approximately - HP Brocade 8/12c | Brocade EZSwitchSetup Administrator's Guide v6.2.0 (53-100119 - Page 43
view fan, temperature, or power supply status, click the Fan, Temp, or Power button. Figure 25 shows the Fan view. The fan view shows the number of Fans and their operating state. FIGURE 25 Fan status EZSwitchSetup Administrator's Guide 31 53-1001193-02 - HP Brocade 8/12c | Brocade EZSwitchSetup Administrator's Guide v6.2.0 (53-100119 - Page 44
, and the temperature in both Celsius and Fahrenheit. FIGURE 26 Temperature status Figure 27 shows the Power Supply view. The power supply view displays the number of power supplies in the switch and their status. FIGURE 27 Power supply status 32 EZSwitchSetup Administrator - HP Brocade 8/12c | Brocade EZSwitchSetup Administrator's Guide v6.2.0 (53-100119 - Page 45
buffers allocated to the port is less than the number of buffers needed by the port to utilize the port at full bandwidth.) If a group of port icons is gray (unavailable), those ports are not licensed. Figure 28 shows port icons and associated LEDs from a Brocade 4100 switch. The layout is similar - HP Brocade 8/12c | Brocade EZSwitchSetup Administrator's Guide v6.2.0 (53-100119 - Page 46
speed, as shown in Figure 30. FIGURE 30 Port State and Port Speed LEDs. Switch Information tab The Switch Information tab is the default information tab under Port Information, Switch Information on the Switch View (Figure 31). Detailed switch information is displayed as a list of properties, which - HP Brocade 8/12c | Brocade EZSwitchSetup Administrator's Guide v6.2.0 (53-100119 - Page 47
as desired FIGURE 32 Port Information tab The information page displays the following for each port: • Port number. • Port name. • State of the port. • Port type. • Status (health) of the port. • Indication of whether the port is licensed. EZSwitchSetup Administrator's Guide 35 53-1001193-02 - HP Brocade 8/12c | Brocade EZSwitchSetup Administrator's Guide v6.2.0 (53-100119 - Page 48
switch. 1. Click Setup under Switch in the task panel. The Switch Configuration launches. 2. Follow the instructions in the wizard. You can optionally change the switch name, switch time, and admin password. When prompted, you must select a zoning configuration. Enable inactive ports EZSwitchSetup - HP Brocade 8/12c | Brocade EZSwitchSetup Administrator's Guide v6.2.0 (53-100119 - Page 49
refine sorting by using the Ctrl key while selecting column headers. For example, if hold down the Ctrl key and select Device Type and Port# shows port numbers associated with device types (Figure 35). FIGURE 35 Device table sorting example EZSwitchSetup Administrator's Guide 37 53-1001193-02 - HP Brocade 8/12c | Brocade EZSwitchSetup Administrator's Guide v6.2.0 (53-100119 - Page 50
Switch Manager displays a graphical representation of the switch and the devices that are connected to each port . Click Display Connections under Devices in the task panel. A graphical representation of the switch the switch, Switch Manager - HP Brocade 8/12c | Brocade EZSwitchSetup Administrator's Guide v6.2.0 (53-100119 - Page 51
Device Aliases wizard is started, the New Alias column is pre-populated with default aliases. You can click OK to accept the default aliases, or click Cancel if you do not want to assign aliases. Note 2. FIGURE 38 Define Device Aliases wizard EZSwitchSetup Administrator's Guide 39 53-1001193-02 - HP Brocade 8/12c | Brocade EZSwitchSetup Administrator's Guide v6.2.0 (53-100119 - Page 52
wizard also prompts you to delete the aliases of any offline devices. Follow the instructions in the wizard. The next time you select Modify Alias, the Current Alias column under Zoning (Figure 40). FIGURE 40 Device alias in Zone Access Map 40 EZSwitchSetup Administrator's Guide 53-1001193-02 - HP Brocade 8/12c | Brocade EZSwitchSetup Administrator's Guide v6.2.0 (53-100119 - Page 53
servers and storage. Zones can be configured dynamically. They can vary in size, depending on the number of fabric-connected devices, and devices can fabric. EZSwitchSetup creates zones for you automatically, based on your configuration choices in Setup. • If you chose Typical Zoning, a port-based - HP Brocade 8/12c | Brocade EZSwitchSetup Administrator's Guide v6.2.0 (53-100119 - Page 54
task panel. This starts a wizard that creates a new Custom Zoning scheme based on your device accessibility choices. If you make any zoning changes to the default Typical Zoning configuration, you will be creating a Custom Zoning configuration to replace it. You can later restore the Typical Zoning - HP Brocade 8/12c | Brocade EZSwitchSetup Administrator's Guide v6.2.0 (53-100119 - Page 55
management 3 If no devices are connected to the switch, or if only storage devices or only HBAs are connected, then the Switch Manager displays a message and the Edit HBA/Storage updated to show the new accessibility relationships. EZSwitchSetup Administrator's Guide 43 53-1001193-02 - HP Brocade 8/12c | Brocade EZSwitchSetup Administrator's Guide v6.2.0 (53-100119 - Page 56
the instructions in the wizard. 3. Note any devices that are not zoned properly and, after exiting the wizard, and click Edit to update the zone configuration. Restoring Typical Zoning If you have modified your zoning configuration and want to reset the configuration back to the default Typical - HP Brocade 8/12c | Brocade EZSwitchSetup Administrator's Guide v6.2.0 (53-100119 - Page 57
the switch, use the "switchDisable" command. Configure... System services (yes, y, no, n): [no] ssl attributes (yes, y, no, n): [no] rpcd attributes (yes, y, no, n): [no] webtools attributes (yes, y, no, n): [no] y Web Tools attributes are displayed. 3. Type yes or y for the Basic User Enabled - HP Brocade 8/12c | Brocade EZSwitchSetup Administrator's Guide v6.2.0 (53-100119 - Page 58
same subnet as your setup computer and the switch, and it must be enabled before running the EZSwitchSetup wizard. You can enable DHCP by taking the following steps. 1. Open a Telnet window. 2. Log in to the switch as a root or admin user, using the factory default IP address. 3. Use the ipaddrset - HP Brocade 8/12c | Brocade EZSwitchSetup Administrator's Guide v6.2.0 (53-100119 - Page 59
apply to all browsers and switch platforms. TABLE 3 EZSwitchSetup Switch Manager Limitations Problem Area Details HTTP timeout Very the Web server on the switch. Due to the nature of an HTTP connection, Switch Manager will report this error after a 90-second default timeout. In this case, - HP Brocade 8/12c | Brocade EZSwitchSetup Administrator's Guide v6.2.0 (53-100119 - Page 60
is still functioning. If the problem is not with the Ethernet connection, wait for Switch Manager to recover the connection switch connection loss is caused by switch hot code load, or other similar operation, the Switch Explorer you are currently running can be downloaded from a different firmware - HP Brocade 8/12c | Brocade EZSwitchSetup Administrator's Guide v6.2.0 (53-100119 - Page 61
information, 32, 33 switch information, 33 zoning configuration, 38 E enabling ports, 34 ending sessions, 29 EZSwitchSetup about, 25 installing, 5 launching, 27 F Fan Status, 30, 31, 34 Fan, Temperature, and Power Supply Legend, 31 Fibre Channel Association, xvi Fibre Channel cables, connecting, 21 - HP Brocade 8/12c | Brocade EZSwitchSetup Administrator's Guide v6.2.0 (53-100119 - Page 62
, 2 restoring default fixed zoning, 41 role-based access control, 28 S security banner, 28 session management, 29 sessions, ending, 29 setting refresh frequency, 2 SFPs, installing, 20 soft zones, 38 support, contacting technical, xvii supported languages, 4 supported switches, 3 Switch discovery - HP Brocade 8/12c | Brocade EZSwitchSetup Administrator's Guide v6.2.0 (53-100119 - Page 63
zones, 18 connect devices, 20 custom zoning, 17, 39 editing, 40 hard zones, 38 restoring default typical zoning, 41 soft zones, 38 specify devices, 18 typical zoning, 17, 39 validating zone configuration, 41 zone access map, displaying, 38 EZSwitchSetup Administrator's Guide 51 53-1001193-02 - HP Brocade 8/12c | Brocade EZSwitchSetup Administrator's Guide v6.2.0 (53-100119 - Page 64
52 EZSwitchSetup Administrator's Guide 53-1001193-02
-
 1
1 -
 2
2 -
 3
3 -
 4
4 -
 5
5 -
 6
6 -
 7
7 -
8
-
9
-
10
-
11
-
12
-
13
-
14
-
15
-
16
-
17
-
18
-
19
-
20
-
21
-
22
-
23
-
24
-
25
-
26
-
27
-
28
-
29
-
30
-
31
-
32
-
33
-
34
-
35
-
36
-
37
-
38
-
39
-
40
-
41
-
42
-
43
-
44
-
45
-
46
-
47
-
48
-
49
-
50
-
51
-
52
-
53
-
54
-
55
-
56
-
57
-
58
-
59
-
60
-
61
-
62
-
63
-
64
 |
 |

53-1001193-02
December 5, 2008
EZSwitchSetup
Administrator’s Guide
Supporting Fabric OS v6.2.0
Supporting Brocade 200E, 300, 4100, 4900, 5000, 5100, 5300