HP C7280 User Guide - Page 33
Connect using integrated wireless WLAN 802.11, Connect using the HP bt450 - photosmart wireless setup
 |
UPC - 883585105137
View all HP C7280 manuals
Add to My Manuals
Save this manual to your list of manuals |
Page 33 highlights
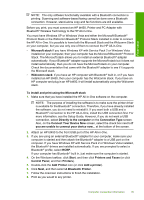
Finish setup Chapter 4 Connect using integrated wireless WLAN 802.11 The HP All-in-One uses an internal networking component that supports a wireless network. For detailed instructions on connecting the HP All-in-One to a wireless (802.11) network, see "Integrated wireless WLAN 802.11 network setup" on page 39. Connect using the HP bt450, Printer and PC Adapter with Bluetooth® Wireless Technology HP bt450, Printer and PC Adapter with Bluetooth® Wireless Technology allows you to print images from most Bluetooth devices, including computers. Simply insert the HP bt450 into the front USB port and print from a Bluetooth device such as a PDA or camera phone. This section contains the following topics: • Find the device name and address • Set Bluetooth security for the HP All-in-One • Use a Bluetooth® connection to print from your computer Find the device name and address Some Bluetooth devices exchange device addresses when they communicate with each other, so you might need to find out the device address of the HP All-in-One in order to establish a connection. Also, some Bluetooth devices display the name of the printer when connected. If you do not want the default name displayed as the name of the HP Allin-One, you can change the device name. To find out the device address of the HP All-in-One 1. Insert the HP bt450 into the front USB port. 2. On the control panel of the HP All-in-One, press Setup. 3. Press until Bluetooth is highlighted, and then press OK. 4. Press until Device Address is highlighted, and then press OK. The Device Address appears, which is read only. 5. To enter the address into your device, follow the instructions that came with your Bluetooth device. 6. Press OK to exit the Setup menu. To change the device name of the HP All-in-One 1. On the control panel of the HP All-in-One, press Setup. 2. Press until Bluetooth is highlighted, and then press OK. 3. Press until Device Name is highlighted, and then press OK. NOTE: The HP All-in-One ships with the predefined name of Photosmart C7200. 4. Use the keypad to enter a new name. 32 Finish setting up the HP All-in-One
-
 1
1 -
2
-
3
-
4
-
5
-
6
-
7
-
8
-
9
-
10
-
11
-
12
-
13
-
14
-
15
-
16
-
17
-
18
-
19
-
20
-
21
-
22
-
23
-
24
-
25
-
26
-
27
-
 28
28 -
 29
29 -
 30
30 -
 31
31 -
 32
32 -
 33
33 -
 34
34 -
 35
35 -
 36
36 -
 37
37 -
 38
38 -
39
-
40
-
41
-
42
-
43
-
44
-
45
-
46
-
47
-
48
-
49
-
50
-
51
-
52
-
53
-
54
-
55
-
56
-
57
-
58
-
59
-
60
-
61
-
62
-
63
-
64
-
65
-
66
-
67
-
68
-
69
-
70
-
71
-
72
-
73
-
74
-
75
-
76
-
77
-
78
-
79
-
80
-
81
-
82
-
83
-
84
-
85
-
86
-
87
-
88
-
89
-
90
-
91
-
92
-
93
-
94
-
95
-
96
-
97
-
98
-
99
-
100
-
101
-
102
-
103
-
104
-
105
-
106
-
107
-
108
-
109
-
110
-
111
-
112
-
113
-
114
-
115
-
116
-
117
-
118
-
119
-
120
-
121
-
122
-
123
-
124
-
125
-
126
-
127
-
128
-
129
-
130
-
131
-
132
-
133
-
134
-
135
-
136
-
137
-
138
-
139
-
140
-
141
-
142
-
143
-
144
-
145
-
146
-
147
-
148
-
149
-
150
-
151
-
152
-
153
-
154
-
155
-
156
-
157
-
158
-
159
-
160
-
161
-
162
-
163
-
164
-
165
-
166
-
167
-
168
-
169
-
170
-
171
-
172
-
173
-
174
-
175
-
176
-
177
-
178
-
179
-
180
-
181
-
182
-
183
-
184
-
185
-
186
-
187
-
188
-
189
-
190
-
191
-
192
-
193
-
194
-
195
-
196
-
197
-
198
-
199
-
200
-
201
-
202
-
203
-
204
-
205
-
206
-
207
-
208
-
209
-
210
-
211
-
212
-
213
-
214
-
215
-
216
-
217
-
218
-
219
-
220
-
221
-
222
-
223
-
224
-
225
-
226
-
227
-
228
-
229
-
230
-
231
-
232
-
233
-
234
-
235
-
236
-
237
-
238
-
239
-
240
-
241
-
242
-
243
-
244
-
245
-
246
-
247
-
248
-
249
-
250
-
251
-
252
-
253
-
254
-
255
-
256
-
257
-
258
-
259
-
260
-
261
-
262
-
263
-
264
-
265
-
266
-
267
-
268
-
269
-
270
-
271
-
272
-
273
-
274
-
275
-
276
-
277
-
278
-
279
-
280
-
281
-
282
-
283
-
284
-
285
-
286
-
287
-
288
-
289
-
290
-
291
-
292
-
293
-
294
-
295
-
296
-
297
-
298
-
299
-
300
-
301
-
302
-
303
-
304
-
305
-
306
-
307
-
308
-
309
 |
 |