HP C7280 User Guide - Page 37
Use printer sharing, Connect to a network - printer driver
 |
UPC - 883585105137
View all HP C7280 manuals
Add to My Manuals
Save this manual to your list of manuals |
Page 37 highlights
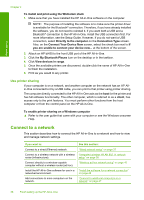
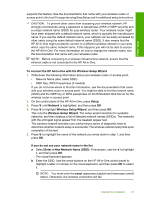
Finish setup Chapter 4 To install and print using the Widcomm stack 1. Make sure that you have installed the HP All-in-One software on the computer. NOTE: The purpose of installing the software is to make sure the printer driver is available for the Bluetooth® connection. Therefore, if you have already installed the software, you do not need to reinstall it. If you want both a USB and a Bluetooth® connection to the HP All-in-One, install the USB connection first. For more information, see the Setup Guide. However, if you do not want a USB connection, select Directly to the computer on the Connection Type screen. Also, on the Connect Your Device Now screen, select the check box next to If you are unable to connect your device now... at the bottom of the screen. 2. Attach an HP bt450 to the front USB port of the HP All-in-One. 3. Click the My Bluetooth Places icon on the desktop or in the taskbar. 4. Click View devices in range. 5. Once the available printers are discovered, double-click the name of HP All-in-One to finish the installation. 6. Print as you would to any printer. Use printer sharing If your computer is on a network, and another computer on the network has an HP Allin-One connected to it by a USB cable, you can print to that printer using printer sharing. The computer directly connected to the HP All-in-One acts as the host for the printer and has full software functionality. The other computer, which is referred to as a client, has access only to the print features. You must perform other functions from the host computer or from the control panel on the HP All-in-One. To enable printer sharing on a Windows computer ▲ Refer to the user guide that came with your computer or see the Windows onscreen Help. Connect to a network This section describes how to connect the HP All-in-One to a network and how to view and manage network settings. If you want to: Connect to a wired (Ethernet) network. Connect to a wireless network with a wireless router (infrastructure). Connect directly to a wireless-capable computer without a wireless router (ad hoc). Install the HP All-in-One software for use in a networked environment. Add connections to more computers on the network. See this section: "Wired network setup" on page 37 "Integrated wireless WLAN 802.11 network setup" on page 39 "Wireless ad hoc network setup" on page 43 "Install the software for a network connection" on page 46 "Connect to additional computers on a network" on page 47 36 Finish setting up the HP All-in-One
-
 1
1 -
2
-
3
-
4
-
5
-
6
-
7
-
8
-
9
-
10
-
11
-
12
-
13
-
14
-
15
-
16
-
17
-
18
-
19
-
20
-
21
-
22
-
23
-
24
-
25
-
26
-
27
-
28
-
29
-
30
-
31
-
 32
32 -
 33
33 -
 34
34 -
 35
35 -
 36
36 -
 37
37 -
 38
38 -
 39
39 -
 40
40 -
 41
41 -
 42
42 -
43
-
44
-
45
-
46
-
47
-
48
-
49
-
50
-
51
-
52
-
53
-
54
-
55
-
56
-
57
-
58
-
59
-
60
-
61
-
62
-
63
-
64
-
65
-
66
-
67
-
68
-
69
-
70
-
71
-
72
-
73
-
74
-
75
-
76
-
77
-
78
-
79
-
80
-
81
-
82
-
83
-
84
-
85
-
86
-
87
-
88
-
89
-
90
-
91
-
92
-
93
-
94
-
95
-
96
-
97
-
98
-
99
-
100
-
101
-
102
-
103
-
104
-
105
-
106
-
107
-
108
-
109
-
110
-
111
-
112
-
113
-
114
-
115
-
116
-
117
-
118
-
119
-
120
-
121
-
122
-
123
-
124
-
125
-
126
-
127
-
128
-
129
-
130
-
131
-
132
-
133
-
134
-
135
-
136
-
137
-
138
-
139
-
140
-
141
-
142
-
143
-
144
-
145
-
146
-
147
-
148
-
149
-
150
-
151
-
152
-
153
-
154
-
155
-
156
-
157
-
158
-
159
-
160
-
161
-
162
-
163
-
164
-
165
-
166
-
167
-
168
-
169
-
170
-
171
-
172
-
173
-
174
-
175
-
176
-
177
-
178
-
179
-
180
-
181
-
182
-
183
-
184
-
185
-
186
-
187
-
188
-
189
-
190
-
191
-
192
-
193
-
194
-
195
-
196
-
197
-
198
-
199
-
200
-
201
-
202
-
203
-
204
-
205
-
206
-
207
-
208
-
209
-
210
-
211
-
212
-
213
-
214
-
215
-
216
-
217
-
218
-
219
-
220
-
221
-
222
-
223
-
224
-
225
-
226
-
227
-
228
-
229
-
230
-
231
-
232
-
233
-
234
-
235
-
236
-
237
-
238
-
239
-
240
-
241
-
242
-
243
-
244
-
245
-
246
-
247
-
248
-
249
-
250
-
251
-
252
-
253
-
254
-
255
-
256
-
257
-
258
-
259
-
260
-
261
-
262
-
263
-
264
-
265
-
266
-
267
-
268
-
269
-
270
-
271
-
272
-
273
-
274
-
275
-
276
-
277
-
278
-
279
-
280
-
281
-
282
-
283
-
284
-
285
-
286
-
287
-
288
-
289
-
290
-
291
-
292
-
293
-
294
-
295
-
296
-
297
-
298
-
299
-
300
-
301
-
302
-
303
-
304
-
305
-
306
-
307
-
308
-
309
 |
 |