HP CB015A User Manual - Page 73
Tips for avoiding jams, WARNING
 |
View all HP CB015A manuals
Add to My Manuals
Save this manual to your list of manuals |
Page 73 highlights
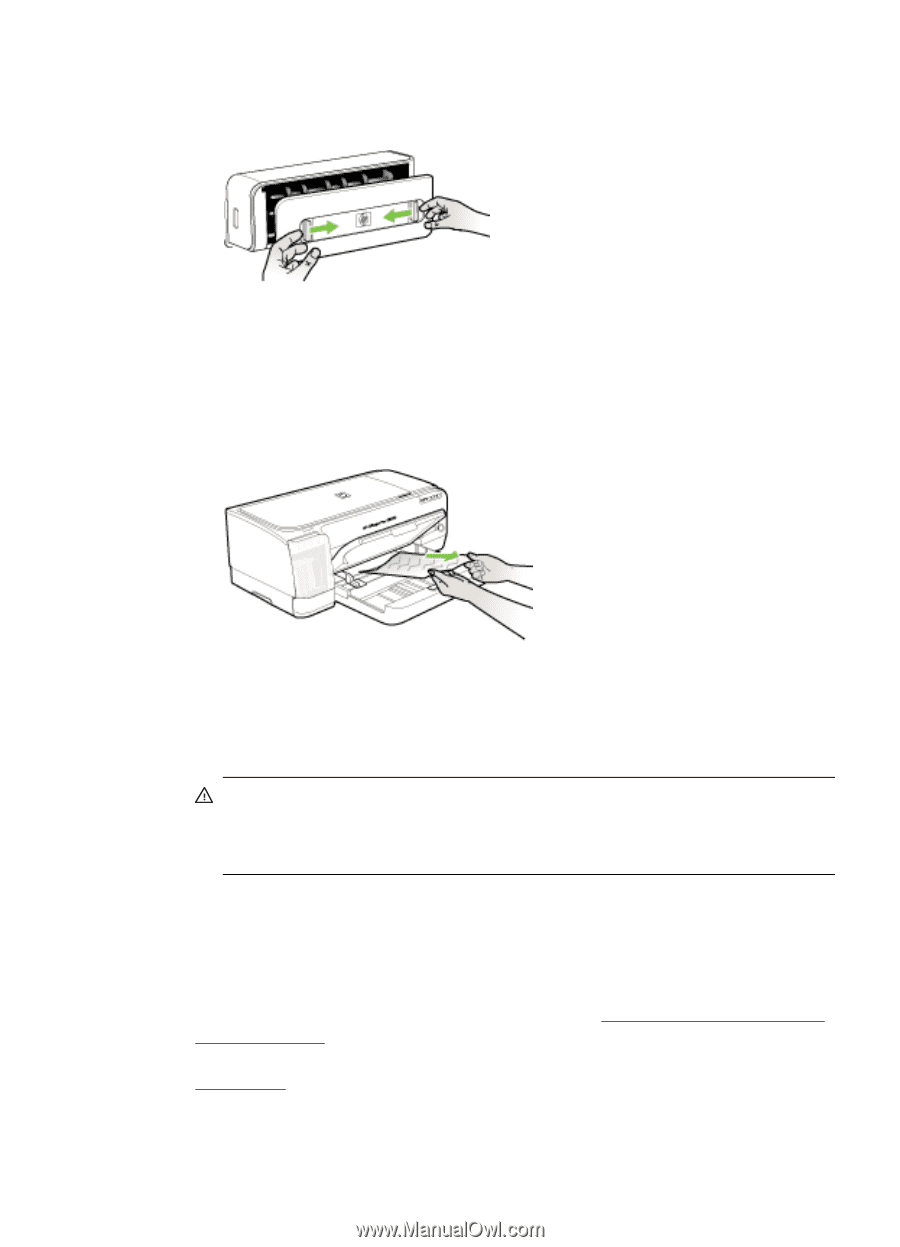
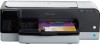
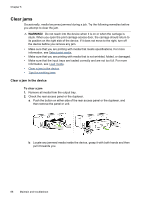
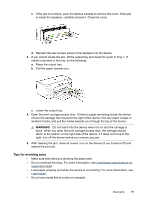
c. If the jam is not there, push the latches inwards to remove the cover. If the jam is inside the duplexer, carefully remove it. Close the cover. d. Reinsert the rear access panel or the duplexer into the device. 3. If you cannot locate the jam, lift the output tray and check for a jam in Tray 1. If media is jammed in the tray, do the following: a. Raise the output tray. b. Pull the paper towards you. c. Lower the output tray. 4. Open the print carriage access door. If there is paper remaining inside the device, ensure the carriage has moved to the right of the device, free any paper scraps or wrinkled media, and pull the media towards you through the top of the device. WARNING! Do not reach into the device when it is on and the carriage is stuck. When you open the print carriage access door, the carriage should return to its position on the right side of the device. If it does not move to the right, turn off the device before you remove any jam. 5. After clearing the jam, close all covers, turn on the device (if you turned it off) and resend the print job. Tips for avoiding jams • Make sure that nothing is blocking the paper path. • Do not overload the trays. For more information, see Understand specifications for supported media. • Load paper properly and when the device is not printing. For more information, see Load media. • Do not use media that is curled or crumpled. Clear jams 69
-
 1
1 -
2
-
3
-
4
-
5
-
6
-
7
-
8
-
9
-
10
-
11
-
12
-
13
-
14
-
15
-
16
-
17
-
18
-
19
-
20
-
21
-
22
-
23
-
24
-
25
-
26
-
27
-
28
-
29
-
30
-
31
-
32
-
33
-
34
-
35
-
36
-
37
-
38
-
39
-
40
-
41
-
42
-
43
-
44
-
45
-
46
-
47
-
48
-
49
-
50
-
51
-
52
-
53
-
54
-
55
-
56
-
57
-
58
-
59
-
60
-
61
-
62
-
63
-
64
-
65
-
66
-
67
-
 68
68 -
 69
69 -
 70
70 -
 71
71 -
 72
72 -
 73
73 -
 74
74 -
 75
75 -
 76
76 -
 77
77 -
 78
78 -
79
-
80
-
81
-
82
-
83
-
84
-
85
-
86
-
87
-
88
-
89
-
90
-
91
-
92
-
93
-
94
-
95
-
96
-
97
-
98
-
99
-
100
-
101
-
102
-
103
-
104
-
105
-
106
-
107
-
108
-
109
-
110
 |
 |