HP CC567A User Guide
HP CC567A Manual
 |
View all HP CC567A manuals
Add to My Manuals
Save this manual to your list of manuals |
HP CC567A manual content summary:
- HP CC567A | User Guide - Page 1
HP Photosmart C7200 All-in-One series Windows Help - HP CC567A | User Guide - Page 2
18 Enter text using the visual keyboard 19 Available symbols for dialing fax numbers 20 Use the HP Photosmart Software 21 3 Find more information...23 4 Finish setting up the HP All-in-One Set your preferences...25 General preferences...25 Set your language and country/region 25 Set the date - HP CC567A | User Guide - Page 3
30 Supported connection types 31 Connect using Ethernet...31 Connect using integrated wireless WLAN 802.11 32 Connect using the HP bt450, Printer and PC Adapter with Bluetooth® Wireless Technology...32 Find the device name and address 32 Set Bluetooth security for the HP All-in-One 33 - HP CC567A | User Guide - Page 4
jams...82 7 Print from your computer Print from a software application 83 Make the HP All-in-One the default printer 84 Change the print settings for the current job 84 Set the paper size...84 from your photos 105 Share photos using HP Photosmart Software 107 Save photos to your computer 108 3 - HP CC567A | User Guide - Page 5
Contents Edit photos using the control panel 109 Zoom and pan to crop a photo 109 Rotate a photo...110 Adjust the brightness of your photos 110 Apply special color effects to your photos 111 Remove red-eye...112 Automatically enhance your photos 112 9 Use the scan features Make reprints of - HP CC567A | User Guide - Page 6
a fax using speed dials 132 Send a fax manually from a phone 133 Send a fax using monitor Receive a fax...140 Receive a fax manually...140 Set up backup fax reception 141 received faxes 144 Set up the HP All-in-One to check the paper type the HP All-in-One Clean the HP All-in-One...155 Clean - HP CC567A | User Guide - Page 7
215 Fax troubleshooting...219 Errors...258 Device messages...258 File messages...261 Supported file types for the HP All-in-One 263 General user messages 263 Paper messages...267 Power and connection messages 269 Ink cartridge messages...271 16 HP warranty and support Warranty...279 Ink cartridge - HP CC567A | User Guide - Page 8
HP Quick Exchange Service (Japan 282 Call HP Korea customer support 282 Prepare the HP All-in-One for shipment 283 Secure the ink system...283 Remove the control panel faceplate 283 Pack the HP All-in-One...284 17 Technical information Specifications...287 Duplexer paper specifications power cord - HP CC567A | User Guide - Page 9
8 Contents - HP CC567A | User Guide - Page 10
on page 131 • "Print reports and forms" on page 149 • "Maintain the HP All-in-One" on page 155 • "Shop for ink supplies" on page 167 • "HP warranty and support" on page 279 • "Technical information" on page 287 HP Photosmart C7200 All-inOne series Help HP Photosmart C7200 All-in-One series Help 9 - HP CC567A | User Guide - Page 11
Chapter 1 HP Photosmart C7200 All-inOne series Help 10 HP Photosmart C7200 All-in-One series Help - HP CC567A | User Guide - Page 12
• Menu overview • Text and symbols • Use the HP Photosmart Software The HP All-in-One at a glance Overview Label 1 2 3 4 5 6 Description Automatic document feeder Color graphics display (also referred to as the display) Output tray Paper-width guide for the main input tray Main input tray (also - HP CC567A | User Guide - Page 13
8 Paper-length guide for the main input tray 9 Photo tray 10 Ink cartridge door 11 Front USB port for your camera or other storage device 12 Memory card slots and Photo light 13 Control panel 14 Glass 15 Lid backing 16 Ethernet port 17 Rear USB port 18 Power connection* 19 - HP CC567A | User Guide - Page 14
then pull up. Attention light: Indicates a problem occurred. See the display for more information. crop box for printing. Photo Menu: Launches the Photosmart Express menu for printing, saving, editing, and When the feature is turned on, the HP All-in-One automatically corrects red eye coloring in the - HP CC567A | User Guide - Page 15
the HP All-in-One in Federal Energy Management Program (FEMP) mode. To completely remove power, turn the HP All-in-One off, and then unplug the power cord. about the HP All-in-One. Icon Purpose Shows the ink cartridge status. The color of the icon corresponds to the color of the ink cartridge, and - HP CC567A | User Guide - Page 16
might appear if an ink cartridge contains non-HP ink. Shows the wired network connection status. If the Auto Answer icon is showing on the display, the HP All-in-One will receive faxes automatically. If there is no icon showing, you will have to receive faxes manually. Indicates the presence and - HP CC567A | User Guide - Page 17
Express Menu The following options are available in the Photosmart Express menu when you insert a memory card or storage device, or when you press Photo Menu on Size Quality Lighter/Darker Preview Crop Paper Size Paper Type Margin Shift Enhancements Set As New Defaults 16 HP All-in-One overview - HP CC567A | User Guide - Page 18
depending on the software applications installed on your computer. Scan and Reprint Scan to Memory Card HP Photosmart Premier Scan to Computer NOTE: The Scan to Computer option only appears if the HP All-in-One is networkconnected. Fax Menu When you press the Fax Menu button, the Enter Fax Number - HP CC567A | User Guide - Page 19
following options are available. Use Control Panel Insert Ink Cartridges Load Paper in Photo Tray Load Paper Load Original on Scanner Icon Glossary How Do I Error Messages General Troubleshooting Networking Troubleshooting Use Memory Card Get Support Text and symbols You can enter text and symbols - HP CC567A | User Guide - Page 20
speed dial entries. TIP: You can also enter text and numbers using the visual keyboard by using the keypad on the control panel of the HP All-in-One. Press a button numerous times to access additional letters. For instance, press 2 three times to enter the letter C. Overview Text and symbols 19 - HP CC567A | User Guide - Page 21
for dialing. Fax header name, speed dial names, speed dial numbers, fax or phone numbers, and monitor dial entries When auto-dialing, the HP All-in-One enters a pause in the number sequence. Fax header name, fax header number, speed dial names, speed dial numbers, and fax or phone numbers - HP CC567A | User Guide - Page 22
. This symbol does not affect dialing. Fax header name, fax header number, speed dial names, speed dial numbers, and fax or phone numbers Use the HP Photosmart Software The HP Photosmart Software provides a fast and easy way to make prints of your photos. It also provides access to other basic - HP CC567A | User Guide - Page 23
Chapter 2 Overview 22 HP All-in-One overview - HP CC567A | User Guide - Page 24
in this onscreen Help. Basics Guide The Basics Guide contains an overview of the HP All-in-One, including stepby-step instructions for basic tasks, troubleshooting tips, and technical information. www.hp.com/support HP Photosmart Essential animations The HP Photosmart Essential animations are an - HP CC567A | User Guide - Page 25
Chapter 3 Find more information 24 Find more information - HP CC567A | User Guide - Page 26
the steps in your Setup Guide, refer to this section to help you finish setting up the HP All-in-One. This section contains important • Fax preferences General preferences Before you begin using the HP All-in-One, you should review and, if necessary, adjust the general device settings described - HP CC567A | User Guide - Page 27
and time stamp on the fax header is a legal requirement. The HP All-in-One has a battery-powered clock so the date and time setting is not lost when the the volume You can adjust the volume of different aspects of the HP All-in-One, including the sounds associated with device events, errors, and fax - HP CC567A | User Guide - Page 28
OK. 3. Press to highlight Fax Sound Volume, and then press OK. 4. Press to highlight one of the options: Soft, Loud, or Off, and then press OK. NOTE: If you want. Enable faster browsing of photos You can set up the HP All-in-One to enable faster photo browsing by writing small thumbnails to the - HP CC567A | User Guide - Page 29
or Photo Tray, and then press OK. Restore the factory defaults You can restore the current settings to what they were when you purchased the HP Allin-One. NOTE: Restoring the factory defaults will not affect any changes you made to scan settings and the language and country/region settings. You can - HP CC567A | User Guide - Page 30
to highlight On or Off, and then press OK. Fax preferences You should review the information in the Fax setup section of the printed documentation to find set up the HP All-in-One for faxing with the other equipment and services that you might have on the same phone line as the HP All-in-One. NOTE: - HP CC567A | User Guide - Page 31
/ region. If you use one of the following, setting the fax speed to a slower speed might be required: • An Internet phone service • A PBX system • Fax over Internet Protocol (FoIP) • An integrated services digital network (ISDN) service If you experience problems sending and receiving faxes, you - HP CC567A | User Guide - Page 32
not be able to print to the HP All-in-One. All features resident on the host computer are supported. Only print is supported from the other computers. Follow the instructions in "Use printer sharing" on page 36. Connect using Ethernet The HP All-in-One supports both 10 Mbps and 100 Mbps Ethernet - HP CC567A | User Guide - Page 33
.11 The HP All-in-One uses an internal networking component that supports a wireless network. For detailed instructions on connecting the HP All-in-One to a wireless (802.11) network, see "Integrated wireless WLAN 802.11 network setup" on page 39. Connect using the HP bt450, Printer and PC Adapter - HP CC567A | User Guide - Page 34
security for the HP All-in-One You can enable printer security settings through the Bluetooth menu on the HP All-inOne. Press supports authentication. The Bluetooth device must provide a passkey, before the HP All-in-One will allow the device to send a print job to it. NOTE: The HP All-in-One - HP CC567A | User Guide - Page 35
without using a cable. With a Bluetooth connection you can access many of the same printing features as with a USB connection. For example, you can check the printer status, as well as the estimated amount of ink remaining in your ink cartridges. 34 Finish setting up the HP All-in-One - HP CC567A | User Guide - Page 36
and print using the Microsoft stack 1. Make sure that you have installed the HP All-in-One software on the computer. NOTE: The purpose of installing the software is to make sure the printer driver is available for the Bluetooth® connection. Therefore, if you have already installed the software - HP CC567A | User Guide - Page 37
installed the HP All-in-One software on the computer. NOTE: The purpose of installing the software is to make sure the printer driver is available from the control panel on the HP All-in-One. To enable printer sharing on a Windows computer ▲ Refer to the user guide that came with your computer - HP CC567A | User Guide - Page 38
HP All-in-One from a USB connection to a network connection. NOTE: Use the instructions in this section if you first installed the HP All-in-One troubleshooting information. "Manage your network settings" on page 48 "Network troubleshooting" on page 183 NOTE: You can connect the HP All-in-One to - HP CC567A | User Guide - Page 39
has 8 contacts on the end. A phone connector has between 2 and 6 contacts. ❑ A desktop computer or laptop with an Ethernet connection. NOTE: The HP All-in-One supports both 10 Mbps and 100 Mbps Ethernet networks. If you are purchasing, or have purchased, a network interface card (NIC), make sure it - HP CC567A | User Guide - Page 40
3. Connect the other end of the Ethernet cable to an available port on your Ethernet router or switch. 4. Once you have connected the HP All-in-One to the network, install the software. Related topics "Install the software for a network connection" on page 46 Integrated wireless WLAN 802.11 network - HP CC567A | User Guide - Page 41
or access point. ❑ A desktop computer or laptop with either wireless networking support, or a network interface card (NIC). The computer must be connected to the wireless network that you intend to install the HP All-in-One on. ❑ Broadband Internet access (recommended) such as cable or DSL. If - HP CC567A | User Guide - Page 42
it supports using EasySetup and for additional setup instructions. CAUTION: To prevent other users from accessing your wireless network, HP strongly recommends name. If this happens you will not be able to access the HP All-in-One. For more information on how to change the network name, see the - HP CC567A | User Guide - Page 43
the HP All-in-One is HP All-in-One confirm. The HP All-in-One will attempt the HP All-in-One connects HP All-in-One with SecureEasySetup 1. Activate SecureEasySetup on your wireless router or access point. 2. On the control panel of the HP All-in-One When the HP All-in-One connects HP All-in-One - HP CC567A | User Guide - Page 44
little flexibility, a low level of network security, and slower network performance than with a wireless router or access point. In order to connect the HP All-in-One to your computer (ad hoc), you need to create an ad hoc network profile on your computer. This includes choosing a network name (SSID - HP CC567A | User Guide - Page 45
letters. NOTE: You must remember the exact uppercase (capital) and lowercase (small) letters. If you enter your WEP key incorrectly on the HP All-in-One, the wireless connection will fail. h. Select the check box for This is a computer-to-computer (ad hoc) network; wireless access points are - HP CC567A | User Guide - Page 46
network name in the list a. Select Enter a New Network Name (SSID). The visual keyboard appears. b. Enter the SSID. Use the arrow buttons on the HP All-in-One control panel to highlight a letter or number on the visual keyboard, and then press OK to select it. NOTE: You must enter the exact - HP CC567A | User Guide - Page 47
" on page 19 • "Install the software for a network connection" on page 46 • "Network troubleshooting" on page 183 Install the software for a network connection Use this section to install the HP All-in-One software on a computer connected to a network. Before you install the software, make sure you - HP CC567A | User Guide - Page 48
as the Setup program searches for the HP All-in-One on the network. 5. On the Printer Found screen, verify that the printer description is correct. If more than one printer is found on the network, the Printers Found screen appears. Select the HP All-in-One you want to connect. 6. Follow the prompts - HP CC567A | User Guide - Page 49
Through the network. 4. When the installation is complete, open Printers and Faxes (or Printers) in the Control Panel and delete the printers from the previous USB installation. For more detailed instructions on connecting the HP All-in-One to a network, see: • "Wired network setup" on page 37 - HP CC567A | User Guide - Page 50
• "Wireless ad hoc network setup" on page 43 View and print network settings You can display a summary of the network settings on the HP All-in-One control panel, or you can print a more detailed configuration page. The network configuration page lists all of the important network settings such as - HP CC567A | User Guide - Page 51
On the control panel of the HP All-in-One, press Setup. 2. Press until Network is highlighted, and then press OK. 3. Press until Wireless Network Test is highlighted, and then press OK. The Wireless Network Test prints. Related topics "Network troubleshooting - HP CC567A | User Guide - Page 52
IP address, subnet mask, or the default gateway. To see the IP address and subnet mask of the HP All-in-One, print a network configuration page from the HP All-in-One. NOTE: When manually entering an IP Setting, you must already be connected to an active Network, otherwise the setting will not stay - HP CC567A | User Guide - Page 53
, a feature that lets you scan photos and documents from the HP All-in-One to your computer using a Web browser, and advanced network security options. Also, the Embedded Web Server enables you to monitor status and order printer supplies. For information on how to use the features available in - HP CC567A | User Guide - Page 54
192.168.1.101. The Embedded Web Server Home page appears, showing information for the HP Allin-One. NOTE: If you are using a proxy server in your browser, you might 5. Click Start Wizard, and then follow all of the wizard instructions. Related topics "View and print network settings" on page 49 - HP CC567A | User Guide - Page 55
Firmware Revision The internal networking component and device firmware revision code. NOTE: If you call HP Support, depending on the problem, you might be asked to provide the firmware With mDNS, your computer can find and use any HP All-in-One connected to your local area network. It can also - HP CC567A | User Guide - Page 56
the network. On small networks, this could be a router. • Manual: The configuration parameters are set manually, such as a static IP address. • Not Specified: The mode used when the HP All-in-One is initializing. The IP address of the domain name service (DNS) for the network. When you use the web - HP CC567A | User Guide - Page 57
Two MAC addresses are assigned: one for wired Ethernet and one for wireless 802.11. NOTE: Some Internet service providers (ISPs) require that . NOTE: Manually assigning an invalid IP address during installation will prevent your network components from seeing the HP All-in-One. Subnet Mask - HP CC567A | User Guide - Page 58
is shown, obtain the DNS IP address from your Internet service provider (ISP). Status of the wireless network: • Connected: The HP All-in-One is connected to a wireless LAN and everything is working. • Disconnected: The HP All-in-One is not connected to the wireless LAN due to incorrect settings - HP CC567A | User Guide - Page 59
computer and the HP All-in-One, make sure that you are using the same communication channel on your computer and the HP All-in-One. In infrastructure mode WPA-PSK) authentication provides significantly stronger security, and is supported in most wireless access points and wireless routers. The - HP CC567A | User Guide - Page 60
hardware address of the Bluetooth device. The device name assigned to the printer, which can identify it on a Bluetooth device. A value that the user must enter in order to print via Bluetooth. Shows whether or not the HP All-in-One is visible to Bluetooth devices that are within range. • Visible to - HP CC567A | User Guide - Page 61
do it. For example, the URL http://www.hp.com contains the domain name hp.com. The DNS on the Internet translates the domain name into an IP address. Devices use the IP addresses to refer to one another. See DNS. The SD portion stands for Service Discovery. This is part of a protocol developed - HP CC567A | User Guide - Page 62
NOTE: Refer to your printed documentation for complete step-by-step instructions on setting up and configuring the HP All-in-One for faxing with other telephone or office equipment and services. For fax setup information in specific countries/regions, you can also see the Fax Configuration Web site - HP CC567A | User Guide - Page 63
on the HP All-in-One. If you are unsure which setting to choose for a specific fax option, refer to the detailed fax setup instructions provided in you want to receive faxes manually. You must be available to respond in person to the incoming fax call or the HP All-in-One will not receive faxes. To - HP CC567A | User Guide - Page 64
to have several phone numbers on one phone line. When you subscribe to this service, each number will have a different ring pattern. You can set up the HP All-in-One to answer incoming calls that have a specific ring pattern. If you connect the HP All-in-One to a line with distinctive ringing, have - HP CC567A | User Guide - Page 65
. If the test fails, review the report for information on how to fix the problem and rerun the test. To test your fax setup from the control panel 1. Set up the HP All-in-One for faxing according to your particular home or office setup instructions. 2. Insert the ink cartridges and load full-size - HP CC567A | User Guide - Page 66
of people at one time. (The maximum number of individual speed dial entries allowed in a group speed dial entry varies by model.) This section or from your computer by using the software that you installed with the HP All-in-One. To create speed dial entries from the control panel 1. Press Setup - HP CC567A | User Guide - Page 67
control panel or from your computer by using the software that you installed with the HP All-in-One. To update a speed dial entry from the control panel 1. Press Setup. dial entries allowed in a group speed dial entry varies by model.) NOTE: The numbers you include in the group speed dial entry must - HP CC567A | User Guide - Page 68
delete, and then press OK. Print the speed dial list You can print a list of all the speed dial entries that you programmed on the HP All-inOne. To print the speed dial list 1. Press Setup. 2. Press to highlight Speed Dial Setup, and then press OK. 3. Press to highlight Print Speed - HP CC567A | User Guide - Page 69
Chapter 4 Finish setup 68 Finish setting up the HP All-in-One - HP CC567A | User Guide - Page 70
child's homework project?" on page 153 • "How do I test my fax setup?" on page 63 • "How do I send a basic fax?" on page 131 • "How do I manually send a fax?" on page 133 • "How do I use a credit card when sending a fax?" on page 134 • "How do I broadcast a fax to multiple recipients?" on page - HP CC567A | User Guide - Page 71
Chapter 5 How do I? 70 How do I? - HP CC567A | User Guide - Page 72
you experience poor print quality using the automatically-adjusted settings, you can manually set the paper size and type for print and copy jobs. This in the automatic document feeder will automatically be fed into the HP All-in-One. This section contains the following topics: • Load an original - HP CC567A | User Guide - Page 73
you hear a beep or see a message on the display indicating that the HP All-in-One detected the pages you loaded. If you are loading legal paper, flip open document feeder tray. Load originals and load paper 2. Slide the paper guides inward until they stop at the left and right edges of the paper - HP CC567A | User Guide - Page 74
You can use different types and sizes of paper in the HP All-in-One. Review the following recommendations to get the best printing and copying quality and copying If you want the best print quality, HP recommends using HP papers that are specifically designed for the type of project you are printing - HP CC567A | User Guide - Page 75
flyers. HP All-in-One Paper or HP Printing Paper • HP All-in-One Paper is specifically designed for HP All-in-One devices. ink can cause printed images to smear, bleed, or not fill in completely. Depending on your country/region, some of these papers might not be available. HP Iron-On Transfers HP - HP CC567A | User Guide - Page 76
or does not accept ink can cause printed images to smear, bleed, or not fill in completely. Papers to avoid for all print and copy jobs • Any size paper other than those listed in the HP All-in-One printer software. • Paper with cutouts or perforations (unless specifically designed for use with - HP CC567A | User Guide - Page 77
many types of letter, A4, or legal paper into the main input tray of the HP Allin-One. To load full-size paper 1. Pull out the main input tray, and then slide the paper-width and paper-length guides to their outermost positions. Load originals and load paper 2. Tap a stack of paper on - HP CC567A | User Guide - Page 78
sure that the HP All-in-One is idle and silent when you load paper into the main input tray. If the HP All-in-One is servicing the ink cartridges or otherwise engaged of the main input tray. 4. Slide the paper-width and paper-length guides inward until they stop at the edges of the paper. Do not - HP CC567A | User Guide - Page 79
5. Push the main input tray back into the HP All-in-One. 6. Pull the output tray extender toward you, (4 x 6 inch) photo paper into the photo tray of the HP Allin-One. For the best results, use 10 x 15 cm (4 x 6 inch) HP Premium Plus Photo Paper or HP Premium Photo Paper. To load 10 x 15 cm (4 x 6 - HP CC567A | User Guide - Page 80
photo tray; make sure the stack of photo paper fits within the photo tray and is no higher than the top of the paper-width guide. Load originals and load paper 4. Push in the photo tray, and then lower the output tray. Related topics • "Recommended papers for printing only" on page - HP CC567A | User Guide - Page 81
the photo tray and is no higher than the top of the paper-width guide. 4. Push in the photo tray, and then lower the output tray. one or more envelopes into the main input tray of the HP All-in-One. Do not use shiny or embossed envelopes or envelopes that have clasps or windows. NOTE: For specific - HP CC567A | User Guide - Page 82
not higher than the top of the paper-width guide. 5. Push the main input tray back into the HP All-in-One. 6. Pull the output tray extender towards you, the HP Photosmart Software or another application, set the paper type and size, and then print. HP Premium Inkjet Transparency Film and HP Premium - HP CC567A | User Guide - Page 83
fit snugly against all paper. Make sure the paper-width guide does not bend the paper in the input tray. • Do not force paper too far forward in the input tray. • Use paper types that are recommended for the HP All-in-One. Related topics • "Recommended papers for printing and copying" on page - HP CC567A | User Guide - Page 84
on specific types of paper or transparency film, or use special features. To print from a software application 1. Make sure you have paper loaded in the input tray. 2. On the File menu in your software application, click Print. 3. Select the HP All-in-One as the printer. If you set the HP All-in-One - HP CC567A | User Guide - Page 85
you have paper loaded in the input tray. 2. On the File menu in your software application, click Print. 3. Make sure the HP All-in-One is the selected printer. 4. Click the button that opens the Properties dialog box. Depending on your software application, this button might be called Properties - HP CC567A | User Guide - Page 86
, or if you experience poor print quality, you can set the paper type manually. To set the paper type for printing 1. Make sure you have paper loaded your software application, click Print. 3. Make sure the HP All-in-One is the selected printer. 4. Click the button that opens the Properties dialog - HP CC567A | User Guide - Page 87
you have paper loaded in the input tray. 2. On the File menu in your software application, click Print. 3. Make sure the HP All-in-One is the selected printer. 4. Click the button that opens the Properties dialog box. Depending on your software application, this button might be called Properties - HP CC567A | User Guide - Page 88
, this button might be called Properties, Options, Printer Setup, Printer, or Preferences. 5. Click the Color tab. Preview your print job You can preview your print job before sending it to the HP All-in-One. This helps to prevent wasting paper and ink on projects that do not print as expected - HP CC567A | User Guide - Page 89
software application, this button might be called Properties, Options, Printer Setup, Printer, or Preferences. 5. Select the print settings appropriate for box. Your print job displays in the preview window. 9. In the HP preview window, do one of the following: • To print, click Start Printing. • To - HP CC567A | User Guide - Page 90
no longer use. To delete a printing shortcut 1. On the File menu in your software application, click Print. 2. Make sure the HP All-in-One is the selected printer. 3. Click the button that opens the Properties dialog box. Depending on your software application, this button might be called Properties - HP CC567A | User Guide - Page 91
The original HP shortcuts cannot be deleted. Perform special print jobs In addition to supporting standard print jobs, the HP All-in-One can perform your software application, click Print. 3. Make sure the HP All-in-One is the selected printer. 4. Click the button that opens the Properties dialog box - HP CC567A | User Guide - Page 92
then load the photo paper print side down. 2. On the File menu in your software application, click Print. 3. Make sure the HP All-in-One is the selected printer. 4. Click the button that opens the Properties dialog box. Depending on your software application, this button might be called Properties - HP CC567A | User Guide - Page 93
. Print custom CD/DVD labels You can use the HP Photosmart Software or online templates from the HP Web site to create and print a custom label on your software application, click Print. 4. Make sure the HP All-in-One is the selected printer. 5. Click the button that opens the Properties dialog box - HP CC567A | User Guide - Page 94
the page 1. Load paper into the input tray. 2. On the File menu in your software application, click Print. 3. Make sure the HP All-in-One is the selected printer. 4. Click the button that opens the Properties dialog box. Depending on your software application, this button might be called Properties - HP CC567A | User Guide - Page 95
set to two pages per sheet. 8. Click OK, and then click Print or OK in the Print dialog box. The HP All-in-One begins printing. 9. Wait until the HP All-in-One has stopped printing for several seconds before removing any of the printed pages from the output tray. If you remove the - HP CC567A | User Guide - Page 96
you have paper loaded in the input tray. 2. On the File menu in your software application, click Print. 3. Make sure the HP All-in-One is the selected printer. 4. Click the button that opens the Properties dialog box. Depending on your software application, this button might be called Properties - HP CC567A | User Guide - Page 97
click Print. 2. Make sure the HP All-in-One is the selected printer. 3. Click the button that opens manually feed the iron-on transfer sheets into the input tray one sheet at a time. Print on transparencies For the best results, HP recommends you use HP transparency products with the HP Allin-One - HP CC567A | User Guide - Page 98
ink to dry before handling the transparency. Print a group of addresses on labels or envelopes With the HP All-in-One, you can print on a single envelope, a group of envelopes, or label sheets designed for inkjet printers guides inward against the stack of labels or envelopes until the guides stop - HP CC567A | User Guide - Page 99
you have paper loaded in the input tray. 2. On the File menu in your software application, click Print. 3. Make sure the HP All-in-One is the selected printer. 4. Click the button that opens the Properties dialog box. Depending on your software application, this button might be called Properties - HP CC567A | User Guide - Page 100
3. Make sure the HP All-in-One is the selected printer. 4. If your Web browser supports it, select the items on the Office 97. If you cannot cancel your print job by using one of the following procedures, consult the instructions for canceling background printing in the online help for your software - HP CC567A | User Guide - Page 101
computer (Windows Vista users) 1. On the Windows taskbar, click Start, and then click Control Panel. 2. Click Printers. 3. Double-click the HP All-in-One icon. TIP: You can also double-click the printer icon in the Windows taskbar. 4. Select the print job you want to cancel. 5. On the Document menu - HP CC567A | User Guide - Page 102
also transfer your photos to the computer to print, edit, or share. The HP All-in-One supports the memory cards described below. Each type of memory card can only be inserted in the appropriate slot for that card, and only one card may be inserted at a time. CAUTION: Do not insert more than - HP CC567A | User Guide - Page 103
in-One, memory card, or storage device. This section contains the following topics: • View and select photos • Print your photos • Create special projects from your photos • Share photos using HP Photosmart Software • Save photos to your computer • Edit photos using the control panel View and select - HP CC567A | User Guide - Page 104
To view and select photos 1. Insert a memory card into the appropriate slot on the HP All-in-One, or connect a storage device to the front USB port. The Photosmart Express menu appears, with the most recent photo shown on the display. Photos View Print Create Share Save 2. Load up to 10 x 15 - HP CC567A | User Guide - Page 105
Preview screen and once to start the print job). 1. Insert a memory card into the appropriate slot on the HP All-in-One, or attach a storage device to the front USB port. The Photosmart Express menu appears, with the most recent photo shown on the display. View Print 104 Use the photo features - HP CC567A | User Guide - Page 106
status screen displays the number of pages to print and the estimated time to complete. Create special projects from your photos The HP All-in-One enables you to create special projects from your photos, including: • Photo albums • Panorama prints • Wallet-size photos • Passport-size photos Create - HP CC567A | User Guide - Page 107
a memory card into the appropriate slot on the HP All-in-One, or connect a storage device to the front USB port. The Photosmart Express menu appears, with the most recent photo shown guidelines or restrictions for passport photos, contact a local passport service agency.) 106 Use the photo features - HP CC567A | User Guide - Page 108
port. To send photos from a memory card or storage device 1. Insert a memory card into the appropriate slot on the HP All-in-One, or connect a storage device to the front USB port. The Photosmart Express menu appears, with the most recent photo shown on the display. View Print Create Share Save - HP CC567A | User Guide - Page 109
device to the front USB port. To save photos 1. Insert a memory card into the appropriate slot on the HP All-in-One, or connect a storage device to the front USB port. The Photosmart Express menu appears, with the most recent photo shown on the display. View Print Create Share 108 Use the - HP CC567A | User Guide - Page 110
HP All-in-One offers several basic editing features that you can use to edit your photos manually crop a photo The HP All-in-One enables you to zoom in or out on a specific area of a photo on the HP All-in-One, or connect a storage device to the front USB port. The Photosmart Express menu appears - HP CC567A | User Guide - Page 111
the arrows on the directional pad to pan around the photo and select a specific area to print. 10. Press OK to crop the photo. Rotate a photo card into the appropriate slot on the HP All-in-One, or connect a storage device to the front USB port. The Photosmart Express menu appears, with the most - HP CC567A | User Guide - Page 112
card or storage device. To change the color effects 1. Insert a memory card into the appropriate slot on the HP All-in-One, or connect a storage device to the front USB port. The Photosmart Express menu appears, with the most recent photo shown on the display. 2. With View highlighted, press OK. You - HP CC567A | User Guide - Page 113
display. Remove red-eye The flash on a camera (especially on older model cameras) can sometimes cause a subject's eyes to appear red in your card into the appropriate slot on the HP All-in-One, or connect a storage device to the front USB port. The Photosmart Express menu appears, with the most - HP CC567A | User Guide - Page 114
perimage basis. To turn off automatic photo enhancement 1. Insert a memory card into the appropriate slot on the HP All-in-One, or connect a storage device to the front USB port. The Photosmart Express menu appears, with the most recent photo shown on the display. 2. With View highlighted, press OK - HP CC567A | User Guide - Page 115
Photos Chapter 8 114 Use the photo features - HP CC567A | User Guide - Page 116
to make reprints in a variety of sizes, up to the size of letter (8.5 x 11 inch) or A4 (210 x 297 mm) paper. By default, the HP All-in-One is set to detect the type of paper you are using automatically. For the best results when reprinting photos, leave the Paper Type set - HP CC567A | User Guide - Page 117
pages. The Scan Preview menu appears. d. Press or to adjust the number of copies and press OK. The Reprint Options screen appears. NOTE: The HP All-in-One scans your original and shows a preview of the photo on the display. e. Press OK to select Print Preview . NOTE: Select Edit Photo to edit - HP CC567A | User Guide - Page 118
Monitor icon in the Windows system tray can cause the HP All-in-One to lose some of its scan functionality. If this happens, you can restore full functionality by restarting your computer or by starting the HP Photosmart Software. This section contains the following topics: • Scan an original - HP CC567A | User Guide - Page 119
can edit a scanned image using the software you installed with the HP All-in-One. You can also edit a scanned document by using your Optical Character Recognition (OCR) software. NOTE: If you are using HP Photosmart Essential, the Optical Character Recognition (OCR) software might not be installed - HP CC567A | User Guide - Page 120
an online photo album or photo finishing service, or to a network-connected HP device. 5. The HP All-in-One sends the scanned photo or document to the computer or to all the share destinations that you selected. Related topics "Share photos using HP Photosmart Software" on page 107 Stop scanning To - HP CC567A | User Guide - Page 121
Scan Chapter 9 120 Use the scan features - HP CC567A | User Guide - Page 122
10 Use the copy features The HP All-in-One enables you to produce high-quality color and black-and-white copies on a variety of paper types, including transparencies. You can enlarge or reduce the size of an original to fit a specific paper size, adjust the darkness of the copy, and use special - HP CC567A | User Guide - Page 123
for the current job You can customize the copy settings of the HP All-in-One to handle nearly any copy task. This section contains the following topics of copies, up to the maximum. (The maximum number of copies varies by model.) TIP: If you hold down either of the arrow buttons, the number of - HP CC567A | User Guide - Page 124
) 8.5x11 inch or A4 Set the copy paper type You can set the paper type on the HP All-in-One. The default paper type setting for copying is Automatic, which causes the HP All-in-One to detect the type of paper in the input tray. To set the paper type for copies - HP CC567A | User Guide - Page 125
Glossy Brochure Matte Transparency Transparency Plain Paper Premium Photo Premium Photo Advanced Photo 4. Press OK. Change copy speed or quality The HP All-in-One provides four options that affect copy speed and quality: • Maximum dpi produces the highest quality for all paper. Maximum dpi copies - HP CC567A | User Guide - Page 126
might be lower quality. The Fast setting uses less ink and extends the life of your ink cartridges. To change the copy quality from the control panel Lighter/Darker, and then press OK. The Lighter/Darker menu appears. 5. Do one of the following: • Press to darken the copy. • Press to lighten the - HP CC567A | User Guide - Page 127
with the HP All-in-One. Perform special copy jobs In addition to supporting standard copy jobs, the HP All-in-One can perform special the glass, as indicated by the engraved guides along the edge of the glass. 3. Press Start Copy Black or Start Copy Color. The HP All-in-One makes a 10 x 15 cm (4 - HP CC567A | User Guide - Page 128
or images at the edges of the sheet. NOTE: In order to resize your original without changing the proportions or cropping the edges, the HP All-in-One might leave an uneven amount of white space around the edges of the paper. To resize a document from the control panel 1. Make sure you - HP CC567A | User Guide - Page 129
to select a percentage to reduce or enlarge the copy. (The minimum and maximum percentage to resize a copy varies by model.) 7. Press OK. Crop an original After changing settings on the HP All-in-One for making a copy, you can use the crop feature to specify a particular area of the original to copy - HP CC567A | User Guide - Page 130
Improve the quality of a copy You can use the Enhancements feature to adjust the quality of text documents by sharpening edges of black text or adjust photographs by enhancing light colors that might otherwise appear white. The Mixed enhancement is the default option. Use the Mixed enhancement to - HP CC567A | User Guide - Page 131
Chapter 10 130 Use the copy features Copy - HP CC567A | User Guide - Page 132
can send a fax in a variety of ways. Using the control panel, you can send a blackand-white or color fax from the HP All-in-One. You can also send a fax manually from an attached phone. This allows you to speak with the recipient before sending the fax. This section contains the following topics - HP CC567A | User Guide - Page 133
try changing the resolution or contrast of your fax. Related topics • "Send a fax manually from a phone" on page 133 • "Send a fax using monitor dialing" on or color fax from the HP All-in-One using speed dials. This section provides instructions for sending the fax in black and white. Fax 132 - HP CC567A | User Guide - Page 134
the device detects an original loaded in the automatic document feeder, the HP All-in-One sends the document to the number you entered. • If the device does "Set up speed dialing" on page 65 Send a fax manually from a phone Sending a fax manually allows you to make a phone call and talk with the - HP CC567A | User Guide - Page 135
a fax manually from a connected phone 1. Load your originals print side up into the document feeder tray. NOTE: This feature is not supported if you tones, telephone prompts, or other sounds through the speakers on the HP All-in-One. This enables you to respond to prompts while dialing, as well - HP CC567A | User Guide - Page 136
Black. NOTE: If you press Start Fax Color, the fax will be sent in black and white and a message appears on the display. The HP All-in-One scans the originals into memory and sends the fax when the receiving fax machine is available. Schedule a fax to send later You can schedule - HP CC567A | User Guide - Page 137
photo fax You can fax a color original or photo from the HP All-in-One. If the HP All-in-One determines that the recipient's fax machine only supports black-and-white faxes, the HP All-in-One sends the fax in black and white. HP recommends that you use only color originals for color faxing. 136 Use - HP CC567A | User Guide - Page 138
glass, and then press to highlight Fax original from scanner glass, and press OK. NOTE: If the recipient's fax machine only supports black-and-white faxes, the HP Allin-One automatically sends the fax in black and white. A message appears after the fax has been sent indicating that the fax was sent - HP CC567A | User Guide - Page 139
and Standard. • Fine: provides high-quality text suitable for faxing most documents. This is the default setting. When sending faxes in color, the HP All-in-One always uses the Fine setting. • Very Fine: provides the best quality fax when you are faxing documents with very fine detail. If you choose - HP CC567A | User Guide - Page 140
To change the Lighter/Darker setting from the control panel 1. Press Fax Menu. The Enter Fax Number screen appears. 2. Enter the fax number by using the keypad, press to redial the last number dialed, or press to access speed dials. 3. Press Fax Menu again. The Fax Menu appears. 4. Press to - HP CC567A | User Guide - Page 141
you a fax while you are still connected. This is referred to as manual faxing. Use the instructions in this section to receive a manual fax. You can receive faxes manually from a phone that is: • Directly connected to the HP All-in-One (on the 2-EXT port) • On the same phone line, but not directly - HP CC567A | User Guide - Page 142
the sender, instruct the sender to press Start on their fax machine. 5. When you hear fax tones from a sending fax machine, do the following: a. Press Start Fax Black or Start Fax Color on the control panel of the HP All-in- One. b. When prompted, press to highlight Receive Fax Manually, and then - HP CC567A | User Guide - Page 143
have received, print the Fax Log. The Fax Log is not deleted when the HP All-in-One is turned off. To set backup fax reception from the control panel 1. Press memory If you set the Backup Fax Reception mode to On, the HP All-in-One stores faxes it receives in memory, whether the device has an error condition - HP CC567A | User Guide - Page 144
power to the HP All-in-One. Related topics "Set up backup fax reception" on page 141 Poll to receive a fax Polling allows the HP All-in-One for polling and have a fax ready to send. NOTE: The HP All-in-One does not support polling pass codes. Polling pass codes are a security feature that require - HP CC567A | User Guide - Page 145
HP All-in-One. NOTE: If the HP All-in-One HP All-in-One will print the fax. If you set up the HP All-in-One fax on the HP All-in-One while forwarding the fax HP All-in-One loses power when Fax Forwarding is set up, the HP All-in-One saves the Fax Forwarding setting and phone number. When power - HP CC567A | User Guide - Page 146
The HP All-in-One always checks the paper size before printing faxes, regardless of the Paper Checking setting. This is to prevent ink from you subscribe to a caller ID service through your phone provider, you can block specific fax numbers, so the HP All-in-One does not print faxes received from - HP CC567A | User Guide - Page 147
supported in your country/region, Junk Fax Blocker Set Up does not appear in the Basic Fax Setup menu. Set the junk fax mode By default, Block Junk Fax mode is turned On. If you do not subscribe to a caller ID service prompt appears, do one of the following , press Back. To manually enter a number to - HP CC567A | User Guide - Page 148
faxes by connecting a phone cord to the 1LINE port on the back of the HP All-in-One, not by connecting the phone cord to the Ethernet port. This FoIP service might not work properly when the HP All-in-One is sending and receiving faxes at high speed (33600 bps). If you experience problems sending - HP CC567A | User Guide - Page 149
make sure their Internet phone service supports faxing. If they do not support faxing, you might encounter intermittent problems when trying to send and are sending or receiving. If the HP All-in-One does not stop faxing, press Cancel again. The HP All-in-One prints any pages it has already started - HP CC567A | User Guide - Page 150
press OK. The HP All-in-One prints a self-test report, which contains the following information: • Product information: includes the model number, serial number, and other product information. • Revision information: includes the firmware version number. • Ink delivery system information: displays - HP CC567A | User Guide - Page 151
HP support. Print fax reports You can set up the HP All-in-One to print error reports and confirmation reports automatically for each fax you send and receive. You can also manually that your faxes were successfully sent, follow these instructions to enable fax confirmation before sending any faxes. - HP CC567A | User Guide - Page 152
so that it automatically prints a report when there is an error during transmission or reception. To set the HP All-in-One to print fax error reports automatically 1. Press Setup. 2. Press to highlight Print Report, and then press OK. The Print Report menu appears. 3. Press to highlight - HP CC567A | User Guide - Page 153
an error" on page 256 Print other reports You can manually generate reports about the HP All-in-One, such as the status of the last fax you sent Setup menu. Caller ID Report If you subscribe to a caller ID service through your phone provider, this report prints a list of approximately the last - HP CC567A | User Guide - Page 154
service through your phone provider, and have designated any numbers as junk fax numbers, this report prints a list of the phone numbers you have blocked. (The maximum number of fax numbers you can block varies by model.) NOTE: This feature is not supported forms The HP All-in-One contains built- - HP CC567A | User Guide - Page 155
Print reports and forms Chapter 12 154 Print reports and forms - HP CC567A | User Guide - Page 156
your copies and scans remain clear. You will also need to replace ink cartridges, clean the print head assembly, or align the printer from time to time. This section provides instructions for keeping the HP All-in-One in top working condition. Perform these simple maintenance procedures as necessary - HP CC567A | User Guide - Page 157
Dry the glass with a dry, soft, lint-free cloth to prevent spotting. 4. Turn on the HP All-in-One. To clean the glass strip inside the automatic document feeder 1. Turn off the HP All-in-One. 2. Lift the cover of the automatic document feeder. 3. Lift the automatic document feeder mechanism. There - HP CC567A | User Guide - Page 158
how soon you might need to replace an ink cartridge. The ink supply level shows an estimate of the amount of ink remaining in the ink cartridges. NOTE: The HP All-in-One can only detect the ink levels for genuine HP ink. The ink levels in ink cartridges that are refilled or have been used in - HP CC567A | User Guide - Page 159
. The HP All-in-One displays a gauge that shows the estimated ink levels of all cartridges installed. 4. Press any button to return to the Tools menu. To check the ink levels from the HP Photosmart Software 1. In the HP Solution Center, click Settings, point to Print Settings, and then click Printer - HP CC567A | User Guide - Page 160
the HP All-in-One Replace the ink cartridges Follow these instructions when you need to replace ink cartridges. NOTE: If you are installing ink cartridges in the HP All-in-One for the first time, be sure to use only the ink cartridges that came with the device. The ink in these cartridges is - HP CC567A | User Guide - Page 161
(pink), or magenta, lift the appropriate latch in the center area. 1 Ink cartridge latch for the black ink cartridge 2 Ink cartridge latches for the color ink cartridges 4. Pull the ink cartridge toward you out of its slot to remove it. Maintain the HP All-in-One 160 Maintain the HP All-in - HP CC567A | User Guide - Page 162
6 for each ink cartridge you are replacing. 8. Close the ink cartridge door. Related topics "Shop for ink supplies" on page 167 Align the printer The HP All-in-One automatically aligns the print head when you install the ink cartridges during the initial setup. The HP All-in-One also aligns the - HP CC567A | User Guide - Page 163
have a defective sensor or ink cartridge. Contact HP support. Go to www.hp.com/support. If prompted, choose your country/region, and then click Contact HP for information on calling for technical support. 6. Press OK to continue. To align the printer from the HP Photosmart Software 1. Load letter - HP CC567A | User Guide - Page 164
print head, try aligning the printer. If print quality problems persist after cleaning and aligning, contact HP support. Related topics "Align the printer" on page 161 Clean the ink cartridge contacts Clean the copper-colored ink cartridge contacts if all ink cartridges are installed and a message - HP CC567A | User Guide - Page 165
close the ink cartridge door. Remove ink from your skin and clothing Follow these instructions to remove ink from your skin and clothing: Surface Skin White fabric Remedy Wash the area with an abrasive soap. Wash the fabric in cold water and use chlorine bleach. 164 Maintain the HP All-in-One - HP CC567A | User Guide - Page 166
for 3 seconds until the HP All-in-One turns off. Turn off the HP All-in-One To avoid damaging the HP All-in-One, you must properly shut it down by using the On button located on the device. Do not turn the HP All-in-One off by unplugging the power cord or turning off a power strip. Self-maintenance - HP CC567A | User Guide - Page 167
Maintain the HP All-in-One Chapter 13 166 Maintain the HP All-in-One - HP CC567A | User Guide - Page 168
tab, and then click Service this device. 2. Click the Estimated Ink Levels tab. 3. Click Ink Cartridge Ordering Information. The ink cartridge reorder numbers appear. 4. Click Order Online. HP sends detailed printer information, including model number, serial number, and ink supply levels, to an - HP CC567A | User Guide - Page 169
Chapter 14 168 Shop for ink supplies Shop for ink supplies - HP CC567A | User Guide - Page 170
Memory card and front USB port troubleshooting • Scan troubleshooting • Copy troubleshooting • Fax troubleshooting • Errors Troubleshooting tips This section contains the following topics: • Communication problems over a USB connection • Information on ink cartridges and the print head • Information - HP CC567A | User Guide - Page 171
the device. Do not turn off the device by turning off a power strip or unplugging the power cord from the HP All-in-One. If you improperly turn off the HP All-in-One, the print head assembly might not return to the correct position. • Store ink cartridges at room temperature (15.6°-26.6° C or 60°-78 - HP CC567A | User Guide - Page 172
ink and shortens the life of the cartridges. • Handle ink cartridges carefully. Dropping, jarring, or rough handling during installation can cause temporary printing problems. Information on paper The HP All-in-One the paper-width guides in the document feeder HP All-in-One. Troubleshooting tips 171 - HP CC567A | User Guide - Page 173
inside the device. If you do not remove all the pieces of paper from the HP All-in-One, more paper jams are likely to occur. 4. If the paper jam is cleared, proceed it snaps into place. 6. Turn on the HP All-in-One, and then press OK to continue the current job. 172 Troubleshooting Troubleshooting - HP CC567A | User Guide - Page 174
clear a paper jam in the automatic document feeder CAUTION: Do not lift the lid of the HP All-in-One and try to remove the jammed document from the glass. You might damage your original document. you can clean the rollers and separator pad. Lift the automatic document feeder Troubleshooting tips 173 - HP CC567A | User Guide - Page 175
the automatic document feeder. Hardware setup troubleshooting This section contains hardware troubleshooting information for the HP All-in-One. Many issues are caused when the HP All-in-One is connected to the computer using a USB cable before the HP All-in-One software is installed on the computer - HP CC567A | User Guide - Page 176
grounded power outlet, surge protector, or power strip. 1 Power connection 2 Power cord and adaptor 3 Grounded power outlet • If you are using a power strip, make sure the power strip is on. Or, try plugging the HP All-in-One directly into a grounded power outlet. Hardware setup troubleshooting 175 - HP CC567A | User Guide - Page 177
Unplug the HP All-in-One from the power outlet and contact HP. Go to: www.hp.com/support If prompted, choose your country/region, and then click Contact HP for information on calling for technical support. I connected the USB cable, but I am having problems using the HP All-in-One with my computer - HP CC567A | User Guide - Page 178
with each other. Solution: Check the connection between the HP All-in-One and computer. For more information, see: "Communication problems over a USB connection" on page 169 Cause: There might be a problem with one or more of the ink cartridges. Hardware setup troubleshooting 177 Troubleshooting - HP CC567A | User Guide - Page 179
information, see: "Work with ink cartridges" on page 158 Cause: The HP All-in-One might not be turned on. Solution: Look at the display on the HP All-in-One. If the display is blank and the On button is not lit, the HP All-in-One is turned off. Make sure the power cord is firmly connected to - HP CC567A | User Guide - Page 180
the HP All-in-One off and open the ink cartridge door. Remove any objects that are blocking the print head assembly (including any packing materials), and then turn the HP All-in-One on again. Follow the prompts on the display or the computer screen to continue. Software installation troubleshooting - HP CC567A | User Guide - Page 181
is turned on, and then try the usb connection again. To retry the usb connection 1. Unplug the HP All-in-One power cord, and then plug it in again. 2. Verify that the USB cable and power cord are plugged in. 3. Click Retry to retry the connection. If this does not work, continue to the next step - HP CC567A | User Guide - Page 182
Start, Settings, Control Panel (or just Control Panel). 2. Double-click Add/Remove Programs (or click Uninstall a program). 3. Select HP Photosmart All-In-One Driver Software, and then click Change/ Remove. Follow the onscreen instructions. Software installation troubleshooting 181 Troubleshooting - HP CC567A | User Guide - Page 183
the HP Photosmart Software. 3. Follow the onscreen instructions and the instructions provided in the Setup Guide that came with the HP All-in-One. Cause: The HP All-in-One is turned off. Solution: Turn the HP All-in-One on. Cause: The computer is turned off. 182 Troubleshooting Troubleshooting - HP CC567A | User Guide - Page 184
then on again. For more information on setting up the HP All-in-One and connecting it to your computer, see the Setup Guide that came with the HP All-in-One. Network troubleshooting This section addresses problems you might encounter while setting up a network. This section contains the following - HP CC567A | User Guide - Page 185
to turn the HP All-inOne off, and press it again to turn the device on. Also, turn off the power on your router or hub, and then turn it on again. Cause: You were able to connect the HP All-in-One to the network previously, but now it will not connect. Troubleshooting 184 Troubleshooting - HP CC567A | User Guide - Page 186
Server" on page 52 The Printer not Found screen appears during installation Cause: The HP All-in-One is not turned on. Solution: Turn on the HP All-in-One. Cause: You do not If the connections are secure, turn off the power on the HP All-in-One, and then turn it on again. Press the On button on the - HP CC567A | User Guide - Page 187
the installation. NOTE: The HP All-in-One is not accessible during VPN sessions. However, print jobs are saved in the print queue. When you exit the VPN session, print jobs in the print queue will be printed. Wireless setup troubleshooting This section addresses problems you might encounter setting - HP CC567A | User Guide - Page 188
name (SSID) may be at the bottom of the SSID list that is displayed when you install the HP All-in-One on a wireless network. Solution: Press to scroll to the bottom of the list. Infrastructure entries are for an ad hoc network. For more information Network troubleshooting 187 Troubleshooting - HP CC567A | User Guide - Page 189
and the HP All-in-One closer together. Then run the wireless setup again. For more information, see: "Integrated wireless WLAN 802.11 network setup" on page 39 Cause: If you manually entered your process, you might have entered the WPA passphrase incorrectly. Troubleshooting 188 Troubleshooting - HP CC567A | User Guide - Page 190
on. Solution: Turn on the HP All-in-One. Print quality troubleshooting If you are having problems with print quality, try the solutions in this section and observe the following guidelines: • Replace refilled or empty ink cartridges with genuine HP ink cartridges. • Check the device settings to - HP CC567A | User Guide - Page 191
If the self-test report does not show a problem, investigate other causes, such as the image file or software program. For additional ink cartridge troubleshooting, visit the HP Web site at www.hp.com/ support. This section contains the following topics: • Ink is bleeding or smearing • The automatic - HP CC567A | User Guide - Page 192
HP for information on calling for technical support. For more information, see: • "Clean the print head" on page 162 • "Print a self-test report" on page 149 • "Align the printer one problem persists, or manually. For more information, see: "Clean the automatic document feeder" on page 173 Ink - HP CC567A | User Guide - Page 193
non-HP ink. Solution: HP recommends that you use genuine HP ink cartridges. Genuine HP ink cartridges are designed and tested with HP printers to help you easily produce great results, time after time. NOTE: HP cannot guarantee the quality or reliability of non-HP ink. Printer service or repairs - HP CC567A | User Guide - Page 194
non-HP ink. Solution: HP recommends that you use genuine HP ink cartridges. Genuine HP ink cartridges are designed and tested with HP printers to help you easily produce great results, time after time. NOTE: HP cannot guarantee the quality or reliability of non-HP ink. Printer service or repairs - HP CC567A | User Guide - Page 195
. Check the color blocks in the report for any problems. If the color blocks show print quality problems, perform a printer alignment. If the problem persists after cleaning and aligning, contact HP support for help. Go to: www.hp.com/support If prompted, choose your country/region, and then click - HP CC567A | User Guide - Page 196
. Check the color blocks in the report for any problems. If the color blocks show print quality problems, perform a printer alignment. If the problem persists after cleaning and aligning, contact HP support for help. Go to: www.hp.com/support If prompted, choose your country/region, and then click - HP CC567A | User Guide - Page 197
. Check the color blocks in the report for any problems. If the color blocks show print quality problems, perform a printer alignment. If the problem persists after cleaning and aligning, contact HP support for help. Go to: www.hp.com/support If prompted, choose your country/region, and then click - HP CC567A | User Guide - Page 198
flat. For best results when printing images, use HP Premium Plus Photo Paper. If the problem persists, use the software you installed with the HP All-in-One or another software application to rotate your image 180 properly or is loaded incorrectly. Print quality troubleshooting 197 Troubleshooting - HP CC567A | User Guide - Page 199
you print after running a copy or print job. If the back side of the page has ink streaks, the HP All-in-One might have over sprayed your previous copy or print job. Solution: Check the paper size setting job. For more information, see: "Load paper" on page 76 Troubleshooting 198 Troubleshooting - HP CC567A | User Guide - Page 200
problems. If the color blocks show print quality problems, perform a printer alignment. If the problem persists after cleaning and aligning, contact HP support for help. Go to: www.hp.com/support The HP All-in-One picked up two sheets of paper while printing the fax. Solution: If the HP All-in-One - HP CC567A | User Guide - Page 201
" on page 149 • "Align the printer" on page 161 Print troubleshooting Use this section to solve these printing problems: • Envelopes print incorrectly • Borderless printing produces unexpected results • The HP All-in-One is not responding • The HP All-in-One prints meaningless characters • Nothing - HP CC567A | User Guide - Page 202
printed several minutes after you sent a print job to the HP All-in-One, check your computer to see if there are any messages. Cause: The HP All-in-One has a paper jam. Solution: Clear the paper jam. For more information, see: "Clear paper jams" on page 171 Print troubleshooting 201 Troubleshooting - HP CC567A | User Guide - Page 203
outlet. Press the On button to turn on the HP All-in-One. Cause: The HP All-in-One experienced an error. Solution: Turn the HP All-in-One off, and then unplug the power cord. Plug the power cord back in, and then press the On button to turn on the HP All-in-One. 202 Troubleshooting Troubleshooting - HP CC567A | User Guide - Page 204
check the printer driver status 1. In the HP Solution Center, HP All-in-One. If it is not lit, the HP All-in-One is turned off. Make sure the power cord is firmly connected to the HP All-in-One and plugged into a power outlet. Press the On button to turn on the HP All-in-One. Cause: The HP All-in-One - HP CC567A | User Guide - Page 205
several minutes after you sent a print job to the HP All-in-One, check the status of the HP All-in-One. In the HP Photosmart Software, click Status. For more information, see: "I connected the USB cable, but I am having problems using the HP All-in-One with my computer" on page 176 Cause: The - HP CC567A | User Guide - Page 206
HP All-in-One off and open the ink cartridge door. Remove any objects that are blocking the print head assembly (including any packing materials), and then turn the HP All-in-One on again. Cause: The HP All-in-One paper guides are not positioned correctly. Print troubleshooting 205 Troubleshooting - HP CC567A | User Guide - Page 207
and then slide the paper width guide inward until it stops at the than the minimum margins the HP All-in-One supports. 3. Cancel the print job HP All-in-One. Cause: The size of the document you are printing is larger than the paper loaded in the input tray. 206 Troubleshooting Troubleshooting - HP CC567A | User Guide - Page 208
supported by the HP All-in-One. To preview the print layout 1. Load the correct paper size into the input tray. 2. Preview your print job before sending it to the HP All-in-One paper" on page 76 Ink is spraying the inside of the HP All-in-One when I print a photo troubleshooting 207 Troubleshooting - HP CC567A | User Guide - Page 209
Cause: The selected paper type and paper size might not be supported by the Twosided printing accessory. Solution: Make sure the selected paper port troubleshooting Use this section to solve these memory card problems: • My memory card no longer works in my digital camera • The HP All-in-One does - HP CC567A | User Guide - Page 210
Cause: The HP All-in-One has detected an error with the memory card. Solution: Remove and reinsert the memory card. You might have inserted it incorrectly. Turn the memory card so that the label side is on the left and the contacts Memory card and front USB port troubleshooting 209 Troubleshooting - HP CC567A | User Guide - Page 211
, click Install More Software to install the HP Photosmart Software. 3. Follow the onscreen instructions and the instructions provided in the Setup Guide that came with the HP All-in-One. Cause: The HP All-in-One is turned off. Solution: Turn the HP All-in-One on. Cause: The computer is turned off - HP CC567A | User Guide - Page 212
If the HP All-in-One is network-connected, check physical network connections and make sure the network is operational. Once you verify network connectivity, retry the task. For more information, see: • "Communication problems over a USB connection" on page 169 • "Network troubleshooting" on page - HP CC567A | User Guide - Page 213
The Common Internet File System (CIFS) server in the HP All-in-One does not support authentication. This is a limitation of the CIFS server. The Solution: Retry your task at a later time. Scan troubleshooting Use this section to solve these scan problems: • Scan halts • Scan fails • Scan fails - HP CC567A | User Guide - Page 214
the HP All-in-One and problems while using other programs, you might need to add more memory to your computer. See the user guide that came with your computer for more information. Scanned image is blank Cause: The original is placed incorrectly on the glass. Scan troubleshooting 213 Troubleshooting - HP CC567A | User Guide - Page 215
that case, you can turn off autocropping and crop the scanned image manually, or not at all. Scanned image has incorrect page layout Cause: applications cannot handle framed text formatting. Framed text is one of the scan document settings. It maintains complex layouts Troubleshooting Troubleshooting - HP CC567A | User Guide - Page 216
Select the correct OCR language. NOTE: If you are using HP Photosmart Essential, the Optical Character Recognition (OCR) software might not or reinstall the software that came with the HP All-in-One. Copy troubleshooting Use this section to solve these copy problems: • Copies are too light or too - HP CC567A | User Guide - Page 217
display is blank and the On button is not lit, the HP All-in-One is turned off. Make sure the power cord is firmly connected to the HP All-in-One and plugged into a power outlet. Press the On button to turn on the HP All-in-One. Cause: The original is placed incorrectly on the glass. Solution - HP CC567A | User Guide - Page 218
detects on the glass as part of the image. Solution: Turn off the HP All-in-One, and then use a soft cloth to wipe the glass and the back of the document lid. For more information, see: • "Clean the glass" on page 155 • "Clean the lid backing" on page 157 Copy troubleshooting 217 Troubleshooting - HP CC567A | User Guide - Page 219
One enlarges the original up to a maximum percentage. This might leave white space around the edges. (The maximum percentage varies by model image is cropped when I make a borderless copy Cause: The HP All-in-One cropped some of the image around the margins of the copy Troubleshooting Troubleshooting - HP CC567A | User Guide - Page 220
originals" on page 71 Fax troubleshooting Use this section to solve the following fax problems: • The HP All-in-One is having problems sending and receiving faxes • The HP All-in-One cannot send faxes, but can receive faxes • The HP All-in-One is having problems sending a manual fax • Pages of a fax - HP CC567A | User Guide - Page 221
not lit, the HP All-in-One is turned off. Make sure the power cord is firmly connected to the HP All-in-One and plugged into a power outlet. Press the On button to turn on the HP All-in-One. Cause: The wrong phone cord is used to connect the HP All-in-One or the phone cord is plugged into the - HP CC567A | User Guide - Page 222
, Spain, Taiwan, Thailand, USA, Venezuela, and Vietnam. Make sure you have correctly connected the HP All-in-One to the telephone wall jack, and correctly connected any additional equipment and services that share the phone line with the HP All-in-One. Fax troubleshooting 221 Troubleshooting - HP CC567A | User Guide - Page 223
cause faxing problems. (A splitter is a two-cord connector that plugs into a telephone wall jack.) Try removing the splitter and connecting the HP All-in-One directly the problem persists, turn Error Correction Mode (ECM) off and contact your telephone company. 222 Troubleshooting Troubleshooting - HP CC567A | User Guide - Page 224
The DSL service sends out a digital signal on the phone line that can interfere with the HP All-in-One, preventing the HP All- HP All-in-One. Solution: Check the display or your computer for an error message providing information about the problem and how to solve it. If there is an error, the HP - HP CC567A | User Guide - Page 225
: The HP All-in-One shares the same phone line with a DSL service and the DSL modem might not be properly grounded. Solution: If the DSL modem is not properly grounded, it can create noise on the phone line. Phone lines with poor sound quality (noise) can cause faxing problems. Troubleshooting 224 - HP CC567A | User Guide - Page 226
completely remove power for at service provider supports faxing over the Internet. If the problem persists, contact your Internet service provider. The HP All-in-One cannot send faxes, but can receive faxes Cause: The HP All-in-One is not set up properly for faxing. Solution: Follow the instructions - HP CC567A | User Guide - Page 227
mail service could be interfering with the recipient's phone line. You can also ask the recipient to check the receiving fax machine for any problems. The HP All-in-One is having problems sending a manual fax Cause: The recipient's fax machine might not support receiving faxes manually. Solution - HP CC567A | User Guide - Page 228
is not pushed in far enough, you will be unable to send a fax manually. Load an original in the document feeder tray, or push the original farther into the tray. Once the HP Allin-One detects the original, a confirmation message appears on the display. Fax troubleshooting 227 Troubleshooting - HP CC567A | User Guide - Page 229
, or a voice mail service could be interfering with the problem persists, check to see if Error Correction Mode (ECM) is On. If it is not, change the ECM setting to On. Faxes might take longer to send, but the print quality of the received fax should improve. 228 Troubleshooting Troubleshooting - HP CC567A | User Guide - Page 230
fax resolution" on page 137 Cause: The glass of the HP All-in-One might be dirty. Solution: If you are sending a fax service could be interfering with the recipient's phone line. You can also ask the recipient to check the receiving fax machine for any problems troubleshooting 229 Troubleshooting - HP CC567A | User Guide - Page 231
with poor sound quality (noise) can cause faxing problems. Solution: If the failure was due to noise listening for static or other noise. If the problem persists, turn Error Correction Mode (ECM) off 137 Cause: The receiving fax machine is having problems. Solution: To check this, try calling the - HP CC567A | User Guide - Page 232
the HP All-in-One to answer faxes manually. You cannot receive faxes automatically if you have a voice mail service at the same phone number you use for fax calls. You must receive faxes manually; this means you must be available to respond in person to incoming fax calls. Fax troubleshooting 231 - HP CC567A | User Guide - Page 233
HP All-in-One when you have a voice mail service, see the printed documentation that came with the HP All-in-One. Cause: You have a computer dial-up modem on the same phone line as the HP Allin-One HP All-in-One to detect fax tones. This problem is phone cord in the box with the HP All-in-One, - HP CC567A | User Guide - Page 234
ring service through your telephone company), and the Distinctive Ring setting on the HP All-in-One does not match. Solution: If you have a special ring pattern for your fax phone number (using a distinctive ring service through your telephone company), make sure that the Fax troubleshooting 233 - HP CC567A | User Guide - Page 235
, review the display for information on the error condition. Also, check for the following problems: • The HP All-in-One is not set up properly for faxing. See the printed documentation for more information. • There is no paper loaded in the input tray. • There is a paper jam. Troubleshooting 234 - HP CC567A | User Guide - Page 236
HP All-in-One is having problems receiving a manual fax Cause: There are documents loaded in the document feeder tray. Solution: The HP All-in-One will not receive a fax manually if documents are loaded in the document feeder tray. Instead, the HP All-in-One attempts to send the Fax troubleshooting - HP CC567A | User Guide - Page 237
the problem and how to solve it. If there is an error message or prompt on the display, the HP All-in-One will not receive the fax manually until in the countries/regions that receive a 2-wire phone cord in the box with the HP All-in-One, including: Argentina, Australia, Brazil, Canada, Chile, - HP CC567A | User Guide - Page 238
5 Answering machine 6 Use the phone cord supplied in the box with the HP All-in-One Make sure the HP All-in-One is set to receive faxes automatically and to a low number of rings and the HP All-in-One to answer in the maximum number of rings supported. (The maximum number of rings varies by country - HP CC567A | User Guide - Page 239
display is blank and the On button is not lit, the HP All-in-One is turned off. Make sure the power cord is firmly connected to the HP All-in-One and plugged into a power outlet. Press the On button to turn on the HP All-in-One. Cause: Auto Answer is turned off, which means that the - HP CC567A | User Guide - Page 240
, review the display for information on the error condition. Also, check for the following problems: • The HP All-in-One is not set up properly for faxing. See the printed documentation for information. • There is no paper loaded in the input tray. • There is a paper jam. • The ink cartridge door - HP CC567A | User Guide - Page 241
Close the ink cartridge door. • The print head assembly is stalled. Turn the HP All-in-One off, remove any objects that are blocking the print head assembly (including any packing materials), and then turn the HP All-in-One on again. After you resolve any problems found, the HP All-in-One can begin - HP CC567A | User Guide - Page 242
-test report to determine if there is a problem with the ink cartridges. If the selftest report shows a problem, clean the ink cartridges. If the problem persists, you might need to replace the ink cartridges. For more information, see: "Maintain the HP All-in-One" on page 155 Cause: The print head - HP CC567A | User Guide - Page 243
fax machine is having problems. Cause: The fax originated , if possible, it fits on one page. Cause: The paper-width guide is not positioned correctly. Solution: Make HP All-in-One will attempt to fit the fax on one page (if automatic reduction is enabled). If the memory is full, the HP All-in-One - HP CC567A | User Guide - Page 244
Figure 15-2 Back view of the HP All-in-One 1 Telephone wall jack 2 Phone cord connected to the 2-EXT port 3 Parallel splitter 4 Telephone (optional) 5 Computer with modem 6 Phone cord supplied in the box with the HP All-in-One connected to the 1-LINE port Fax troubleshooting 243 Troubleshooting - HP CC567A | User Guide - Page 245
of the HP All-in-One. 2. Using the phone cord supplied in the box with the HP All-in-One, connect one end to HP All-in-One to answer calls, automatically or manually: • If you set up the HP All-in-One to answer calls automatically, it answers all incoming calls and receives faxes. The HP All-in-One - HP CC567A | User Guide - Page 246
view of the HP All-in-One 1 Telephone wall jack 2 Phone cord connected to the 2-EXT port 3 Parallel splitter 4 Telephone (optional) 5 Answering machine 6 Computer with modem 7 Phone cord supplied in the box with the HP All-in-One connected to the 1-LINE port Fax troubleshooting 245 Troubleshooting - HP CC567A | User Guide - Page 247
on the back of the HP All-in-One. 2. Using the phone cord supplied in the box with the HP All-in-One, connect one end to your telephone wall rings. 11. Change the Rings to Answer setting on the HP All-in-One to the maximum number of rings supported by your device. (The maximum number of rings varies - HP CC567A | User Guide - Page 248
. Figure 15-4 Back view of the HP All-in-One 1 Telephone wall jack 2 Phone cord connected to the 2-EXT port 3 Parallel splitter 4 Telephone (optional) 5 Computer with modem 6 Phone cord supplied in the box with the HP All-in-One connected to the 1-LINE port Fax troubleshooting 247 Troubleshooting - HP CC567A | User Guide - Page 249
manually. I hear static on my telephone line since connecting the HP All-in-One Cause: The HP All-in-One HP All-in-One to a working telephone wall jack. Make sure you used the phone cord supplied in the box with the HP All-in-One. Connect the 2-wire phone cord Troubleshooting 248 Troubleshooting - HP CC567A | User Guide - Page 250
-One. Cause: You are using a phone line splitter between the 1-LINE port on the HP Allin-One and the wall. Solution: A phone line splitter can affect the sound quality of your phone line and cause static. (A splitter is a two-cord connector that plugs into a telephone wall jack.) Fax troubleshooting - HP CC567A | User Guide - Page 251
to a power supply, and is connected to your computer. For more information on setting up the HP All-inOne, see the Setup Guide that came with the HP All-in-One. • The HP All-in-One is turned on. If it is not, press the On button to turn on the HP All-in-One. • The ink cartridges are installed - HP CC567A | User Guide - Page 252
on the control panel and then unplug the power cord from the back of the HP All-in-One. After a few seconds, plug the power cord back in and turn the power on. Run the test again. If the test fails again, continue reviewing the troubleshooting information in this section. NOTE: Depending how long - HP CC567A | User Guide - Page 253
. If you can send or receive a fax successfully, there might not be a problem. After you resolve any problems found, run the fax test again to make sure it passes and the HP All-in-One is ready for faxing. Cause: The "Phone Cord Connected to Correct Port on Fax" test failed. Solution: Plug the phone - HP CC567A | User Guide - Page 254
wall jack. One end of the phone cord should be connected to the port labeled 1-LINE on the back of the HP All-in-One and the other end to your telephone wall jack, as shown below. 1 Telephone wall jack 2 Phone cord supplied in the box with the HP All-in-One Fax troubleshooting 253 Troubleshooting - HP CC567A | User Guide - Page 255
fails without the other equipment, connect the HP All-in-One to a working phone line and continue reviewing the troubleshooting information in this section. • If you are using a phone splitter, this can cause faxing problems. (A splitter is a two-cord connector that plugs into a telephone wall jack - HP CC567A | User Guide - Page 256
and rerunning the test each time, until you identify which piece of equipment is causing the problem. • Try connecting a working phone and phone cord to the telephone wall jack that you are using for the HP All-in-One and check for a dial tone. If you do not hear a dial tone, contact your telephone - HP CC567A | User Guide - Page 257
or receiving a fax, a Fax Log report will print. Solution: Review the following table for information on the error codes in the Fax Log report. This information can help you troubleshoot any problems you encounter when using the fax features of the HP All-in-One. The table also indicates which codes - HP CC567A | User Guide - Page 258
are specific to Error Correction Mode (ECM). If the same error appears repeatedly, try turning off ECM. Error code Error definition (223 Error One or more to send a fax. (325-328 Error The receiving fax machine indicated one or more pages might not be Correction Mode) readable. 329-331 332- - HP CC567A | User Guide - Page 259
• Power and connection messages • Ink cartridge messages Device messages The following is a list of device-related error messages: • Automatic document feeder failed to load • Automatic document feeder is jammed • Firmware revision mismatch • Mechanism error • Memory is full Troubleshooting 258 - HP CC567A | User Guide - Page 260
page 171 Cause: The print head assembly is blocked or stalled. Solution: Turn the HP All-in-One off and open the ink cartridge door. Remove any objects that are blocking the print head assembly (including any packing materials), and then turn the HP All-in-One on again. Errors 259 Troubleshooting - HP CC567A | User Guide - Page 261
HP All-in-One and then turn it on again. Restart your computer and then try to scan again. If the problem persists, try plugging the power cord directly into a grounded power outlet rather than a surge protector or power strip. If the problem continues, contact HP Support. Go to www.hp.com/support - HP CC567A | User Guide - Page 262
the top of the paper-width guide. Cause: Two or more pieces problem persists, use photo paper that is not curled. Cause: You might be using the printer in an extremely high- or low-humidity environment. Solution: Load one the accessory from the device. Troubleshooting File messages The following is - HP CC567A | User Guide - Page 263
using the HP Photosmart Software. File supported Cause: The HP All-in-One software did not recognize or support the file format of the image you are trying to open or save. If the file extension indicates it is a supported file type, the file might be corrupted. 262 Troubleshooting Troubleshooting - HP CC567A | User Guide - Page 264
Supported file types for the HP All-in-One The HP All-in-One One or try transferring the files to your computer using a memory card reader or a USB cable. If you already transferred the files to your computer, try printing those files by using the HP Photosmart lost. Troubleshooting General user - HP CC567A | User Guide - Page 265
There are two or more memory cards inserted into the HP All-in-One at the same time. Solution: Remove all but one memory card. The HP All-in-One reads the remaining memory card and displays the first photo stored it in the memory card slot until it stops. 264 Troubleshooting Troubleshooting - HP CC567A | User Guide - Page 266
problems over a USB connection" on page 169 • "Network troubleshooting" on page 183 No scan options Cause: The software that came with the HP All-in-One is not running, or has never been installed. Solution: Make sure the software is installed and running. For more information, see the Setup Guide - HP CC567A | User Guide - Page 267
HP All-in-One. Solution: You can insert only one memory card at a time. If more than one memory card is inserted, the Attention light will blink rapidly, and an error message will appear on the display. Remove the additional memory card to resolve the problem . Troubleshooting 266 Troubleshooting - HP CC567A | User Guide - Page 268
dial failed to connect to a fax machine. Solution: Try dialing the fax number manually. If this works, update the speed dial. If this does not work, contact paper-related error messages: • Cannot load paper from input tray • Ink is drying • Out of paper • Paper jam, misfeed or blocked print head - HP CC567A | User Guide - Page 269
For more information, see: "Load full-size paper" on page 76 Ink is drying Cause: Transparencies and some other media require a drying time that HP All-in-One. Solution: Clear the jam. To continue your print job, press OK on the control panel of the HP All-in-One. 268 Troubleshooting Troubleshooting - HP CC567A | User Guide - Page 270
the display on the HP All-in-One. If the display is blank and the On button is not lit, the HP All-in-One is turned off. Make sure the power cord is firmly connected to the HP All-in-One and plugged into a power outlet. Press the On button to turn on the HP All-in-One. Errors 269 Troubleshooting - HP CC567A | User Guide - Page 271
. Solution: If the HP All-in-One is not properly connected to the computer, communication errors can occur. Make sure the USB cable is securely connected to the HP All-in-One and the computer, as shown below. Troubleshooting For more information, see: "Communication problems over a USB connection - HP CC567A | User Guide - Page 272
USB cable is securely connected to the HP All-in-One and the computer, as shown below. For more information, see: "Communication problems over a USB connection" on page 169 Ink cartridge messages The following is a list of ink cartridge error messages: • Calibration error • Cannot print • Incorrect - HP CC567A | User Guide - Page 273
ink cartridges for the HP All-in-One. To find out the reorder number for all the ink cartridges that the HP All-in-One supports, see the printed documentation that came with the HP All-in-One. For more information, see: "Replace the ink cartridges" on page 159 272 Troubleshooting Troubleshooting - HP CC567A | User Guide - Page 274
for technical support. Ink cartridge problem Cause: The indicated ink cartridge(s) are missing or are damaged. Solution: Replace the indicated ink cartridge(s) immediately so that you can resume printing. If there are no ink cartridges missing from the HP All-in-One, the ink cartridge contacts might - HP CC567A | User Guide - Page 275
see: "Replace the ink cartridges" on page 159 Ink delivery failure Cause: The print head assembly or the ink delivery system has failed and the HP All-in-One can no longer print. Solution: Turn the HP All-in-One off, unplug the power cord, and wait 10 seconds. Then, plug the power cord back in and - HP CC567A | User Guide - Page 276
replacing the ink cartridge, by following the instructions on the HP All-in-One or the ink cartridge expiration message on your computer screen. HP recommends replacing the expired ink cartridges. HP cannot guarantee the quality or reliability of expired ink cartridges. Device service or repairs - HP CC567A | User Guide - Page 277
Chapter 15 HP recommends that you use genuine HP ink cartridges. Genuine HP ink cartridges are designed and tested with HP printers to help you easily produce great results, time after time. NOTE: HP cannot guarantee the quality or reliability of non-HP ink. Printer service or repairs required as a - HP CC567A | User Guide - Page 278
cartridge(s) are installed. Solution: The first time you set up and use the HP All-in-One, make sure to install the ink cartridges that were shipped with your device. The ink in these ink cartridges is specially formulated to mix with the ink in the print head assembly. Errors 277 Troubleshooting - HP CC567A | User Guide - Page 279
ink cartridges missing from the HP All-in-One, the ink cartridge contacts might need to be cleaned. If there are no ink cartridges missing from the HP All-in-One, and you still receive this message after cleaning the ink cartridge contacts, you might have a damaged ink cartridge. Contact HP support - HP CC567A | User Guide - Page 280
• Warranty • Ink cartridge warranty information • Support process • Before you call HP support • HP support by phone • Additional warranty options • HP Quick Exchange Service (Japan) • Call HP Korea customer support • Prepare the HP All-in-One for shipment • Pack the HP All-in-One Warranty For more - HP CC567A | User Guide - Page 281
ink cartridges are installed correctly. c. The recommended paper is properly loaded in the input tray. 2. Reset the HP All-in-One: a. Turn off the HP All-in-One by pressing the On button. b. Unplug the power cord from the back of the HP All-in-One. c. Plug the power cord back into the HP All-in-One - HP CC567A | User Guide - Page 282
also be available at the HP online support Web site: www.hp.com/support. Contact your HP dealer or call the support phone number for your country/region to learn more about support options. Additional warranty options Extended service plans are available for the HP All-in-One at additional costs. Go - HP CC567A | User Guide - Page 283
HP warranty and support Chapter 16 HP Quick Exchange Service (Japan) For instructions on how to pack your device for exchange, see "Pack the HP All-in-One" on page 284. Call HP Korea customer support 282 HP warranty and support - HP CC567A | User Guide - Page 284
the HP All-in-One for shipment If, after contacting HP support or returning to the point of purchase, you are requested to send the HP All-in-One in for service, make sure you remove and keep the following items before returning your device: • The control panel faceplate • The power cord, USB - HP CC567A | User Guide - Page 285
functions on the replacement HP All-in-One. NOTE: See the Setup Guide that came with the HP All-in-One for instructions on how to attach your control panel faceplate. The replacement HP All-in-One might come with instructions for setting up your device. Pack the HP All-in-One Complete the following - HP CC567A | User Guide - Page 286
HP warranty and support If you do not have the original packaging materials, please 3. Include the following items in the box: • A complete description of symptoms for service personnel (samples of print quality problems are helpful). • A copy of the sales slip or other proof of purchase to - HP CC567A | User Guide - Page 287
HP warranty and support Chapter 16 286 HP warranty and support - HP CC567A | User Guide - Page 288
Photo paper * Maximum capacity. † Output tray capacity is affected by the type of paper and the amount of ink you are using. HP recommends emptying the output tray frequently. * Maximum capacity. NOTE: For a complete list of supported media sizes, see the printer driver. Technical information 287 - HP CC567A | User Guide - Page 289
Manual fax send and receive. • Automatic busy redial up to five times (varies by model). • Automatic no-answer redial one time (varies by model the printer resolution, see the printer software. For more information, see "View the print resolution" on page 85. Ink cartridge yield Visit www.hp.com/ - HP CC567A | User Guide - Page 290
Technical information Acoustic information If you have Internet access, you can get acoustic information from the HP Web site. Go to: www.hp.com/support. Duplexer paper specifications Table 17-1 Media weight Type Paper Brochure paper Cards and photos Size Letter: 8.5 x 11 inches Executive: 7.25 x - HP CC567A | User Guide - Page 291
recycle used print cartridges and ink cartridges free of charge. For more information, go to the following Web site: www.hp.com/hpinfo/ Specific information on power consumption may be found in the printed documentation that came with the HP All-in-One. Special handling of materials This HP - HP CC567A | User Guide - Page 292
more information about where you can drop off your waste equipment for recycling, please contact your local city office, your household waste disposal service or the shop where you purchased the product. Évacuation des équipements usagés par les utilisateurs dans les foyers privés au sein de l'Union - HP CC567A | User Guide - Page 293
purposes, your product is assigned a Regulatory Model Number. The Regulatory Model Number for your product is SDGOB-0713. This regulatory number should not be confused with the marketing name (HP Photosmart C7200 All-in-One series, etc.) or product numbers (CC567A, etc.). 292 Technical information - HP CC567A | User Guide - Page 294
and used in accordance with the instructions, may cause harmful interference to is encouraged to try to correct the interference by one or more of the following measures: • Reorient the made to this device that are not expressly approved by HP may void the user's authority to operate the equipment - HP CC567A | User Guide - Page 295
telephone company. An FCC compliant telephone cord and modular plug is provided with your number is called. Too many devices on one line might result in failure to ring in response service. If you experience trouble with this equipment, please contact the manufacturer, or look elsewhere in this manual - HP CC567A | User Guide - Page 296
This equipment meets the applicable Industry Canada Terminal Equipment Technical Specifications. This is confirmed by the registration number. The abbreviation IC their own protection that the electrical ground connections of the power utility, telephone lines and internal metallic water pipe system - HP CC567A | User Guide - Page 297
Company if additional product support is necessary. This equipment dialing. In the unlikely event of problems with loop disconnect dialing, it HP All-in-One enthalten ist, an die Wandsteckdose (TAE 6) Code N an. Dieses HP HP device must be connected to Telecommunication Network through a line cord - HP CC567A | User Guide - Page 298
for users in Japan Notice to users in Japan about power cord Geräuschemission Geräuschemission LpA < 70 dB am Arbeitsplatz im during normal operation is minimized. This product and any attached external antenna, if supported, shall be placed in such a manner to minimize the potential for human - HP CC567A | User Guide - Page 299
CE compliance of this product is valid only if powered with the correct CE-marked AC adapter provided by HP. If this product has telecommunications functionality, it ) that are listed in the EU Declaration of Conformity issued by HP for this product or product family. This compliance is indicated by - HP CC567A | User Guide - Page 300
) The Declaration of Conformity in this document complies with ISO/IEC 17050-1 and EN 17050-1. It identifies the product, manufacturer's name and address, and applicable specifications recognized in the European community. Declaration of conformity (European Economic Area) 299 - HP CC567A | User Guide - Page 301
Technical information Chapter 17 HP Photosmart C7200 All-in-One series declaration of Model: Regulatory Model Number:1) Product Options: Radio Module: HP Photosmart C7200 Series (CC564A) SDGOB-0713 ALL RSVLD-0608 Power Adapter: 0957-2230 conforms to the following Product Specifications - HP CC567A | User Guide - Page 302
122 load 78 specifications 287 2 pages support period 281 align printer 161 answer ring pattern 63 answering machine fax tones recorded 236 set up with fax 242 authentication type 58 automatic document feeder clean 173, 191 feeding problems, troubleshoot HP All-in- One cartridges. See ink cartridges - HP CC567A | User Guide - Page 303
216 troubleshooting 215 correct port test, fax 252 country/region, set 25 credit card, fax using 133, 134 crop borderless copy is wrong 218 fails 264 crop an original 128 crop photos 109 customer support HP Quick Exchange Service (Japan) 282 Korea 282 warranty 279, 281 D damaged, ink cartridge 273 - HP CC567A | User Guide - Page 304
219, 225, 226, 230 slow transmission 230 smeared ink 190 static on phone line 248 text cut off 229, 241 troubleshoot 219 FCC statement 293 file invalid name 263 supported formats 263 unreadable 262 unsupported formats 262 firmware revision mismatch 259 firmware version 54 fit to page 127 fit to - HP CC567A | User Guide - Page 305
M MAC address 54, 56 maintenance align printer 161 check ink levels 157 clean exterior 157 clean glass 155 clean lid backing 157 clean print head 162 replace ink cartridges 159 restore factory defaults 28 self-test report 149 set FEMP mode 165 make a copy 121 manual receive, fax 140 send, fax 133 - HP CC567A | User Guide - Page 306
199, 228 reverse images 96 reversed page order 205 self-test report 149 special print jobs 90 specifications 288 transparencies 96 troubleshooting 200 vertical streaks 197 Web pages 98 print cartridges low ink 207 print head clean 162 failure 276 stalled 276 print head, blocked 178 print quality 86 - HP CC567A | User Guide - Page 307
save to memory card 117 save to storage device 117 scan specifications 288 send using HP Photosmart Share 119 share images 119 stop 119 text appears as dotted lines 214 text format incorrect 214 text incorrect 214 to memory card 117 troubleshooting 212 scan glass clean 155 load original 72 scan to - HP CC567A | User Guide - Page 308
59 transmitted 59 total packets received (802.3 wired) 56 total packets transmitted (802.3 wired) 55 transparencies copy 123 load 81 specifications 287 troubleshoot blocked print head 178 fax problems 190, 191, 199, 219, 225, 226, 228, 229, 230, 231, 235, 236, 238, 240, 241, 248, 256 hardware - HP CC567A | User Guide - Page 309
Z zoom button 13 buttons 109 photos 109 308 Index
-
 1
1 -
 2
2 -
 3
3 -
 4
4 -
 5
5 -
 6
6 -
 7
7 -
8
-
9
-
10
-
11
-
12
-
13
-
14
-
15
-
16
-
17
-
18
-
19
-
20
-
21
-
22
-
23
-
24
-
25
-
26
-
27
-
28
-
29
-
30
-
31
-
32
-
33
-
34
-
35
-
36
-
37
-
38
-
39
-
40
-
41
-
42
-
43
-
44
-
45
-
46
-
47
-
48
-
49
-
50
-
51
-
52
-
53
-
54
-
55
-
56
-
57
-
58
-
59
-
60
-
61
-
62
-
63
-
64
-
65
-
66
-
67
-
68
-
69
-
70
-
71
-
72
-
73
-
74
-
75
-
76
-
77
-
78
-
79
-
80
-
81
-
82
-
83
-
84
-
85
-
86
-
87
-
88
-
89
-
90
-
91
-
92
-
93
-
94
-
95
-
96
-
97
-
98
-
99
-
100
-
101
-
102
-
103
-
104
-
105
-
106
-
107
-
108
-
109
-
110
-
111
-
112
-
113
-
114
-
115
-
116
-
117
-
118
-
119
-
120
-
121
-
122
-
123
-
124
-
125
-
126
-
127
-
128
-
129
-
130
-
131
-
132
-
133
-
134
-
135
-
136
-
137
-
138
-
139
-
140
-
141
-
142
-
143
-
144
-
145
-
146
-
147
-
148
-
149
-
150
-
151
-
152
-
153
-
154
-
155
-
156
-
157
-
158
-
159
-
160
-
161
-
162
-
163
-
164
-
165
-
166
-
167
-
168
-
169
-
170
-
171
-
172
-
173
-
174
-
175
-
176
-
177
-
178
-
179
-
180
-
181
-
182
-
183
-
184
-
185
-
186
-
187
-
188
-
189
-
190
-
191
-
192
-
193
-
194
-
195
-
196
-
197
-
198
-
199
-
200
-
201
-
202
-
203
-
204
-
205
-
206
-
207
-
208
-
209
-
210
-
211
-
212
-
213
-
214
-
215
-
216
-
217
-
218
-
219
-
220
-
221
-
222
-
223
-
224
-
225
-
226
-
227
-
228
-
229
-
230
-
231
-
232
-
233
-
234
-
235
-
236
-
237
-
238
-
239
-
240
-
241
-
242
-
243
-
244
-
245
-
246
-
247
-
248
-
249
-
250
-
251
-
252
-
253
-
254
-
255
-
256
-
257
-
258
-
259
-
260
-
261
-
262
-
263
-
264
-
265
-
266
-
267
-
268
-
269
-
270
-
271
-
272
-
273
-
274
-
275
-
276
-
277
-
278
-
279
-
280
-
281
-
282
-
283
-
284
-
285
-
286
-
287
-
288
-
289
-
290
-
291
-
292
-
293
-
294
-
295
-
296
-
297
-
298
-
299
-
300
-
301
-
302
-
303
-
304
-
305
-
306
-
307
-
308
-
309
 |
 |
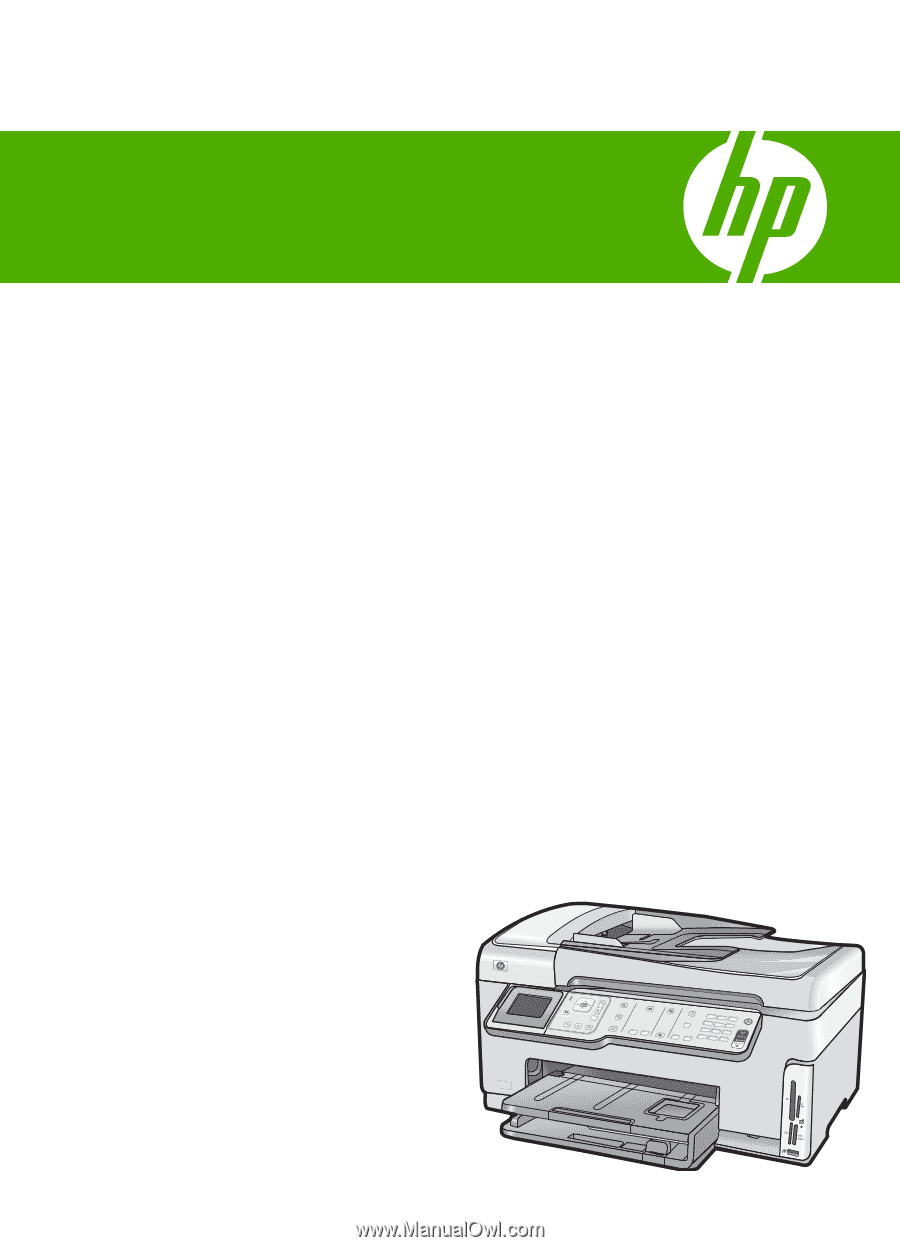
HP Photosmart C7200 All-in-One series
Windows Help