HP CM2320fxi HP Color LaserJet CM2320 MFP - Scan Tasks
HP CM2320fxi - Color LaserJet Laser Manual
 |
UPC - 883585420667
View all HP CM2320fxi manuals
Add to My Manuals
Save this manual to your list of manuals |
HP CM2320fxi manual content summary:
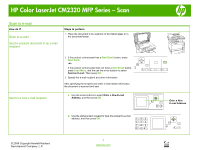
- HP CM2320fxi | HP Color LaserJet CM2320 MFP - Scan Tasks - Page 1
all three destinations 5 Click Update. 1 Click Start, click Programs (or All Programs in Windows XP), click HP, click the product, click Scan, and then click Settings. 2 Select Create a new destination with settings that I specify. © 2008 Copyright Hewlett-Packard Development Company, L.P. 1 www - HP CM2320fxi | HP Color LaserJet CM2320 MFP - Scan Tasks - Page 2
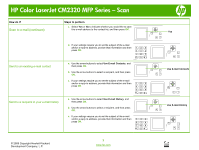
HP Color LaserJet CM2320 MFP Series - Scan How do I? Add destinations (continued) Delete destinations Steps to perform 3 Do one of the following: • For folders, select Save it to my computer, and choose another destination. © 2008 Copyright Hewlett-Packard Development Company, L.P. 2 www.hp.com - HP CM2320fxi | HP Color LaserJet CM2320 MFP - Scan Tasks - Page 3
HP Color LaserJet CM2320 MFP Series - Scan Scan from the PC How do I? Scan from the PC Steps to perform 1 In the HP program group, select Scan to start HP LaserJet Scan. NOTE: Pressing Start Scan on the product control panel also starts HP LaserJet Scan. 2 Choose the action that you want to - HP CM2320fxi | HP Color LaserJet CM2320 MFP - Scan Tasks - Page 4
Color LaserJet CM2320 MFP Series - Scan Send my scan to a folder How do I? Steps to perform Scan to a file or software program 1 Load the originals that are to be scanned face-up in the automatic document feeder (ADF) input tray, with the top of the document forward, and adjust the media guides - HP CM2320fxi | HP Color LaserJet CM2320 MFP - Scan Tasks - Page 5
HP Color LaserJet CM2320 MFP Series - Scan Scan to e-mail How do I? Scan to e-mail Send a scanned document to an e-mail recipient Steps to perform 1 Place the document to be scanned on the flatbed glass or in the document feeder. Send to a new e-mail recipient 2 If the product control panel has - HP CM2320fxi | HP Color LaserJet CM2320 MFP - Scan Tasks - Page 6
HP Color LaserJet CM2320 MFP Series - Scan How do I? Scan to e-mail (continued) Steps to perform c. Select Yes or , provide that information and then press OK. .. © 2008 Copyright Hewlett-Packard Development Company, L.P. 2 www.hp.com Yes ? ? Use E-mail Contacts ? ? Use E-mail History ? ? - HP CM2320fxi | HP Color LaserJet CM2320 MFP - Scan Tasks - Page 7
HP Color LaserJet CM2320 MFP Series - Scan Make my scan look better How do I? Clean the scanner glass Steps to perform 1 Turn off the product, unplug the power cord from the electrical socket a chamois or cellulose sponge. © 2008 Copyright Hewlett-Packard Development Company, L.P. 1 www.hp.com - HP CM2320fxi | HP Color LaserJet CM2320 MFP - Scan Tasks - Page 8
HP Color LaserJet CM2320 MFP Series - Scan Configure scan-to-e-mail How do I? Steps to perform Configure scan-to-e-mail 1 If the product control panel has an Email Menu button, press Email Menu. -or- Before the scan-to-e-mail features can be used, you must specify the SMTP gateway, SMTP port, - HP CM2320fxi | HP Color LaserJet CM2320 MFP - Scan Tasks - Page 9
HP Color LaserJet CM2320 MFP Series - Scan How do I? Configure scan-to-e-mail (continued) Steps to perform 7 Select Yes or No to indicate whether sent. 9 Press OK to complete the e-mail configuration process. Yes ? Yes ? ? © 2008 Copyright Hewlett-Packard Development Company, L.P. 2 www.hp.com
-
 1
1 -
 2
2 -
 3
3 -
 4
4 -
 5
5 -
 6
6 -
 7
7 -
8
-
9
 |
 |
HP Color LaserJet CM2320 MFP Series – Scan
© 2008 Copyright Hewlett-Packard
Development Company, L.P.
1
www.hp.com
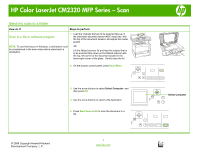
Select scan properties
How do I?
Steps to perform
Set up destinations on the product
1
Click
Start
, click
Programs
(or
All Programs
in
Windows XP), click
HP
, click the product, click
Scan
,
and then click
Settings
.
2
Select
Change the destinations that show up on the
all-in-one control panel
.
3
The product is pre-configured with the following three
destinations in the dialog box.
○
Scan a document and attach it to an e-mail
○
Scan a photo and attach it to an e-mail
○
Scan a photo and save it as a file
4
Highlight a destination and click the arrow to move to the
destinations currently on the dialog box. Repeat for all
three destinations
5
Click
Update
.
Add destinations
1
Click
Start
, click
Programs
(or
All Programs
in
Windows XP), click
HP
, click the product, click
Scan
,
and then click
Settings
.
2
Select
Create a new destination with settings that I
specify
.