HP CM3530 HP Color LaserJet CM3530 MFP Series - Analog Fax Accessory 500 Fax G - Page 22
Send fax settings, Set the dial tone detection, Set the overlay header (outgoing faxes)
 |
UPC - 884420196501
View all HP CM3530 manuals
Add to My Manuals
Save this manual to your list of manuals |
Page 22 highlights
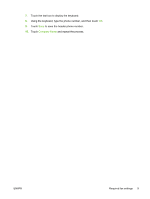
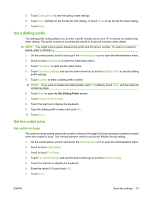
Send fax settings Set the dial tone detection The detect dial tone setting determines whether the fax checks for a dial tone before sending a fax. 1. On the control panel, scroll to and touch the Administration icon to open the Administration menu. 2. Scroll to touch Initial Setup to open the initial setup menu. 3. Touch Fax Setup to open the fax setup menu. 4. Touch Fax Send Settings and use the down arrow key to scroll to Detect Dial Tone. 5. Touch Enabled (default) to enable dial tone detection, or touch Disabled to disable dial tone detection. Set the overlay header (outgoing faxes) The overlay header consists of the date, time, company name, phone number, and page number and is printed at the top of the page on outgoing faxes. This setting determines whether the header is appended to the top of the page or is printed as an overlay. If the header is appended to the top of a page, it moves page data down which can result in data at the bottom of a page being pushed to another page, possibly printing an additional page. If the header is printed as an overlay, it does not push any page data, but might print over data at the top of the page. NOTE: When fax forwarding is enabled, the overlay header is always appended to the top of the page, even if overlay is enabled. 1. On the control panel, touch the Administration icon to open the Administration menu. 2. Scroll to and touch Default Job Options 3. Scroll to and touch Default Fax Options. 4. Scroll to and touch Send Fax. 5. Touch Fax Header to see the header settings. 6. Touch Overlay to print the header as an overlay, or touch Prepend (default) to append the header to the top of the page. 7. Touch Save. Set the dialing mode The dialing mode setting sets the type of dialing that is used: either tone (touch-tone phones) or pulse (rotary-dial phones). To set the dialing mode, perform the following steps. 1. On the control panel, scroll to and touch the Administration icon to open the Administration menu. 2. Scroll to touch Initial Setup to open the initial setup menu. 3. Touch Fax Setup to open the fax setup menu. 4. Touch Fax Send Settings and use the down arrow key to scroll to Dialing Mode. 14 Chapter 2 Set fax settings ENWW
-
 1
1 -
2
-
3
-
4
-
5
-
6
-
7
-
8
-
9
-
10
-
11
-
12
-
13
-
14
-
15
-
16
-
 17
17 -
 18
18 -
 19
19 -
 20
20 -
 21
21 -
 22
22 -
 23
23 -
 24
24 -
 25
25 -
 26
26 -
 27
27 -
28
-
29
-
30
-
31
-
32
-
33
-
34
-
35
-
36
-
37
-
38
-
39
-
40
-
41
-
42
-
43
-
44
-
45
-
46
-
47
-
48
-
49
-
50
-
51
-
52
-
53
-
54
-
55
-
56
-
57
-
58
-
59
-
60
-
61
-
62
-
63
-
64
-
65
-
66
-
67
-
68
-
69
-
70
-
71
-
72
-
73
-
74
-
75
-
76
-
77
-
78
-
79
-
80
-
81
-
82
-
83
-
84
-
85
-
86
-
87
-
88
-
89
-
90
-
91
-
92
-
93
-
94
-
95
-
96
 |
 |