HP CN216A User Guide
HP CN216A Manual
 |
View all HP CN216A manuals
Add to My Manuals
Save this manual to your list of manuals |
HP CN216A manual content summary:
- HP CN216A | User Guide - Page 1
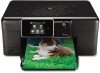
HP Photosmart Plus e-All-in-One B210 series - HP CN216A | User Guide - Page 2
- HP CN216A | User Guide - Page 3
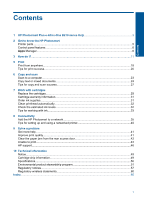
Contents Contents 1 HP Photosmart Plus e-All-in-One B210 series Help 3 2 Get to know the HP Photosmart Printer parts...5 Control panel features...8 Apps Manager...8 3 How do I?...11 5 Print Print from anywhere...19 Tips for print success...20 6 Copy and scan Scan to a computer... - HP CN216A | User Guide - Page 4
2 Contents - HP CN216A | User Guide - Page 5
• "Print" on page 17 • "Copy and scan" on page 23 • "Work with cartridges" on page 29 • "Connectivity" on page 35 • "Technical information" on page 49 • "HP support" on page 46 HP Photosmart Plus e-All-in-One B210 series Help HP Photosmart Plus e-All-in-One B210 series Help 3 - HP CN216A | User Guide - Page 6
Chapter 1 HP Photosmart Plus e-All-in-One B210 series Help 4 HP Photosmart Plus e-All-in-One B210 series Help - HP CN216A | User Guide - Page 7
2 Get to know the HP Photosmart • Printer parts • Control panel features • Apps Manager Printer parts • Front view of the HP Photosmart Get to know the HP Photosmart Get to know the HP Photosmart 5 - HP CN216A | User Guide - Page 8
the tray extender) 8 Paper-width guide for the photo tray 9 Photo tray 10 Wireless LED 11 On button 12 Lid Backing 13 Cartridge door 14 Paper-width guide for the main tray 15 Main tray (also referred to as the input tray) • Top and rear views of the HP Photosmart 6 Get to know the - HP CN216A | User Guide - Page 9
16 17 18 19 20 21 16 Printhead assembly 17 Cartridge access area 18 Model number location 19 Rear USB port 20 Power connection (Use only with the power adapter supplied by HP.) 21 Rear door Get to know the HP Photosmart Printer parts 7 - HP CN216A | User Guide - Page 10
you can change the wireless settings. 13 HP ePrint: Opens the HP ePrint menu where you can turn the service on or off, display the printer email address, and print an information page. Apps Manager The Apps Manager can be used to add new Apps or to remove Apps. 8 Get to know the HP Photosmart - HP CN216A | User Guide - Page 11
Manage Apps ▲ Add new Apps. a. Touch Apps on the home screen. b. Press the directional keys to scroll to the More menu option. Press OK. Check desired Apps.Press OK. Follow prompts. Get to know the HP Photosmart Apps Manager 9 - HP CN216A | User Guide - Page 12
Chapter 2 Get to know the HP Photosmart 10 Get to know the HP Photosmart - HP CN216A | User Guide - Page 13
3 How do I? This section contains links to commonly performed tasks, such as printing photos, scanning, and making copies. "Apps Manager" on page 8 "Replace the cartridges" on page 29 "Load media" on page 13 "Scan to a computer" on page 23 "Copy text or mixed documents" on page 24 "Clear the - HP CN216A | User Guide - Page 14
Chapter 3 How do I? 12 How do I? - HP CN216A | User Guide - Page 15
Paper basics 4 Paper basics Load media ▲ Do one of the following: Load 10 x 15 cm (4 x 6 inch) paper a. Raise photo tray lid. Raise photo tray lid and slide paper-width guide outwards. b. Load paper. Insert stack of photo paper into photo tray with short edge forward and print side down. Slide - HP CN216A | User Guide - Page 16
4 c. Lower photo tray lid. Load A4 or 8.5 x 11 inch paper a. Raise output tray. Raise and hold output tray in open position. Slide paper-width guide outwards. Remove all paper from the main input tray. b. Load paper. Insert stack of paper into main input tray with short edge forward and print - HP CN216A | User Guide - Page 17
catch closed. Load envelopes a. Raise output tray. Raise and hold output tray in open position. Slide paper-width guide outwards. Remove all paper from the main input tray. b. Load envelopes. Insert one or more envelopes into far-right side of main input tray, with envelope flaps on left and facing - HP CN216A | User Guide - Page 18
Paper basics Chapter 4 Slide stack of envelopes forward until it stops. Slide paper-width guide inward against stack of envelopes until it stops. c. Lower output tray. 16 Paper basics - HP CN216A | User Guide - Page 19
handled by the software application. You need to change the settings manually only when you change print quality, print on specific types of your software application, click Print. 3. Make sure the product is the selected printer. 4. If you need to change settings, click the button that opens the - HP CN216A | User Guide - Page 20
options for your print job by choosing one of the predefined print tasks on the paper in the main input tray. 2. Slide the paper-width guide inward until it stops at the edge of the paper. 3. button might be called Properties, Options, Printer Setup, Printer, or Preferences. 6. Click the Features - HP CN216A | User Guide - Page 21
you can use the Maximum dpi setting with supported types of photo paper. If Maximum dpi HP Photosmart, you can print on a single envelope, a group of envelopes, or label sheets designed for inkjet printers the paper-width guide inward against the stack of labels or envelopes until the guide stops. 5. - HP CN216A | User Guide - Page 22
instruction in the Tools menu on the display. Alternatively, you can check the ink levels in Printer Toolbox from the software. • Load a stack of paper, not just one page. Use clean and flat paper of the same size. Make sure only one type of paper is loaded at a time. • Adjust the paper-width guide - HP CN216A | User Guide - Page 23
HP ePrint and restrict who can email your printer. To print the email address or registration url, touch Print Info Sheet on the Web Services reset the email address, touch the Web Service icon on Home screen. Touch Reset Email Address. • HP ePrint supports the following file types as attachments: ◦ - HP CN216A | User Guide - Page 24
Chapter 5 Print 22 Print - HP CN216A | User Guide - Page 25
6 Copy and scan • Scan to a computer • Copy text or mixed documents • Tips for copy and scan success Scan to a computer To scan to a computer 1. Load original. a. Lift lid on product. b. Load original print side down on right front corner of glass. Copy and scan Copy and scan 23 - HP CN216A | User Guide - Page 26
shortcut you want to use. 4. Touch Start Scan. Related topics "Tips for copy and scan success" on page 27 Copy text or mixed documents ▲ Do one of the following: Make a black and white copy a. Load paper. Load full-size paper in main input tray. b. Load original. Lift lid on product. Copy - HP CN216A | User Guide - Page 27
TIP: To make copies of thick originals, such as books, you can remove the lid. Load original print side down on right front corner of glass. Copy and scan Close lid. c. Select Copy. Touch Copy on Home screen. The Copy menu appears. Touch up arrow to increase number of copies. Touch Settings. The - HP CN216A | User Guide - Page 28
Chapter 6 TIP: To make copies of thick originals, such as books, you can remove the lid. Load original print side down on right front corner of glass. Copy and scan Close lid. c. Select Copy. Touch Copy on Home screen. The Copy menu appears. Touch up arrow to increase number of copies. Touch - HP CN216A | User Guide - Page 29
Use the following tips to copy and scan successfully: • Learn how to scan when your printer is on a wireless network and not nearby your computer. Click here to go online for autocropping feature in the software and crop the scanned image manually. Copy and scan Tips for copy and scan success 27 - HP CN216A | User Guide - Page 30
Chapter 6 Copy and scan 28 Copy and scan - HP CN216A | User Guide - Page 31
7 Work with cartridges • Replace the cartridges • Cartridge warranty information • Order ink supplies • Clean printhead automatically • Check the estimated ink levels • Tips for working with ink Replace the cartridges To replace the cartridges 1. Check that power is on. 2. Remove cartridge. a. Open - HP CN216A | User Guide - Page 32
Chapter 7 b. Twist orange cap to snap it off. A forceful twist may be required to remove cap. c. Match color icons, then slide cartridge into slot until it clicks into place. d. Close cartridge door. 30 Work with cartridges Work with cartridges - HP CN216A | User Guide - Page 33
the printed documentation that came with the product. Order ink supplies To order genuine HP supplies for the HP Photosmart, go to www.hp.com/buy/supplies. If prompted, choose your country/region, follow the prompts to select your product, and then click one of the shopping links on the page. Order - HP CN216A | User Guide - Page 34
supported in your country/region, contact a local HP reseller for information about purchasing cartridges. Clean printhead automatically To clean the printhead from the printer Estimated Ink Levels. The HP Photosmart displays a gauge that shows the estimated ink levels of all cartridges installed. - HP CN216A | User Guide - Page 35
the ink levels from the Printer Software 1. Click the HP Photosmart desktop icon to open the Printer Software. NOTE: You can also access the Printer Software by clicking Start > Programs > HP > HP Photosmart Plus B210 > HP Photosmart Plus B210 2. In the Printer Software, click Estimated Ink Levels - HP CN216A | User Guide - Page 36
Chapter 7 Work with cartridges 34 Work with cartridges - HP CN216A | User Guide - Page 37
up and using a networked printer Add the HP Photosmart to a network • "WiFi support, or a network interface card (NIC). The computer must be connected to the wireless network that you intend to install the HP Photosmart on. To connect the HP Photosmart using WiFi Protected Setup (WPS) ▲ Do one - HP CN216A | User Guide - Page 38
router or access point. A desktop computer or laptop with either wireless networking support, or a network interface card (NIC). The computer must be connected to the wireless network that you intend to install the HP Photosmart on. Broadband Internet access (recommended) such as cable or DSL. If - HP CN216A | User Guide - Page 39
There are two methods you can use to connect the HP Photosmart to your computer using an ad hoc wireless network connection. Once connected, you can install the HP Photosmart software. Turn on the wireless radio for the HP Photosmart and the wireless radio on your computer. On your computer - HP CN216A | User Guide - Page 40
a network profile (Windows Vista) NOTE: The product comes configured with a network profile with hp (product model).(6-digit unique identifier) as the network name (SSID). However, for security and privacy HP recommends you create a new network profile on your computer as described here. 1. In the - HP CN216A | User Guide - Page 41
sure you have connected the HP Photosmart to a network. If the HP Photosmart has not been connected to a network, follow the onscreen instructions during the software installation to connect the product to the network. To install the Windows HP Photosmart Software on a networked computer 1. Quit - HP CN216A | User Guide - Page 42
and this is a first time install of the HP Photosmart, you will be prompted to connect the USB cable after the network search is performed. 5. On the Printer Found screen, verify that the printer description is correct and then select it. If more than one printer is found on the network, the - HP CN216A | User Guide - Page 43
9 Solve a problem This section contains the following topics: • Get more help • Improve print quality • Clear the paper jam from the rear access door • Unable to print • HP support Get more help You can find more information and help about your HP Photosmart by entering a keyword in the Search - HP CN216A | User Guide - Page 44
Actions and then click Maintenance Tasks to access the Printer Toolbox. c. Click Clean Ink Cartridges. Follow the onscreen instructions. If the above solutions do not resolve the problem, click here for more online troubleshooting. Clear the paper jam from the rear access door To clear a paper - HP CN216A | User Guide - Page 45
a problem 5. Turn on product. 6. Try printing again. Unable to print Make sure that the printer is is not paused or offline NOTE: HP provides a Printer Diagnostic Utility that can automatically fix this do one of the following: • Windows 7: From the Windows Start menu, click Devices and Printers. - HP CN216A | User Guide - Page 46
Solve a problem Chapter 9 4. Verify that the product is set as the default printer. To verify that the product is set as the default printer NOTE: HP provides a Printer Diagnostic Utility that can automatically fix this issue. Click here to go online for more information. Otherwise, follow the - HP CN216A | User Guide - Page 47
service. b. Make sure the correct product is set as the default printer. The default printer has a check mark in a black or green circle next to it. c. If the wrong product is set as the default printer NOTE: HP provides a Printer Diagnostic the problem, click here for more online troubleshooting. - HP CN216A | User Guide - Page 48
Africa, go to www.hp.com/support. Standard phone company charges apply. Placing a call Call HP support while you are in front of the computer and the product. Be prepared to provide the following information: • Product name (HP Photosmart Plus e-All-in-One B210 series) • Serial number (located on - HP CN216A | User Guide - Page 49
warranty options Extended service plans are available for the HP Photosmart at additional costs. Go to www.hp.com/support, select your country/region and language, then explore the services and warranty area for information about the extended service plans. Solve a problem HP support 47 - HP CN216A | User Guide - Page 50
Chapter 9 Solve a problem 48 Solve a problem - HP CN216A | User Guide - Page 51
the HP Photosmart. This HP products and services are set forth in the express warranty statements accompanying such products and services. Nothing herein should be construed as constituting an additional warranty. HP the date when the cartridge was first installed, the date when the cartridge was - HP CN216A | User Guide - Page 52
's usage information. Technical information Specifications Technical specifications for the HP Photosmart are provided in this section. For complete product specifications, see the Product Data Sheet at www.hp.com/support. System requirements Software and system requirements are located in the - HP CN216A | User Guide - Page 53
NOTE: For a complete list of supported media sizes, see the printer driver. Print specifications • Print speeds vary according to Plastics • Material safety data sheets • Power consumption • Recycling program • HP inkjet supplies recycling program • Disposal of waste equipment by users in private - HP CN216A | User Guide - Page 54
purposes at the end of product life. Material safety data sheets Material safety data sheets (MSDS) can be obtained from the HP Web site at: www.hp.com/go/msds Power consumption Hewlett-Packard printing and imaging equipment marked with the ENERGY STAR® logo is qualified to the U.S. Environmental - HP CN216A | User Guide - Page 55
is available in many countries/regions, and lets you recycle used print cartridges and ink cartridges free of charge. For more information, go to the following Web site: www.hp.com/hpinfo/globalcitizenship/environment/recycle/ Technical information Environmental product stewardship program 53 - HP CN216A | User Guide - Page 56
de l'environnement. Pour plus d'informations sur les lieux de collecte des équipements usagés, veuillez contacter votre mairie, votre service de traitement des dé ina Português Polski Lietuviškai Latviski Magyar Chemical Substances HP is committed to providing our customers with information about - HP CN216A | User Guide - Page 57
Toxic and hazardous substance table Technical information Battery disposal in the Netherlands Dit HP Product bevat een lithium-manganese-dioxide batterij. Deze bevindt zich op de hoofdprintplaat. Wanneer deze batterij leeg is, moet deze volgens de geldende regels worden - HP CN216A | User Guide - Page 58
real time clock or product settings and is designed to last the life of the product. Any attempt to service or replace this battery should be performed by a qualified service technician. Directive sur les batteries de l'Union Européenne Ce produit contient une batterie qui permet de maintenir l'int - HP CN216A | User Guide - Page 59
power cord • Notice to users in Korea • Notice to users in Germany • Noise emission statement for Germany • HP Photosmart Plus e-All-in-One B210 series declaration of conformity Regulatory model identification number For regulatory identification purposes, your product is assigned a Regulatory Model - HP CN216A | User Guide - Page 60
installation. This equipment generates, uses and can radiate radio frequency energy and, if not installed and used in accordance with the instructions or modifications made to this device that are not expressly approved by HP may void the user's authority to operate the equipment. This device - HP CN216A | User Guide - Page 61
Notice to users in Japan about the power cord Notice to users in Korea Notice to users in Germany Sehanzeige-Arbeitsplätze Das Gerät ist nicht für die Benutzung am Bildschirmarbeitsplatz gemäß BildscharbV vorgesehen. Noise emission statement for Germany Geräuschemission LpA < 70 dB am Arbeitsplatz - HP CN216A | User Guide - Page 62
-01-RevA Hewlett-Packard Company 138 Depot Road, #02-01, Singapore 109683 declares, that the product Product Name and Model: HP Photosmart Plus All-in-One Series - B210 Regulatory Model Number: 1) SNPRB-1001-01 Product Options: All Radio Module: RSVLD-0707 (802.11g /b) Power Adapter: 0957 - HP CN216A | User Guide - Page 63
be used in such a manner that the potential for human contact during normal operation is minimized. This product and any attached external antenna, if supported, shall be placed in such a manner to minimize the potential for human contact during normal operation. In order to avoid the possibility of - HP CN216A | User Guide - Page 64
• EMC Directive 2004/108/EC CE compliance of this product is valid only if powered with the correct CE-marked AC adapter provided by HP. If this product has telecommunications functionality, it also complies with the essential requirements of the following EU Directive: • R&TTE Directive 1999/5/EC - HP CN216A | User Guide - Page 65
Notice to users in Taiwan Technical information Regulatory wireless statements 63 - HP CN216A | User Guide - Page 66
Chapter 10 Technical information 64 Technical information - HP CN216A | User Guide - Page 67
phone support 46 phone support period period for support 46 photo paper specifications 50 print specifications 51 R recycle ink cartridges 53 regulatory notices regulatory model identification number 57 wireless statements 60 S scan scan specifications 51 security network, WEP key 39 troubleshoot 39 - HP CN216A | User Guide - Page 68
66 Index
-
 1
1 -
 2
2 -
 3
3 -
 4
4 -
 5
5 -
 6
6 -
 7
7 -
8
-
9
-
10
-
11
-
12
-
13
-
14
-
15
-
16
-
17
-
18
-
19
-
20
-
21
-
22
-
23
-
24
-
25
-
26
-
27
-
28
-
29
-
30
-
31
-
32
-
33
-
34
-
35
-
36
-
37
-
38
-
39
-
40
-
41
-
42
-
43
-
44
-
45
-
46
-
47
-
48
-
49
-
50
-
51
-
52
-
53
-
54
-
55
-
56
-
57
-
58
-
59
-
60
-
61
-
62
-
63
-
64
-
65
-
66
-
67
-
68
 |
 |

HP Photosmart Plus e-All-in-One
B210 series