HP CP1518ni HP Color LaserJet CP1510 Series - Software Technical Reference - Page 161
General Windows installation instructions for network-connected computers
 |
UPC - 883585140633
View all HP CP1518ni manuals
Add to My Manuals
Save this manual to your list of manuals |
Page 161 highlights
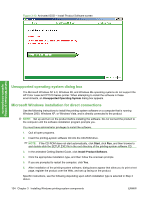
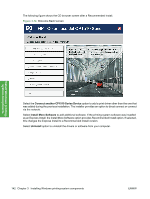
Install Windows printingsystem components To print a configuration page, do the following: a. Press OK to open the menus. b. Press the Left arrow or Right arrow to navigate to Main menu/Reports. Press OK. c. Press the Left arrow or Right arrow to navigate to Reports/Config report. Press OK. The configuration page prints. 4. Install the printing-system software. Use the information from the configuration pages to specify the network variables during installation. General Windows installation instructions for network-connected computers NOTE: Complete the network setup before completing this procedure. Use the following instructions to install the printing-system software on a computer that is running Windows 2000, Windows XP, or Windows Vista, and is connected to the product through a network. NOTE: You must have administrator privileges to install the software. 1. Quit all open programs. 2. Insert the printing-system software CD into the CD-ROM drive. NOTE: If the CD-ROM does not start automatically, click Start, click Run, and then browse to and double-click the SETUP.EXE file in the root directory of the CD. 3. In the animated Getting Started Guide, click Install Product Software. 4. Click the appropriate installation type and follow the onscreen prompts. 5. When the installer software prompts you to select how the product will be connected, select Through the network., and then click Next. Follow the onscreen instructions. 6. If you are prompted to restart the computer, click Yes. 7. After installation of the printing-system software, a test page prints, and dialog boxes appear that allow you to register the product over the Web and set up faxing. Specific instructions, see the following depending upon which installation type is selected in Step 3 above. ● Recommended Install - Easy Install option ● Recommended Install - Advanced Install opton ● Express Install - Express Network Install option Recommended Install - Easy Install option 1. Close all programs. 2. Insert the printing-system software CD into the CD-ROM drive. 3. In the animated Getting Started Guide, click Install Product Software. 4. On the Select Install to begin installing your new HP device window, click Recommended Install. ENWW Microsoft Windows general installation overview 137
-
 1
1 -
2
-
3
-
4
-
5
-
6
-
7
-
8
-
9
-
10
-
11
-
12
-
13
-
14
-
15
-
16
-
17
-
18
-
19
-
20
-
21
-
22
-
23
-
24
-
25
-
26
-
27
-
28
-
29
-
30
-
31
-
32
-
33
-
34
-
35
-
36
-
37
-
38
-
39
-
40
-
41
-
42
-
43
-
44
-
45
-
46
-
47
-
48
-
49
-
50
-
51
-
52
-
53
-
54
-
55
-
56
-
57
-
58
-
59
-
60
-
61
-
62
-
63
-
64
-
65
-
66
-
67
-
68
-
69
-
70
-
71
-
72
-
73
-
74
-
75
-
76
-
77
-
78
-
79
-
80
-
81
-
82
-
83
-
84
-
85
-
86
-
87
-
88
-
89
-
90
-
91
-
92
-
93
-
94
-
95
-
96
-
97
-
98
-
99
-
100
-
101
-
102
-
103
-
104
-
105
-
106
-
107
-
108
-
109
-
110
-
111
-
112
-
113
-
114
-
115
-
116
-
117
-
118
-
119
-
120
-
121
-
122
-
123
-
124
-
125
-
126
-
127
-
128
-
129
-
130
-
131
-
132
-
133
-
134
-
135
-
136
-
137
-
138
-
139
-
140
-
141
-
142
-
143
-
144
-
145
-
146
-
147
-
148
-
149
-
150
-
151
-
152
-
153
-
154
-
155
-
 156
156 -
 157
157 -
 158
158 -
 159
159 -
 160
160 -
 161
161 -
 162
162 -
 163
163 -
 164
164 -
 165
165 -
 166
166 -
167
-
168
-
169
-
170
-
171
-
172
-
173
-
174
-
175
-
176
-
177
-
178
-
179
-
180
-
181
-
182
-
183
-
184
-
185
-
186
-
187
-
188
-
189
-
190
-
191
-
192
-
193
-
194
-
195
-
196
-
197
-
198
-
199
-
200
-
201
-
202
-
203
-
204
-
205
-
206
-
207
-
208
-
209
-
210
-
211
-
212
-
213
-
214
-
215
-
216
-
217
-
218
-
219
-
220
-
221
-
222
-
223
-
224
-
225
-
226
-
227
-
228
-
229
-
230
-
231
-
232
-
233
-
234
-
235
-
236
-
237
-
238
-
239
-
240
-
241
-
242
-
243
-
244
-
245
-
246
-
247
-
248
-
249
-
250
-
251
-
252
-
253
-
254
-
255
-
256
-
257
-
258
-
259
-
260
-
261
-
262
-
263
-
264
-
265
-
266
-
267
-
268
-
269
-
270
-
271
-
272
-
273
-
274
-
275
-
276
-
277
-
278
-
279
-
280
-
281
-
282
-
283
-
284
-
285
-
286
-
287
-
288
-
289
-
290
-
291
-
292
-
293
-
294
-
295
-
296
-
297
-
298
-
299
-
300
-
301
-
302
-
303
-
304
-
305
-
306
-
307
-
308
-
309
-
310
-
311
-
312
-
313
-
314
-
315
-
316
-
317
-
318
-
319
-
320
-
321
-
322
-
323
-
324
-
325
-
326
-
327
-
328
-
329
-
330
-
331
-
332
-
333
-
334
-
335
-
336
-
337
-
338
-
339
-
340
 |
 |