HP CP3505 HP Color LaserJet CP3505 Series Printers - User Guide - Page 86
Con tray 1 for envelopes, PAPER, HANDLING, UNIT OF MEASURE, X DIMENSION, Landscape
 |
View all HP CP3505 manuals
Add to My Manuals
Save this manual to your list of manuals |
Page 86 highlights
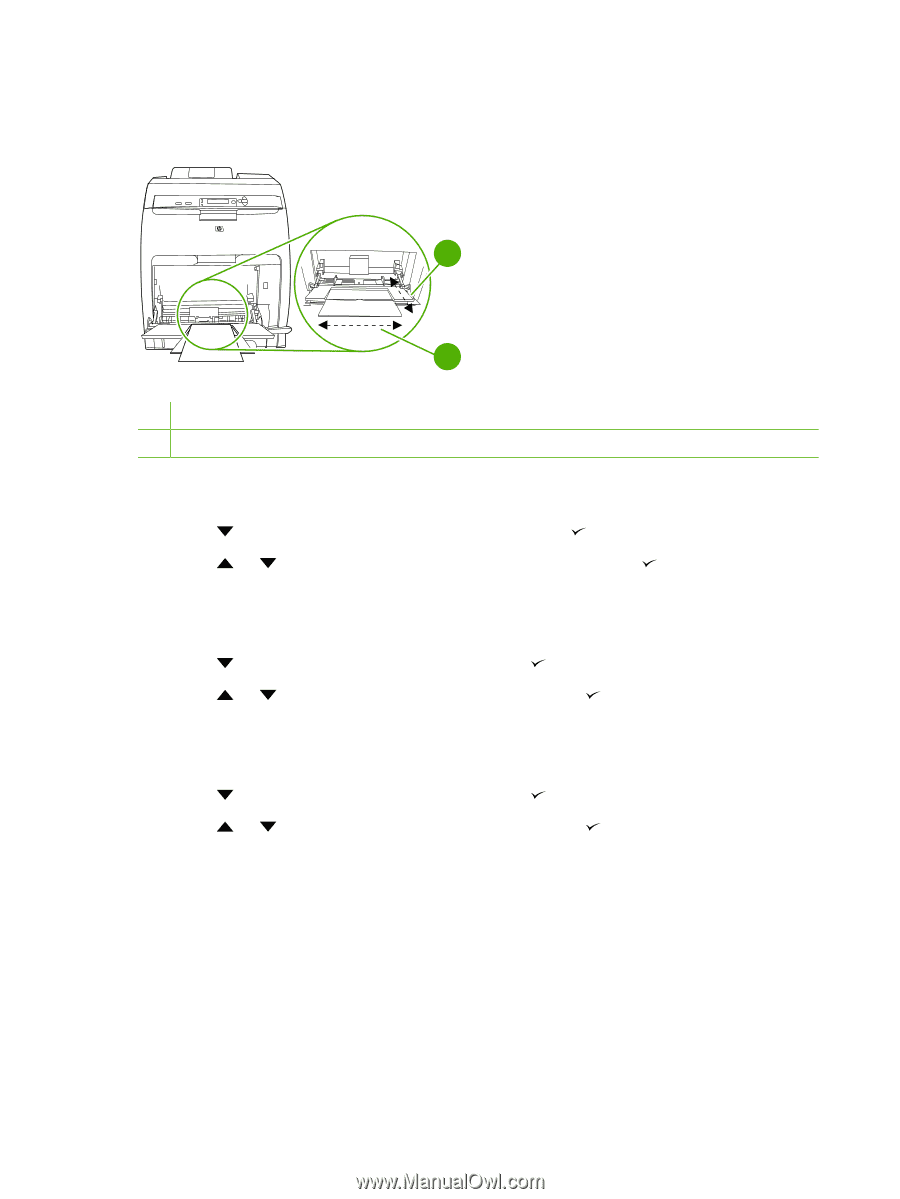
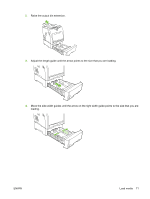
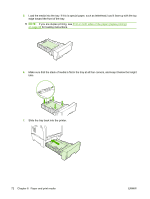
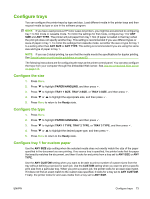
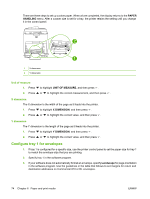
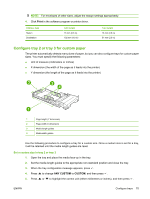
There are three steps to set up custom paper. When all are completed, the display returns to the PAPER HANDLING menu. After a custom size is set for a tray, the printer retains the setting until you change it in the control panel. 2 y x 1 1 X dimension 2 Y dimension Unit of measure 1. Press 2. Press to highlight UNIT OF MEASURE, and then press . or to highlight the correct measurement, and then press . X dimension The X dimension is the width of the page as it feeds into the printer. 1. Press to highlight X DIMENSION, and then press . 2. Press or to highlight the correct value, and then press . Y dimension The Y dimension is the length of the page as it feeds into the printer. 1. Press to highlight Y DIMENSION, and then press . 2. Press or to highlight the correct value, and then press . Configure tray 1 for envelopes 1. If tray 1 is configured for a specific size, use the printer control panel to set the paper size for tray 1 to match the envelope size that you are printing. 2. Specify tray 1 in the software program. 3. If your software does not automatically format an envelope, specify Landscape for page orientation in the software program. Use the guidelines in the table that follows to set margins for return and destination addresses on Commercial #10 or DL envelopes. 74 Chapter 6 Paper and print media ENWW
-
 1
1 -
2
-
3
-
4
-
5
-
6
-
7
-
8
-
9
-
10
-
11
-
12
-
13
-
14
-
15
-
16
-
17
-
18
-
19
-
20
-
21
-
22
-
23
-
24
-
25
-
26
-
27
-
28
-
29
-
30
-
31
-
32
-
33
-
34
-
35
-
36
-
37
-
38
-
39
-
40
-
41
-
42
-
43
-
44
-
45
-
46
-
47
-
48
-
49
-
50
-
51
-
52
-
53
-
54
-
55
-
56
-
57
-
58
-
59
-
60
-
61
-
62
-
63
-
64
-
65
-
66
-
67
-
68
-
69
-
70
-
71
-
72
-
73
-
74
-
75
-
76
-
77
-
78
-
79
-
80
-
 81
81 -
 82
82 -
 83
83 -
 84
84 -
 85
85 -
 86
86 -
 87
87 -
 88
88 -
 89
89 -
 90
90 -
 91
91 -
92
-
93
-
94
-
95
-
96
-
97
-
98
-
99
-
100
-
101
-
102
-
103
-
104
-
105
-
106
-
107
-
108
-
109
-
110
-
111
-
112
-
113
-
114
-
115
-
116
-
117
-
118
-
119
-
120
-
121
-
122
-
123
-
124
-
125
-
126
-
127
-
128
-
129
-
130
-
131
-
132
-
133
-
134
-
135
-
136
-
137
-
138
-
139
-
140
-
141
-
142
-
143
-
144
-
145
-
146
-
147
-
148
-
149
-
150
-
151
-
152
-
153
-
154
-
155
-
156
-
157
-
158
-
159
-
160
-
161
-
162
-
163
-
164
-
165
-
166
-
167
-
168
-
169
-
170
-
171
-
172
-
173
-
174
-
175
-
176
-
177
-
178
-
179
-
180
-
181
-
182
-
183
-
184
-
185
-
186
-
187
-
188
-
189
-
190
-
191
-
192
-
193
-
194
-
195
-
196
-
197
-
198
-
199
-
200
-
201
-
202
-
203
-
204
-
205
-
206
-
207
-
208
-
209
-
210
-
211
-
212
-
213
-
214
-
215
-
216
-
217
-
218
-
219
-
220
-
221
-
222
-
223
-
224
-
225
-
226
 |
 |