HP CP6015dn HP Color LaserJet CP6015 Series - User Guide - Page 129
Use the personal job feature, Print a personal job
 |
UPC - 883585363018
View all HP CP6015dn manuals
Add to My Manuals
Save this manual to your list of manuals |
Page 129 highlights
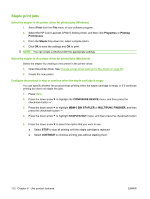
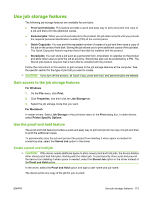
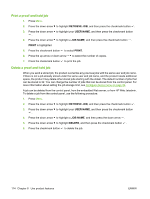
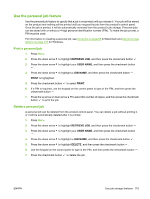
Use the personal job feature Use the personal job feature to specify that a job is not printed until you release it. Your job will be stored on the product and nothing will be printed until you request the job from the product's control panel. Once the job is printed, it will be automatically removed from the product's job storage. Personal jobs can be stored with or without a 4-digit personal identification number (PIN). To make the job private, a PIN must be used. For information on creating a personal job, see Store jobs on page 68 for Macintosh and Set job storage options on page 127 for Windows. Print a personal job 1. Press Menu. 2. Press the down arrow to highlight RETRIEVE JOB, and then press the checkmark button . 3. Press the down arrow to highlight your USER NAME, and then press the checkmark button . 4. Press the down arrow to highlight a JOB NAME, and then press the checkmark button . PRINT is highlighted. 5. Press the checkmark button to select PRINT. 6. If a PIN is required, use the keypad on the control panel to type in the PIN, and then press the checkmark button . 7. Press the up arrow or down arrow button to print the job. to select the number of copies, and then press the checkmark Delete a personal job A personal job can be deleted from the product control panel. You can delete a job without printing it, or it will be automatically deleted after it is printed. 1. Press Menu. 2. Press the down arrow to highlight RETRIEVE JOB, and then press the checkmark button . 3. Press the down arrow to highlight your USER NAME, and then press the checkmark button . 4. Press the down arrow to highlight a JOB NAME, and then press the checkmark button . 5. Press the down arrow to highlight DELETE, and then press the checkmark button . 6. Use the keypad on the control panel to type in the PIN, and then press the checkmark button . 7. Press the checkmark button to delete the job. ENWW Use job storage features 115
-
 1
1 -
2
-
3
-
4
-
5
-
6
-
7
-
8
-
9
-
10
-
11
-
12
-
13
-
14
-
15
-
16
-
17
-
18
-
19
-
20
-
21
-
22
-
23
-
24
-
25
-
26
-
27
-
28
-
29
-
30
-
31
-
32
-
33
-
34
-
35
-
36
-
37
-
38
-
39
-
40
-
41
-
42
-
43
-
44
-
45
-
46
-
47
-
48
-
49
-
50
-
51
-
52
-
53
-
54
-
55
-
56
-
57
-
58
-
59
-
60
-
61
-
62
-
63
-
64
-
65
-
66
-
67
-
68
-
69
-
70
-
71
-
72
-
73
-
74
-
75
-
76
-
77
-
78
-
79
-
80
-
81
-
82
-
83
-
84
-
85
-
86
-
87
-
88
-
89
-
90
-
91
-
92
-
93
-
94
-
95
-
96
-
97
-
98
-
99
-
100
-
101
-
102
-
103
-
104
-
105
-
106
-
107
-
108
-
109
-
110
-
111
-
112
-
113
-
114
-
115
-
116
-
117
-
118
-
119
-
120
-
121
-
122
-
123
-
 124
124 -
 125
125 -
 126
126 -
 127
127 -
 128
128 -
 129
129 -
 130
130 -
 131
131 -
 132
132 -
 133
133 -
 134
134 -
135
-
136
-
137
-
138
-
139
-
140
-
141
-
142
-
143
-
144
-
145
-
146
-
147
-
148
-
149
-
150
-
151
-
152
-
153
-
154
-
155
-
156
-
157
-
158
-
159
-
160
-
161
-
162
-
163
-
164
-
165
-
166
-
167
-
168
-
169
-
170
-
171
-
172
-
173
-
174
-
175
-
176
-
177
-
178
-
179
-
180
-
181
-
182
-
183
-
184
-
185
-
186
-
187
-
188
-
189
-
190
-
191
-
192
-
193
-
194
-
195
-
196
-
197
-
198
-
199
-
200
-
201
-
202
-
203
-
204
-
205
-
206
-
207
-
208
-
209
-
210
-
211
-
212
-
213
-
214
-
215
-
216
-
217
-
218
-
219
-
220
-
221
-
222
-
223
-
224
-
225
-
226
-
227
-
228
-
229
-
230
-
231
-
232
-
233
-
234
-
235
-
236
-
237
-
238
-
239
-
240
-
241
-
242
-
243
-
244
-
245
-
246
-
247
-
248
-
249
-
250
-
251
-
252
-
253
-
254
-
255
-
256
-
257
-
258
-
259
-
260
-
261
-
262
-
263
-
264
-
265
-
266
-
267
-
268
-
269
-
270
-
271
-
272
-
273
-
274
-
275
-
276
-
277
-
278
-
279
-
280
-
281
-
282
-
283
-
284
-
285
-
286
-
287
-
288
-
289
-
290
-
291
-
292
-
293
-
294
-
295
-
296
-
297
-
298
-
299
-
300
-
301
-
302
-
303
-
304
-
305
-
306
-
307
-
308
 |
 |