HP Dc5750 Quick Setup and Getting Started Guide - Enhanced for Accessibility
HP Dc5750 - Compaq Business Desktop Manual
 |
UPC - 883585056446
View all HP Dc5750 manuals
Add to My Manuals
Save this manual to your list of manuals |
HP Dc5750 manual content summary:
- HP Dc5750 | Quick Setup and Getting Started Guide - Enhanced for Accessibility - Page 1
- HP Dc5750 | Quick Setup and Getting Started Guide - Enhanced for Accessibility - Page 2
- HP Dc5750 | Quick Setup and Getting Started Guide - Enhanced for Accessibility - Page 3
Quick Setup & Getting Started Enhanced For Accessibility Business PCs - HP Dc5750 | Quick Setup and Getting Started Guide - Enhanced for Accessibility - Page 4
HP products and services are set forth in the express warranty statements accompanying such products and services. Nothing herein should be construed as constituting an additional warranty. HP . Quick Setup & Getting Started Business PCs First Edition (August 2006) Second Edition (January 2007) - HP Dc5750 | Quick Setup and Getting Started Guide - Enhanced for Accessibility - Page 5
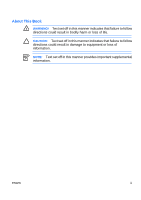
About This Book WARNING! Text set off in this manner indicates that failure to follow directions could result in bodily harm or loss of life. CAUTION: Text set off in this manner indicates that failure to follow directions could result in damage to equipment or loss of information. NOTE: Text set - HP Dc5750 | Quick Setup and Getting Started Guide - Enhanced for Accessibility - Page 6
iv About This Book ENWW - HP Dc5750 | Quick Setup and Getting Started Guide - Enhanced for Accessibility - Page 7
Software 1 Installing the Operating System 1 Downloading Microsoft Windows Updates 2 Installing or Upgrading Device Drivers 2 Customizing the Monitor Display 3 Protecting the Software 3 HP Backup and Recovery Manager 3 Turning Off the Computer 4 Finding More Information 5 Using the - HP Dc5750 | Quick Setup and Getting Started Guide - Enhanced for Accessibility - Page 8
vi ENWW - HP Dc5750 | Quick Setup and Getting Started Guide - Enhanced for Accessibility - Page 9
loaded, you will be prompted to register the computer with HP Total Care before installing the operating system. You will see a brief movie followed by an online registration form. Fill out the form, click the Begin button, and follow the instructions on the screen. CAUTION: Do not add optional - HP Dc5750 | Quick Setup and Getting Started Guide - Enhanced for Accessibility - Page 10
the operating system to the appropriate drivers. Obtain the latest support software , including support software for the operating system from www.hp.com/support. Select your country and language, select Download drivers and software, enter the model number of the computer, and press Enter. 2 Quick - HP Dc5750 | Quick Setup and Getting Started Guide - Enhanced for Accessibility - Page 11
available on systems shipped with Microsoft Windows XP. The HP Backup and Recovery Manager included with Microsoft Windows Vista is a more limited version. Check for updates by clicking the Software & Driver Downloads link at http://www.hp.com. The HP Backup and Recovery Manager is an easy-to-use - HP Dc5750 | Quick Setup and Getting Started Guide - Enhanced for Accessibility - Page 12
: For more information on using HP Backup and Recovery Manager, refer to the HP Backup and Recovery Manager User Guide by selecting Start > HP Backup and Recovery > HP Backup and Recovery Manager Manual. You can order a Recovery Disc Set from HP by calling the HP support center. Go to the following - HP Dc5750 | Quick Setup and Getting Started Guide - Enhanced for Accessibility - Page 13
troubleshooting information should you encounter any problems during initial startup. ● Hardware Reference Guide (PDF on the CD) Provides an overview of the product hardware, as well as instructions for upgrading this series of computers; includes information on RTC batteries, memory, and power - HP Dc5750 | Quick Setup and Getting Started Guide - Enhanced for Accessibility - Page 14
: If you do not have an optical drive capable of reading CDs, you may download the product documentation from the Web at http://www.hp.com/support. Select your country and language, select See support and troubleshooting information, enter the model number of the computer, and press Enter. Using the - HP Dc5750 | Quick Setup and Getting Started Guide - Enhanced for Accessibility - Page 15
exact problem before calling for technical support. ● Run the diagnostics utility. Refer to the Troubleshooting Guide on the Documentation and Diagnostics CD for more information. ● Run the Drive Protection System (DPS) Self-Test in Computer Setup. Refer to the Computer Setup (F10) Utility Guide on - HP Dc5750 | Quick Setup and Getting Started Guide - Enhanced for Accessibility - Page 16
call is handled properly: ● Be in front of your computer when you call. ● Write down the computer serial number and product ID number, and the monitor serial number before calling. ● Spend time troubleshooting the problem with the service technician. ● Remove any hardware that was recently added to - HP Dc5750 | Quick Setup and Getting Started Guide - Enhanced for Accessibility - Page 17
of the computer to see if it is flashing. The flashing lights are error codes that will help you diagnose the problem. Refer to Interpreting POST Diagnostic Front Panel LEDs and Audible Codes on page 18 in this guide for details. ● Turn up the brightness and contrast controls of the monitor if the - HP Dc5750 | Quick Setup and Getting Started Guide - Enhanced for Accessibility - Page 18
Guide is available on the Documentation and Diagnostics CD and under the reference library at http://www.hp.com/support. Select your country and language, select See support and troubleshooting information, enter the model number of the computer, and press Enter. Solving General Problems - HP Dc5750 | Quick Setup and Getting Started Guide - Enhanced for Accessibility - Page 19
display is incorrect. Cause RTC (real-time clock) battery may need to be replaced. Solution First, reset the date and time under Control Panel (Computer Setup can also be used to update the RTC date and time). If the problem persists, replace the RTC battery. See the ENWW Basic Troubleshooting 11 - HP Dc5750 | Quick Setup and Getting Started Guide - Enhanced for Accessibility - Page 20
is locked. Unlock the Smart Cover Lock using Computer Setup. The Smart Cover FailSafe Key, a device for manually disabling the Smart Cover Lock, is available from HP. You will need the FailSafe Key in case of forgotten password, power loss, or computer malfunction. Order PN 166527-001 for 12 Quick - HP Dc5750 | Quick Setup and Getting Started Guide - Enhanced for Accessibility - Page 21
application or consult the documentation that came with the application for suggestions on how to improve performance by adjusting parameters in the application. 2. Add more memory. 3. Upgrade the graphics solution. Cause unknown. Restart the computer. ENWW Basic Troubleshooting 13 - HP Dc5750 | Quick Setup and Getting Started Guide - Enhanced for Accessibility - Page 22
Table 1 Solving General Problems (continued) Computer powered off automatically and the Power LED flashes Red two times, once every second, followed by a two second pause, and the computer beeps two times. (Beeps stop after fifth iteration but LEDs continue flashing). Cause Solution Processor - HP Dc5750 | Quick Setup and Getting Started Guide - Enhanced for Accessibility - Page 23
, then replace the power supply. 6. Replace the system board. Solving Hardware Installation Problems You may need to reconfigure the computer when you add or remove hardware, such as an additional drive or expansion card. If you install a plug and play device, Windows automatically recognizes the - HP Dc5750 | Quick Setup and Getting Started Guide - Enhanced for Accessibility - Page 24
to determine if you are using the correct memory modules and to verify the proper installation. NOTE: DIMM 1 must always be installed. 2. Observe the beeps and LED lights on the front of the computer. Beeps and flashing LEDs are codes for specific problems. 3. If you still cannot resolve the issue - HP Dc5750 | Quick Setup and Getting Started Guide - Enhanced for Accessibility - Page 25
Replace third-party memory with HP memory. 4. Replace the system board. Power LED flashes Red six times, once every second, followed by a two second pause, and the computer beeps six times. (Beeps stop after fifth iteration but LEDs continue flashing.) Cause Solution Graphics card is not seated - HP Dc5750 | Quick Setup and Getting Started Guide - Enhanced for Accessibility - Page 26
Hardware Installation Problems (continued) Power LED flashes Red ten times, once every second, followed by a two second pause, and the computer beeps ten times. (Beeps stop after fifth iteration but LEDs continue flashing.) Cause Solution Bad option card. 1. Check each option card by removing - HP Dc5750 | Quick Setup and Getting Started Guide - Enhanced for Accessibility - Page 27
hood and ensure the 4 or supply is 6-wire power supply cable is overloaded). seated into the connector on the system board. 2. Check if a device is causing the problem by removing ALL attached devices (such as hard, diskette, or optical drives, and expansion cards). Power on the system. If the - HP Dc5750 | Quick Setup and Getting Started Guide - Enhanced for Accessibility - Page 28
by a two second pause. Beeps stop after fifth iteration but LEDs continue until problem is solved. Invalid ROM based on bad checksum. 1. Reflash the system ROM with the latest BIOS image. See the "Boot Block Emergency Recovery Mode" section of the Desktop Management Guide on the Documentation and - HP Dc5750 | Quick Setup and Getting Started Guide - Enhanced for Accessibility - Page 29
ten times, once every second, followed by a two second pause. Beeps stop after fifth iteration but LEDs continue until problem is solved. Bad option card. 1. Check each option card by removing the card (one at a time if multiple cards), then power on the system to see if fault goes away. 2. Once - HP Dc5750 | Quick Setup and Getting Started Guide - Enhanced for Accessibility - Page 30
Activity Beeps Possible Cause Recommended Action problem persists, replace the system board. 5. If the 5V_aux light on the system board is not turned on, remove the expansion cards one at a time until the 5V_aux light on the system board turns on. It the problem persists, replace the power supply
-
 1
1 -
 2
2 -
 3
3 -
 4
4 -
 5
5 -
 6
6 -
 7
7 -
8
-
9
-
10
-
11
-
12
-
13
-
14
-
15
-
16
-
17
-
18
-
19
-
20
-
21
-
22
-
23
-
24
-
25
-
26
-
27
-
28
-
29
-
30
 |
 |