HP Designjet H35000 HP Designjet H35000 and H45000 Printer Series - Image Qual
HP Designjet H35000 - Commercial Printer Manual
 |
View all HP Designjet H35000 manuals
Add to My Manuals
Save this manual to your list of manuals |
HP Designjet H35000 manual content summary:
- HP Designjet H35000 | HP Designjet H35000 and H45000 Printer Series - Image Qual - Page 1
HP Designjet H series Printer Image Quality Guide - HP Designjet H35000 | HP Designjet H35000 and H45000 Printer Series - Image Qual - Page 2
contained herein is subject to change without notice. The only warranties for HP products and services are set forth in the express warranty statements accompanying such products and services. Nothing herein should be construed as constituting an additional warranty. HP shall not be liable - HP Designjet H35000 | HP Designjet H35000 and H45000 Printer Series - Image Qual - Page 3
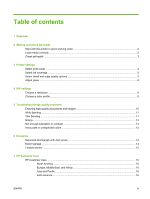
Select ink coverage ...5 Select detail and edge quality options 5 Adjust gloss ...6 4 RIP settings Choose a resolution ...8 Choose a color profile ...8 5 Troubleshoot image quality problems Ensuring high-quality documents and images 10 Wide Banding ...11 Thin Banding ...11 Grainy ...12 Not enough - HP Designjet H35000 | HP Designjet H35000 and H45000 Printer Series - Image Qual - Page 4
8 Image quality flow chart ...18 iv ENWW - HP Designjet H35000 | HP Designjet H35000 and H45000 Printer Series - Image Qual - Page 5
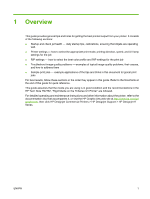
for the job ● RIP settings - how to select the best color profile and RIP settings for the print job ● Troubleshoot image quality problems - examples of typical image quality problems, their causes, and how to address them ● Sample print jobs - example applications of the tips and tricks in this - HP Designjet H35000 | HP Designjet H35000 and H45000 Printer Series - Image Qual - Page 6
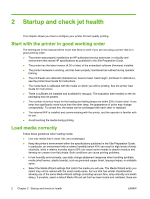
working order The techniques in this manual will be much less likely to Guide for instructions. ● There is sufficient ink installed and available for resupply. The expiration date marked on the ink packaging has not passed. ● The number of service conditions can cause printing problems. ● In low- - HP Designjet H35000 | HP Designjet H35000 and H45000 Printer Series - Image Qual - Page 7
● Configure and load media as described in the printer User Guide. ● Wipe down synthetic media with isopropyl alcohol (IPA) manually mapped out (Menu > Calibrate> Manual Calibrations > Manual Jet Mapping) ◦ Printheads may be damaged ◦ Service station may need to be calibrated ◦ Contact your service - HP Designjet H35000 | HP Designjet H35000 and H45000 Printer Series - Image Qual - Page 8
3 Printer settings This chapter shows you how to adjust the printer's media and print mode settings for the best output. Select print mode Figure 3-1 Front Page screen The printer has three print modes that are designed to balance printing speed and output quality, based on the distance from which - HP Designjet H35000 | HP Designjet H35000 and H45000 Printer Series - Image Qual - Page 9
point sizes, select Fine Text mode. You can also set the RIP to print Pure Black in text, rather than Rich Black/Process Black, if supported by your RIP. ● If the print requires sharp edge definition, for example with large text or color blocks that will be viewed closely, select Sharp - HP Designjet H35000 | HP Designjet H35000 and H45000 Printer Series - Image Qual - Page 10
Adjust gloss You can increase the gloss level of printed output by shuttering the trailing UV curing lamp. This allows the drop of jetted ink to spread out more before it is cured, which gives the print a glossier look. To shutter the trailing lamp: 1. On the printer's Front Page screen, press the - HP Designjet H35000 | HP Designjet H35000 and H45000 Printer Series - Image Qual - Page 11
3. On the lamp modes screen, press Low, Medium, or High: 4. On the shutter aperture screen, press the up arrow for the trailing lamp repeatedly to change the angle of the shutter from 0 degrees to closed. The greater the angle, the glossier the appearance of the print. Closed will provide the - HP Designjet H35000 | HP Designjet H35000 and H45000 Printer Series - Image Qual - Page 12
4 RIP settings For detailed operating instructions, refer to the RIP user guide. Choose a resolution The print resolution is determined by the and Caldera RIPs to their registered users. For download instructions,see the manufacturer's web site (Onyx, http://www.onyxgfx.com; Caldera, 8 Chapter - HP Designjet H35000 | HP Designjet H35000 and H45000 Printer Series - Image Qual - Page 13
http://www.caldera.eu). Users of the HP RIP Software can create a custom profile to reduce ink usage. Refer to the HP RIP Software User Guide for instructions on creating a custom profile. ● For four-color printing with the Onyx or Caldera RIP, use the generic CMYK color profile (refer to your RIP - HP Designjet H35000 | HP Designjet H35000 and H45000 Printer Series - Image Qual - Page 14
5 Troubleshoot image quality problems This chapter explains how to address typical image quality problems. Ensuring high-quality documents and images ● Ensure that all text is converted to outlines (not bitmaps) or the fonts are included with the artwork files. ● - HP Designjet H35000 | HP Designjet H35000 and H45000 Printer Series - Image Qual - Page 15
Wide Banding Wide horizontal banding, sometimes referred to as "directional gloss banding" or "lawnmower banding," which may be caused by light reflecting differently off adjacent printed areas. Ink that is laid down when the printhead carriage is moving in one direction will have a different - HP Designjet H35000 | HP Designjet H35000 and H45000 Printer Series - Image Qual - Page 16
inkjets or miscalibrated media feed. ● Check jet health using the procedure at the beginning of this guide. ● Check media feed calibration from the printer's control panel (Menu > Manual Calibrations > Media Feed Calibration). ● If used, Plus mode could have the effect of producing thin horizontal - HP Designjet H35000 | HP Designjet H35000 and H45000 Printer Series - Image Qual - Page 17
type, you are using. ● Perform a color calibration (linearization). ● Check for missing jets. See Check jet health on page 3 for instructions. ● If the problem consists of color differences between your computer monitor and printed output, consider calibrating your monitor according to manufacturer - HP Designjet H35000 | HP Designjet H35000 and H45000 Printer Series - Image Qual - Page 18
6 Examples This chapter presents some examples of applying the tips and tricks in this guide to typical print jobs. Saturated photograph with dark areas Factor Viewing distance: less than 1 m (3 ft) Image content: saturated and dark colors Ink coverage: high Event - HP Designjet H35000 | HP Designjet H35000 and H45000 Printer Series - Image Qual - Page 19
Factor Viewing distance: over 5 m (16 ft) Image content: text and line art with large unprinted areas Ink coverage: low Recommended techniques Print in Production mode RIP at 600x300 dpi Print in any bidirectional mode Flexible banner Factor Recommended techniques Viewing distance: 1-5 m (3-16 - HP Designjet H35000 | HP Designjet H35000 and H45000 Printer Series - Image Qual - Page 20
Care This chapter explains the HP Customer Care options. HP Customer Care In case of any question or problem, you should approach your local HP Authorized Representative for consultancy and support. However, if required, you can contact HP directly by using the following methods. NOTE: For up-to - HP Designjet H35000 | HP Designjet H35000 and H45000 Printer Series - Image Qual - Page 21
Honduras: 800 0 123 / 1 800 711 2884 Mexico: 52 55 5258-9922 Nicaragua: 1 800 0164 / 800 711 2884 Panama: 001 800 711 2884 Peru: 511 411 2443 / 0 800 10111 El Salvador: 800 6160 Venezuela: 58 212 278 8666 / 0 800 474 68368 CC LAR Nextel: (5255) 1088 0884; ID 52*20115*51 CC LAR e-Mail: carecenter. - HP Designjet H35000 | HP Designjet H35000 and H45000 Printer Series - Image Qual - Page 22
8 Image quality flow chart The image quality flow charts provide a high-level summary of the tips and tricks in this guide. You can print out the chart for reference and follow the recommended steps to optimal print quality, from start to finish. 18 Chapter 8 Image quality flow chart ENWW - HP Designjet H35000 | HP Designjet H35000 and H45000 Printer Series - Image Qual - Page 23
Run AutoJet. (Menu > Calibrate > Auto Calibrations > AutoJet Calibration) (User Guide, Chapter 4) Repeat Print Prime Bars and check quality again. 9 If OK, go to next page. 8 If not OK, check calibrations and troubleshooting. Repeat Print Jet Out Lines and check quality again. (Calibrations - HP Designjet H35000 | HP Designjet H35000 and H45000 Printer Series - Image Qual - Page 24
HP Designjet H series Printers Image Quality Flowchart 2. PRINTER SETTINGS FROM PAGE 1 CHOOSE MODE Choose mode based on viewing distance: • >5 m (16 ft): use Billboard Mode (fastest) • 1-5 m (3-16 ft): use Production Mode • - HP Designjet H35000 | HP Designjet H35000 and H45000 Printer Series - Image Qual - Page 25
you are using. • Reduce ink usage? Select Ink Saver profile. • If needed, perform a color calibration (see RIP user guide for instructions) 4. CHECK QUALITY Problem Wide (gloss) horizontal banding Thin horizontal banding Grainy Colors not saturated enough, or not enough contrast Unexpected color - HP Designjet H35000 | HP Designjet H35000 and H45000 Printer Series - Image Qual - Page 26
check calibrations and troubleshooting. Repeat Print Jet Out Lines and check quality again. (Calibrations: User Guide, Chapter 4) (Troubleshooting: page x) perform a color calibration (see RIP user guide for instructions) 4. CHECK QUALITY TO PAGE 3 Problem What to do No Wide (gloss)
-
 1
1 -
 2
2 -
 3
3 -
 4
4 -
 5
5 -
 6
6 -
 7
7 -
8
-
9
-
10
-
11
-
12
-
13
-
14
-
15
-
16
-
17
-
18
-
19
-
20
-
21
-
22
-
23
-
24
-
25
-
26
 |
 |

HP Designjet H series Printer
Image Quality Guide