HP Deskjet 3070A User Guide - Page 8
Control panel features, Wireless Settings - e all in one printer
 |
View all HP Deskjet 3070A manuals
Add to My Manuals
Save this manual to your list of manuals |
Page 8 highlights
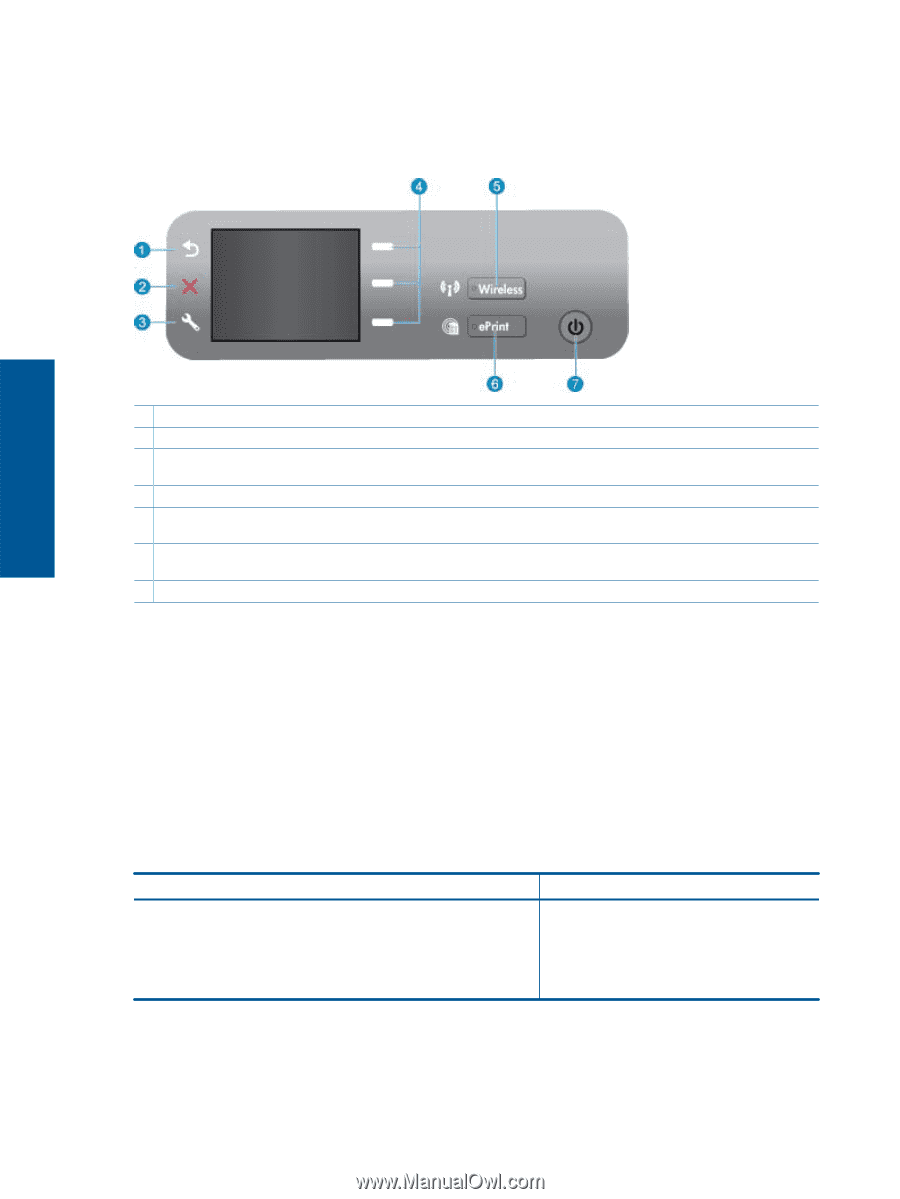
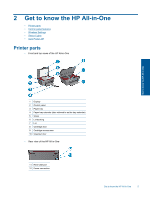
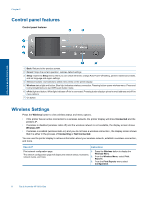
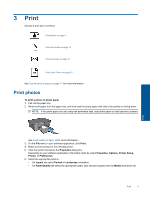
Chapter 2 Control panel features Control panel features Get to know the HP All-in-One 1 Back: Returns to the previous screen. 2 Cancel: Stops the current operation, restores default settings. 3 Setup: Opens the Setup menu where you can check ink levels, change Auto Power-Off setting, perform maintenance tasks, and set language and region settings. 4 Selection buttons: Use buttons to select menu items on the printer display. 5 Wireless status light and button: Blue light indicates wireless connection. Pressing button opens wireless menu. Press and hold until light blinks to start WPS push button mode. 6 ePrint light and button: White light indicates ePrint is connected. Pressing button displays printer's email address and ePrint menu options. 7 On button Wireless Settings Press the Wireless button to view wireless status and menu options. • If the printer has an active connection to a wireless network, the printer display will show Connected and the printer's IP. • If wireless is disabled (wireless radio off) and the wireless network is not available, the display screen shows Wireless Off. • If wireless is enabled (wireless radio on) and you do not have a wireless connection , the display screen shows that it is either in the process of Connecting or Not Connected. You can use the printer display to retrieve information about your wireless network, establish a wireless connection, and more. How do I? Instructions Print network configuration page. 1. Press the Wireless button to display the The network configuration page will display the network status, hostname, Wireless Menu. network name, and more. 2. From the Wireless Menu, select Print Reports. 3. From the Print Reports menu select Configuration. 6 Get to know the HP All-in-One
-
 1
1 -
2
-
 3
3 -
 4
4 -
 5
5 -
 6
6 -
 7
7 -
 8
8 -
 9
9 -
 10
10 -
 11
11 -
 12
12 -
 13
13 -
14
-
15
-
16
-
17
-
18
-
19
-
20
-
21
-
22
-
23
-
24
-
25
-
26
-
27
-
28
-
29
-
30
-
31
-
32
-
33
-
34
-
35
-
36
-
37
-
38
-
39
-
40
-
41
-
42
-
43
-
44
-
45
-
46
-
47
-
48
-
49
-
50
-
51
-
52
-
53
-
54
-
55
-
56
-
57
-
58
-
59
-
60
 |
 |