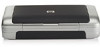
HP Deskjet 460 User's Guide - Page 57
Setting up for 802.11 on existing non-default networks - windows 8 driver
 |
View all HP Deskjet 460 manuals
Add to My Manuals
Save this manual to your list of manuals |
Page 57 highlights
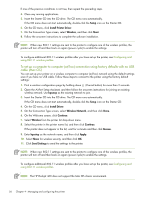
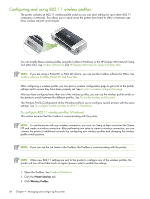
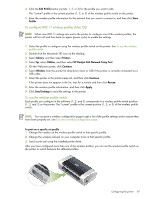
Setting up for 802.11 on existing (non-default) networks If you want to connect to an existing network with settings other than the factory defaults (for example an infrastructure network), and are already connected wirelessly using the factory defaults, you can simply enter the network settings for one of the three positions of the wireless profile switch using the Toolbox (Windows) or HP Deskjet 460 Network Setup Tool (Mac OS). See Configuring and using 802.11 wireless profiles. NOTE: To use the printer with any wireless connection, you must run Setup at least once from the Starter CD and create a wireless connection. After performing one wireless setup, you can connect the printer to additional wireless networks by configuring new wireless profiles in the wireless profile switch. To set up on an existing network with a USB cable (Windows or Mac OS) You can set up your printer on any wireless network if you have a USB cable nearby to use for a temporary connection. Follow these steps to create a wireless connection to the printer: 1. Get all of the necessary settings for the wireless network. See About 802.11 wireless network settings. 2. Close any running applications. 3. Insert the Starter CD into the CD drive. The CD menu runs automatically. If the CD menu does not start automatically, double-click the Setup icon on the Starter CD. 4. On the CD menu, click Install Printer Driver (Windows) or Install Driver (Mac OS). 5. Follow the onscreen instructions to complete the software installation. a. Enter the wireless network settings in the dialogs. b. Temporarily connect a USB cable when prompted. c. Mac OS only: Complete the installation using the HP Deskjet 460 Network Setup Tool, which launches automatically during setup. NOTE: When new 802.11 settings are sent to the printer to configure one of the wireless profiles, the printer will turn off and then back on again (power cycle) to enable the settings. To configure additional 802.11 wireless profiles after you have set up the printer, see Configuring and using 802.11 wireless profiles. To set up on an existing network with no USB cable This section describes connecting to an existing network with settings other than the factory defaults, or setting up a new ad hoc (Windows) or computer to computer (Mac OS) network that does not use the factory defaults, when all of the following conditions are true: • You have a computer with 802.11. • You do not have a USB cable. • You have never set up the printer to connect wirelessly. If all of the above are true, then you will need to do the following: 1. Set up the printer with a wireless connection using the factory defaults. See Setting up for 802.11 using factory defaults. 2. Configure one of the three positions of the wireless profile switch with the desired network settings using the Toolbox (Windows) or HP Deskjet 460 Network Setup Tool (Mac OS). See Configuring and using 802.11 wireless profiles. Configuring the printer 57
-
 1
1 -
2
-
3
-
4
-
5
-
6
-
7
-
8
-
9
-
10
-
11
-
12
-
13
-
14
-
15
-
16
-
17
-
18
-
19
-
20
-
21
-
22
-
23
-
24
-
25
-
26
-
27
-
28
-
29
-
30
-
31
-
32
-
33
-
34
-
35
-
36
-
37
-
38
-
39
-
40
-
41
-
42
-
43
-
44
-
45
-
46
-
47
-
48
-
49
-
50
-
51
-
 52
52 -
 53
53 -
 54
54 -
 55
55 -
 56
56 -
 57
57 -
 58
58 -
 59
59 -
 60
60 -
 61
61 -
 62
62 -
63
-
64
-
65
-
66
-
67
-
68
-
69
-
70
-
71
-
72
-
73
-
74
-
75
-
76
-
77
-
78
-
79
-
80
-
81
-
82
-
83
-
84
-
85
-
86
-
87
-
88
-
89
-
90
-
91
-
92
-
93
-
94
-
95
-
96
-
97
-
98
-
99
-
100
-
101
-
102
-
103
-
104
-
105
-
106
-
107
-
108
-
109
-
110
-
111
-
112
-
113
-
114
-
115
-
116
-
117
-
118
-
119
-
120
-
121
-
122
-
123
-
124
-
125
-
126
-
127
-
128
-
129
-
130
-
131
-
132
 |
 |