HP Disk Carrier Blade for bh3710 Installation Guide, Second Edition - HP Carri
HP Disk Carrier Blade for bh3710 Manual
 |
View all HP Disk Carrier Blade for bh3710 manuals
Add to My Manuals
Save this manual to your list of manuals |
HP Disk Carrier Blade for bh3710 manual content summary:
- HP Disk Carrier Blade for bh3710 | Installation Guide, Second Edition - HP Carri - Page 1
hp Carrier Grade Blade Server bh3710 Installation Guide Manufacturing Part Number: USA © Copyright 2002 Second Edition September 2002 - HP Disk Carrier Blade for bh3710 | Installation Guide, Second Edition - HP Carri - Page 2
The information in this document is subject to change without notice. Hewlett-Packard makes no warranty of any kind with regard to this manual, including, but not limited to, the implied warranties of merchantability and fitness for a particular purpose. Hewlett-Packard shall not be held liable for - HP Disk Carrier Blade for bh3710 | Installation Guide, Second Edition - HP Carri - Page 3
Contents 1. hp Carrier Grade Server bh3710 Overview Introduction 1 Network Equipment-Building Systems (NEBS) Compliance 1 Installation Guide Contents 1 Audience Assumptions 1 2. Unpacking and Installing the hp Carrier Grade Blade Server bh3710 Introduction 1 Site Preparation 1 Unpacking the - HP Disk Carrier Blade for bh3710 | Installation Guide, Second Edition - HP Carri - Page 4
the Carrier Blade 28 6. Communication with the hp Carrier Grade Blade Server bh3710 Introduction 1 Remote Installation of Operating Systems 1 The Support Tool Manager 1 7. Specifications for the hp Carrier Grade Server bh3710 Introduction 1 A. LVM Boot Device Hardware PathChange for the hp - HP Disk Carrier Blade for bh3710 | Installation Guide, Second Edition - HP Carri - Page 5
FC Disk Carrier Legend Marking 18 Figure 5-15. FC Disk Drive Bulkhead Label 18 Figure 5-16. Slot Blocker 21 Figure 5-17. Align Blades With Card Guides and Push Into Chassis 22 Figure 5-18. Insert the Blade 23 Figure 5-19. Tighten the Locking Screws 23 Figure 5-20. Releasing Locking Levers 24 - HP Disk Carrier Blade for bh3710 | Installation Guide, Second Edition - HP Carri - Page 6
Figures vi - HP Disk Carrier Blade for bh3710 | Installation Guide, Second Edition - HP Carri - Page 7
, as needed, basis. The updates will consist of a complete replacement manual and pertinent on-line or CD-ROM documentation. First Edition April 2002 Second , and configuration information. Server blade installation/removal instructions are also included in this chapter. • An index is included. - HP Disk Carrier Blade for bh3710 | Installation Guide, Second Edition - HP Carri - Page 8
viii - HP Disk Carrier Blade for bh3710 | Installation Guide, Second Edition - HP Carri - Page 9
hp Carrier Grade Blade Server bh3710 (called "blade server" in this manual) provides customers with a single chassis that houses one server blade and guide is written for the person who installs, administers, and troubleshoots servers. Hewlett-Packard Company assumes that you are qualified to service - HP Disk Carrier Blade for bh3710 | Installation Guide, Second Edition - HP Carri - Page 10
hp Carrier Grade Server bh3710 Overview Introduction 1- 2 Chapter 1 - HP Disk Carrier Blade for bh3710 | Installation Guide, Second Edition - HP Carri - Page 11
system information, refer to the hp Carrier Grade Blade Server bh3710 Service Manual. Site Preparation Prepare the site for installation as described in the hp Carrier Grade Blade Server bh3710 Site Preparation Guide. - HP Disk Carrier Blade for bh3710 | Installation Guide, Second Edition - HP Carri - Page 12
Unpacking and Installing the hp Carrier Grade Blade Server bh3710 Installing the bh3710 Blade Server in a Rack Step 1. Unpack the blade server from its shipping container. Step 2. Compare the contents with the packing list to ensure that all required components have been received, as listed in - HP Disk Carrier Blade for bh3710 | Installation Guide, Second Edition - HP Carri - Page 13
hp Carrier Grade Server bh3710 Power and Cooling Component Overview Introduction 3 hp Carrier Grade Server bh3710 Power and Cooling Component Overview Introduction Blade server power and cooling elements are described in Chapter 2, Table 2-1. All components ordered are pre-installed and configured - HP Disk Carrier Blade for bh3710 | Installation Guide, Second Edition - HP Carri - Page 14
hp Carrier Grade Server bh3710 Power and Cooling Component Overview DC Power Supplies DC Power Supplies Power supplies come in two parts and reside in the lower bay of the chassis. They are accessed from both the front and rear of the chassis as illustrated in Figure 0-1. Each power supply has two - HP Disk Carrier Blade for bh3710 | Installation Guide, Second Edition - HP Carri - Page 15
Output Module (Server Front View) Power supplies are hot swappable. Hot swap remove and replace details are found in the hp Blade Server bh 3710 Service Guide. Chapter 3 3- 3 - HP Disk Carrier Blade for bh3710 | Installation Guide, Second Edition - HP Carri - Page 16
hp Carrier Grade Server bh3710 Power and Cooling Component Overview DC Power Supplies Blade Server Power Supply Connector DC Power Input Module and Cable Connector Pinout Information The power supply connector on the input module is a Positronics PLB06. The cable supplied for each power supply is - HP Disk Carrier Blade for bh3710 | Installation Guide, Second Edition - HP Carri - Page 17
hp Carrier Grade Server bh3710 Power and Cooling Component Overview DC Power Supplies Power cable pin-out information is illustrated as follows: Figure 0-5 DC Power Connector Pin location Chapter 3 3- 5 - HP Disk Carrier Blade for bh3710 | Installation Guide, Second Edition - HP Carri - Page 18
hp Carrier Grade Server bh3710 Power and Cooling Component Overview Blade Server Cooling System Blade Server Cooling System Both server blade and Power Supply cooling are shown in Figure 3-6 and addressed in this section. • The CompactPCI server blades in the main chamber are cooled by the fan tray - HP Disk Carrier Blade for bh3710 | Installation Guide, Second Edition - HP Carri - Page 19
Applying Power to the hp Blade Server bh3710 Introduction 4 Applying Power to the hp Blade Server bh3710 Introduction The following sections discuss both the application and removal of power to the blade server. NOTE Before applying power to the blade server, locate the management server blade in - HP Disk Carrier Blade for bh3710 | Installation Guide, Second Edition - HP Carri - Page 20
Applying Power to the hp Blade Server bh3710 Blade Server Power-Down Blade Server Power-Down Power-down procedures apply to the rp2200 and management server blades. The chassis (blade server) is powered down only after all server blades are shut off. Power-Down the bp2200 and Management Blades - HP Disk Carrier Blade for bh3710 | Installation Guide, Second Edition - HP Carri - Page 21
Rear Transition Module (RTM) Blade" • "Fibre Channel (FC) Disk Carrier". The following section describes how to install server blades and can also be used as a guide for removal and replacement. • "Installing and Removing Blades". Chapter 5 5- 1 - HP Disk Carrier Blade for bh3710 | Installation Guide, Second Edition - HP Carri - Page 22
hp Carrier Grade Server bh3710 Server Blade Installation Information Server Blades Server Blades As listed in Chapter 2, Table 2-1, the standard server blade as-shipped configuration for the blade server includes: No. Blade Name Front/Rear Slot(s) 1 Management Blade 1 bp2200 PA Blade 1 or 2 - HP Disk Carrier Blade for bh3710 | Installation Guide, Second Edition - HP Carri - Page 23
hp Carrier Grade Server bh3710 Server Blade Installation Information Server Blades Figure 5-1 Rear View of Chassis With Blades Installed Chapter 5 5- 3 - HP Disk Carrier Blade for bh3710 | Installation Guide, Second Edition - HP Carri - Page 24
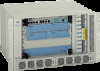
hp Carrier Grade Server bh3710 Server Blade Installation Information Server Blades Figure 5-2 Front View of Chassis With Blades Installed Display Panel Blade Status Indicators The blades may be inserted only in compatible slots on the chassis. Each slot is marked with a legend corresponding to - HP Disk Carrier Blade for bh3710 | Installation Guide, Second Edition - HP Carri - Page 25
hp Carrier Grade Server bh3710 Server Blade Installation Information Management Blade Management Blade Management Blade information is provided as follows: Figure 5-3 Management Blade Figure 5-4 Management Blade Bulkhead Label Management Blade LED Definitions The following list describes the - HP Disk Carrier Blade for bh3710 | Installation Guide, Second Edition - HP Carri - Page 26
hp Carrier Grade Server bh3710 Server Blade Installation Information Management Blade The Management blade (previously called Server Management Card (SMC)) contains all the logic necessary to manage the blade server system remotely. The Management blade must reside in slot F10 (Front 10). Both the - HP Disk Carrier Blade for bh3710 | Installation Guide, Second Edition - HP Carri - Page 27
hp Carrier Grade Server bh3710 Server Blade Installation Information Management Blade Configuration Procedures. Power on the Console. The Management Blade boot sequence will display, followed by a login prompt. Management Blade Configuration. Follow the steps listed below to configure the Management - HP Disk Carrier Blade for bh3710 | Installation Guide, Second Edition - HP Carri - Page 28
hp Carrier Grade Server bh3710 Server Blade Installation Information bp2200 Server Blade bp2200 Server Blade Figure 5-6 bp2200 Server Blade The bp2200 server blade (also called the PA-RISC or PA blade), comes factory installed, and runs the pre-configured HP-UX Operating System stored on the - HP Disk Carrier Blade for bh3710 | Installation Guide, Second Edition - HP Carri - Page 29
HP-UX; solid green when OS is booted and server blade is running. NOTE See the bp2200 chapter of the hp Carrier Grade Server bh3710 Service Guide for Attention and Fault LED definitions. Chapter 5 5- 9 - HP Disk Carrier Blade for bh3710 | Installation Guide, Second Edition - HP Carri - Page 30
. The Management Blade boot sequence will display, followed by a login prompt. Configure the Management Blade first, then the Management Processor (MP), (formerly called the Guardian Service Processor (GSP)) resident on the bp2200 server blade. Proceed as follows: 5- 10 Chapter 5 - HP Disk Carrier Blade for bh3710 | Installation Guide, Second Edition - HP Carri - Page 31
as the MP has been accessed. Failure to observe this precaution may result in compromised system security. Refer to the hp Carrier Grade Server bp3710 Service Manual for information about the MP. Once the IP Address is set, a remote host is used to TelNet into the MP. Plug a LAN cable into the - HP Disk Carrier Blade for bh3710 | Installation Guide, Second Edition - HP Carri - Page 32
or modify a path SEArch [DIsplay|IPL] [] Search for boot devices COnfiguration menu INformation menu SERvice menu Displays or sets boot values Displays hardware information Displays service commands DIsplay HElp [|] RESET ---- Main Menu: Enter command or menu Redisplay the - HP Disk Carrier Blade for bh3710 | Installation Guide, Second Edition - HP Carri - Page 33
hp Carrier Grade Server bh3710 Server Blade Installation Information bp2200 Server Blade Rebooting to the HP-UX Prompt HP-UX can be restarted as shown in the following steps: Step 1. Telnet to the MP IP. Step 2. Log in to the MP using the assigned login name and password. Step 3. Press Enter then - HP Disk Carrier Blade for bh3710 | Installation Guide, Second Edition - HP Carri - Page 34
hp Carrier Grade Server bh3710 Server Blade Installation Information Fibrechannel (FC) and LAN Rear Transition Module (RTM) Blade Fibrechannel (FC) and LAN Rear Transition Module (RTM) Blade FC and LAN RTM blade information is provided in the following sections. Figure 5-9 FC and LAN RTM Blade - HP Disk Carrier Blade for bh3710 | Installation Guide, Second Edition - HP Carri - Page 35
hp Carrier Grade Server bh3710 Server Blade Installation Information Fibrechannel (FC) and LAN Rear Transition Module (RTM) Blade FC and LAN RTM LED Definitions The following list describes the LEDs found on the FC and LAN RTM blade: LED Color Description Management Console LED FC Link LED LAN - HP Disk Carrier Blade for bh3710 | Installation Guide, Second Edition - HP Carri - Page 36
hp Carrier Grade Server bh3710 Server Blade Installation Information Fibrechannel (FC) and LAN Rear Transition Module (RTM) Blade Figure 5-12 bh3710 Chassis (Rear View) If the Payload LAN and the Management LAN are on separate LAN segments: Step 1. In rear slot 9: Plug payload LAN (A) into RJ-45 - HP Disk Carrier Blade for bh3710 | Installation Guide, Second Edition - HP Carri - Page 37
hp Carrier Grade Server bh3710 Server Blade Installation Information Fibrechannel (FC) and LAN Rear Transition Module (RTM) Blade If the Payload LAN and the Management LAN are on the same LAN segment: Step 1. In rear slot 10: Plug the Payload (A)/Management LAN into the RJ-45 Management LAN Console - HP Disk Carrier Blade for bh3710 | Installation Guide, Second Edition - HP Carri - Page 38
hp Carrier Grade Server bh3710 Server Blade Installation Information Fibre Channel (FC) Disk Carrier Fibre Channel (FC) Disk Carrier FC Disk Carrier blade information is provided in the following sections. Figure 5-13 FC Disk Carrier Server blade storage capacity can be added by using the FC - HP Disk Carrier Blade for bh3710 | Installation Guide, Second Edition - HP Carri - Page 39
hp Carrier Grade Server bh3710 Server Blade Installation Information Fibre Channel (FC) Disk Carrier NOTE LEDs are only found on the disk drives contained within the disk carrier. There are no LEDs for the disk carrier. FC Disk Drive LED Definitions The following list describes the LEDs found on - HP Disk Carrier Blade for bh3710 | Installation Guide, Second Edition - HP Carri - Page 40
have a slot blocker ready. • Have a number 1 Phillips screwdriver available. • Familiarize yourself with the operation before you begin. Following the planning instructions outlined above, prepare your equipment and select the empty slot(s) compatible with the type of blade you wish to install. Then - HP Disk Carrier Blade for bh3710 | Installation Guide, Second Edition - HP Carri - Page 41
blockers according to the steps listed below: Step 1. Retrieve the slot blocker from its stored location. Step 2. Carefully align the slot blocker in the card guides and slide it into the chassis. Step 3. Tighten the captive screws. Chapter 5 5-21 - HP Disk Carrier Blade for bh3710 | Installation Guide, Second Edition - HP Carri - Page 42
3. Holding the blade by the locking levers, align it with the card guides inside the open slot and carefully push the blade fully into the chassis break, thereby compromising air circulation. Figure 5-17 Align Blades With Card Guides and Push Into Chassis Step 4. When the blade is fully inserted, - HP Disk Carrier Blade for bh3710 | Installation Guide, Second Edition - HP Carri - Page 43
hp Carrier Grade Server bh3710 Server Blade Installation Information Installing and Removing Blades NOTE Figure 5-18 The blue LED will briefly illuminated when power is reestablished as the blade mates with the backplane connectors. Insert the Blade Step 6. Tighten the small screws in each - HP Disk Carrier Blade for bh3710 | Installation Guide, Second Edition - HP Carri - Page 44
hp Carrier Grade Server bh3710 Server Blade Installation Information Installing and Removing Blades Removing Blades With Locking Levers Removing Server Blades with locking levers can be accomplished in either of two ways: • Entering the /etc/shutdown -h command at the console to bring the blade to - HP Disk Carrier Blade for bh3710 | Installation Guide, Second Edition - HP Carri - Page 45
hp Carrier Grade Server bh3710 Server Blade Installation Information Installing and Removing Blades Figure 5-21 Loosen Locking Screws Step 3. To release the blade from the backplane, apply pressure to the left locking lever and to the right locking lever at the same time. You should be able to " - HP Disk Carrier Blade for bh3710 | Installation Guide, Second Edition - HP Carri - Page 46
hp Carrier Grade Server bh3710 Server Blade Installation Information Installing and Removing Blades Step 4. Still grasping the locking levers, firmly pull the blade from the chassis (Figure 5-23). The blade connectors fit snugly in the backplane and it may take additional effort to disengage the - HP Disk Carrier Blade for bh3710 | Installation Guide, Second Edition - HP Carri - Page 47
steps listed below describe the two-disk configuration. Step 1. Grasp the blade by the handles (shown in Figure 5-24) and align it with the card guides inside the open slot. Figure 5-24 Two-Handled Blade Step 2. Carefully push the blade into the chassis until it mates with the backplane. Step - HP Disk Carrier Blade for bh3710 | Installation Guide, Second Edition - HP Carri - Page 48
hp Carrier Grade Server bh3710 Server Blade Installation Information Installing and Removing Blades Removing the Carrier Blade CAUTION Fibre Channel disks have no hot swap LED to indicate when they can be removed. Remove the disk carrier only under the following conditions: • The bp2200 hot swap - HP Disk Carrier Blade for bh3710 | Installation Guide, Second Edition - HP Carri - Page 49
Management blade. See Chapter 3 of this manual and the hp bh3710 Carrier Grade Blade Server Service Guide for configuration details. Once the Management blade Installation of Operating Systems below), and to troubleshoot using the Support Tool Manager diagnostic tool. CAUTION The factory default - HP Disk Carrier Blade for bh3710 | Installation Guide, Second Edition - HP Carri - Page 50
Communication with the hp Carrier Grade Blade Server bh3710 Remote Installation of Operating Systems 6- 2 Chapter 6 - HP Disk Carrier Blade for bh3710 | Installation Guide, Second Edition - HP Carri - Page 51
Specifications for the hp Carrier Grade Server bh3710 Introduction 7 Specifications for the hp Carrier Grade Server bh3710 Introduction This chapter lists the environmental specifications for the Blade Server. Description Dimensions (H, W, D) Weight (configured) Input Power • Operational • - HP Disk Carrier Blade for bh3710 | Installation Guide, Second Edition - HP Carri - Page 52
Specifications for the hp Carrier Grade Server bh3710 Introduction 7- 2 Chapter 7 - HP Disk Carrier Blade for bh3710 | Installation Guide, Second Edition - HP Carri - Page 53
LVM Boot Device Hardware Path Change for the hp Carrier Grade Server bh3710 A LVM Boot Device Hardware PathChange for the hp Carrier Grade Server bh3710 Appendix A A- 1 - HP Disk Carrier Blade for bh3710 | Installation Guide, Second Edition - HP Carri - Page 54
LVM Boot Device Hardware Path Change for the hp Carrier Grade Server bh3710 A- 2 Appendix A - HP Disk Carrier Blade for bh3710 | Installation Guide, Second Edition - HP Carri - Page 55
, 5-27 RS232, 3-3 S Server Blade Power-Up, 4-1 Server Blades, 5-2 Server Management Blade, 2-2 Site Preparation Guide, 2-1 Site Preperation, 2-1 Specifications for the hp Carrier Grade Server bh3710, 7-1 Support Tool Manager, 6-1 T Temperature, 7-1 U Unpacking the Blade Server, 2-1 W Weight, 7-1 3
-
 1
1 -
 2
2 -
 3
3 -
 4
4 -
 5
5 -
 6
6 -
 7
7 -
8
-
9
-
10
-
11
-
12
-
13
-
14
-
15
-
16
-
17
-
18
-
19
-
20
-
21
-
22
-
23
-
24
-
25
-
26
-
27
-
28
-
29
-
30
-
31
-
32
-
33
-
34
-
35
-
36
-
37
-
38
-
39
-
40
-
41
-
42
-
43
-
44
-
45
-
46
-
47
-
48
-
49
-
50
-
51
-
52
-
53
-
54
-
55
 |
 |

hp Carrier Grade Blade Server
bh3710
Installation Guide
Manufacturing Part Number:
USA
© Copyright 2002
Second Edition
September 2002