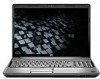
HP Dv5-1010us Notebook Tour - Windows Vista
HP Dv5-1010us - Pavilion - Core 2 Duo GHz Manual
 |
View all HP Dv5-1010us manuals
Add to My Manuals
Save this manual to your list of manuals |
HP Dv5-1010us manual content summary:
- HP Dv5-1010us | Notebook Tour - Windows Vista - Page 1
Notebook Tour User Guide - HP Dv5-1010us | Notebook Tour - Windows Vista - Page 2
Development Company, L.P. Microsoft and Windows are U.S. registered trademarks of services. Nothing herein should be construed as constituting an additional warranty. HP shall not be liable for technical or editorial errors or omissions contained herein. First Edition: June 2008 Document Part - HP Dv5-1010us | Notebook Tour - Windows Vista - Page 3
, such as an adjoining optional printer, or a soft surface, such as pillows or rugs or clothing, to block airflow. Also, do not allow the AC adapter to contact the skin or a soft surface, such as pillows or rugs or clothing, during operation. The computer and the AC - HP Dv5-1010us | Notebook Tour - Windows Vista - Page 4
iv Safety warning notice - HP Dv5-1010us | Notebook Tour - Windows Vista - Page 5
Table of contents 1 Identifying hardware 2 Components Product notice ...3 Top components ...3 TouchPad ...3 Keys ...4 Buttons, speakers and fingerprint reader 5 Front components ...7 Rear components ...8 Right-side components ...9 Left-side components ...10 Bottom components ...11 Display - HP Dv5-1010us | Notebook Tour - Windows Vista - Page 6
vi - HP Dv5-1010us | Notebook Tour - Windows Vista - Page 7
> System properties. 2. In the left pane, click Device Manager. You can also add hardware or modify device configurations using Device Manager. NOTE: Windows® includes the User Account Control feature to improve the security of your computer. You may be prompted for your permission or password for - HP Dv5-1010us | Notebook Tour - Windows Vista - Page 8
2 Components 2 Chapter 2 Components - HP Dv5-1010us | Notebook Tour - Windows Vista - Page 9
guide describes features that are common to most models. Some features may not be available on your computer. Top components TouchPad Component Description (1) TouchPad on/off button Enables/disables the TouchPad. (2) TouchPad* Moves the pointer and selects or activates items on the screen - HP Dv5-1010us | Notebook Tour - Windows Vista - Page 10
combination with the fn key. Executes frequently used system functions when pressed in combination with a function key or the esc key. Displays the Windows Start menu. Displays a shortcut menu for items beneath the pointer. Can be used like the keys on an external numeric keypad. Execute frequently - HP Dv5-1010us | Notebook Tour - Windows Vista - Page 11
briefly to exit Sleep. ● When the computer is in Hibernation, press the button briefly to exit Hibernation. If the computer has stopped responding and Windows® shutdown procedures are ineffective, press and hold the power button for at least 5 seconds to turn off the computer. To learn more about - HP Dv5-1010us | Notebook Tour - Windows Vista - Page 12
wireless network must be set up in order to establish a wireless connection. (11) Fingerprint reader (select models only) Allows a fingerprint logon to Windows, instead of a password logon. *This table describes factory settings. For information about changing factory settings, refer to the user - HP Dv5-1010us | Notebook Tour - Windows Vista - Page 13
a low battery level. (3) Drive light Blinking: The hard drive or optical drive is being accessed. (4) Consumer infrared lens Receives a signal from the HP Remote Control . For information about changing factory settings, refer to the user guides located in Help and Support. Front components 7 - HP Dv5-1010us | Notebook Tour - Windows Vista - Page 14
Rear components Component Vents (2) Description Enables airflow to cool internal components. NOTE: The computer fan starts up automatically to cool internal components and prevent overheating. It is normal for the internal fan to cycle on and off during routine operation. 8 Chapter 2 Components - HP Dv5-1010us | Notebook Tour - Windows Vista - Page 15
standard or high-definition TV broadcasts. Connects a modem cable. Attaches an optional security cable to the computer. NOTE: The security cable is designed to act as a deterrent, but it may not prevent the computer from being mishandled or stolen. Connects an AC adapter. Right-side components 9 - HP Dv5-1010us | Notebook Tour - Windows Vista - Page 16
an optional docking device or an optional video or audio Supports the following optional digital card formats: Secure Digital (SD) Memory Card, MultiMediaCard (MMC), Memory Stick (MS), Memory Stick Pro (MSP), xD-Picture Card (XD), xD-Picture Card (XD) Type H, xD-Picture Card (XD) Type M. Supports - HP Dv5-1010us | Notebook Tour - Windows Vista - Page 17
components Component (1) Mini Card compartment (2) Vents (8) (3) Memory module compartment (4) Hard drive bay and WLAN module (5) Battery bay (6) Battery release latch Description Holds the TV tuner card and, for select models only, the Intel Turbo Memory card. Enable airflow to cool internal - HP Dv5-1010us | Notebook Tour - Windows Vista - Page 18
display switch (2) Internal microphones (2) (3) Integrated webcam light (4) Integrated webcam Description Turns off the display and initiates Sleep if the display is closed while the power is on. Record sound. On: The integrated webcam is in use. Records video and captures still photographs. 12 - HP Dv5-1010us | Notebook Tour - Windows Vista - Page 19
in the computer are fully charged. If the computer is not plugged into an external power source, the light stays off until the battery reaches a low battery level. Blinking: The hard drive or optical drive is being accessed. On: Caps lock is on. ● White: Computer sound is turned on. ● Amber - HP Dv5-1010us | Notebook Tour - Windows Vista - Page 20
button Launches the QuickPlay program. NOTE: If the computer has been set up to require a logon password, you may be asked to log on to Windows. QuickPlay launches after you log on. Refer to the QuickPlay software Help for more information. 14 Chapter 2 Components - HP Dv5-1010us | Notebook Tour - Windows Vista - Page 21
smudges and lint, frequently clean the display with a soft, damp, lint-free cloth. If the screen requires additional cleaning, use premoistened antistatic wipes or an antistatic screen cleaner. CAUTION: To prevent permanent damage to the computer, never spray water, cleaning fluids, or chemicals - HP Dv5-1010us | Notebook Tour - Windows Vista - Page 22
, refer to the section of the Regulatory, Safety and Environmental Notices that applies to your country or region. These notices are located in Help and Support. 16 Chapter 2 Components - HP Dv5-1010us | Notebook Tour - Windows Vista - Page 23
an RJ-11 telephone jack or to a country- or region-specific modem adapter. (5) Country- or region-specific modem cable adapter Adapts the modem cable to a non-RJ-11 telephone jack. (select models only) *Modem cables, batteries, and power cords vary in appearance by region and country. Additional - HP Dv5-1010us | Notebook Tour - Windows Vista - Page 24
support. The service tag label is affixed to the bottom of the computer. ● Microsoft® Certificate of Authenticity: Contains the Windows® Product Key. You may need the Product Key to update or troubleshoot This label is located inside the battery bay. ● HP Broadband Wireless Module serial number label - HP Dv5-1010us | Notebook Tour - Windows Vista - Page 25
) 7 RJ-11 (modem) 9 RJ-45 (network 10 TV antenna/cable 9 K keypad keys, identifying 4 keys esc 4 fn 4 function 4 keypad 4 Windows applications 4 Windows logo 4 L labels Bluetooth 18 HP Broadband 18 Microsoft Certificate of Authenticity 18 modem approval 18 regulatory 18 service tag 18 Index 19 - HP Dv5-1010us | Notebook Tour - Windows Vista - Page 26
6, 15 media button, identifying 5, 14 memory module compartment, identifying 11 microphone (audio-in) jack 7 microphone, internal 12 Microsoft Certificate of Authenticity label 18 modem approval label 18 modem cable adapter, country- or region-specific 17 modem cable, identifying 17 monitor port - HP Dv5-1010us | Notebook Tour - Windows Vista - Page 27
-
 1
1 -
 2
2 -
 3
3 -
 4
4 -
 5
5 -
 6
6 -
 7
7 -
8
-
9
-
10
-
11
-
12
-
13
-
14
-
15
-
16
-
17
-
18
-
19
-
20
-
21
-
22
-
23
-
24
-
25
-
26
-
27
 |
 |

Notebook Tour
User Guide