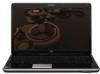
HP Dv7-3060us Drives - Windows Vista
HP Dv7-3060us - Pavilion Entertainment - Turion II Ultra 2.4 GHz Manual
 |
UPC - 884962549155
View all HP Dv7-3060us manuals
Add to My Manuals
Save this manual to your list of manuals |
HP Dv7-3060us manual content summary:
- HP Dv7-3060us | Drives - Windows Vista - Page 1
Drives User Guide - HP Dv7-3060us | Drives - Windows Vista - Page 2
products and services. Nothing herein should be construed as constituting an additional warranty. HP shall not be liable for technical or editorial errors or omissions contained herein. First Edition: February 2009 Document Part Number: 512507-001 Product notice This user guide describes features - HP Dv7-3060us | Drives - Windows Vista - Page 3
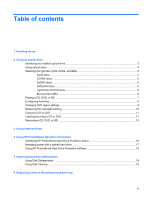
copyright warning ...10 Copying a CD or DVD ...11 Creating (burning) a CD or DVD ...12 Removing a CD, DVD, or BD ...13 3 Using external drives 4 Using HP ProtectSmart Hard Drive Protection Identifying HP ProtectSmart Hard Drive Protection status 16 Managing power with a parked hard drive 17 Using - HP Dv7-3060us | Drives - Windows Vista - Page 4
in the secondary hard drive bay 8 Troubleshooting The optical disc tray does not open for removal of a CD, a DVD, or a BD 27 The computer does not detect the CD, DVD, or device driver must be reinstalled ...33 Obtaining Microsoft device drivers 33 Obtaining HP device drivers 33 Index ...35 iv - HP Dv7-3060us | Drives - Windows Vista - Page 5
bay. Do not type on the keyboard or move the computer while the optical drive (select models only) is writing to a disc. The write process is sensitive to vibration. When the battery is the only source of power, be sure that the battery is sufficiently charged before writing to media. Avoid exposing - HP Dv7-3060us | Drives - Windows Vista - Page 6
an optical drive that expands the functionality of the computer. Identify what kind of device is installed in your computer to see its capabilities. The optical drive allows you to read data discs, play music, and watch movies. If your computer includes a Blu-ray Disc ROM Drive, then you can - HP Dv7-3060us | Drives - Windows Vista - Page 7
. You will see a list of all the devices installed in your computer, including your optical drive. You may have one of the following types of drives: ● LightScribe DVD±RW/R and CD-RW Combo drive with Double-Layer (DL) support ● Blu-ray Disc ROM Drive with LightScribe/SuperMulti DVD±R/RW Double Layer - HP Dv7-3060us | Drives - Windows Vista - Page 8
ROM Drive, it can also read Blu-ray Discs. NOTE: Some of the optical drives listed may not be supported by your computer. The listed drives are not necessarily all of the supported optical drives. Some optical drives can also write to optical discs as described in the following table. Optical drive - HP Dv7-3060us | Drives - Windows Vista - Page 9
backup purposes. DVDs and BDs are the same form factor as CDs but have a much higher storage capacity. NOTE: The optical drive on your computer may not support all the types of optical discs discussed in this section. CD-R discs CD-R (write-once) discs are widely used for creating a permanent copy - HP Dv7-3060us | Drives - Windows Vista - Page 10
DVD at 8.5 GB. Typical uses include the following: ● Storage of large amounts of data ● High-definition video playback and storage ● Video games NOTE: As Blu-ray is a new format containing new technologies, certain disc, digital connection, compatibility, and/or performance issues may arise, and - HP Dv7-3060us | Drives - Windows Vista - Page 11
Playing a CD, DVD, or BD 1. Turn on the computer. 2. Press the release button (1) on the drive bezel to release the . It prompts you to select how you want to use the media content. NOTE: For best results, be sure that your AC adapter is plugged into an external power source while playing a BD. Playing - HP Dv7-3060us | Drives - Windows Vista - Page 12
media and devices check box is selected. 3. Click Choose a default, and then select one of the available options for each media type listed. NOTE: Choose HP MediaSmart to play DVDs. 4. Click Save. NOTE: For more information about AutoPlay, refer to Help and - HP Dv7-3060us | Drives - Windows Vista - Page 13
. To change settings through the operating system: 1. Select Start > Computer > System properties. 2. In the left pane, click Device Manager installing software, running utilities, or changing Windows settings. Refer to Help and Support for more information. 3. Click the plus sign (+) next to DVD/CD- - HP Dv7-3060us | Drives - Windows Vista - Page 14
disc, connect the computer to a reliable external power source. Do not write to a disc while the computer is running on battery power. Before writing : For details about using software included with the computer, refer to the software manufacturer's instructions, which may be provided on disc, in the - HP Dv7-3060us | Drives - Windows Vista - Page 15
Copying a CD or DVD 1. Select Start > All Programs > CyberLink DVD Suites > Power2Go. 2. Insert the disc you want to copy into the optical drive. 3. Click Copy at the bottom right of the screen. Creator Basic reads the source disc and copies the data to a temporary folder on your hard drive. 4. When - HP Dv7-3060us | Drives - Windows Vista - Page 16
guide that came with your DVD player for a list of supported formats. ● An MP3 file uses less space than other music file formats, and the process for creating an MP3 disc is the same as the process for creating a data file. MP3 files can be played only on MP3 players or on computers - HP Dv7-3060us | Drives - Windows Vista - Page 17
Removing a CD, DVD, or BD 1. Press the release button (1) on the drive bezel to release the disc tray, and then gently pull out the tray (2) until it stops. 2. Remove the disc (3) from the tray by gently pressing down on the spindle while lifting the outer edges of the disc. Hold the disc by the - HP Dv7-3060us | Drives - Windows Vista - Page 18
±RW and CD-RW Combo Drive NOTE: For more information about required software and drivers, or to learn which computer port to use, refer to the manufacturer's instructions. To connect an external drive to the computer: CAUTION: To reduce the risk of damage to the equipment when connecting a powered - HP Dv7-3060us | Drives - Windows Vista - Page 19
I/O requests under either of the following conditions: ● You drop the computer. ● You move the computer with the display closed while the computer is running on battery power. A short time after the end of one of these events, HP ProtectSmart Hard Drive Protection returns the hard drive to normal - HP Dv7-3060us | Drives - Windows Vista - Page 20
drive light on the computer turns on to indicate that a hard drive is parked. To determine whether drives are currently protected or whether a drive is parked, select Start > Control Panel > Mobile PC > Windows Mobility Center. The Mobility Center also indicates HP ProtectSmart Hard Drive Protection - HP Dv7-3060us | Drives - Windows Vista - Page 21
except as described in the following Note. NOTE: If the computer is running on battery power and reaches a critical battery level, HP ProtectSmart Hard Drive Protection allows the computer to initiate Hibernation. ● The computer will not activate battery alarms set on the Alarms tab in Power Options - HP Dv7-3060us | Drives - Windows Vista - Page 22
for non-Administrator users. ● Determine whether a drive in the system is supported. To open the software and change settings, follow these steps: 1. In Mobility Center, click the hard drive icon to open the HP ProtectSmart Hard Drive Protection window. - or - Select Start > Control Panel > Hardware - HP Dv7-3060us | Drives - Windows Vista - Page 23
. HP recommends defragmenting your hard drive at least once a month. You may set Disk Defragmenter to run on a monthly schedule, but you can defragment your computer manually at any time. To run Disk Defragmenter: 1. Select Start > All Programs > Accessories > System Tools > Disk Defragmenter - HP Dv7-3060us | Drives - Windows Vista - Page 24
3. Disconnect all external hardware devices connected to the computer. 4. Unplug the power cord from the AC outlet. 5. Turn the computer upside down on a flat surface, with the hard drive bay toward you. 6. Remove the battery from the computer. 7. Loosen the 4 hard drive cover screws (1). 20 Chapter - HP Dv7-3060us | Drives - Windows Vista - Page 25
8. Lift the hard drive cover away from the computer (2). 9. Pull firmly on the plastic tab (1) on drive, lift the hard drive to a 45-degree angle, and then remove the hard drive (3) from the computer. To install the primary hard drive: 1. Insert the hard drive into the hard drive bay (1). 2. Using - HP Dv7-3060us | Drives - Windows Vista - Page 26
3. Connect the hard drive cable (3) to the hard drive connector on the system board. 4. Align the tabs on the hard drive cover with the notches on the computer (1). 5. Close the cover (2). 6. Tighten the hard drive cover screws (3). 22 Chapter 6 Replacing a drive in the primary hard drive bay - HP Dv7-3060us | Drives - Windows Vista - Page 27
Disconnect all external hardware devices connected to the computer. 4. Unplug the power cord from the AC outlet. 5. Turn the computer upside down on a flat surface, with the secondary hard drive bay toward you. 6. Remove the battery from the computer. 7. Loosen the 3 secondary hard drive bay screws - HP Dv7-3060us | Drives - Windows Vista - Page 28
tab (2) on the left side of the hard drive, lift the hard drive to a 45-degree angle, and then remove the hard drive (3) from the computer. To install a drive in the secondary hard drive bay: 1. Insert the hard drive into the hard drive bay (1). 2. Using the tab (2) on the hard drive - HP Dv7-3060us | Drives - Windows Vista - Page 29
3. Connect the hard drive cable (3) to the hard drive connector on the system board. 4. Align the tabs on the hard drive cover with the notches on the computer (1). 5. Close the cover (2). 6. Tighten the secondary hard drive bay cover screws (3). 25 - HP Dv7-3060us | Drives - Windows Vista - Page 30
8 Troubleshooting The following sections describe several common issues and resolutions. 26 Chapter 8 Troubleshooting - HP Dv7-3060us | Drives - Windows Vista - Page 31
The optical disc tray does not open for removal of a CD, a DVD, or a BD 1. Insert the end of a paper clip (1) into the release access in the front bezel of the drive. 2. Press in gently on the paper clip until the disc tray is released, and then pull out the tray (2) until it stops. 3. Remove the - HP Dv7-3060us | Drives - Windows Vista - Page 32
The computer does not detect the CD, DVD, or BD drive If Windows does not detect an installed device, the device driver software may be missing or is not listed, install (or reinstall) the device driver as instructed in the section "A device driver must be reinstalled." 28 Chapter 8 Troubleshooting - HP Dv7-3060us | Drives - Windows Vista - Page 33
a disc. Otherwise, you may see a warning message asking if you want to continue. If this message is displayed, click No. After you click No, the computer may behave in either of the following ways: ◦ Playback may resume. - or - ◦ The playback window in the multimedia program may close. To return to - HP Dv7-3060us | Drives - Windows Vista - Page 34
all media and devices check box is selected. 3. Click Save. A disc should now start automatically when it is inserted into the optical drive. 30 Chapter 8 Troubleshooting - HP Dv7-3060us | Drives - Windows Vista - Page 35
that you are using the right kind of disc for your drive. See your user guides for more information about disc types. ● Be sure that the disc is inserted and then burn from your hard drive. ● Reinstall the disc-burning device driver located in the DVD/CD-ROM drives category in Device Manager. The - HP Dv7-3060us | Drives - Windows Vista - Page 36
A DVD or BD playing in Windows Media Player produces no sound or display Use MediaSmart to play a DVD or BD. MediaSmart is installed on the computer, and is also available from the HP Web site at http://www.hp.com. 32 Chapter 8 Troubleshooting - HP Dv7-3060us | Drives - Windows Vista - Page 37
the latest updates for your computer operating system, programs, and hardware. 4. Follow the on-screen instructions to install Microsoft Update. If restart your computer. Obtaining HP device drivers Follow either of the following procedures to obtain HP device drivers. A device driver must be - HP Dv7-3060us | Drives - Windows Vista - Page 38
.com/support, and select your country or region. 2. Click the option for software and driver downloads, type your computer model number in the search box, and then press enter. - or - If you want a specific SoftPaq, enter the SoftPaq number in the Search box, press enter, and follow the instructions - HP Dv7-3060us | Drives - Windows Vista - Page 39
, DVD 9 S secondary hard drive, replacing 23 software Disk Cleanup 19 Disk Defragmenter 19 SuperMulti LightScribe DVD±RW and CD-RW Combo with DL support 4 T troubleshooting burning discs 31 device driver 33 disc play 29, 30 HP device drivers 33 optical disc tray 27 optical drive detection 28 Windows - HP Dv7-3060us | Drives - Windows Vista - Page 40
-
 1
1 -
 2
2 -
 3
3 -
 4
4 -
 5
5 -
 6
6 -
 7
7 -
8
-
9
-
10
-
11
-
12
-
13
-
14
-
15
-
16
-
17
-
18
-
19
-
20
-
21
-
22
-
23
-
24
-
25
-
26
-
27
-
28
-
29
-
30
-
31
-
32
-
33
-
34
-
35
-
36
-
37
-
38
-
39
-
40
 |
 |

Drives
User Guide