HP Dx2250 Quick Setup & Getting Started Guide
HP Dx2250 - Compaq Business Desktop Manual
 |
UPC - 883585243983
View all HP Dx2250 manuals
Add to My Manuals
Save this manual to your list of manuals |
HP Dx2250 manual content summary:
- HP Dx2250 | Quick Setup & Getting Started Guide - Page 1
Quick Setup & Getting Started HP Compaq Business PC - HP Dx2250 | Quick Setup & Getting Started Guide - Page 2
that is protected by copyright. No part of this document may be photocopied, reproduced, or translated to another language without the prior written consent of Hewlett-Packard Company. Quick Setup & Getting Started HP Compaq Business PC First Edition (January 2007) Document Part Number: 440790-001 - HP Dx2250 | Quick Setup & Getting Started Guide - Page 3
About This Book This guide provides basic information about setting up and maintaining your computer. WARNING! Text set off in this manner indicates that failure to follow directions could result in bodily harm or loss of life. CAUTION: Text set - HP Dx2250 | Quick Setup & Getting Started Guide - Page 4
iv About This Book ENWW - HP Dx2250 | Quick Setup & Getting Started Guide - Page 5
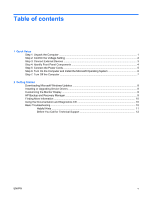
the Computer ...7 2 Getting Started Downloading Microsoft Windows Updates 8 Installing or Upgrading Device Drivers 8 Customizing the Monitor Display ...8 HP Backup and Recovery Manager ...9 Finding More Information ...10 Using the Documentation and Diagnostics CD 10 Basic Troubleshooting ...10 - HP Dx2250 | Quick Setup & Getting Started Guide - Page 6
vi ENWW - HP Dx2250 | Quick Setup & Getting Started Guide - Page 7
Safety & Comfort Guide. It describes proper workstation setup, posture, and health and work habits for computer users, and provides important electrical and mechanical safety information. This guide is located on the Web at http://www.hp.com/ergo and on the Documentation and Diagnostics CD. ENWW - HP Dx2250 | Quick Setup & Getting Started Guide - Page 8
supply is set to the correct voltage for your region (115 volts or 230 volts). CAUTION: You should not need to change the voltage setting; however, you should verify that the voltage selection is compatible with your local power specifications. Failure to do so could result in damage to the computer - HP Dx2250 | Quick Setup & Getting Started Guide - Page 9
Connector 10 Line-Out Connector for (purple) powered audio devices (green) 5 Universal Serial Bus (USB) 11 Line-In Audio Connector (blue) 6 Serial Connector 12 RJ-45 Network Connector NOTE: If a PCI graphics card is installed, the connectors on the card and the system board may be used - HP Dx2250 | Quick Setup & Getting Started Guide - Page 10
Light 8 Microphone Connector 3 5.25" Expansion Bay 9 USB (Universal Serial Bus) Ports 4 3.5" Expansion Bay (optional Media Card Reader shown)1 10 Optical Drive Eject Button 5 Dual-State Power Button 11 Power On Light 6 Hard Drive Activity Light 1 The 3.5" bay may be populated with a diskette - HP Dx2250 | Quick Setup & Getting Started Guide - Page 11
grounding plug is an important safety feature. Plug the power cord into a grounded (earthed) outlet that is easily accessible at all times. Disconnect power from the computer by unplugging the power cord from either the electrical outlet or the computer. CAUTION: Be sure there is a 10.2 cm (4-inch - HP Dx2250 | Quick Setup & Getting Started Guide - Page 12
Windows Vista loaded, you will be prompted to register the computer with HP Total Care before installing the operating system. You will see a brief movie followed by an online registration form. Fill out the form, click the Begin button, and follow the instructions on the screen. If the computer - HP Dx2250 | Quick Setup & Getting Started Guide - Page 13
: Manually forcing the computer off will cause the loss of any unsaved data. On some models, you can use the Computer Setup utility to reconfigure the power button to work in on/ off mode instead of standby mode. Refer to the Computer Setup (F10) Utility Guide on the Documentation and Diagnostics CD - HP Dx2250 | Quick Setup & Getting Started Guide - Page 14
critical updates and service packs. 5. After the updates have been installed, Windows will prompt you to reboot the computer. Be sure to save any files or documents that you may have open before rebooting. Then select Yes to reboot the computer. Installing or Upgrading Device Drivers When installing - HP Dx2250 | Quick Setup & Getting Started Guide - Page 15
available on systems shipped with Microsoft Windows XP. The HP Backup and Recovery Manager included with Microsoft Windows Vista is a more limited version. Check for updates by clicking the Software & Driver Downloads link at http://www.hp.com. The HP Backup and Recovery Manager is an easy-to-use - HP Dx2250 | Quick Setup & Getting Started Guide - Page 16
● Troubleshooting Guide ● Computer Setup (F10) Utility Guide ● Safety & Regulatory Information ● Support Telephone Numbers ● Safety & Comfort Guide NOTE: If you do not have an optical drive capable of reading CDs, you may download the product documentation from the Web at http://www.hp.com/support - HP Dx2250 | Quick Setup & Getting Started Guide - Page 17
at http://www.hp.com/support. Select your country and language, select See support and troubleshooting information, enter the model number of the computer, and press Enter. Helpful Hints If you encounter problems with the computer, monitor, or software, see the following list of general suggestions - HP Dx2250 | Quick Setup & Getting Started Guide - Page 18
User Guide by selecting Start > HP Backup and Recovery > HP Backup and Recovery Manager Manual. CAUTION: Running the Restore Plus! CD will erase all data on the hard drive. To assist you in resolving problems online, HP Instant Support Professional Edition provides you with self-solve diagnostics - HP Dx2250 | Quick Setup & Getting Started Guide - Page 19
time troubleshooting the problem with the service technician. ● Remove any hardware that was recently added to your system. ● Remove any software that was recently installed. ● Run the Restore Plus! CD. CAUTION: Running the Restore Plus! CD will erase all data on the hard drive. NOTE: For sales
-
 1
1 -
 2
2 -
 3
3 -
 4
4 -
 5
5 -
 6
6 -
 7
7 -
8
-
9
-
10
-
11
-
12
-
13
-
14
-
15
-
16
-
17
-
18
-
19
 |
 |

Quick Setup & Getting Started
HP Compaq Business PC