HP Dx2300 Hardware Reference Guide - dx 2300 MT
HP Dx2300 - Compaq Business Desktop Manual
 |
UPC - 883585669479
View all HP Dx2300 manuals
Add to My Manuals
Save this manual to your list of manuals |
HP Dx2300 manual content summary:
- HP Dx2300 | Hardware Reference Guide - dx 2300 MT - Page 1
Hardware Reference Guide - dx2300 Series Microtower Models HP Compaq Business PC - HP Dx2300 | Hardware Reference Guide - dx 2300 MT - Page 2
Windows, and Windows Vista are either trademarks or registered trademarks of Microsoft Corporation in the United States and/or other countries. The only warranties for HP products and services of Hewlett-Packard Company. Hardware Reference Guide HP Compaq Business PC dx2300 Series Microtower Models - HP Dx2300 | Hardware Reference Guide - dx 2300 MT - Page 3
About This Book This guide provides basic information for upgrading this computer model. WARNING! Text set off in this manner indicates that failure to follow directions could result in bodily harm or loss of life. CAUTION: Text - HP Dx2300 | Hardware Reference Guide - dx 2300 MT - Page 4
iv About This Book ENWW - HP Dx2300 | Hardware Reference Guide - dx 2300 MT - Page 5
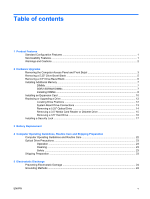
the Computer Access Panel and Front Bezel 3 Removing a 5.25" Drive Bezel Blank 5 Removing a 3.5" Drive Bezel Blank ...6 Installing Additional Memory ...7 DIMMs ...7 DDR2-SDRAM DIMMs ...7 Installing DIMMs ...8 Installing an Expansion Card ...10 Replacing or Upgrading a Drive ...12 Locating Drive - HP Dx2300 | Hardware Reference Guide - dx 2300 MT - Page 6
vi ENWW - HP Dx2300 | Hardware Reference Guide - dx 2300 MT - Page 7
HP Compaq dx2300 Series Microtower NOTE: The drive configuration shown above may be different than your computer model. The illustration shown above may look different than your computer model. Serviceability Features The Microtower computer includes features that make it easy to upgrade and service - HP Dx2300 | Hardware Reference Guide - dx 2300 MT - Page 8
Warnings and Cautions Before performing upgrades be sure to carefully read all of the applicable instructions, cautions, and warnings in this guide. WARNING! To reduce the risk of personal injury from electrical shock, rotating fans, hot surfaces, and/or fire: Disconnect the power cord from the wall - HP Dx2300 | Hardware Reference Guide - dx 2300 MT - Page 9
2 Hardware Upgrades Removing the Computer Access Panel and Front Bezel 1. Turn off the computer properly through the operating system, then turn off any external devices. 2. Disconnect the power cord from the power outlet and the computer (1), and disconnect any external devices. CAUTION: Regardless - HP Dx2300 | Hardware Reference Guide - dx 2300 MT - Page 10
into place so that the catches on the three tabs on the left side of the bezel snap into place on the chassis. 4 Chapter 2 Hardware Upgrades ENWW - HP Dx2300 | Hardware Reference Guide - dx 2300 MT - Page 11
drive to the option bay, you must first remove the bezel blank. 1. Turn off the computer properly through the operating system, then turn off any external devices. 2. Disconnect the power cord from the power outlet and the computer into the two retainer slots on the left side of the front bezel - HP Dx2300 | Hardware Reference Guide - dx 2300 MT - Page 12
3.5" bay, you must first remove the bezel blank. 1. Turn off the computer properly through the operating system, then turn off any external devices. 2. Disconnect the power cord from the power outlet and the computer, and disconnect any external devices. 3. Remove the access panel and front bezel - HP Dx2300 | Hardware Reference Guide - dx 2300 MT - Page 13
CAS latency 4 (CL = 4) for PC2-5300 667 MHz ● contain the mandatory JEDEC SPD information In addition, the computer supports: ● 256Mbit, 512Mbit, and 1Gbit non-ECC memory technologies ● single-sided and double-sided DIMMs ● DIMMs constructed with x8 and x16 DDR devices; DIMMs constructed with x4 - HP Dx2300 | Hardware Reference Guide - dx 2300 MT - Page 14
Installing DIMMs CAUTION: You must disconnect the power cord and wait approximately 30 seconds for the power to drain before adding or removing memory modules. Regardless of the power-on state, voltage is always supplied to the memory modules as long as the computer is plugged into an active AC - HP Dx2300 | Hardware Reference Guide - dx 2300 MT - Page 15
that the module is fully inserted and properly seated. Make sure the latches are in the closed position (3). 7. Replace the computer access panel. 8. Reconnect the power cord and turn on the computer. The computer should automatically recognize the additional memory the next time you turn on the - HP Dx2300 | Hardware Reference Guide - dx 2300 MT - Page 16
On the rear panel of the computer, remove the screw that secures the slot cover lock in place (1) and slide the slot cover lock up and away from the slots to remove it from the computer (2). Figure 2-6 Releasing the Slot Cover Lock 5. If you are installing an expansion card for the first time, you - HP Dx2300 | Hardware Reference Guide - dx 2300 MT - Page 17
the system board, if needed. 9. Replace the computer access panel and reconnect the power cord. NOTE: To remove an expansion card, reverse the installation procedure. CAUTION: After removing an expansion card, you must replace it with a new card or expansion slot cover for proper cooling of internal - HP Dx2300 | Hardware Reference Guide - dx 2300 MT - Page 18
a Drive The computer supports up to five drives that may be installed in various configurations. This section describes the procedure for replacing or upgrading the storage drives. A Torx T-15 screwdriver is needed to remove and install the guide screws and retainer screws on a drive. Locating Drive - HP Dx2300 | Hardware Reference Guide - dx 2300 MT - Page 19
Board Drive Connections Drive Configuration 1 hard drive 1 optical drive 1 hard drive 2 optical drives 2 hard drives 1 optical drive 2 hard drives 2 optical drives media card reader diskette drive System Board Connectors primary hard drive: (1) SATA1 optical drive: (2) SATA2 primary hard drive - HP Dx2300 | Hardware Reference Guide - dx 2300 MT - Page 20
from the front of the chassis. There are a total of eight extra guide/retainer screws on the front of the chassis behind the bezel. Four have 6-32 standard threads and four have M3 metric threads. Standard screws are used for hard drives and have a silver finish. Metric screws are used for all other - HP Dx2300 | Hardware Reference Guide - dx 2300 MT - Page 21
the access panel and front bezel. Refer to Removing the Computer Access Panel and Front Bezel on page 3. 4. If the device is a media card reader, disconnect the internal USB cable from the system board. If the device is a diskette drive, disconnect the power and data cables from the back of the - HP Dx2300 | Hardware Reference Guide - dx 2300 MT - Page 22
replacing the primary hard drive, you will need to load the HP factory-installed files from the Recovery Disc Set. 1. Turn off the computer properly through the operating system, then turn off any external devices. 2. Disconnect the power cord from the power outlet and the computer, and disconnect - HP Dx2300 | Hardware Reference Guide - dx 2300 MT - Page 23
a Security Lock An optional security lock can be installed on the rear panel of the computer to provide physical computer security. Figure 2-13 Installing a Security Lock NOTE: The security lock slot may be in a different location on your computer model. ENWW Installing a Security Lock 17 - HP Dx2300 | Hardware Reference Guide - dx 2300 MT - Page 24
the HP spare designated for this product. CAUTION: Before replacing the battery, it is important to back up the computer CMOS settings. When the battery is removed or replaced, the CMOS settings will be cleared. Refer to the Computer Setup (F10) Utility Guide on the Documentation and Diagnostics CD - HP Dx2300 | Hardware Reference Guide - dx 2300 MT - Page 25
on the system board. NOTE: On some computer models, it may be necessary to remove an internal component to gain access to the battery. 7. Depending on the type of battery holder on the system board, complete the following instructions to replace the battery. Type 1 a. Lift the battery out of its - HP Dx2300 | Hardware Reference Guide - dx 2300 MT - Page 26
edge of the battery (2). Figure 3-2 Removing and Replacing a Coin Cell Battery (Type 2) Type 3 a. Pull back on the clip (1) that is holding the battery in place into place. Figure 3-3 Removing a Coin Cell Battery (Type 3) NOTE: After the battery has been replaced, use the following steps to - HP Dx2300 | Hardware Reference Guide - dx 2300 MT - Page 27
9. Plug in the computer and turn on power to the computer. 10. Reset the date and time, your passwords, and any special system setups using Computer Setup. Refer to the Computer Setup (F10) Utility Guide on the Documentation and Diagnostics CD. 11. Lock any security devices that were disengaged when - HP Dx2300 | Hardware Reference Guide - dx 2300 MT - Page 28
on the enclosure, and the same operating guidelines listed above will still apply. ● Keep liquids away from the computer and keyboard. ● Never cover the ventilation slots on the monitor with any type of material. ● Install or enable power management functions of the operating system or other - HP Dx2300 | Hardware Reference Guide - dx 2300 MT - Page 29
. Safety If any object or liquid falls into the drive, immediately unplug the computer and have it checked by an authorized HP service provider. Shipping Preparation Follow these suggestions when preparing to ship the computer: 1. Back up the hard drive files on PD discs, tape cartridges, CDs, or - HP Dx2300 | Hardware Reference Guide - dx 2300 MT - Page 30
wrist strap connected by a ground cord to a grounded workstation or computer chassis. Wrist straps are flexible straps with a minimum of 1 HP authorized dealer, reseller, or service provider. NOTE: For more information on static electricity, contact an HP authorized dealer, reseller, or service
-
 1
1 -
 2
2 -
 3
3 -
 4
4 -
 5
5 -
 6
6 -
 7
7 -
8
-
9
-
10
-
11
-
12
-
13
-
14
-
15
-
16
-
17
-
18
-
19
-
20
-
21
-
22
-
23
-
24
-
25
-
26
-
27
-
28
-
29
-
30
 |
 |

Hardware Reference Guide - dx2300 Series
Microtower Models
HP Compaq Business PC