HP Dx2300 HP Compaq dx2300 and dx2308 Business PC Service Reference Guide, 1st
HP Dx2300 - Compaq Business Desktop Manual
 |
UPC - 883585669479
View all HP Dx2300 manuals
Add to My Manuals
Save this manual to your list of manuals |
HP Dx2300 manual content summary:
- HP Dx2300 | HP Compaq dx2300 and dx2308 Business PC Service Reference Guide, 1st - Page 1
Service Reference Guide HP Compaq dx2300 and dx2308 Business PC - HP Dx2300 | HP Compaq dx2300 and dx2308 Business PC Service Reference Guide, 1st - Page 2
that is protected by copyright. No part of this document may be photocopied, reproduced, or translated to another language without the prior written consent of Hewlett-Packard Company. Service Reference Guide Business PCs First Edition (February 2007) Document Part Number: 443232-001 - HP Dx2300 | HP Compaq dx2300 and dx2308 Business PC Service Reference Guide, 1st - Page 3
About This Book WARNING! Text set off in this manner indicates that failure to follow directions could result in bodily harm or loss of life. CAUTION: Text set off in this manner indicates that failure to follow directions could result in damage to equipment or loss of information. NOTE: Text set - HP Dx2300 | HP Compaq dx2300 and dx2308 Business PC Service Reference Guide, 1st - Page 4
iv About This Book ENWW - HP Dx2300 | HP Compaq dx2300 and dx2308 Business PC Service Reference Guide, 1st - Page 5
...16 Saving and Printing Information in HP Insight Diagnostics 16 Downloading the Latest Version of HP Insight Diagnostics 17 4 Desktop Management Remote System Installation ...20 ROM Flash ...21 Boot Block Emergency Recovery Mode 21 HP Web Site Support ...22 Security ...22 DriveLock ...22 Using - HP Dx2300 | HP Compaq dx2300 and dx2308 Business PC Service Reference Guide, 1st - Page 6
33 Cleaning the Mouse 34 Service Considerations ...34 Power Supply Fan 34 Tools and Software Requirements 34 Screws ...34 Cables and Connectors 35 Hard Drives ...35 Lithium Coin Cell Battery 35 7 Removal and Replacement Procedures- Microtower (MT) Chassis Preparation for Disassembly ...37 - HP Dx2300 | HP Compaq dx2300 and dx2308 Business PC Service Reference Guide, 1st - Page 7
Hard Drive 53 Front I/O Panel Housing Assembly 54 Power Switch Assembly ...55 Speaker ...56 Second Serial Port ...57 System Fan ...58 Heatsink ...59 Processor ...60 System Board ...62 Battery ...63 Type 1 Battery Holder 64 Type 2 Battery Holder 65 Type 3 Battery Holder 66 Power Supply ...67 - HP Dx2300 | HP Compaq dx2300 and dx2308 Business PC Service Reference Guide, 1st - Page 8
General Requirements ...81 Japanese Power Cord Requirements 81 Country-Specific Requirements 81 Appendix C Troubleshooting Safety and Comfort ...83 Helpful Hints ...83 Solving General Problems ...85 Solving Hardware Installation Problems 88 Interpreting Diagnostic Lights 89 Index ...91 viii - HP Dx2300 | HP Compaq dx2300 and dx2308 Business PC Service Reference Guide, 1st - Page 9
appropriate drivers. Obtain the latest support software, including support software for the operating system from http://www.hp.com/support. Select your country and language, select Download drivers and software, enter the model number of the computer, and press Enter. ENWW Installing or Upgrading - HP Dx2300 | HP Compaq dx2300 and dx2308 Business PC Service Reference Guide, 1st - Page 10
: For more information on using HP Backup and Recovery Manager, refer to the HP Backup and Recovery Manager User Guide by selecting Start > HP Backup and Recovery > HP Backup and Recovery Manager Manual. You can order a Recovery Disc Set from HP by calling the HP support center. Go to the following - HP Dx2300 | HP Compaq dx2300 and dx2308 Business PC Service Reference Guide, 1st - Page 11
processor, graphics, memory, audio, storage, communications, and input devices. ● Modify the boot order of bootable devices such as hard drives, diskette drives, optical drives, or USB flash media devices. ● Restrict a device from booting the unit. ● Run hard drive self-tests. ● View CPU and system - HP Dx2300 | HP Compaq dx2300 and dx2308 Business PC Service Reference Guide, 1st - Page 12
the computer power OFF while the ROM is saving the Computer Setup (F10 Computer Setup-Advanced on page 7 Boot Computer Setup-Boot on page 9 PC Health Computer Setup-PC Health on page 10 Exit Computer Setup-Actions on page 10 Computer Setup-System Information NOTE: Support for specific Computer - HP Dx2300 | HP Compaq dx2300 and dx2308 Business PC Service Reference Guide, 1st - Page 13
Table 2-2 Computer Setup-System Information (continued) Cache Size (view only) Memory Size (view only) Integrated MAC (view only) UUID (view only) System Serial # (view only) Asset Tracking Number (view only) ENWW Computer Setup (F10) Utilities 5 - HP Dx2300 | HP Compaq dx2300 and dx2308 Business PC Service Reference Guide, 1st - Page 14
Support for specific Computer Setup options may vary depending on the hardware configuration. Table 2-3 Computer Setup-Main Option Description Date (mm:dd:yy) Allows you to set system date Onboard FDC Controller Disables/enables the floppy disk controller. Drive A Allows you to set Drive A to - HP Dx2300 | HP Compaq dx2300 and dx2308 Business PC Service Reference Guide, 1st - Page 15
: Support for specific Computer Setup options may vary depending on the hardware configuration. Table 2-4 Computer Setup-Advanced Option Description Execute Disable Bit Disables/enables hardware DEP functionality. MAX DVMT Allocation Specify the size of DVMT/system memory to allocate for video - HP Dx2300 | HP Compaq dx2300 and dx2308 Business PC Service Reference Guide, 1st - Page 16
Loss Allows you to select system power loss behavior: ● On ● Off ● Last State Wake on PCI Device Disables/enables waking up from S5 by PCI device. from S5 RTC Alarm Resume Disables/enables RTC (real-time clock) alarm. Date (of Month) If RTC Alarm Resume is enabled, allows you to select the - HP Dx2300 | HP Compaq dx2300 and dx2308 Business PC Service Reference Guide, 1st - Page 17
● Hard Disk ● CDROM ● Network ● Disabled NOTE: MS-DOS drive lettering assignments may not apply after a non-MS-DOS operating system has started. Set Supervisor Password Set User Password Security Option BIOS Write Protection Allows you to establish a password to control access to Computer Setup - HP Dx2300 | HP Compaq dx2300 and dx2308 Business PC Service Reference Guide, 1st - Page 18
settings established in the Computer Setup (F10) Utility requires that you first back up the settings before a recovery is needed. The CMOS Save/Load utility can be found at http://www.hp.com under the Software & Driver Downloads for your specific model. Download the firmware files into - HP Dx2300 | HP Compaq dx2300 and dx2308 Business PC Service Reference Guide, 1st - Page 19
the removable storage device. Restoring the CMOS 1. Make sure the target computer is turned on. Connect the removable storage to the target computer. 2. Boot to DOS. 3. Type N:\folder\BIOS.exe LOAD:ABC001.DAT (where N is the drive letter of the removable storage) to load the custom CMOS setting onto - HP Dx2300 | HP Compaq dx2300 and dx2308 Business PC Service Reference Guide, 1st - Page 20
12 Chapter 2 Computer Setup (F10) Utility ENWW - HP Dx2300 | HP Compaq dx2300 and dx2308 Business PC Service Reference Guide, 1st - Page 21
) utility so that the system attempts to boot to the optical drive before booting to the hard drive. Refer to the Computer Setup (F10) Utility Guide on the Documentation and Diagnostics CD for more information. 4. Select the appropriate language and click Continue. ENWW HP Insight Diagnostics 13 - HP Dx2300 | HP Compaq dx2300 and dx2308 Business PC Service Reference Guide, 1st - Page 22
-Shows HP Insight Diagnostics version information, computer configuration memory (CMOS) information, system board data, and system management BIOS data. Storage-Shows information about storage media connected to the computer. This list includes all fixed disks, diskette drives, and optical drives - HP Dx2300 | HP Compaq dx2300 and dx2308 Business PC Service Reference Guide, 1st - Page 23
type, there are two test modes to choose from: ● Interactive Mode-Provides maximum control over the testing process. The diagnostic or Complete Test, select the device to be tested from the drop-down list. If performing a Custom Test, Click the Expand button and select the HP Insight Diagnostics 15 - HP Dx2300 | HP Compaq dx2300 and dx2308 Business PC Service Reference Guide, 1st - Page 24
that are run. Saving and Printing Information in HP Insight Diagnostics You can save the information displayed in the HP Insight Diagnostics Survey and Log tabs to a diskette or a USB 2.0 HP Drive Key (64MB or higher). You can not save to the hard drive. The system will automatically create an html - HP Dx2300 | HP Compaq dx2300 and dx2308 Business PC Service Reference Guide, 1st - Page 25
CD from the optical drive. Downloading the Latest Version of HP Insight Diagnostics 1. Go to http://www.hp.com. 2. Click the Software & Driver Downloads link. 3. Enter your product number (for example, dc7700) in the text box and press the Enter key. 4. Select your specific computer model. 5. Select - HP Dx2300 | HP Compaq dx2300 and dx2308 Business PC Service Reference Guide, 1st - Page 26
18 Chapter 3 HP Insight Diagnostics ENWW - HP Dx2300 | HP Compaq dx2300 and dx2308 Business PC Service Reference Guide, 1st - Page 27
4 Desktop Management ENWW 19 - HP Dx2300 | HP Compaq dx2300 and dx2308 Business PC Service Reference Guide, 1st - Page 28
a hard drive ● Deploying a software image on one or more new PCs ● Remotely updating the system BIOS in flash ROM ● Configuring the system BIOS settings To initiate Remote System Installation, press F12 when the F12 = Network Service Boot message appears in the lower-right corner of the HP logo - HP Dx2300 | HP Compaq dx2300 and dx2308 Business PC Service Reference Guide, 1st - Page 29
ROM from being unintentionally updated or overwritten. This is important to ensure the operating integrity of the computer. Should you need or want to upgrade the BIOS, you may download the latest BIOS images from the HP driver and support page, http:///www.hp.com/support/files. CAUTION: For maximum - HP Dx2300 | HP Compaq dx2300 and dx2308 Business PC Service Reference Guide, 1st - Page 30
the latest support software easier. You can download the software from http://www.hp.com/support. The Web site contains the latest device drivers, utilities, and flashable ROM images needed to run the latest Microsoft Windows operating system on the HP computer. Security DriveLock DriveLock - HP Dx2300 | HP Compaq dx2300 and dx2308 Business PC Service Reference Guide, 1st - Page 31
is written onto the drive. Each time DPS is run, test results are written to the hard drive. You can use this information to help diagnose conditions that caused you to run the DPS software. Refer to the Troubleshooting Guide on the Documentation and Diagnostics CD for instructions on using DPS - HP Dx2300 | HP Compaq dx2300 and dx2308 Business PC Service Reference Guide, 1st - Page 32
Surge-Tolerant Power Supply An integrated surge-tolerant power supply provides greater reliability when the computer is hit with an unpredictable power surge. This power supply is rated to withstand a power surge of up to 2000 volts without incurring any system downtime or data loss. Thermal Sensor - HP Dx2300 | HP Compaq dx2300 and dx2308 Business PC Service Reference Guide, 1st - Page 33
ATA (SATA) Drive Guidelines and Features NOTE: HP only supports the use of SATA hard drives on these models of computer. No Parallel ATA (PATA) drives are supported. SATA Hard Drives Serial ATA Hard Drive Characteristics Number of pins/conductors in data cable Number of pins in power cable Maximum - HP Dx2300 | HP Compaq dx2300 and dx2308 Business PC Service Reference Guide, 1st - Page 34
hard drive or listed in the computer specification. Drive size calculations by drive manufacturers are bytes to the base 10 while calculations by Microsoft are bytes to the base 2. File System FAT 32 NTFS Drive/Partition Capacity Limits Controller Type ATA ATA Operating System Windows 2000/ XP - HP Dx2300 | HP Compaq dx2300 and dx2308 Business PC Service Reference Guide, 1st - Page 35
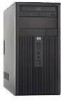
board. You must disconnect the power cord from the power source before opening the computer to prevent system board or component damage. Chassis Designations The following subsection illustrates the dx2300 and dx2308 chassis design. Microtower (MT) Figure 6-1 dx2300 ENWW Chassis Designations 27 - HP Dx2300 | HP Compaq dx2300 and dx2308 Business PC Service Reference Guide, 1st - Page 36
Figure 6-2 dx2308 28 Chapter 6 Identifying the Chassis, Routine Care, and Disassembly Preparation ENWW - HP Dx2300 | HP Compaq dx2300 and dx2308 Business PC Service Reference Guide, 1st - Page 37
, but it has been degraded in the internal layers, reducing its life expectancy. Networks built into many integrated circuits provide some protection, but in many cases, the discharge contains enough power to alter device parameters or melt silicon junctions. Generating Static The following table - HP Dx2300 | HP Compaq dx2300 and dx2308 Business PC Service Reference Guide, 1st - Page 38
● Heel straps/Toe straps/Boot straps can be used at standing workstations and are compatible with most types of shoes or boots. On conductive floors or dissipative Handle them only at static-free work areas. ● Turn off power and input signals before inserting and removing connectors or test equipment - HP Dx2300 | HP Compaq dx2300 and dx2308 Business PC Service Reference Guide, 1st - Page 39
● Conductive tabletop workstations with ground cord of one-megohm +/- 10% resistance ● Static-dissipative table or floor mats with hard tie to ground ● Field service kits ● Static awareness labels ● Wrist straps and footwear straps providing one-megohm +/- 10% resistance ● Material handling packages - HP Dx2300 | HP Compaq dx2300 and dx2308 Business PC Service Reference Guide, 1st - Page 40
on the enclosure, and the same operating guidelines listed above will still apply. ● Keep liquids away from the computer and keyboard. ● Never cover the ventilation slots on the monitor with any type of material. ● Install or enable power management functions of the operating system or other - HP Dx2300 | HP Compaq dx2300 and dx2308 Business PC Service Reference Guide, 1st - Page 41
keys or the keyboard body, follow the procedures described in Cleaning the Computer Case on page 32. When cleaning debris from under the keys, to prevent damage to the keys. This tool is available through many electronic supply outlets. CAUTION: Never remove a wide leveled key (like the space bar) - HP Dx2300 | HP Compaq dx2300 and dx2308 Business PC Service Reference Guide, 1st - Page 42
page 32. Service Considerations Listed below are some of the considerations that you should keep in mind during the disassembly and assembly of the computer. Power Supply Fan The power supply fan is a variable-speed fan based on the temperature in the power supply. CAUTION: The cooling fan is always - HP Dx2300 | HP Compaq dx2300 and dx2308 Business PC Service Reference Guide, 1st - Page 43
Battery The battery that comes with the computer provides power to the real-time clock and has a minimum lifetime of about three years. See the appropriate removal and replacement chapter for the chassis you are working on in this guide for instructions on the replacement procedures. WARNING! This - HP Dx2300 | HP Compaq dx2300 and dx2308 Business PC Service Reference Guide, 1st - Page 44
36 Chapter 6 Identifying the Chassis, Routine Care, and Disassembly Preparation ENWW - HP Dx2300 | HP Compaq dx2300 and dx2308 Business PC Service Reference Guide, 1st - Page 45
Microtower (MT) Chassis Adherence to the procedures and precautions described in this chapter is essential for proper service. After completing all necessary removal and replacement procedures, run the Diagnostics utility to verify that all components operate properly. NOTE: Not all features listed - HP Dx2300 | HP Compaq dx2300 and dx2308 Business PC Service Reference Guide, 1st - Page 46
computer access panel, ensure that the computer is turned off and that the power cord is disconnected from the electrical outlet. 2. Disconnect the power cord from the computer and from the power the removal steps. 38 Chapter 7 Removal and Replacement Procedures- Microtower (MT) Chassis ENWW - HP Dx2300 | HP Compaq dx2300 and dx2308 Business PC Service Reference Guide, 1st - Page 47
Front Bezel 1. Prepare the computer for disassembly (Preparation for Disassembly on page 37) 2. Remove the access panel (Access Panel on page 38 ) 3. Press down on all three tabs (1) on the - HP Dx2300 | HP Compaq dx2300 and dx2308 Business PC Service Reference Guide, 1st - Page 48
the computer for disassembly (Preparation for Disassembly on page 37) 2. Remove the access panel (Access Panel on page 38) 3. Remove the front bezel (Front Bezel on page 39) 5.25" Drive Bezel the removal procedure. 40 Chapter 7 Removal and Replacement Procedures- Microtower (MT) Chassis ENWW - HP Dx2300 | HP Compaq dx2300 and dx2308 Business PC Service Reference Guide, 1st - Page 49
Removing a 3.5" Drive Bezel Blank While facing the inside of the front bezel, press outward on the retaining tabs on each side of the bezel install a 3.5" bezel blank, press the blank inward from the inside of the front bezel so that it snaps into place. ENWW Removing a 3.5" Drive Bezel Blank 41 - HP Dx2300 | HP Compaq dx2300 and dx2308 Business PC Service Reference Guide, 1st - Page 50
electricity can damage the electronic components of the computer or optional cards. Before beginning these procedures, ensure that you are discharged of static electricity by briefly touching a grounded metal object. 42 Chapter 7 Removal and Replacement Procedures- Microtower (MT) Chassis ENWW - HP Dx2300 | HP Compaq dx2300 and dx2308 Business PC Service Reference Guide, 1st - Page 51
access panel and lay the computer down on its side to make it easier to work on. (Access Panel on page 38) WARNING! To reduce risk of personal injury from hot surfaces, allow the internal system components to cool before touching. 3. Open both latches of the memory module socket (1), and insert the - HP Dx2300 | HP Compaq dx2300 and dx2308 Business PC Service Reference Guide, 1st - Page 52
computer, remove the screw that secures the slot cover lock in place (1) then, slide the slot cover lock up and away from the slots to remove it from the computer (2). To reinstall the slot cover lock, reverse the removal procedure. 44 Chapter 7 Removal and Replacement Procedures- Microtower (MT - HP Dx2300 | HP Compaq dx2300 and dx2308 Business PC Service Reference Guide, 1st - Page 53
) 2. Remove the access panel (Access Panel on page 38) 3. Lay the computer down on its side to make it easier to work on. 4. Remove the slot cover lock (Expansion Slot Cover Lock on page 44) If you are installing an expansion card for the first time go to step 9. If you are replacing an - HP Dx2300 | HP Compaq dx2300 and dx2308 Business PC Service Reference Guide, 1st - Page 54
in the expansion card socket. 11. Reinstall the slot cover lock and its retaining screw. 12. Replace the access panel. 13. Connect external cables to the installed card, if needed. Reconfigure the computer, if necessary. 46 Chapter 7 Removal and Replacement Procedures- Microtower (MT) Chassis ENWW - HP Dx2300 | HP Compaq dx2300 and dx2308 Business PC Service Reference Guide, 1st - Page 55
computer. ● Keep cables away from major heat sources like the heatsink. ● Do not jam cables on top of expansion cards or memory modules. Printed circuit cards cable. ● Do not rely on components like the drive cage, power supply, or computer cover to push cables down into the chassis. Always position - HP Dx2300 | HP Compaq dx2300 and dx2308 Business PC Service Reference Guide, 1st - Page 56
Power Supply Power Supply Power Supply Power Supply Power Supply Cable Diskette drive 1st SATA Hard drive 2nd SATA Hard drive Primary ODD Second ODD Heatsink fan Chassis fan Front power on button Front I/O USB Speaker Front audio Second Serial Port Media Card Reader To System board, 24-pin CPU - HP Dx2300 | HP Compaq dx2300 and dx2308 Business PC Service Reference Guide, 1st - Page 57
the guide screws on a drive. CAUTION: Make sure personal files on the hard drive are backed up to an external storage device before removing the hard drive. Failure to do so will result in data loss. After replacing the primary hard drive, you will need to run the Restore Plus! CD to load the Compaq - HP Dx2300 | HP Compaq dx2300 and dx2308 Business PC Service Reference Guide, 1st - Page 58
metric threads. US screws are used for used for hard drives and have a silver finish. Metric screws are used for all other drives and have a black finish. Be sure to install the appropriate guide screws into the drive. 50 Chapter 7 Removal and Replacement Procedures- Microtower (MT) Chassis ENWW - HP Dx2300 | HP Compaq dx2300 and dx2308 Business PC Service Reference Guide, 1st - Page 59
a flat blade screwdriver to break out the metal shield. The 3.5" external drive bay may be populated with a diskette drive or a media card reader. The removal procedure is the same for both devices. 1. Prepare the computer for disassembly (Preparation for Disassembly on page 37) 2. Remove the access - HP Dx2300 | HP Compaq dx2300 and dx2308 Business PC Service Reference Guide, 1st - Page 60
metric threads. US screws are used for used for hard drives and have a silver finish. Metric screws are used for all other drives and have a black finish. Be sure to install the appropriate guide screws into the drive. 52 Chapter 7 Removal and Replacement Procedures- Microtower (MT) Chassis ENWW - HP Dx2300 | HP Compaq dx2300 and dx2308 Business PC Service Reference Guide, 1st - Page 61
bays 4 and 5). NOTE: If you replaced the primary hard drive, the Restore Plus!CD may be used to restore the operating system, software drivers, and/or any software applications that were preinstalled on the computer. Follow the instructions in the guide included with the CD. When the restore process - HP Dx2300 | HP Compaq dx2300 and dx2308 Business PC Service Reference Guide, 1st - Page 62
(Preparation for Disassembly on page 37) 2. Remove the access panel and rotate the computer so the system board is parallel to the table to make it easier to work the housing assembly, reverse the removal procedures. 54 Chapter 7 Removal and Replacement Procedures- Microtower (MT) Chassis ENWW - HP Dx2300 | HP Compaq dx2300 and dx2308 Business PC Service Reference Guide, 1st - Page 63
Power Switch Assembly 1. Prepare the computer for disassembly (Preparation for Disassembly on page 37). 2. Remove the access panel and rotate the computer so the system board is parallel to the table to make it easier to work on (Access Panel on page 38) 3. Disconnect the braided cables - HP Dx2300 | HP Compaq dx2300 and dx2308 Business PC Service Reference Guide, 1st - Page 64
Speaker 1. Prepare the computer for disassembly (Preparation for Disassembly on page 37) 2. Remove the access panel (Access Panel on page 38) 3. , make sure the speaker wires point towards the speaker retaining screw. 56 Chapter 7 Removal and Replacement Procedures- Microtower (MT) Chassis ENWW - HP Dx2300 | HP Compaq dx2300 and dx2308 Business PC Service Reference Guide, 1st - Page 65
Second Serial Port 1. Prepare the computer for disassembly (Preparation for Disassembly on page 37). 2. Remove the access panel (Access Panel on page 38). 3. Disconnect the serial port cable from the system - HP Dx2300 | HP Compaq dx2300 and dx2308 Business PC Service Reference Guide, 1st - Page 66
procedures. NOTE: When installing the fan, the CPU power cable must be plugged into the system board before securing the cable to the bottom of the fan cage. This will ensure that the cable is properly positioned. 58 Chapter 7 Removal and Replacement Procedures- Microtower (MT) Chassis ENWW - HP Dx2300 | HP Compaq dx2300 and dx2308 Business PC Service Reference Guide, 1st - Page 67
panel and lay the computer down on its side to make it easier to work on. (Access Panel on page 38) 3. Disconnect the heatsink control cable from the system grease already applied. Position the heatsink so that fan wiring is closest to the power supply. Check to ensure that the heatsink mounting lugs - HP Dx2300 | HP Compaq dx2300 and dx2308 Business PC Service Reference Guide, 1st - Page 68
2. Remove the access panel and lay the computer down on its side to make it easier to work on. (Access Panel on page 38). 3. Disconnect the heatsink control cable from the system board and remove the atop the processor. 60 Chapter 7 Removal and Replacement Procedures- Microtower (MT) Chassis ENWW - HP Dx2300 | HP Compaq dx2300 and dx2308 Business PC Service Reference Guide, 1st - Page 69
with the 4 captive screws and attach the heatsink control cable to the system board. CAUTION: Heatsink retaining update the system ROM to ensure that the latest version of the BIOS is being used on the computer. The latest system ROM BIOS can be found on the Web at: http:\\h18000.www1.hp.com/support - HP Dx2300 | HP Compaq dx2300 and dx2308 Business PC Service Reference Guide, 1st - Page 70
new system board, always update the system ROM to ensure that the latest version of the BIOS is being used on the computer. The latest system ROM BIOS can be found on the Web at: http:\\h18000.www1.hp.com/support/files. 62 Chapter 7 Removal and Replacement Procedures- Microtower (MT) Chassis ENWW - HP Dx2300 | HP Compaq dx2300 and dx2308 Business PC Service Reference Guide, 1st - Page 71
battery only with the HP/Compaq spare designated for this product. CAUTION: Before replacing the battery, it is important to back up the computer CMOS settings. When the battery is removed or replaced, the CMOS settings will be cleared. Refer to the Troubleshooting Guide for information on backing - HP Dx2300 | HP Compaq dx2300 and dx2308 Business PC Service Reference Guide, 1st - Page 72
the computer access panel. 5. Plug in the computer and turn on power to the computer. 6. Reset the date and time, your passwords, and any special system setups, using Computer Setup. Refer to the Computer Setup (F10) Utility Guide. 64 Chapter 7 Removal and Replacement Procedures- Microtower (MT - HP Dx2300 | HP Compaq dx2300 and dx2308 Business PC Service Reference Guide, 1st - Page 73
Type 2 Battery Holder 1. To release the battery from its holder, squeeze computer access panel. 4. Plug in the computer and turn on power to the computer. 5. Reset the date and time, your passwords, and any special system setups, using Computer Setup. Refer to the Computer Setup (F10) Utility Guide - HP Dx2300 | HP Compaq dx2300 and dx2308 Business PC Service Reference Guide, 1st - Page 74
the computer access panel. 4. Plug in the computer and turn on power to the computer. 5. Reset the date and time, your passwords, and any special system setups, using Computer Setup. Refer to the Computer Setup (F10) Utility Guide. 66 Chapter 7 Removal and Replacement Procedures- Microtower (MT - HP Dx2300 | HP Compaq dx2300 and dx2308 Business PC Service Reference Guide, 1st - Page 75
board. 4. Cut the tie wrap (1) at the bottom of the fan that secures the CPU power cable (2) to the fan cage. 5. Remove the 4 screws (1) that secure the power supply to the chassis. 6. Slide the power supply toward the front of the computer, then lift it out of the computer. ENWW Power Supply 67 - HP Dx2300 | HP Compaq dx2300 and dx2308 Business PC Service Reference Guide, 1st - Page 76
the CPU power cable to the system board, use the tie-wrap provided in the spares kit to secure the cable to the lower right corner of the fan cage. This will prevent the wire bundle from interfering with the chassis fan blades. 68 Chapter 7 Removal and Replacement Procedures- Microtower (MT - HP Dx2300 | HP Compaq dx2300 and dx2308 Business PC Service Reference Guide, 1st - Page 77
A Connector Pin Assignments This appendix contains the pin assignments for many computer and workstation connectors. Some of these connectors may not be used on the product being serviced. Keyboard Connector and Icon Pin Signal 1 Data 2 Unused 3 Ground 4 +5 VDC 5 Clock 6 Unused - HP Dx2300 | HP Compaq dx2300 and dx2308 Business PC Service Reference Guide, 1st - Page 78
RJ-45 Connector and Icon Ethernet AUI Connector and Icon Pin Signal 1 Ground 2 Negative AUI Differential Collision 3 Positive AUI Differential Collision 4 Negative AUI Differential Transmit 5 Positive AUI Differential Transmit 6 Ground 7 Ground 8 - HP Dx2300 | HP Compaq dx2300 and dx2308 Business PC Service Reference Guide, 1st - Page 79
Bit 5 8 Data Bit 6 9 Data Bit 7 Pin Signal 10 Acknowledge 11 Busy 12 Paper End 13 Select 14 Auto Linefeed 15 Error 16 Initialize Printer 17 Select 25 Serial Interface, Powered and Non-Powered Connector and Icon Pin Signal 1 Carrier Detect (12V if powered) 2 Receive Data - HP Dx2300 | HP Compaq dx2300 and dx2308 Business PC Service Reference Guide, 1st - Page 80
Diskette Drive Power Connector and Icon 4 1 Microphone Connector and Icon (1/8" miniphone) 1 23 Headphone Connector and Icon (1/8" miniphone) 1 23 Line-in Audio Connector and Icon (1/8" miniphone) 1 23 Line-out Audio Connector and Icon (1/8" miniphone) 1 23 72 Appendix A Connector Pin - HP Dx2300 | HP Compaq dx2300 and dx2308 Business PC Service Reference Guide, 1st - Page 81
External Infrared Transceiver Connector and Icon Pin 1 2 3 4 5 6 7 8 Monitor Connector and Icon Signal Transmit Receive Ground 5V Mode Not Used Not Used Not Used Pin Signal 1 Red Analog 2 Green Analog 3 Blue Analog 4 Not used 5 Ground 6 Ground 7 Ground 8 Ground Pin - HP Dx2300 | HP Compaq dx2300 and dx2308 Business PC Service Reference Guide, 1st - Page 82
34 1 Pin Signal 1 Ground 2 Low density 3 Key 4 Media - ID 5 Ground 6 No Signal 7 Ground 8 Index 9 Ground 10 Reserved 11 Ground 12 Drive Select 24-Pin Power Connector 24 33 Pin Signal 13 Ground 14 Reserved 15 Ground 16 Motor On 17 Ground 18 Direction In 19 - HP Dx2300 | HP Compaq dx2300 and dx2308 Business PC Service Reference Guide, 1st - Page 83
12 Pin Signal 1 +5 Vaux 2 GND 3 +5V 4 +5V 5 PS_ON 6 GND 1 Pin Signal 7 PWRGD 8 +3.3V 9 +3.3V 10 Tach 11 GND 12 Fan-CMD 4-Pin Power (for CPU) Connector and Icon 6-Pin Power (for CPU) Connector and Icon 4 6 Pin Signal 13 +12V 14 +5V Sense 15 GND 16 +5V 17 +5V 18 +3.3V Pin - HP Dx2300 | HP Compaq dx2300 and dx2308 Business PC Service Reference Guide, 1st - Page 84
SATA Data and Power Drive Connector Pin Signal S1 Ground S5 BP1 Ground P5 BP9 V 5 P13 V 12 *S = Data, P = Power Pin Signal S2 A+ S6 B+ P2 V 3.3 P6 Ground P10 Ground P14 V12 PCI Express x1, x4, x8, and x16 PCI Express Connector Pin Signal S3 AS7 - HP Dx2300 | HP Compaq dx2300 and dx2308 Business PC Service Reference Guide, 1st - Page 85
52 PERp8 57 PERn9 53 PERN8 58 GND 54 GND 59 GND 55 GND 60 PERp10 76 PERp14 81 PERn15 77 PERn14 82 GND 78 GND 79 GND 80 PERp15 Pin B information is on the next page 62 GND 63 GND 64 PERp11 65 PERn11 NOTE: x1 PCI Express uses pins 1-18 x4 PCI Express uses pins 1-32 x8 PCI Express uses - HP Dx2300 | HP Compaq dx2300 and dx2308 Business PC Service Reference Guide, 1st - Page 86
9 T.M.D.S. Data1- 10 T.M.D.S. Data1+ 11 T.M.D.S. Data1/3 Shield 78 Appendix A Connector Pin Assignments Pin Signal 13 T.M.D.S. Data3+ 14 +5V Power 15 Ground (for +5V) 16 Hot Pug Detect 17 T.M.D.S. Data0- 18 T.M.D.S. Data0+ 19 T.M.D.S. Data0/5 Shield 20 T.M.D.S. Data5- 21 - HP Dx2300 | HP Compaq dx2300 and dx2308 Business PC Service Reference Guide, 1st - Page 87
12 T.M.D.S. Data3- 24 T.M.D.S. Clock- ENWW DVI Connector 79 - HP Dx2300 | HP Compaq dx2300 and dx2308 Business PC Service Reference Guide, 1st - Page 88
80 Appendix A Connector Pin Assignments ENWW - HP Dx2300 | HP Compaq dx2300 and dx2308 Business PC Service Reference Guide, 1st - Page 89
the computer. General Requirements The requirements listed below are applicable to all countries: 1. The power power cord received with this product. CAUTION: Do not use the power cord received with this product on any other products. Country-Specific Requirements Additional requirements specific - HP Dx2300 | HP Compaq dx2300 and dx2308 Business PC Service Reference Guide, 1st - Page 90
Finland (1) SETI United Kingdom (1) BSI France (1) UTE United States (2) UL Germany (1) VDE 1. The flexible cord must be Type HO5VV-F, 3-conductor, 0.75mm2 conductor size. Power cord set fittings (appliance coupler and wall plug) must bear the certification mark of the agency responsible - HP Dx2300 | HP Compaq dx2300 and dx2308 Business PC Service Reference Guide, 1st - Page 91
C Troubleshooting Safety and Comfort WARNING! Misuse of the computer or failure to establish a safe and comfortable work environment may result in discomfort or serious injury. Refer to the Safety & Comfort Guide on the Documentation and Diagnostics CD and available on the Web site at http://www.hp - HP Dx2300 | HP Compaq dx2300 and dx2308 Business PC Service Reference Guide, 1st - Page 92
in Computer Setup. CAUTION: When the computer is plugged into an AC power source, there is always voltage applied to the system board. You must disconnect the power cord from the power source before opening the computer to prevent system board or component damage. 84 Appendix C Troubleshooting - HP Dx2300 | HP Compaq dx2300 and dx2308 Business PC Service Reference Guide, 1st - Page 93
lose any unsaved data. Computer date and time display is incorrect. Cause RTC (real-time clock) battery may need to be replaced. Solution First, reset the date and time under Control Panel (Computer Setup can also be used to update the RTC date and time). If the problem persists, replace the RTC - HP Dx2300 | HP Compaq dx2300 and dx2308 Business PC Service Reference Guide, 1st - Page 94
is installed properly. Hard drive is full. Transfer data from the hard drive to create more space on the hard drive. Low on memory. Add more memory. Hard drive fragmented. Defragment hard drive. Program previously accessed did not release reserved memory Restart the computer. back to the - HP Dx2300 | HP Compaq dx2300 and dx2308 Business PC Service Reference Guide, 1st - Page 95
for suggestions on how to improve performance by adjusting parameters in the application. 2. Add more memory. 3. Upgrade the graphics solution. Cause unknown. Restart the computer. Blank screen (no video). Cause Solution Monitor is not turned on and the monitor light is not on. Turn on - HP Dx2300 | HP Compaq dx2300 and dx2308 Business PC Service Reference Guide, 1st - Page 96
correct memory modules and to verify the proper installation. 2. Observe the LED lights on the front of the computer. See Interpreting Diagnostic Lights on page 89 to determine possible causes. 3. If you still cannot resolve the issue, contact Customer Support. 88 Appendix C Troubleshooting ENWW - HP Dx2300 | HP Compaq dx2300 and dx2308 Business PC Service Reference Guide, 1st - Page 97
LEDs on the front panel of the computer and refer to the following table to determine the front panel LED codes. Recommended actions in the following table are listed in the order in which they should be performed. Replace the system board or power supply only as the last resort. Activity Possible - HP Dx2300 | HP Compaq dx2300 and dx2308 Business PC Service Reference Guide, 1st - Page 98
the graphics card. 2. Replace the graphics card. 3. Replace the system board. For systems with integrated graphics, replace the system board. 1. Reflash the system ROM with the latest BIOS image. 2. Replace the system board. Press and hold the power button for less than 4 seconds. If the hard drive - HP Dx2300 | HP Compaq dx2300 and dx2308 Business PC Service Reference Guide, 1st - Page 99
card removal and replacement 45 expansion slot cover lock removal and replacement 44 F fan, power supply 34 Fault Notification and Recovery HP Client Manager 23 front bezel removal and replacement 39 front drive bezel 40 front I/O panel removal and replacement 54 G grounding methods 30 H hard drive - HP Dx2300 | HP Compaq dx2300 and dx2308 Business PC Service Reference Guide, 1st - Page 100
and Recovery Manager 2 HP Insight Diagnostics 13 Remote System Installation 20 Restore Plus! CD 2 servicing computer 34 spare part number tamper-resistent wrench 34 Torx T-15 screwdriver 34 speaker, removal and replacement 56 specifications memory 42 static electricity 29 surge-tolerant power supply - HP Dx2300 | HP Compaq dx2300 and dx2308 Business PC Service Reference Guide, 1st - Page 101
W Web sites BIOS download 21 ROM Flash 21 software support 22 ENWW Index 93 - HP Dx2300 | HP Compaq dx2300 and dx2308 Business PC Service Reference Guide, 1st - Page 102
94 Index ENWW
-
 1
1 -
 2
2 -
 3
3 -
 4
4 -
 5
5 -
 6
6 -
 7
7 -
8
-
9
-
10
-
11
-
12
-
13
-
14
-
15
-
16
-
17
-
18
-
19
-
20
-
21
-
22
-
23
-
24
-
25
-
26
-
27
-
28
-
29
-
30
-
31
-
32
-
33
-
34
-
35
-
36
-
37
-
38
-
39
-
40
-
41
-
42
-
43
-
44
-
45
-
46
-
47
-
48
-
49
-
50
-
51
-
52
-
53
-
54
-
55
-
56
-
57
-
58
-
59
-
60
-
61
-
62
-
63
-
64
-
65
-
66
-
67
-
68
-
69
-
70
-
71
-
72
-
73
-
74
-
75
-
76
-
77
-
78
-
79
-
80
-
81
-
82
-
83
-
84
-
85
-
86
-
87
-
88
-
89
-
90
-
91
-
92
-
93
-
94
-
95
-
96
-
97
-
98
-
99
-
100
-
101
-
102
 |
 |

Service Reference Guide
HP Compaq dx2300 and dx2308 Business PC