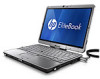
HP EliteBook 2760p HP EliteBook 2760p Tablet PC - Maintenance and Service Gui
HP EliteBook 2760p Manual
 |
View all HP EliteBook 2760p manuals
Add to My Manuals
Save this manual to your list of manuals |
HP EliteBook 2760p manual content summary:
- HP EliteBook 2760p | HP EliteBook 2760p Tablet PC - Maintenance and Service Gui - Page 1
HP EliteBook 2760p Tablet PC Maintenance and Service Guide - HP EliteBook 2760p | HP EliteBook 2760p Tablet PC - Maintenance and Service Gui - Page 2
States and other countries. Microsoft and Windows are U.S. registered trademarks of Microsoft Corporation. SD Logo is a trademark of its proprietor. The information contained herein is subject to change without notice. The only warranties for HP products and services are set forth in the express - HP EliteBook 2760p | HP EliteBook 2760p Tablet PC - Maintenance and Service Gui - Page 3
the computer air vents. Use the computer only on a hard, flat surface. Do not allow another hard surface, such as an adjoining optional printer, or a soft surface, such as pillows or rugs or clothing, to block airflow. Also, do not allow the AC adapter to contact the skin or a soft surface, such as - HP EliteBook 2760p | HP EliteBook 2760p Tablet PC - Maintenance and Service Gui - Page 4
iv Safety warning notice - HP EliteBook 2760p | HP EliteBook 2760p Tablet PC - Maintenance and Service Gui - Page 5
Mass storage devices ...25 Miscellaneous parts ...26 Sequential part number listing ...28 4 Removal and replacement procedures ...33 Preliminary replacement requirements 33 Tools required ...33 Service considerations ...33 Plastic parts ...33 Cables and connectors 34 Drive handling 34 Grounding - HP EliteBook 2760p | HP EliteBook 2760p Tablet PC - Maintenance and Service Gui - Page 6
...41 Service access cover ...42 Primary memory module ...43 SIM ...45 Hard drive ...46 WLAN module ...48 WWAN module ...51 Keyboard ...53 Secondary memory module 56 Top cover ...57 TouchPad board ...61 RTC battery ...62 Display assembly ...63 System board shield ...66 Modem module ...67 Bluetooth - HP EliteBook 2760p | HP EliteBook 2760p Tablet PC - Maintenance and Service Gui - Page 7
recovery tools 94 Using f11 ...94 Using a Windows 7 operating system DVD (purchased separately 95 8 Power cord set requirements ...96 Requirements for all countries and regions 96 Requirements for specific countries and regions 96 9 Recycling ...98 Battery ...98 Display ...98 Index ...104 vii - HP EliteBook 2760p | HP EliteBook 2760p Tablet PC - Maintenance and Service Gui - Page 8
viii - HP EliteBook 2760p | HP EliteBook 2760p Tablet PC - Maintenance and Service Gui - Page 9
1 Product description Category Product name Processors Chipset Graphics Panel Memory Hard drives Description HP EliteBook 2760p Tablet PC Intel® 2nd Generation Core™ i7 processors (soldered to system board) i7-2620M, 2.7-GHz (turbo up to 3.4-GHz) Dual-Core processor, 4 MB L3 cache, 35W Intel 2nd - HP EliteBook 2760p | HP EliteBook 2760p Tablet PC - Maintenance and Service Gui - Page 10
following WLAN formats: ● Broadcom 4313GN 802.11b/g/n 1x1 WiFi Adapter ● Broadcom 43224 AGN 802.11a/b/g/n 2x2 WiFi Adapter ● Intel Centrino® Advanced-N 6205 802.11a/b/g/n Supports "no WLAN" option Two WLAN antennas built into display assembly Integrated WWAN options by way of wireless module: Two - HP EliteBook 2760p | HP EliteBook 2760p Tablet PC - Maintenance and Service Gui - Page 11
battery connector For HP 2740p Ultra-Slim Expansion Base Full-size keyboard Dual point Spill-resistant design, DuraKey coating TouchPad supports: ● 2-way scroll ● Taps enabled as default ● 2-Finger Scrolling, 2-Finger Zoom (Pinch) gestures enabled by default Digital eraser pen with tether AC adapter - HP EliteBook 2760p | HP EliteBook 2760p Tablet PC - Maintenance and Service Gui - Page 12
Operating system Description Integrated smart card reader (active) Alcor AU9540 Supports security lock Trusted platform module (TPM) V.1.2 Preboot authentication (password, smart card) HP ProtectTools HP Power Assistant Preinstalled: Windows 7 Professional 64 (U.S., Canada, and Japan only) Windows - HP EliteBook 2760p | HP EliteBook 2760p Tablet PC - Maintenance and Service Gui - Page 13
Category Serviceability Description Microsoft WHQL Novell SuSE Linux End-user replaceable parts: AC adapter Battery Hard drive Memory module WLAN module WWAN module 5 - HP EliteBook 2760p | HP EliteBook 2760p Tablet PC - Maintenance and Service Gui - Page 14
2 External component identification Top TouchPad Component (1) Pointing stick (2) Left pointing stick button (3) TouchPad or activates items on the screen. Functions like the left button on an external mouse. Moves the pointer and selects or activates items on the screen. Functions like the left - HP EliteBook 2760p | HP EliteBook 2760p Tablet PC - Maintenance and Service Gui - Page 15
Component (1) (2) Caps lock light TouchPad light (3) Mute light (4) Volume down light (5) Volume up light (6) Num lock light (7) Drive light Description On: Caps lock is on. ● White: The hard drive or optical drive is being accessed. ● Amber: HP 3D DriveGuard has temporarily parked the - HP EliteBook 2760p | HP EliteBook 2760p Tablet PC - Maintenance and Service Gui - Page 16
the only available power source has reached a low battery level. When the battery reaches a critical battery level, the battery light begins blinking rapidly. ● Off: If the computer is plugged into an external power source, the light turns off when all batteries in the computer are fully charged. If - HP EliteBook 2760p | HP EliteBook 2760p Tablet PC - Maintenance and Service Gui - Page 17
Buttons Component (1) Volume mute button (2) Volume down button (3) Volume up button Description Mutes and restores speaker sound. Decreases computer volume. Increases computer volume. Top 9 - HP EliteBook 2760p | HP EliteBook 2760p Tablet PC - Maintenance and Service Gui - Page 18
num lk key, or the esc key. Displays the Windows Start menu. Displays a shortcut menu for items beneath the pointer. Can be used like the keys on an external numeric keypad when the embedded numeric keypad is turned on. Execute frequently used system functions when pressed in combination with the fn - HP EliteBook 2760p | HP EliteBook 2760p Tablet PC - Maintenance and Service Gui - Page 19
Front Component (1) Webcam light (2) External WWAN antenna button (3) External WWAN antenna (4) Power switch (5) Speakers (2) (6) Display release latch (7) Bluetooth® compartment Description On: The webcam is in use. Opens the external wireless wide area network (WWAN) antenna. Send and receive - HP EliteBook 2760p | HP EliteBook 2760p Tablet PC - Maintenance and Service Gui - Page 20
the computer is in Microsoft Windows, press the button to open the default Web browser. ● When the computer is in HP QuickWeb, press the button to open the default Web browser. NOTE: For more information, refer to "HP QuickWeb" in this guide and to the HP QuickWeb software Help. If your computer - HP EliteBook 2760p | HP EliteBook 2760p Tablet PC - Maintenance and Service Gui - Page 21
during routine operation. Supports optional ExpressCards. ● White: An integrated wireless device, such as a wireless local area network (WLAN) device, the HP Mobile Broadband Module, and/or a Bluetooth device, is on. ● Amber: All wireless devices are off. Turns the wireless feature on or off, but - HP EliteBook 2760p | HP EliteBook 2760p Tablet PC - Maintenance and Service Gui - Page 22
Programs > HP > HP Webcam. (5) Keyboard light button Opens and turns on the keyboard light. (6) Touch screen Allows you to perform certain actions using your fingers or the digitizer pen. (7) Ambient light sensor Automatically adjusts the display brightness based on the lighting conditions - HP EliteBook 2760p | HP EliteBook 2760p Tablet PC - Maintenance and Service Gui - Page 23
standard keyboard. information is lost. The reset function can be used to restore functionality when the system has become unresponsive. Connects an AC adapter. Connects a network cable. (7) External monitor port Connects an external VGA monitor or projector. *To protect your work and the system - HP EliteBook 2760p | HP EliteBook 2760p Tablet PC - Maintenance and Service Gui - Page 24
through Help and Support. Connects an optional docking device. Displays the approximate remaining battery charge. Releases the battery from the battery bay. Connects an optional accessory battery. Slides open to expose the accessory battery connector. 16 Chapter 2 External component identification - HP EliteBook 2760p | HP EliteBook 2760p Tablet PC - Maintenance and Service Gui - Page 25
information, the serial number label, located inside the battery bay, provides important information that you may need when contacting technical support identifier that provides specific information about the product's hardware components. The part number helps a service technician to determine - HP EliteBook 2760p | HP EliteBook 2760p Tablet PC - Maintenance and Service Gui - Page 26
Computer major components 18 Chapter 3 Illustrated parts catalog - HP EliteBook 2760p | HP EliteBook 2760p Tablet PC - Maintenance and Service Gui - Page 27
2 WWAN antenna transceivers and cables) 30.7 cm (12.1 in) WXGA, LED, AntiGlare touch screen display 649753-001 30.7 cm (12.1 in) WXGA, LED, AntiGlare touch screen display for use outdoors 649754-001 Hinge cover assembly (included in the Plastics Kit, spare part number 649764-001) Keyboard with - HP EliteBook 2760p | HP EliteBook 2760p Tablet PC - Maintenance and Service Gui - Page 28
Memory battery 649769-001 Speaker assembly 649767-001 System board shield (includes replacement thermal material) 649760-001 Fan/heat sink assembly (includes replacement information. 628824-001 Smart card reader 597839-001 System board (includes replacement Intel Core i7-2620M Dual-Core - HP EliteBook 2760p | HP EliteBook 2760p Tablet PC - Maintenance and Service Gui - Page 29
-001 Hard drive (includes bracket) 320 GB, 7200 rpm, SATA 7 mm (2.5 in) self-encrypting drive (SED) 656621-001 320 GB, 7200 rpm, SATA 7 mm (2.5 in) 656620-001 250 GB, 7200 rpm, SATA 7 mm (2.5 in) 656619-001 128 GB solid-state drive 653017-001 160 GB solid-state drive 653018-001 Memory - HP EliteBook 2760p | HP EliteBook 2760p Tablet PC - Maintenance and Service Gui - Page 30
Item (28) Description 6-cell, 44 Whr, 2.0-Ah Service access cover (included in the Plastics Kit, spare part number 649764-001) Spare part number 593592-001 22 Chapter 3 Illustrated parts catalog - HP EliteBook 2760p | HP EliteBook 2760p Tablet PC - Maintenance and Service Gui - Page 31
Plastics Kit Item Description Plastics Kit (1) VGA bracket (2) Display hinge cover (3) ExpressCard slot protective insert (4) Service access cover (5) RJ11 door Spare part number 649764-001 Plastics Kit 23 - HP EliteBook 2760p | HP EliteBook 2760p Tablet PC - Maintenance and Service Gui - Page 32
Cable Kit Item (1) (2) (3) (4) (5) Description Cable Kit RJ-11 connector cable Bluetooth module cable Audio cable TouchPad connector cable Volume connector cable 24 Chapter 3 Illustrated parts catalog Spare part number 649758-001 - HP EliteBook 2760p | HP EliteBook 2760p Tablet PC - Maintenance and Service Gui - Page 33
storage devices Description Hard drives (includes bracket) 320 GB SED, 7200 rpm, 7 mm (2.5 in) 320 GB, 7200 rpm, 7 mm (2.5 in) 250 GB, 7200 rpm, 7 mm (2.5 in) 128 GB solid-state drive (SSD) 160 GB SSD Spare part number 656621-001 656620-001 656619-001 653017-001 653018-001 Mass storage devices 25 - HP EliteBook 2760p | HP EliteBook 2760p Tablet PC - Maintenance and Service Gui - Page 34
Miscellaneous parts Description AC adapter 65W AC travel adapter (for use only in Japan) 65W Smart AC adapter, RC V, 3W 65W Smart AC adapter, RC V, EM. 3W Rubber Kit (includes feet and screw covers) HP 2740 Ultra-Slim Expansion Base Power cords For use in Argentina For use in Australia For use in - HP EliteBook 2760p | HP EliteBook 2760p Tablet PC - Maintenance and Service Gui - Page 35
Description For use in the United States Screw Kit ● Phillips 2.5×8.0 captive screw ● Phillips 2.0×7.0 captive screw ● Phillips 2.0×3.0 captive screw ● Phillips 3.0×2.5 screw ● Phillips 2.5×3.0 screw ● Phillips 2.5×6.0 screw ● Phillips 2.0×4.0 screw ● Phillips 2.0×3.5 screw ● Phillips 2.0×3.0 screw - HP EliteBook 2760p | HP EliteBook 2760p Tablet PC - Maintenance and Service Gui - Page 36
in India Bluetooth module (The Bluetooth cable is included in the Cable Kit, spare part number 649758-001.) Broadcom 43224 802.11 a/b/g/n 2x2 WiFi Adapter: For , Yemen, and Zimbabwe 65W AC travel Adapter (for use in Japan) 6-cell, 44 Whr, 2.0 Ah, Li-ion battery (with charging indicator) 28 Chapter - HP EliteBook 2760p | HP EliteBook 2760p Tablet PC - Maintenance and Service Gui - Page 37
HP 2740 Ultra-Slim Expansion Base Pen (includes tether) 65W AC Smart Adapter, RC V, 3W 65W AC Smart Adapter, RC V, EM 3W 2 GB memory module (PC3-10600, 1333 MHz, DDR3, shared) 4 GB memory page 24 for more Cable Kit spare part number information. Intel Centrino Advanced-N 6205 a/b/g/n WLAN module for - HP EliteBook 2760p | HP EliteBook 2760p Tablet PC - Maintenance and Service Gui - Page 38
, U.S. Virgin Islands, Venezuela, Vietnam, Yemen, and Zimbabwe 8-GB memory module (PC3-10600, 1333-MHz, DDR3, shared) Qualcomm Gobi 3000 and regions except Russia and the People's Republic of China System board with Second Generation Intel Core i7 2620M Dual-Core processor [2.7 GHz (turbo up to 3.4 - HP EliteBook 2760p | HP EliteBook 2760p Tablet PC - Maintenance and Service Gui - Page 39
of China System board with Second Generation Intel Core i7 2620M Dual-Core processor [2.7 GHz (turbo up to 3.4 GHz), 4 MB L3 cache] for use only in Russia and the People's Republic of China 30.7 cm (12.1 in) WXGA, LED, AntiGlare touch screen display assembly (includes 2 WLAN antenna transceivers and - HP EliteBook 2760p | HP EliteBook 2760p Tablet PC - Maintenance and Service Gui - Page 40
) RTC battery 128 GB solid-state drive (includes bracket) 160 GB solid-state drive (includes bracket) Hard drive, 250 GB, 7200 rpm, SATA 7 mm (2.5 in) Hard drive, 320 GB, 7200 rpm, SATA 7 mm (2.5 in) Hard drive, 320 GB, 7200 rpm, SATA 7 mm (2.5 in) self-encrypting drive (SED) External Antenna 32 - HP EliteBook 2760p | HP EliteBook 2760p Tablet PC - Maintenance and Service Gui - Page 41
from the work area to prevent damage. Plastic parts CAUTION: Using excessive force during disassembly and reassembly can damage plastic parts. Use care when handling the plastic parts. Apply pressure only at the points designated in the maintenance instructions. Preliminary replacement requirements - HP EliteBook 2760p | HP EliteBook 2760p Tablet PC - Maintenance and Service Gui - Page 42
, or loss of information, observe these precautions: Before removing or inserting a hard drive, shut down the computer. If you are unsure whether the computer is off or in Hibernation, turn the computer on, and then shut it down through the operating system. Before handling a drive, be sure that - HP EliteBook 2760p | HP EliteBook 2760p Tablet PC - Maintenance and Service Gui - Page 43
not be affected at all and can work perfectly throughout a normal cycle. Or the device may function normally for a while, and then degrade in the internal layers, reducing its life expectancy. CAUTION: To prevent damage to the computer when you are removing or installing internal components, observe - HP EliteBook 2760p | HP EliteBook 2760p Tablet PC - Maintenance and Service Gui - Page 44
, parts, and assemblies by the case or PCM laminate. Handle these items only at static-free workstations. ● Avoid contact with pins, leads, or circuitry. ● Turn off power and input signals before inserting or removing connectors or test equipment. 36 Chapter 4 Removal and replacement procedures - HP EliteBook 2760p | HP EliteBook 2760p Tablet PC - Maintenance and Service Gui - Page 45
workstation. ● When seated, wear a wrist strap connected to a grounded system. Wrist straps are flexible straps with a minimum of one megohm ±10 -dissipative tables or floor mats with hard ties to the ground ● Field service kits ● Static awareness labels ● V Preliminary replacement requirements 37 - HP EliteBook 2760p | HP EliteBook 2760p Tablet PC - Maintenance and Service Gui - Page 46
screws in 12 different sizes, that must be removed, replaced, or loosened when servicing the computer. Make special note of each screw size and location during removal and replacement. Service tag When ordering parts or requesting information, provide the computer serial number and model description - HP EliteBook 2760p | HP EliteBook 2760p Tablet PC - Maintenance and Service Gui - Page 47
Computer feet The computer feet are adhesive-backed rubber pads. The feet are included in the Rubber Kit, spare part number 649765-001. There are four rubber feet that attach to the base enclosure in the locations illustrated below. Component replacement procedures 39 - HP EliteBook 2760p | HP EliteBook 2760p Tablet PC - Maintenance and Service Gui - Page 48
Digitizer pen with eraser (includes tether) Spare part number 606899-001 Remove the pen: 1. Position the computer right-side up, with the it, and then pull the pen through the loop (1). 3. Remove the pen and tether from the computer (2). Reverse this procedure to install the pen. 40 Chapter - HP EliteBook 2760p | HP EliteBook 2760p Tablet PC - Maintenance and Service Gui - Page 49
it down through the operating system. 2. Disconnect all external devices connected to the computer. 3. Disconnect the power from the computer by first unplugging the power cord from the AC outlet, and then unplugging the AC adapter from the computer. Remove the battery: 1. Turn the computer upside - HP EliteBook 2760p | HP EliteBook 2760p Tablet PC - Maintenance and Service Gui - Page 50
system. 2. Disconnect all external devices connected to the computer. 3. Disconnect the power from the computer by first unplugging the power cord from the AC outlet, and then unplugging the AC adapter from the computer. 4. Remove the battery (see Battery on page 41) Remove the service access - HP EliteBook 2760p | HP EliteBook 2760p Tablet PC - Maintenance and Service Gui - Page 51
external devices connected to the computer. 3. Disconnect the power from the computer by first unplugging the power cord from the AC outlet, and then unplugging the AC adapter from the computer. 4. Remove the following components: a. Remove the battery (see Battery on page 41) b. Remove the service - HP EliteBook 2760p | HP EliteBook 2760p Tablet PC - Maintenance and Service Gui - Page 52
Reverse this procedure to install a primary memory module. 44 Chapter 4 Removal and replacement procedures - HP EliteBook 2760p | HP EliteBook 2760p Tablet PC - Maintenance and Service Gui - Page 53
external devices connected to the computer. 3. Disconnect the power from the computer by first unplugging the power cord from the AC outlet, and then unplugging the AC adapter from the computer. 4. Remove the following components: a. Remove the battery (see Battery on page 41) b. Remove the service - HP EliteBook 2760p | HP EliteBook 2760p Tablet PC - Maintenance and Service Gui - Page 54
external devices connected to the computer. 3. Disconnect the power from the computer by first unplugging the power cord from the AC outlet, and then unplugging the AC adapter from the computer. 4. Remove the following components: a. Remove the battery (see Battery on page 41) b. Remove the service - HP EliteBook 2760p | HP EliteBook 2760p Tablet PC - Maintenance and Service Gui - Page 55
3. Lift the hard drive (2) to remove it from the computer. 4. If it is necessary to replace the hard drive bracket, remove the four Phillips M2.5x3.0 screws (1) that secure the bracket to the hard drive. 5. Lift the bracket (2) straight up to remove it from the hard drive. Reverse this procedure to - HP EliteBook 2760p | HP EliteBook 2760p Tablet PC - Maintenance and Service Gui - Page 56
are not interchangeable. Description Spare part number Broadcom 43224 802.11 a/b/g/n 2x2 WiFi Adapter: For use in Antigua and Barbuda, Argentina, Aruba, the Bahamas, Barbados, Belize the United Kingdom, Vietnam, Yemen, and Zimbabwe 582564-002 48 Chapter 4 Removal and replacement procedures - HP EliteBook 2760p | HP EliteBook 2760p Tablet PC - Maintenance and Service Gui - Page 57
external devices connected to the computer. 3. Disconnect the power from the computer by first unplugging the power cord from the AC outlet, and then unplugging the AC adapter from the computer. 4. Remove the following components: a. Remove the battery (see Battery on page 41) b. Remove the service - HP EliteBook 2760p | HP EliteBook 2760p Tablet PC - Maintenance and Service Gui - Page 58
cable is connected to the WLAN module "Main" terminal. The white WLAN antenna cable is connected to the WLAN module "Aux" terminal. 2. Remove the two Phillips M2.5×3.0 screws (3) that secure the WLAN module to the computer. 3. Remove the WLAN module by pulling the module away from the slot at an - HP EliteBook 2760p | HP EliteBook 2760p Tablet PC - Maintenance and Service Gui - Page 59
external devices connected to the computer. 3. Disconnect the power from the computer by first unplugging the power cord from the AC outlet, and then unplugging the AC adapter from the computer. 4. Remove the following components: a. Remove the battery (see Battery on page 41) b. Remove the service - HP EliteBook 2760p | HP EliteBook 2760p Tablet PC - Maintenance and Service Gui - Page 60
3. Remove the WWAN module (4) by pulling the module away from the slot at an angle. NOTE: WWAN modules are designed with a notch (5) to prevent incorrect insertion. Reverse this procedure to install the WWAN module. 52 Chapter 4 Removal and replacement procedures - HP EliteBook 2760p | HP EliteBook 2760p Tablet PC - Maintenance and Service Gui - Page 61
external devices connected to the computer. 3. Disconnect the power from the computer by first unplugging the power cord from the AC outlet, and then unplugging the AC adapter from the computer. 4. Remove the following components: a. Remove the battery (see Battery on page 41) b. Remove ths service - HP EliteBook 2760p | HP EliteBook 2760p Tablet PC - Maintenance and Service Gui - Page 62
computer right-side up, with the front toward you. 4. Open the display as far as possible. 5. Insert a flat tool under the back edge (1) of the keyboard near the display hinge. Gently lift the rear edge of the keyboard (2) and disconnect the keyboard. 54 Chapter 4 Removal and replacement procedures - HP EliteBook 2760p | HP EliteBook 2760p Tablet PC - Maintenance and Service Gui - Page 63
and remove the pointing stick ZIF cable (3) from the connector. 7. Flip the keyboard over to the left and lay it flat (1), then release the ZIF connector that secures the keyboard cable (2) to the system board and remove the keyboard cable (3) from the ZIF connector. Component replacement procedures - HP EliteBook 2760p | HP EliteBook 2760p Tablet PC - Maintenance and Service Gui - Page 64
the AC outlet, and then unplugging the AC adapter from the computer. 4. Remove the following components: a. Remove the battery (see Battery on page 41) b. Service access cover (see Service access cover on page 42) c. Remove the keyboard (see Keyboard on page 53) 56 Chapter 4 Removal and replacement - HP EliteBook 2760p | HP EliteBook 2760p Tablet PC - Maintenance and Service Gui - Page 65
external devices connected to the computer. 3. Disconnect the power from the computer by first unplugging the power cord from the AC outlet, and then unplugging the AC adapter from the computer. 4. Remove the following components: a. Remove the battery (see Battery on page 41) b. Remove the service - HP EliteBook 2760p | HP EliteBook 2760p Tablet PC - Maintenance and Service Gui - Page 66
two Torx 8M2.0x5.0 screws (3) located below the battery bay. 4. Turn the computer right-side up, with the front toward you. 5. Open the display as far as possible. 6. Release the ZIF connector (1) that secures the audio cable to the system board and remove the audio cable (2) from the ZIF connector - HP EliteBook 2760p | HP EliteBook 2760p Tablet PC - Maintenance and Service Gui - Page 67
8. Remove the two Phillips M2.5x7.0 screws (5). 9. Lift the rear edge (1) of the top cover. 10. Disengage the top cover from the computer, (2) up and off the computer. NOTE: A small plastic brace for the VGA port rests below the top cover. Simply lift the brace. Component replacement procedures 59 - HP EliteBook 2760p | HP EliteBook 2760p Tablet PC - Maintenance and Service Gui - Page 68
11. Remove the Phillips M2.0x2.0 screw (1) from the volume control board and slide the volume control (2) out from the tab. Reverse this procedure to install the top cover. 60 Chapter 4 Removal and replacement procedures - HP EliteBook 2760p | HP EliteBook 2760p Tablet PC - Maintenance and Service Gui - Page 69
external devices connected to the computer. 3. Disconnect the power from the computer by first unplugging the power cord from the AC outlet, and then unplugging the AC adapter from the computer. 4. Remove the following components: a. Remove the battery (see Battery on page 41) b. Remove the service - HP EliteBook 2760p | HP EliteBook 2760p Tablet PC - Maintenance and Service Gui - Page 70
external devices connected to the computer. 3. Disconnect the power from the computer by first unplugging the power cord from the AC outlet, and then unplugging the AC adapter from the computer. 4. Remove the following components: a. Remove the battery (see Battery on page 41) b. Remove the service - HP EliteBook 2760p | HP EliteBook 2760p Tablet PC - Maintenance and Service Gui - Page 71
external devices connected to the computer. 3. Disconnect the power from the computer by first unplugging the power cord from the AC outlet, and then unplugging the AC adapter from the computer. 4. Remove the following components: a. Remove the battery (see Battery on page 41) b. Remove the service - HP EliteBook 2760p | HP EliteBook 2760p Tablet PC - Maintenance and Service Gui - Page 72
right-side up, with the front toward you and open the display so it stands straight up. 6. Feed the WWAN and WLAN antennas (1) through the bottom of the base enclosure and remove the antennas. 7. Disconnect the webcam cable (2) from the system board. 64 Chapter 4 Removal and replacement procedures - HP EliteBook 2760p | HP EliteBook 2760p Tablet PC - Maintenance and Service Gui - Page 73
system board. CAUTION: Support the display assembly when removing the display screws in the following step. Failure to support the display assembly can result in damage to the assembly and other components. 9. Remove the two Phillips M2.5x6.0 screws (1) that secure the display assembly to the base - HP EliteBook 2760p | HP EliteBook 2760p Tablet PC - Maintenance and Service Gui - Page 74
external devices connected to the computer. 3. Disconnect the power from the computer by first unplugging the power cord from the AC outlet, and then unplugging the AC adapter from the computer. 4. Remove the following components: a. Remove the battery (see Battery on page 41) b. Remove the service - HP EliteBook 2760p | HP EliteBook 2760p Tablet PC - Maintenance and Service Gui - Page 75
removing the modem module, follow these steps: 1. Shut down the computer. If you are unsure whether the computer is off or in Hibernation, turn the computer on, and then shut it down through the operating system. 2. Disconnect all external devices connected to the computer. Component replacement - HP EliteBook 2760p | HP EliteBook 2760p Tablet PC - Maintenance and Service Gui - Page 76
unplugging the power cord from the AC outlet, and then unplugging the AC adapter from the computer. 4. Remove the following components: a. Remove the battery (see Battery on page 41) b. Remove the service access cover (see Service access cover on page 42) c. Remove the WLAN module (see WLAN module - HP EliteBook 2760p | HP EliteBook 2760p Tablet PC - Maintenance and Service Gui - Page 77
external devices connected to the computer. 3. Disconnect the power from the computer by first unplugging the power cord from the AC outlet, and then unplugging the AC adapter from the computer. 4. Remove the following components: a. Remove the battery (see Battery on page 41) b. Remove the service - HP EliteBook 2760p | HP EliteBook 2760p Tablet PC - Maintenance and Service Gui - Page 78
external devices connected to the computer. 3. Disconnect the power from the computer by first unplugging the power cord from the AC outlet, and then unplugging the AC adapter from the computer. 4. Remove the following components: a. Remove the battery (see Battery on page 41) b. Remove the service - HP EliteBook 2760p | HP EliteBook 2760p Tablet PC - Maintenance and Service Gui - Page 79
external devices connected to the computer. 3. Disconnect the power from the computer by first unplugging the power cord from the AC outlet, and then unplugging the AC adapter from the computer. 4. Remove the following components: a. Remove the battery (see Battery on page 41) b. Remove the service - HP EliteBook 2760p | HP EliteBook 2760p Tablet PC - Maintenance and Service Gui - Page 80
external devices connected to the computer. 3. Disconnect the power from the computer by first unplugging the power cord from the AC outlet, and then unplugging the AC adapter from the computer. 4. Remove the following components: a. Remove the battery (see Battery on page 41) b. Remove the service - HP EliteBook 2760p | HP EliteBook 2760p Tablet PC - Maintenance and Service Gui - Page 81
WWAN module (see WWAN module on page 51) e. Remove the keyboard (see Keyboard on page 53) f. Remove the top cover (see Top cover on page 57) g. Remove the display assembly (see Display assembly on page 63) h. Remove the Bluetooth module (see Bluetooth module on page 68) i. Latch assembly (see Latch - HP EliteBook 2760p | HP EliteBook 2760p Tablet PC - Maintenance and Service Gui - Page 82
external devices connected to the computer. 3. Disconnect the power from the computer by first unplugging the power cord from the AC outlet, and then unplugging the AC adapter from the computer. 4. Remove the following components: a. Remove the battery (see Battery on page 41) b. Remove the service - HP EliteBook 2760p | HP EliteBook 2760p Tablet PC - Maintenance and Service Gui - Page 83
out of the chassis (3). NOTE: Adhesive secures the reader to the base enclosure. You must break the adhesion to remove the reader. 4. Remove the Bluetooth cable by disconnecting the ZIF cable (1) securing the Bluetooth module to the system board and thn lift the cable (2). Reverse this procedure to - HP EliteBook 2760p | HP EliteBook 2760p Tablet PC - Maintenance and Service Gui - Page 84
external devices connected to the computer. 3. Disconnect the power from the computer by first unplugging the power cord from the AC outlet, and then unplugging the AC adapter from the computer. 4. Remove the following components: a. Remove the battery (see Battery on page 41) b. Remove the service - HP EliteBook 2760p | HP EliteBook 2760p Tablet PC - Maintenance and Service Gui - Page 85
that the following components are removed from the defective system board and installed on the replacement system board: ● Remove the SIM (see SIM on page 45) ● Remove the memory modules (see Primary memory module on page 43 and Secondary memory module on page 56) ● Remove the WLAN module (see WLAN - HP EliteBook 2760p | HP EliteBook 2760p Tablet PC - Maintenance and Service Gui - Page 86
external devices connected to the computer. 3. Disconnect the power from the computer by first unplugging the power cord from the AC outlet, and then unplugging the AC adapter from the computer. 4. Remove the following components: a. Remove the battery (see Battery on page 41) b. Remove the service - HP EliteBook 2760p | HP EliteBook 2760p Tablet PC - Maintenance and Service Gui - Page 87
h. Remove the keyboard (see Keyboard on page 53) i. Remove the top cover (see Top cover on page 57) j. Remove the RTC battery (see RTC battery on page 62) k. Remove the display assembly (see Display assembly on page 63) l. Remove the system board shield (see System board shield on page 66) m. Remove - HP EliteBook 2760p | HP EliteBook 2760p Tablet PC - Maintenance and Service Gui - Page 88
thermal material must be thoroughly cleaned from the surfaces of the heat sink (1) and processor (2) each time the heat sink is removed. Thermal material is included with fan/heat sink assembly and system board spare part kits. Reverse this procedure to install the fan/heat sink assembly. 80 Chapter - HP EliteBook 2760p | HP EliteBook 2760p Tablet PC - Maintenance and Service Gui - Page 89
Computer Setup is a preinstalled, ROM-based utility that can be used even when the operating system is not working or will not load. NOTE: Some of the Computer Setup menu items listed in this guide may not be supported by your computer. NOTE: An external keyboard or mouse connected to a USB port can - HP EliteBook 2760p | HP EliteBook 2760p Tablet PC - Maintenance and Service Gui - Page 90
the ESC key for Startup Menu" message is displayed at the bottom of the screen. 2. Press f10 to enter BIOS Setup. 3. Use a pointing device or the arrow keys to select File > Restore Defaults. 4. Follow the on-screen instructions. 5. To save your changes and exit, click the Save icon in the lower - HP EliteBook 2760p | HP EliteBook 2760p Tablet PC - Maintenance and Service Gui - Page 91
Reset BIOS security to factory default Ignore Changes and Exit Save Changes and Exit To do this ● View identification information for the computer and the batteries in the system. ● View specification information for the processor, cache and memory size, system ROM, video revision, and keyboard - HP EliteBook 2760p | HP EliteBook 2760p Tablet PC - Maintenance and Service Gui - Page 92
only; disabled by default). Enter, change, or delete a BIOS administrator password. Enroll or reset HP SpareKey, which is a set of security questions and answers used if you forget your password. Enable/disable Anti-Theft Protection. ● Enable/disable DriveLock on any computer hard drive (enabled - HP EliteBook 2760p | HP EliteBook 2760p Tablet PC - Maintenance and Service Gui - Page 93
of a USB keyboard in Computer Setup even when a Windows operating system is not running ◦ Startup from bootable USB devices, including a hard drive, diskette drive, or optical drive connected by a USB port to the computer ● Enable/disable fan always on while connected to an AC outlet (disabled by - HP EliteBook 2760p | HP EliteBook 2760p Tablet PC - Maintenance and Service Gui - Page 94
/disable secondary battery fast charge (enabled by default). ● Enable/disable HP QuickLook (enabled by default). ● Enable/disable preboot authentication on HP QuickLook boot (enabled by default). ● Enable/disable HP QuickWeb (enabled by default). ● Enable/disable HP QuickWeb write protect (disabled - HP EliteBook 2760p | HP EliteBook 2760p Tablet PC - Maintenance and Service Gui - Page 95
radio (select models only; enabled by default). ● Enable/disable the embedded Bluetooth device radio (enabled by default). ● Enable/disable the network interface controller (enabled by default). ● Enable/disable LAN/WLAN switching (disabled by default). ● Set the wake on LAN state. Options include - HP EliteBook 2760p | HP EliteBook 2760p Tablet PC - Maintenance and Service Gui - Page 96
unconfigure AMT on next boot. ● Select terminal emulation mode: ◦ ANSI ◦ VT100 ● Enable/disable firmware progress event support. ● Enable/disable initiate Intel CIRA. Change, view, or hide security levels for all BIOS menu items. Restore the default security settings. 88 Chapter 5 Computer Setup - HP EliteBook 2760p | HP EliteBook 2760p Tablet PC - Maintenance and Service Gui - Page 97
21.2 cm 8.35 in Width 29.0 cm 11.4 in Height (front to rear) 3.2 cm 1.27 in Weight (equipped with 1 DIMM, 6-cell battery, WLAN module) 1.8 kg 3.97 lbs Input power Operating voltage 18.5 V dc @ 3.5 A - 65 W Operating current 3.5 A Temperature Operating 5°C to 35°C 41°F to 95 - HP EliteBook 2760p | HP EliteBook 2760p Tablet PC - Maintenance and Service Gui - Page 98
Pixel resolution Pitch Format Configuration Backlight Character display Total power consumption Viewing angle Metric U.S. , ±75° Vertical (minimum) ±80° Horizontal, ±80° Vertical (typical) Hard drive specifications 128-GB* Dimensions Height 7.0 mm Width 70 mm Weight 75 g Interface - HP EliteBook 2760p | HP EliteBook 2760p Tablet PC - Maintenance and Service Gui - Page 99
5°C to 35°C 5°C to 35°C *1 GB = 1 billion bytes when referring to hard drive storage capacity. Actual accessible capacity is less. Actual drive specifications may differ slightly. NOTE: Certain restrictions and exclusions apply. Contact technical support for details. Hard drive specifications 91 - HP EliteBook 2760p | HP EliteBook 2760p Tablet PC - Maintenance and Service Gui - Page 100
7 Backup and recovery To protect your information, use Windows Backup and Restore to back up individual files and folders, back up your entire hard drive (select models only), create system repair discs (select models only), or create system restore points. In case of system failure, you can use the - HP EliteBook 2760p | HP EliteBook 2760p Tablet PC - Maintenance and Service Gui - Page 101
Control feature to improve the security of your computer. You may be prompted for your permission or password for tasks such as installing software, running utilities, or changing Windows settings. Refer to Help and Support for more information. Performing a recovery In case of system failure - HP EliteBook 2760p | HP EliteBook 2760p Tablet PC - Maintenance and Service Gui - Page 102
and Support. Using f11 CAUTION: Using f11 completely erases hard drive contents and reformats the hard drive. All files you have created and any software installed on the computer are permanently removed. The f11 recovery tool reinstalls the operating system and HP programs and drivers that were - HP EliteBook 2760p | HP EliteBook 2760p Tablet PC - Maintenance and Service Gui - Page 103
discs or on an external drive) is easily accessible. To order a Windows 7 operating system DVD, go to http://www.hp.com/support, select your country or region, and then follow the on-screen instructions. You can also order the DVD by calling technical support. For contact information, refer to the - HP EliteBook 2760p | HP EliteBook 2760p Tablet PC - Maintenance and Service Gui - Page 104
range input feature of the computer permits it to operate from any line voltage from 100 to 120 volts AC, or from 220 to 240 volts AC. The 3- of 10 amps and a nominal voltage rating of 125 or 250 V AC, as required by the power system of each country or region. ● The appliance coupler must meet the - HP EliteBook 2760p | HP EliteBook 2760p Tablet PC - Maintenance and Service Gui - Page 105
Country/region Accredited agency Applicable note number Sweden SEMKO 1 Switzerland SEV 1 Taiwan BSMI 4 The United Kingdom BSI 1 The United States UL 2 1. The flexible cord must be Type HO5VV-F, 3-conductor, 1.0-mm² conductor size. Power cord set fittings (appliance coupler and wall - HP EliteBook 2760p | HP EliteBook 2760p Tablet PC - Maintenance and Service Gui - Page 106
-life. Disposal of mercury may be regulated because of environmental considerations. For disposal or recycling information, contact your local authorities, or see the Electronic Industries Alliance (EIA) Web site at http://www.eiai.org. This section provides disassembly instructions for the display - HP EliteBook 2760p | HP EliteBook 2760p Tablet PC - Maintenance and Service Gui - Page 107
and out on the left and right inside edges (1) and the top and bottom inside edges (2) of the display bezel until the bezel disengages from the display assembly. 3. Remove the display bezel 3. 4. Disconnect all display panel cables (1) from the display inverter and remove the inverter 2. Display 99 - HP EliteBook 2760p | HP EliteBook 2760p Tablet PC - Maintenance and Service Gui - Page 108
all screws (1) that secure the display panel assembly to the display enclosure. 6. Remove the display panel assembly (2) from the display enclosure. 7. Turn the display panel assembly upside down. 8. Remove all screws that secure the display panel frame to the display panel. 9. Use a sharp-edged - HP EliteBook 2760p | HP EliteBook 2760p Tablet PC - Maintenance and Service Gui - Page 109
12. Lift the top edge of the backlight cover (2) and swing it outward. 13. Remove the backlight cover. 14. Turn the display panel right-side up. 15. Remove the backlight cables (1) from the clip (2) in the display panel. 16. Turn the display panel upside down. Display 101 - HP EliteBook 2760p | HP EliteBook 2760p Tablet PC - Maintenance and Service Gui - Page 110
exposure to the mercury. 18. Remove the backlight from the backlight frame. 19. Disconnect the display cable (1) from the LCD panel. 20. Remove the screws (2) that secure the LCD panel to the display rear panel. 21. Release the LCD panel (3) from the display rear panel. 102 Chapter 9 Recycling - HP EliteBook 2760p | HP EliteBook 2760p Tablet PC - Maintenance and Service Gui - Page 111
22. Release the tape (4) that secures the LCD panel to the display rear panel. 23. Remove the LCD panel. 24. Recycle the LCD panel and backlight. Display 103 - HP EliteBook 2760p | HP EliteBook 2760p Tablet PC - Maintenance and Service Gui - Page 112
and Restore 92, 93 base enclosure, spare part number 21 battery removal 41 spare part number 21, 28, 41 battery bay 16 battery light 8 battery release latch 16 BIOS administrator password 84 Bluetooth cable, illustrated 24 Bluetooth compartment identifying 11 Bluetooth module removal 68 spare part - HP EliteBook 2760p | HP EliteBook 2760p Tablet PC - Maintenance and Service Gui - Page 113
15 num lock light 7 O operating system, product description 4 L language, changing in Computer Setup 85 latch assembly removal 70 spare part number 70 Latch Kit spare part number 21 latch, battery release 16 legacy support, USB 81, 85 P packing guidelines 36 passwords 84 pen removal 40 spare part - HP EliteBook 2760p | HP EliteBook 2760p Tablet PC - Maintenance and Service Gui - Page 114
module removal 43 spare part numbers 43 processor, product description 1 product description audio 2 chipset 1 display panel 1 docking support 3 Ethernet 2 external media cards 3 graphics 1 hard drives 1 keyboard 3 memory module 1 microphone 2 modem module 2 operating system 4 pointing devices - HP EliteBook 2760p | HP EliteBook 2760p Tablet PC - Maintenance and Service Gui - Page 115
time 83 system diagnostics 83 system fan 85 system IDs 84 system information 83 T thermal material, replacement 80 tools required 33 top cover removal 57 spare part number 20, 57 Touch screen identifying 14 TouchPad buttons 6 TouchPad board removal 61 spare part number 61 TouchPad light, identifying
-
 1
1 -
 2
2 -
 3
3 -
 4
4 -
 5
5 -
 6
6 -
 7
7 -
8
-
9
-
10
-
11
-
12
-
13
-
14
-
15
-
16
-
17
-
18
-
19
-
20
-
21
-
22
-
23
-
24
-
25
-
26
-
27
-
28
-
29
-
30
-
31
-
32
-
33
-
34
-
35
-
36
-
37
-
38
-
39
-
40
-
41
-
42
-
43
-
44
-
45
-
46
-
47
-
48
-
49
-
50
-
51
-
52
-
53
-
54
-
55
-
56
-
57
-
58
-
59
-
60
-
61
-
62
-
63
-
64
-
65
-
66
-
67
-
68
-
69
-
70
-
71
-
72
-
73
-
74
-
75
-
76
-
77
-
78
-
79
-
80
-
81
-
82
-
83
-
84
-
85
-
86
-
87
-
88
-
89
-
90
-
91
-
92
-
93
-
94
-
95
-
96
-
97
-
98
-
99
-
100
-
101
-
102
-
103
-
104
-
105
-
106
-
107
-
108
-
109
-
110
-
111
-
112
-
113
-
114
-
115
 |
 |

HP EliteBook 2760p Tablet PC
Maintenance and Service Guide