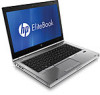
HP EliteBook 8460p RAID - Windows 7
HP EliteBook 8460p Manual
 |
View all HP EliteBook 8460p manuals
Add to My Manuals
Save this manual to your list of manuals |
HP EliteBook 8460p manual content summary:
- HP EliteBook 8460p | RAID - Windows 7 - Page 1
RAID User Guide - HP EliteBook 8460p | RAID - Windows 7 - Page 2
products and services. Nothing herein should be construed as constituting an additional warranty. HP shall not be liable for technical or editorial errors or omissions contained herein. First Edition: October 2009 Document Part Number: 572439-001 Product notice This user guide describes features - HP EliteBook 8460p | RAID - Windows 7 - Page 3
Intel Rapid Recover Technology ...10 5 RAID volume setup Enable RAID through the system BIOS (f10 12 Initiate RAID migration using Intel Matrix Storage Console 14 Using Intel Matrix Storage Console IRRT features 24 6 Resetting RAID drives to non-RAID 7 Frequently asked questions Can more than one - HP EliteBook 8460p | RAID - Windows 7 - Page 4
iv - HP EliteBook 8460p | RAID - Windows 7 - Page 5
were; manually copying files to a backup drive or using cumbersome backup software. If users failed to HP's RAID solution will also benefit notebook PC users who frequently work with large files and want to improve the storage performance of their computer. NOTE: The illustrations in this guide - HP EliteBook 8460p | RAID - Windows 7 - Page 6
terms used in this guide and describes the RAID technologies supported by select HP Business system BIOS that provides extended support for a particular piece of hardware. The RAID option ROM provides boot support for RAID volumes as well as a user interface for managing and configuring the systems - HP EliteBook 8460p | RAID - Windows 7 - Page 7
the HP Advanced Docking Station (see Devices supported on page 6). RAID 5 and RAID 10 are not supported. users to determine how the recovery volume is updated, either continuously or on request. IRRT also enables docking and undocking of the computer if the recovery drive is in the docking station - HP EliteBook 8460p | RAID - Windows 7 - Page 8
the capacities of the primary and recovery HDDs are different (see HP SATA drive option kits on page 6). Advantages: Identical (mirrored) with eSATA or docking station HDD). Enables easy migration to non-RAID. Disadvantages: Only half of the total drive capacity can be used for storage. Storage - HP EliteBook 8460p | RAID - Windows 7 - Page 9
RAID modes supported Fault tolerance and recovery of a single file or an entire HDD is much simpler than using RAID 1 alone. Performance Performance is easy to understand, but it is write performance and read performance, both of which vary based on the RAID technology selected. ● RAID 0 (striping - HP EliteBook 8460p | RAID - Windows 7 - Page 10
® XP Professional (SP1, SP2, and SP3), Windows Vista® (SP1 and SP2), and Windows 7 operating systems. Devices supported This section describes the devices supported for RAID migration, including the SATA drives, computers, and docking station. Device support is summarized in the following table and - HP EliteBook 8460p | RAID - Windows 7 - Page 11
of the eSATA drive, the same recommendations apply as stated for secondary drives in the notebook PC Upgrade Bay. HP Business Notebook PCs Select HP Business Notebook PCs support RAID using Intel® Matrix Storage Manager software (v8.0.2 and higher) and a secondary SATA drive in the Upgrade Bay. The - HP EliteBook 8460p | RAID - Windows 7 - Page 12
between the primary HDD (1) and an optional HDD in the SATA swappable bay of the HP Advanced Docking station (2). The following illustration shows an HP Advanced Docking Station with the recovery HDD in the SATA swappable bay that allows IRRT. 8 Chapter 3 Operating systems and devices supported - HP EliteBook 8460p | RAID - Windows 7 - Page 13
features to apply (see Enable RAID through the system BIOS (f10) on page 12). AHCI is enabled by default on supported HP Business notebook PCs. Native Command Queuing A read/write drive head writes data to an HDD platter in concentric circles (tracks) based on the order in which the write request - HP EliteBook 8460p | RAID - Windows 7 - Page 14
the system. If you undock the computer while using the docking station Users can migrate from a RAID 1 or IRRT volume to two non-RAID HDDs, called "breaking the array," by following the instructions in Resetting RAID drives to non-RAID on page 27. Migration from RAID 1 to IRRT is also supported - HP EliteBook 8460p | RAID - Windows 7 - Page 15
Bay, in the SATA swappable bay of the docking station, or connected to the eSATA port of the notebook PC (see Devices supported on page 6). The basic RAID migration steps are as follows: ● Enable RAID through the system BIOS. ● Initiate RAID migration using the Intel® Matrix Storage Console. CAUTION - HP EliteBook 8460p | RAID - Windows 7 - Page 16
the system BIOS (f10), and then install the operating system and all required drivers, including the Intel Matrix Storage driver. Then follow the steps in Initiate RAID migration using Intel Matrix Storage Console on page 14. Users must enable RAID capability through the system BIOS to switch the - HP EliteBook 8460p | RAID - Windows 7 - Page 17
window, select RAID to the right of SATA Device Mode. Click Yes when the message displays: "Changing this setting may require reinstallation of your operating system. Are you sure you want to proceed?" NOTE: The HDD image supplied with your notebook PC contains drivers that allow you to switch - HP EliteBook 8460p | RAID - Windows 7 - Page 18
mode, displaying the status of the installed drives. The available RAID levels are based on the location of the secondary HDD. For example, when the secondary drive is in the notebook PC Upgrade Bay, all three RAID options are available as shown. When the secondary HDD is in the docking station bay - HP EliteBook 8460p | RAID - Windows 7 - Page 19
following sections. If you are an advanced user and prefer more options, refer to Intel displays, click Yes to begin the migration, or click No to cancel the migration. 2. The progress of the RAID 1 migration displays in a separate window. You can minimize the Console and progress windows and use - HP EliteBook 8460p | RAID - Windows 7 - Page 20
3. The hard drive and volume status display after the migration is complete. 4. Close the Console window, save any open files, and reboot Create a RAID 0 volume in the right pane. When the confirmation message displays, click Yes to begin the migration, or click No to change to a different RAID volume - HP EliteBook 8460p | RAID - Windows 7 - Page 21
displays in a separate window. You can minimize the Console and progress windows and use the computer during the migration process. 3. Click Yes to reboot the system Recovery partitions using the following procedure. The EFI partition stores QuickLook, system diagnostics, and BIOS Flash Recovery - HP EliteBook 8460p | RAID - Windows 7 - Page 22
, and then copy its contents (\boot, \sources, \system.save, bootmgr, and HP_WINRE) to the external USB drive. If the Destination Folder Access Denied window displays, click Continue to copy the file. If the User Account Control window displays, click Continue. 10. Select the HP_TOOLS partition in - HP EliteBook 8460p | RAID - Windows 7 - Page 23
.EXE -store D:\Boot\BCD -set {572bcd55-ffa7-11d9-aae0-0007e994107d} device ramdisk=[D:]\sources\winre.wim,{ramdiskoptions} BCDEDIT.EXE -store D:\Boot\BCD -set {572bcd55-ffa7-11d9-aae0-0007e994107d} path \windows\system32\boot\winload.exe Initiate RAID migration using Intel Matrix Storage Console 19 - HP EliteBook 8460p | RAID - Windows 7 - Page 24
.EXE -store D:\Boot\BCD -create {bootmgr} /d "Windows Boot Manager" BCDEDIT.EXE -store D:\Boot\BCD -set {bootmgr} device boot BCDEDIT.EXE -store D:\Boot\BCD -set {bootmgr} displayorder {default} BCDEDIT.EXE -store D:\Boot\BCD -set {bootmgr} default {572bcd55-ffa7-11d9aae0-0007e994107d} BCDEdit.exe - HP EliteBook 8460p | RAID - Windows 7 - Page 25
When the secondary HDD is in the docking station SATA swappable bay or connected to the displays, click Yes to begin the migration, or click No to change to a different RAID volume. 2. The MSM software runs in the background while creating the RAID volume. You can minimize the Console window and use - HP EliteBook 8460p | RAID - Windows 7 - Page 26
the system, select View > Advanced Mode. The left pane, also called the device pane, shows the logical and physical views of the available drives. 2. In Advanced Mode, the Console also includes the Actions menu, which can be used to access advanced RAID options that allow you to manually configure - HP EliteBook 8460p | RAID - Windows 7 - Page 27
3. Selecting one of the Action options opens the Create Recovery Volume Wizard, which allows you to select the primary (master) drive and the secondary (recovery) drive. Select Help > Contents and Index, or press f1 for more information. Initiate RAID migration using Intel Matrix Storage Console 23 - HP EliteBook 8460p | RAID - Windows 7 - Page 28
in the right pane. 2. Select the icon beside Disable Continuous Updates in the right pane. The on-request update policy displays in Basic mode. 3. When using the on-request update policy, you can manually update the recovery volume by selecting Update Recovery Volume in the left pane, and then - HP EliteBook 8460p | RAID - Windows 7 - Page 29
files: 1. Select Access Recovery Drive Files in the left pane, and then click the icon beside Access Recovery Drive Files in the right pane. A message displays that updates to the recovery volume will be disabled. Using Intel Matrix Storage Console IRRT features 25 - HP EliteBook 8460p | RAID - Windows 7 - Page 30
recovery drive files. You can now open Windows Explorer to view the files. The update policy changes to on-request and the recovery volume flashes red in the Console window. 3. After you are finished viewing the files in Explorer, select Modify Volume Update Policy in the left pane, and then select - HP EliteBook 8460p | RAID - Windows 7 - Page 31
to two non-RAID drives using the following instructions to access the Intel Option ROM and reset both drives to non-RAID status. You must also reset both drives to non-RAID if you need to move the RAID recovery drive from the notebook PC Upgrade Bay to the docking station bay. NOTE: A RAID 0 volume - HP EliteBook 8460p | RAID - Windows 7 - Page 32
2. In the Main Menu, use the up or down arrow key to select 3. Reset Disks to Non-RAID, and then press enter. The Reset RAID Data window displays. 3. Press the space bar to select the first drive, and then press the down arrow key and the space bar to select the second drive. 4. Press enter, and - HP EliteBook 8460p | RAID - Windows 7 - Page 33
one RAID volume on a computer. Is Matrix RAID supported to allow both RAID 0 and RAID 1 on a single RAID volume? No. Can the computer be undocked if the recovery HDD is in the docking station SATA swappable bay? Yes. If the "Continuous update" policy is selected, data is automatically copied to the - HP EliteBook 8460p | RAID - Windows 7 - Page 34
10 stripe 2, 3 striping 2, 5 supported devices 6 supported operating systems 6 supported RAID modes 3 F fault tolerance 2, 3, 4, 5 files, accessing recovery drive 25 frequently asked questions 29 H HDD 2 hot plug 9 HP Advanced Docking Station 8 HP Business Notebook PCs 7 HP SATA drive option kits - HP EliteBook 8460p | RAID - Windows 7 - Page 35
-
 1
1 -
 2
2 -
 3
3 -
 4
4 -
 5
5 -
 6
6 -
 7
7 -
8
-
9
-
10
-
11
-
12
-
13
-
14
-
15
-
16
-
17
-
18
-
19
-
20
-
21
-
22
-
23
-
24
-
25
-
26
-
27
-
28
-
29
-
30
-
31
-
32
-
33
-
34
-
35
 |
 |

RAID
User Guide