HP Engage 15t Maintenance and Service Guide
HP Engage 15t Manual
 |
View all HP Engage 15t manuals
Add to My Manuals
Save this manual to your list of manuals |
HP Engage 15t manual content summary:
- HP Engage 15t | Maintenance and Service Guide - Page 1
Maintenance and Service Guide Engage 15t model SUMMARY This guide provides information about spare parts, removal and replacement of parts, diagnostic tests, problem troubleshooting, and more. - HP Engage 15t | Maintenance and Service Guide - Page 2
contained herein is subject to change without notice. The only warranties for HP products and services are set forth in the express warranty statements accompanying such products and services. Nothing herein should be construed as constituting an additional warranty. HP shall not be liable - HP Engage 15t | Maintenance and Service Guide - Page 3
of Contents 1 Getting started ...2 Important safety information ...2 Important service information and precautions...2 RoHS (2002/95/EC) requirements...3 General descriptions DC Power Jack connector CN101...18 Function test ...19 Function test ...19 Support and troubleshooting ...19 Index ...20 1 - HP Engage 15t | Maintenance and Service Guide - Page 4
to the safe, reliable operation of equipment. Improper service methods can damage equipment. The service procedures recommended and described in this service manual provide effective methods of performing service operations. Service engineers should have prior repair knowledge and experience as - HP Engage 15t | Maintenance and Service Guide - Page 5
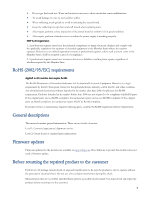
replacement. General descriptions This manual contains general information. There are two levels of service: Level 1: Cosmetic/appearance/alignment service Level 2: Circuit board or standard parts replacement Firmware updates Firmware updates for the monitor are available at support.hp.com. If no - HP Engage 15t | Maintenance and Service Guide - Page 6
diagonal viewable screen area with 1024 × 768 resolution, plus full-screen support for lower resolutions; includes custom scaling for maximum image size while access the latest user guide, go to http://www.hp.com/support, and follow the instructions to find your product. Then select Manuals. 4 - HP Engage 15t | Maintenance and Service Guide - Page 7
on. Open the OSD menu and make adjustments to monitor settings. Connects optional powered stereo speakers, headphones, or an audio cable. This jack does not support optional standalone microphones. 5 - HP Engage 15t | Maintenance and Service Guide - Page 8
Rear components To identify the components on the rear of the monitor, use this illustration and table. Table 1-2: Rear components and their descriptions Component 1 USB connector (downstream) 2 USB connector (downstream) 3 USB Type-B connector 4 DisplayPort connector 5 Power connector - HP Engage 15t | Maintenance and Service Guide - Page 9
Locating the serial number and product number The SPEC label (1) and Barcode label (2) are located on the rear of the monitor. The serial number and product number are located on a Safety label. You may need these numbers when contacting HP about the monitor model. 7 - HP Engage 15t | Maintenance and Service Guide - Page 10
3 Illustrated parts catalog To identify the monitor major components, use this illustration and table. Item Description Qty 1 DECO_BEZEL 1 2 PANEL 1 3 MIDDLE_FRAME 1 4 MAIN BOARD 1 5 MAINFRAME 1 6 BKT_VESA 1 7 REAR_COVER 1 8 COVER_VESA 1 S1 SCREW D3 6 4 S2 SCREW M3 3 - HP Engage 15t | Maintenance and Service Guide - Page 11
ICC) 692221030100 (Wurth Elektronik) DP1RD20JQ1 (JAE) Contact HP Support NOTE: Rear cover and chassis need to be modified to hold continually improves and changes product parts. For complete and current information about supported parts for your product, go to https://partsurfer.hp.com/Search.aspx, - HP Engage 15t | Maintenance and Service Guide - Page 12
prepare to disassemble and reassemble the monitor. 1) Read the "Important safety information" and "Important service information and precautions" sections in the "Getting started" chapter of this guide. 2) Clean the room for disassembly. 3) Identify the disassembly area. 4) Check the position that - HP Engage 15t | Maintenance and Service Guide - Page 13
Rear Cover Before removing the Rear Cover, follow these steps: ▲ Prepare the monitor for disassembly. See Preparation for disassembly on page 10. Remove the Rear Cover: 1) Use disassembly tool to open all the latches along the edge of the rear cover. 2) Disassemble the Rear Cover, take off the tapes - HP Engage 15t | Maintenance and Service Guide - Page 14
4) Disconnect the pin and remove the headphone jack board. 5) Disconnect the pin and remove the key board. 12 - HP Engage 15t | Maintenance and Service Guide - Page 15
6) Disconnect the pin and remove the mainframe. 7) Unscrew the screws to remove the main board. 13 - HP Engage 15t | Maintenance and Service Guide - Page 16
Power board The power board is adapter. Connector repair This procedure includes USB 3.0A, USB 3.0 B, DisplayPort and DC POWER JACK connectors. The connectors are on the main board (board part number CBPR2EBH5Q1). The connectors identifiers are as follows: Connector Location USB 3.0 A CN703/ - HP Engage 15t | Maintenance and Service Guide - Page 17
• If connector need to replace, please insert new parts carefully because the near pin may cause short circuit by inappropriate operate. • DO NOT allow any liquid on the board. Water and moisture may cause short-circuit to the electronic components and lead to malfunctions. • The fusion point of - HP Engage 15t | Maintenance and Service Guide - Page 18
USB 3.0 A connector CN703/CN705 Repair the USB 3.0 A connector: 1) Use a soldering iron and a de-soldering pump to remove as much solder as possible from the pin. 2) Lift the CN703/CN705 connector from the circuit board. 3) Place the new component on the circuit board. Be sure that it matches the - HP Engage 15t | Maintenance and Service Guide - Page 19
USB 3.0 B connector CN704 Repair the USB 3.0 B connector: 1) Use a soldering iron and a de-soldering pump to remove as much solder as possible from the pin. 2) Lift the CN704 connector from the circuit board. 3) Place the new component on the circuit board. Be sure that it matches the circuit board - HP Engage 15t | Maintenance and Service Guide - Page 20
3) Lift the CN501 connector from the circuit board. 4) Place the new component on the circuit board. Be sure that it matches the circuit board footprint. 5) Solder the new component. DC Power Jack connector CN101 Repair the DC POWER JACK connector: 1) Use a soldering iron and a de-soldering pump to - HP Engage 15t | Maintenance and Service Guide - Page 21
4-1: Function test the monitor. Support and troubleshooting Audio test Change volume and balance to confirm whether volume is smooth and loud enough. Speaker The following table lists possible problems, the possible cause or each problem - HP Engage 15t | Maintenance and Service Guide - Page 22
components, 6 removal power board, 14 RC, 11 removal and replacement procedures, 10 returning to customer, 3 RoHS (2002/95/EC) requirements, 3 safety information, 2 serial number location, 7 service information, 2 spare parts, 8 support and troubleshooting, 19 troubleshooting, 19 20 - HP Engage 15t | Maintenance and Service Guide - Page 23
21
-
 1
1 -
 2
2 -
 3
3 -
 4
4 -
 5
5 -
 6
6 -
 7
7 -
8
-
9
-
10
-
11
-
12
-
13
-
14
-
15
-
16
-
17
-
18
-
19
-
20
-
21
-
22
-
23
 |
 |

Maintenance and Service Guide
Engage 15t model
SUMMARY
This guide provides information about spare parts, removal and replacement of parts, diagnostic tests, problem
troubleshooting, and more.