HP G4050 User Guide - Page 14
HP Scanjet G4050. If you are using an HP Scanjet G4010, see - negative scanner
 |
UPC - 882780686793
View all HP G4050 manuals
Add to My Manuals
Save this manual to your list of manuals |
Page 14 highlights
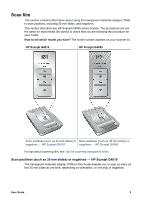
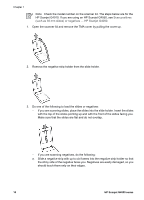
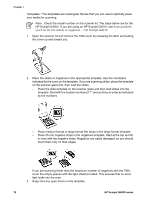
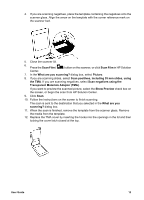
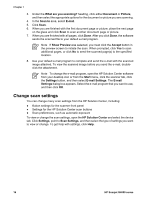
Chapter 1 "templates." The templates are rectangular frames that you can use to optimally place your media for scanning. Note Check the model number on the scanner lid. The steps below are for the HP Scanjet G4050. If you are using an HP Scanjet G4010, see Scan positives (such as 35 mm slides) or negatives - HP Scanjet G4010. 1. Open the scanner lid and remove the TMA cover by releasing the latch and pulling the cover up and toward you. 2. Place the slides or negatives in the appropriate template. Use the orientation indicated by the icons on the template. If you are scanning slides, place the template on the scanner glass first, then load the slides. - Place the slide template on the scanner glass and then load slides into the template. Start with the location numbered "1" and continue in order as indicated by the numbers. - Place medium-format or large-format film strips in the large-format template. - Place 35 mm negative strips in the negatives template. Start at the top and fill in rows with the negative strips. Negatives are easily damaged, so you should touch them only on their edges. If you are scanning fewer than the maximum number of negatives with the TMA, cover the empty spaces with the light shield provided. This ensures that no extra light leaks into the scan. 3. Snap shut any open doors on the template. 12 HP Scanjet G4000 series
-
 1
1 -
2
-
3
-
4
-
5
-
6
-
7
-
8
-
 9
9 -
 10
10 -
 11
11 -
 12
12 -
 13
13 -
 14
14 -
 15
15 -
 16
16 -
 17
17 -
 18
18 -
 19
19 -
20
-
21
-
22
-
23
-
24
-
25
-
26
-
27
-
28
 |
 |