HP G61-320US Drives - Windows 7
HP G61-320US Manual
 |
UPC - 884962533956
View all HP G61-320US manuals
Add to My Manuals
Save this manual to your list of manuals |
HP G61-320US manual content summary:
- HP G61-320US | Drives - Windows 7 - Page 1
Drives User Guide - HP G61-320US | Drives - Windows 7 - Page 2
and services. Nothing herein should be construed as constituting an additional warranty. HP shall not be liable for technical or editorial errors or omissions contained herein. Second Edition: August 2009 First Edition: August 2009 Document Part Number: 539206-002 Product notice This user guide - HP G61-320US | Drives - Windows 7 - Page 3
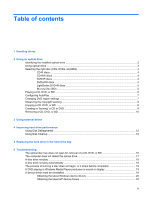
, DVD, or BD ...8 Creating or "burning" a CD or DVD ...9 Removing a CD, DVD, or BD ...10 3 Using external drives 4 Improving hard drive performance Using Disk Defragmenter ...12 Using Disk Cleanup ...12 5 Replacing the hard drive in the hard drive bay 6 Troubleshooting The optical disc tray does not - HP G61-320US | Drives - Windows 7 - Page 4
Index ...21 iv - HP G61-320US | Drives - Windows 7 - Page 5
through the operating system. Do not use excessive force when inserting a drive into a drive bay. Do not type on the keyboard or move the computer while the optical drive is writing to a disc. The write process is sensitive to vibration. When the battery is the only source of power, be sure that the - HP G61-320US | Drives - Windows 7 - Page 6
following types of drives: ● DVD±RW/R and CD-RW Combo Drive with Double-Layer (DL) support ● LightScribe DVD±RW/R and CD-RW Combo Drive with Double-Layer (DL) support ● Blu-ray Disc ROM Drive with SuperMulti DVD±R/RW Double-Layer (DL) support ● LightScribe Blu-ray Disc ROM Drive with SuperMulti DVD - HP G61-320US | Drives - Windows 7 - Page 7
of the optical drives listed may not be supported by your computer. The listed drives are not necessarily all of the supported optical drives. Some optical drives can also write to optical discs as described in the following table. Optical drive type Write to CD-RW DVD±RW and CD-RW Yes SuperMulti - HP G61-320US | Drives - Windows 7 - Page 8
CDs but have a much higher storage capacity. NOTE: The optical drive on your computer may not support all the types of optical discs discussed in this section. CD-R discs CD music CDs ● Keeping permanent archives of computer files and scanned home records ● Offloading files from your hard drive to - HP G61-320US | Drives - Windows 7 - Page 9
discs are read-compatible with most DVD-ROM drives and DVD video players. With a LightScribe-enabled drive and LightScribe software, you can write data to technologies, certain disc, digital connection, compatibility, and/or performance issues may arise, and do not constitute defects in the product. - HP G61-320US | Drives - Windows 7 - Page 10
Playing a CD, DVD, or BD 1. Turn on the computer. 2. Press the release button (1) on the drive bezel to release the disc tray. 3. Pull out the tray (2). . NOTE: For best results, be sure that your AC adapter is plugged into an external power source while playing a BD. 6 Chapter 2 Using an optical - HP G61-320US | Drives - Windows 7 - Page 11
NOTE: Choose HP DVD Play to play DVDs. 4. Click Save. NOTE: For more information about AutoPlay, refer to Help and Support. Changing DVD Support for more information. 2. Click the arrow next to DVD/CD-ROM drives to expand the list to show all of the installed drives. 3. Right-click the DVD drive - HP G61-320US | Drives - Windows 7 - Page 12
your hard drive to the destination disc. Do not use the computer keyboard or move the computer while the computer is writing to a disc. The write process is sensitive to vibration. NOTE: For details about using software included with the computer, refer to the software manufacturer's instructions - HP G61-320US | Drives - Windows 7 - Page 13
. 6. Open the folder, and then drag the files to the drive that contains the blank disc. 7. Initiate the burning process as directed by the program you have selected. For specific instructions, refer to the software manufacturer's instructions, which may be provided with the software, on disc, or on - HP G61-320US | Drives - Windows 7 - Page 14
Removing a CD, DVD, or BD 1. Press the release button (1) on the drive bezel to release the disc tray, and then gently pull out the tray (2) until it stops. 2. Remove the disc (3) as you remove it. 3. Close the disc tray and place the disc in a protective case. 10 Chapter 2 Using an optical drive - HP G61-320US | Drives - Windows 7 - Page 15
diskette drive ● Hard drive module (a hard drive with an adapter attached) ● DVD-ROM Drive ● DVD/CD-RW Combo Drive ● DVD±RW and CD-RW Combo Drive NOTE: For more information about required software and drivers, or to learn which computer port to use, refer to the manufacturer's instructions. To - HP G61-320US | Drives - Windows 7 - Page 16
hard drive for unnecessary files that you can safely delete to free up disk space and help the computer to run more efficiently. To run Disk Cleanup: 1. Select Start > All Programs > Accessories > System Tools > Disk Cleanup. 2. Follow the on-screen instructions. 12 Chapter 4 Improving hard drive - HP G61-320US | Drives - Windows 7 - Page 17
all external devices connected to the computer. 4. Unplug the power cord from the AC outlet. 5. Turn the computer upside down on a flat surface. 6. Remove the battery from the computer. 7. With the hard drive bay toward you, loosen the 4 hard drive cover screws (1). 13 - HP G61-320US | Drives - Windows 7 - Page 18
the hard drive. 11. Lift the hard drive (3) out of the hard drive bay. To install a hard drive: 1. Insert the hard drive into the hard drive bay (1). 2. Pull the hard drive tab (2) to the right until the hard drive snaps into place. 14 Chapter 5 Replacing the hard drive in the hard drive bay - HP G61-320US | Drives - Windows 7 - Page 19
3. Replace the 4 screws that secure the hard drive to the computer (3). 4. Align the tabs (1) on the hard drive cover with the notches on the computer. 5. Close the cover (2). 6. Tighten the 4 hard drive cover screws (3). 15 - HP G61-320US | Drives - Windows 7 - Page 20
6 Troubleshooting The following sections describe several common issues and resolutions. The optical disc tray does not open for removal of a CD, DVD, or BD 1. Insert the end of a paper clip (1) into the release access in the front bezel of the drive. 2. Press in gently on the paper clip until the - HP G61-320US | Drives - Windows 7 - Page 21
changes. Windows scans your system for installed hardware and installs any required drivers. ● Click Properties to see if the device is working properly: ◦ The Properties window provides details about the device to help you troubleshoot issues. ◦ Click the Driver tab to update, disable, or uninstall - HP G61-320US | Drives - Windows 7 - Page 22
play automatically 1. Select Start > Default Programs > Change AutoPlay settings. 2. Confirm that the Use AutoPlay for all media and devices check box is selected. 3. Click Save. A CD, DVD, or BD should now start automatically when it is inserted into the optical drive. 18 Chapter 6 Troubleshooting - HP G61-320US | Drives - Windows 7 - Page 23
from your hard drive. ● Reinstall the disc-burning device driver located in the DVD/CD-ROM drives category in Device Manager. A DVD playing in Windows Media Player produces no sound or display Use DVD Play to play a DVD. DVD Play is installed on the computer and is also available from the HP Web - HP G61-320US | Drives - Windows 7 - Page 24
check for updates. 2. Click Check for updates. 3. Follow the on-screen instructions. Obtaining the latest HP device drivers To use the HP Web site to obtain HP device drivers: 1. Open your Internet browser, go to http://www.hp.com/support, and select your country or region. 2. Click the option for - HP G61-320US | Drives - Windows 7 - Page 25
10 CD drive 2, 11 copyright warning 8 D device drivers HP drivers 20 Windows drivers 20 Disk Cleanup software 12 Disk Defragmenter software 12 disk performance 12 diskette drive 11 drives caring for 1 diskette 11 external 11 hard 11, 13, 14 optical 2, 11 See also hard drive; optical drive DVD - HP G61-320US | Drives - Windows 7 - Page 26
-
 1
1 -
 2
2 -
 3
3 -
 4
4 -
 5
5 -
 6
6 -
 7
7 -
8
-
9
-
10
-
11
-
12
-
13
-
14
-
15
-
16
-
17
-
18
-
19
-
20
-
21
-
22
-
23
-
24
-
25
-
26
 |
 |

Drives
User Guide