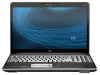
HP HDX X16-1375DX Memory Modules - Windows Vista
HP HDX X16-1375DX Manual
 |
View all HP HDX X16-1375DX manuals
Add to My Manuals
Save this manual to your list of manuals |
HP HDX X16-1375DX manual content summary:
- HP HDX X16-1375DX | Memory Modules - Windows Vista - Page 1
Memory Modules User Guide - HP HDX X16-1375DX | Memory Modules - Windows Vista - Page 2
products and services. Nothing herein should be construed as constituting an additional warranty. HP shall not be liable for technical or editorial errors or omissions contained herein. First Edition: August 2008 Document Part Number: 487231-001 Product notice This user guide describes features - HP HDX X16-1375DX | Memory Modules - Windows Vista - Page 3
Table of contents Adding or replacing a memory module Index ...6 iii - HP HDX X16-1375DX | Memory Modules - Windows Vista - Page 4
iv - HP HDX X16-1375DX | Memory Modules - Windows Vista - Page 5
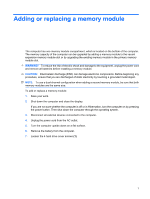
Adding or replacing a memory module The computer has one memory module compartment, which is located on the bottom of the computer. The memory capacity of the computer can be upgraded by adding a memory module to the vacant expansion memory module slot or by upgrading the existing memory module in - HP HDX X16-1375DX | Memory Modules - Windows Vista - Page 6
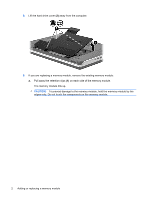
8. Lift the hard drive cover (2) away from the computer. 9. If you are replacing a memory module, remove the existing memory module: a. Pull away the retention clips (1) on each side of the memory module. The memory module tilts up. CAUTION: To prevent damage to the memory module, hold the memory - HP HDX X16-1375DX | Memory Modules - Windows Vista - Page 7
b. Grasp the edge of the memory module (2), and gently pull the module out of the memory module slot. To protect a memory module after removal, place it in an electrostatic-safe container. 10. Insert a new memory module: CAUTION: To prevent damage to the memory module, hold the memory module by the - HP HDX X16-1375DX | Memory Modules - Windows Vista - Page 8
c. Gently press the memory module (3) down, applying pressure to both the left and right edges of the memory module, until the retention clips snap into place. CAUTION: To prevent damage to the memory module, be sure that you do not bend the memory module. 11. Align the tabs (1) on the hard drive - HP HDX X16-1375DX | Memory Modules - Windows Vista - Page 9
14. Replace the battery. 15. Turn the computer right-side up, and then reconnect external power and external devices. 16. Turn on the computer. 5 - HP HDX X16-1375DX | Memory Modules - Windows Vista - Page 10
Index H hard drive cover removing 2 replacing 4 M memory adding memory modules 1 replacing memory modules 1 upgrading memory modules 1 memory module adding 1 inserting 3 removing 2 replacing 1 upgrading 1 6 Index - HP HDX X16-1375DX | Memory Modules - Windows Vista - Page 11
-
 1
1 -
 2
2 -
 3
3 -
 4
4 -
 5
5 -
 6
6 -
 7
7 -
8
-
9
-
10
-
11
 |
 |

Memory Modules
User Guide