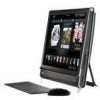
HP IQ525 Upgrade and Service
HP IQ525 - TouchSmart - 4 GB RAM Manual
 |
UPC - 884420456766
View all HP IQ525 manuals
Add to My Manuals
Save this manual to your list of manuals |
HP IQ525 manual content summary:
- HP IQ525 | Upgrade and Service - Page 1
Upgrading and Servicing Guide - HP IQ525 | Upgrade and Service - Page 2
- HP IQ525 | Upgrade and Service - Page 3
- HP IQ525 | Upgrade and Service - Page 4
Hewlett-Packard HP HP HP HP Hewlett-Packard Company P.O. Box 4010 Cupertino, CA 95015-4010 USA Copyright © 2008 Hewlett-Packard Development Company, L.P. 4,930,158 與 4,930,160 2008 年 8 月 28 日。 Microsoft 和 Windows 為 Microsoft Corporation Windows Vista 是 Microsoft Corporation HP - HP IQ525 | Upgrade and Service - Page 5
目錄 1 1 找出 HP TouchSmart PC 2 拆開 HP TouchSmart PC ...3 7 7 8 10 12 12 18 裝回 HP TouchSmart PC ...23 目錄 iii - HP IQ525 | Upgrade and Service - Page 6
iv - HP IQ525 | Upgrade and Service - Page 7
HP TouchSmart PC 安全資訊 IT IEC 60950 開始之前 http://www.hp.com/support HP TouchSmart PC 1 - HP IQ525 | Upgrade and Service - Page 8
HP TouchSmart PC 時,Hewlett-Packard HP TouchSmart PC HP TouchSmart PC 找出 HP TouchSmart PC 的組件 HP TouchSmart PC A B G C F D E A B:背板 C D E F G 2 - HP IQ525 | Upgrade and Service - Page 9
拆開 HP TouchSmart PC HP TouchSmart PC 1 移除 HP TouchSmart PC CD、DVD USB 2 HP TouchSmart PC 靜電。 3 點選 Windows Vista 4 HP TouchSmart PC A A A 3 - HP IQ525 | Upgrade and Service - Page 10
5 A A 6 HP TouchSmart PC 4 - HP IQ525 | Upgrade and Service - Page 11
7 HP A)。 8 90 度 (B C)。 B C A 9 5 - HP IQ525 | Upgrade and Service - Page 12
10 A)。 A 11 B C B C 12 6 - HP IQ525 | Upgrade and Service - Page 13
您的 HP TouchSmart PC RAM HP TouchSmart PC 開始之前 SO-DIMM HP TouchSmart PC http://www.hp.com/support。 7 - HP IQ525 | Upgrade and Service - Page 14
1 HP TouchSmart PC 3 HP TouchSmart PC 2 8 - HP IQ525 | Upgrade and Service - Page 15
3 4 9 - HP IQ525 | Upgrade and Service - Page 16
您升級 HP TouchSmart PC 1 8 2 10 - HP IQ525 | Upgrade and Service - Page 17
3 A A 4 裝回 HP TouchSmart PC 23 HP TouchSmart PC」。 11 - HP IQ525 | Upgrade and Service - Page 18
ATA DVD HP TouchSmart PC 拆卸硬碟 1 HP TouchSmart PC 3 HP TouchSmart PC 2 12 - HP IQ525 | Upgrade and Service - Page 19
3 4 A 3 HP TouchSmart PC A 13 - HP IQ525 | Upgrade and Service - Page 20
5 6 14 - HP IQ525 | Upgrade and Service - Page 21
7 8 15 - HP IQ525 | Upgrade and Service - Page 22
9 10 16 - HP IQ525 | Upgrade and Service - Page 23
11 17 - HP IQ525 | Upgrade and Service - Page 24
安裝硬碟 1 12 2 3 18 - HP IQ525 | Upgrade and Service - Page 25
4 5 19 - HP IQ525 | Upgrade and Service - Page 26
6 7 20 - HP IQ525 | Upgrade and Service - Page 27
8 9 21 - HP IQ525 | Upgrade and Service - Page 28
10 11 12 23 HP TouchSmart PC 22 - HP IQ525 | Upgrade and Service - Page 29
裝回 HP TouchSmart PC HP TouchSmart PC 1 2 A B B A 23 - HP IQ525 | Upgrade and Service - Page 30
3 4 A B)。 A B 24 - HP IQ525 | Upgrade and Service - Page 31
5 6 25 - HP IQ525 | Upgrade and Service - Page 32
7 NIC 網路)。 8 9 10 開啟 HP TouchSmart PC 26 - HP IQ525 | Upgrade and Service - Page 33
Upgrading and Servicing Guide - HP IQ525 | Upgrade and Service - Page 34
,160 until August 28, 2008. Microsoft and Windows are U.S. registered trademarks of Microsoft Corporation. The Windows Vista is either a registered trademark or trademark of Microsoft Corporation in the United States and/or other countries/regions. HP supports lawful use of technology and does not - HP IQ525 | Upgrade and Service - Page 35
HP TouchSmart PC 2 Opening the HP TouchSmart PC...3 Adding Memory...7 Before you begin...7 Removing a memory module...8 Installing a memory module ...10 Removing and Installing the Hard Disk Drive 12 Removing the hard disk drive 12 Installing a hard disk drive ...18 Closing the HP TouchSmart PC - HP IQ525 | Upgrade and Service - Page 36
iv Upgrading and Servicing Guide - HP IQ525 | Upgrade and Service - Page 37
Upgrading and Servicing Guide This guide provides instructions for upgrading the memory and the hard disk drive in your HP TouchSmart PC. Safety Information This product has not been evaluated for connection to an "IT" power system (an AC distribution system with no direct connection to the earth, - HP IQ525 | Upgrade and Service - Page 38
to the following illustration to locate components of the HP TouchSmart PC. A B G C F D E A: Optical disc drive cover B: Back cover C: Computer stand D: Power adapter connector G: Connector cover E: Wireless keyboard and mouse receiver F: Memory cover 2 Upgrading and Servicing Guide - HP IQ525 | Upgrade and Service - Page 39
shock or hot surfaces, disconnect the power cord from the wall outlet, and allow the internal system components to cool before touching them. 4 After the system has completely shut down, disconnect the power adapter (A) from the back of the HP TouchSmart PC. A A Upgrading and Servicing Guide 3 - HP IQ525 | Upgrade and Service - Page 40
5 Remove the connector cover by inserting your finger under the gap on the bottom-left side of the cover (A), and then pulling gently. A 6 Disconnect all other attached cables from the back of the HP TouchSmart PC. 4 Upgrading and Servicing Guide - HP IQ525 | Upgrade and Service - Page 41
upright position, about 90 degrees (B) from the computer, and then move the latch to the left until it is in the locked position (C). B C A 9 Using the notch on the wireless keyboard and mouse receiver, pull the receiver out of and away from the back of the computer. Upgrading and Servicing Guide 5 - HP IQ525 | Upgrade and Service - Page 42
edge to release it (B), then, gently slide the cover down toward the bottom of the computer (C), and then remove it. B C WARNING: Beware of sharp edges inside the chassis. To upgrade your hard disk drive, see "Removing and Installing the Hard Disk Drive" on page 12. 6 Upgrading and Servicing Guide - HP IQ525 | Upgrade and Service - Page 43
random access memory (RAM), which temporarily stores data and instructions on your computer. The HP TouchSmart PC ships with one or two memory modules that you can replace. Before you begin Observe the following requirements before removing and replacing the memory module. The motherboard contains - HP IQ525 | Upgrade and Service - Page 44
of the retaining clips to remove the module. 2 Push the two latches of the retaining clips away from the memory module. It may be easier to push one latch at a time. The memory module pops up at an angle. Both memory modules can be removed by using the same procedure. 8 Upgrading and Servicing Guide - HP IQ525 | Upgrade and Service - Page 45
3 Lift the memory module from the memory socket. Note the location of the key slot on the connector edge. 4 Store the memory module in antistatic packaging. Upgrading and Servicing Guide 9 - HP IQ525 | Upgrade and Service - Page 46
Installing a memory module Upgrade the memory in your HP TouchSmart PC with memory of the same type and speed as the memory originally installed. The capacity for both memory modules must match for optimal performance. Both memory modules can be installed by using the same procedure listed below. - HP IQ525 | Upgrade and Service - Page 47
4 Close the HP TouchSmart PC. See "Closing the HP TouchSmart PC" on page 23. NOTE: If a blank screen is displayed after you replace or add a memory module, the memory is installed incorrectly, or it is the wrong type of memory. Remove and reinstall the memory module. Upgrading and Servicing Guide 11 - HP IQ525 | Upgrade and Service - Page 48
with your HP TouchSmart PC. Removing the hard disk drive 1 Complete the procedures to prepare the HP TouchSmart PC. See "Opening the HP TouchSmart PC" on page 3. WARNING: To reduce the risk of personal injury from electrical shock or hot surfaces, disconnect the power cord from the wall outlet, and - HP IQ525 | Upgrade and Service - Page 49
the HP TouchSmart PC" on page 3. Remove the nine screws that secure the back cover to the chassis. Four of the screws are located along the bottom edge of the back cover, two are located on the sides of the optical drive, and three are located in the connector area. A Upgrading and Servicing Guide - HP IQ525 | Upgrade and Service - Page 50
5 Lift the back cover up from the bottom inside edge of the memory cover area to release it, place both hands under the bottom edge of the cover and lift it up, and then rotate the back cover up as far as it will go. 6 Lift away the back cover from the computer. 14 Upgrading and Servicing Guide - HP IQ525 | Upgrade and Service - Page 51
that secures the optical disc drive to the chassis, and then slide the drive toward the center of the computer to move it out of the way. You do not need to remove the optical drive cables. 8 Remove the screw that secures the hard disk drive cage to the chassis. Upgrading and Servicing Guide 15 - HP IQ525 | Upgrade and Service - Page 52
9 Slide the hard disk drive cage toward the top of the computer, and then pull it away from the computer. 10 Disconnect the power and data cables by pressing the latches and then removing them from the drive. 16 Upgrading and Servicing Guide - HP IQ525 | Upgrade and Service - Page 53
11 Remove the four screws that secure the hard disk drive to the cage, and then slide the hard disk drive out of the cage. Upgrading and Servicing Guide 17 - HP IQ525 | Upgrade and Service - Page 54
Installing a hard disk drive 1 If necessary, remove the hard disk drive. See "Removing the hard disk drive" on page 12. 2 Slide the hard disk drive into the cage, and then replace the four screws. 3 Connect the power and data cables to the hard disk drive. 18 Upgrading and Servicing Guide - HP IQ525 | Upgrade and Service - Page 55
four hooks on the cage with the four holes on the back of the chassis, and then slide the cage toward the bottom of the computer until it rests against the bracket on the chassis. 5 Replace the screw that secures the hard disk drive cage to the chassis. Upgrading and Servicing Guide 19 - HP IQ525 | Upgrade and Service - Page 56
6 Align the hooks on the optical disc drive with the holes on the computer, and then slide the optical disc drive toward the outer edge of the computer. 7 Replace the screw that secures the optical disc drive to the chassis. 20 Upgrading and Servicing Guide - HP IQ525 | Upgrade and Service - Page 57
the top edge of the back cover with the holes on the top of the computer. The screw holes on the back cover should be aligned with the screw holes on the back of the computer. 9 Press the top, side, and then bottom edges to snap the cover into place. Upgrading and Servicing Guide 21 - HP IQ525 | Upgrade and Service - Page 58
with the back cover. 11 Replace the optical disc drive cover by aligning the tabs on the bottom edge of the optical drive cover with the hole on the computer, and then snapping the top edge into place. 12 Follow the steps in "Closing the HP TouchSmart PC" on page 23. 22 Upgrading and Servicing Guide - HP IQ525 | Upgrade and Service - Page 59
closing the HP TouchSmart PC: 1 If you removed it, replace the computer stand. Align the four screw holes of the stand over the four holes on the back of the computer, and then replace the four screws that secure the stand to the computer. 2 Replace the memory cover. Align the memory cover over - HP IQ525 | Upgrade and Service - Page 60
secures the memory cover to the computer. 4 Push the computer stand back slightly beyond the locked position (A), holding it with one hand so it does not snap back when the lock is released, and then release the lock on the computer stand (B) with the other hand. A B 24 Upgrading and Servicing Guide - HP IQ525 | Upgrade and Service - Page 61
5 Replace the keyboard and mouse receiver. 6 Place the computer upright on a flat surface with the stand in a safe and open position. 10° min. 40°max Upgrading and Servicing Guide 25 - HP IQ525 | Upgrade and Service - Page 62
then replace the connector cover by aligning the three tabs on the side edge of the cover with the holes on the computer, and then rotating inward to snap it into place. 9 Reconnect external devices. 10 Turn on the HP TouchSmart PC and all devices connected to it. 26 Upgrading and Servicing Guide - HP IQ525 | Upgrade and Service - Page 63
- HP IQ525 | Upgrade and Service - Page 64
Copyright © 2008 Hewlett-Packard Development Company, L.P The information contained herein is subject to change without notice. Printed in xxxxx
-
 1
1 -
 2
2 -
 3
3 -
 4
4 -
 5
5 -
 6
6 -
 7
7 -
8
-
9
-
10
-
11
-
12
-
13
-
14
-
15
-
16
-
17
-
18
-
19
-
20
-
21
-
22
-
23
-
24
-
25
-
26
-
27
-
28
-
29
-
30
-
31
-
32
-
33
-
34
-
35
-
36
-
37
-
38
-
39
-
40
-
41
-
42
-
43
-
44
-
45
-
46
-
47
-
48
-
49
-
50
-
51
-
52
-
53
-
54
-
55
-
56
-
57
-
58
-
59
-
60
-
61
-
62
-
63
-
64
 |
 |

升級與維護手冊
Upgrading and Servicing Guide