HP J4680c User Guide
HP J4680c - Officejet All-in-One Color Inkjet Manual
 |
View all HP J4680c manuals
Add to My Manuals
Save this manual to your list of manuals |
HP J4680c manual content summary:
- HP J4680c | User Guide - Page 1
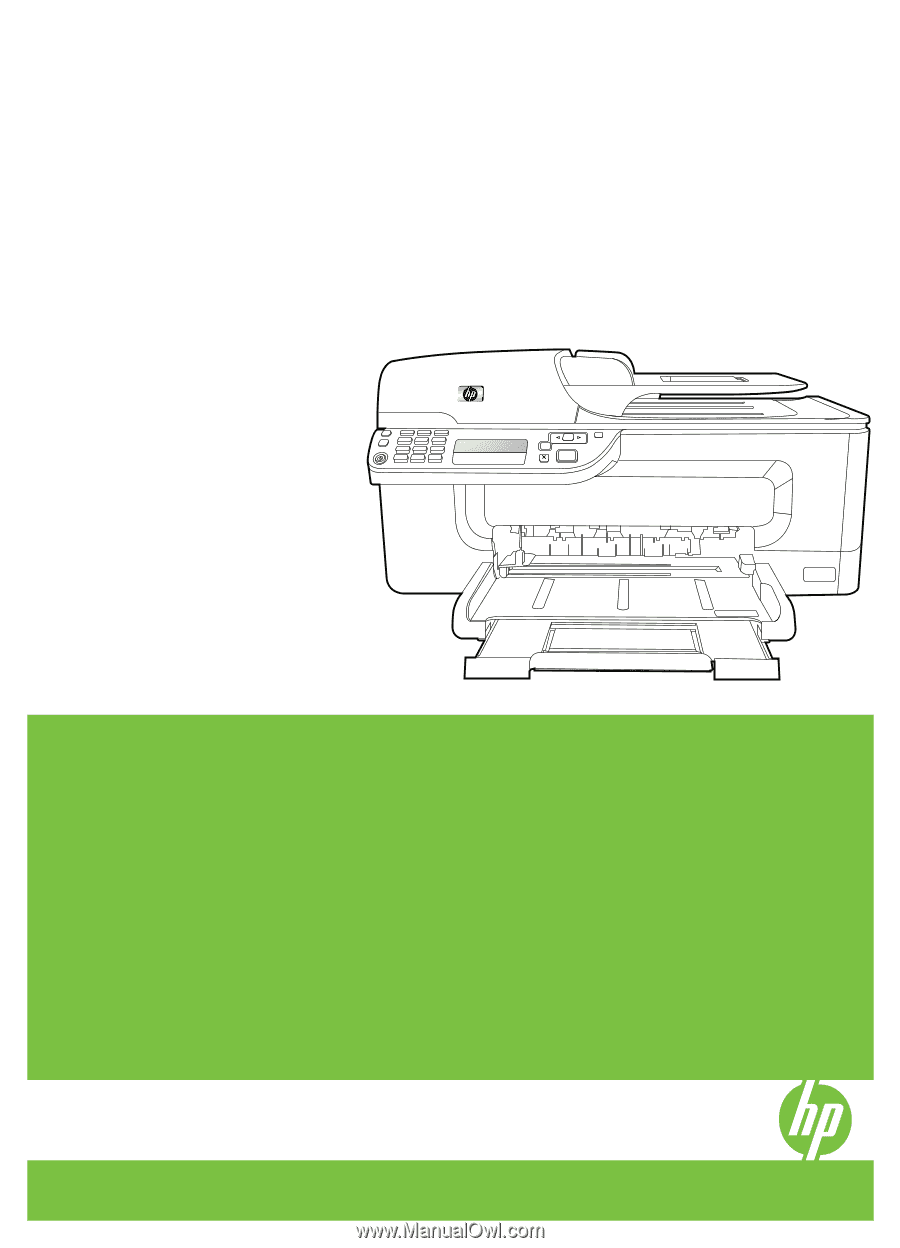
HP Officejet J4500 All-in-One series User Guide 1 4 ghi 2 abc 3 def 5 jkl 6 mno 7 pqrs 8 tuv 9 wxyz #* 0 #- OK Podręcznik użytkownika - HP J4680c | User Guide - Page 2
HP Officejet J4500 All-in-One series User Guide - HP J4680c | User Guide - Page 3
software also supports Windows accessibility options such as StickyKeys, ToggleKeys, FilterKeys, and MouseKeys. The device doors, buttons, paper trays, and paper guides can be operated by users with limited strength and reach. Support For more details about the accessibility of this product and HP - HP J4680c | User Guide - Page 4
- HP J4680c | User Guide - Page 5
Center (Windows 14 Use the HP photo and imaging software 14 Load originals ...15 Load an original on the scanner glass 16 Load an original in the automatic document feeder (ADF 16 Select print media ...17 Tips for selecting and using print media 17 Understand specifications for supported media - HP J4680c | User Guide - Page 6
compliant program 38 Edit a scanned original ...39 Edit a scanned photo or graphic 39 Edit a scanned document using optical character recognition (OCR) software 39 Change scan settings ...39 Cancel a scan job ...39 6 Fax Send a fax ...40 Send a basic fax ...41 Send a fax manually from a phone 41 - HP J4680c | User Guide - Page 7
Print and view the fax log 61 Cancel a fax ...62 7 Configure and manage Manage the device ...63 Monitor the device ...63 Administer the device ...64 Use device management tools 64 Toolbox (Windows) ...64 Open the Toolbox ...65 Toolbox tabs ...65 HP Printer Utility (Mac OS 66 Open the HP Printer - HP J4680c | User Guide - Page 8
troubleshoot Work with ink cartridges ...98 Supported ink cartridges 98 Handle the ink cartridges 99 Replace the ink cartridges 99 Align the ink cartridges 102 Clean the ink cartridges 104 Clean the ink cartridge contacts 105 Clean the area around the ink nozzles 106 Store printing supplies - HP J4680c | User Guide - Page 9
...130 Troubleshoot installation issues 142 Hardware installation suggestions 142 Software installation suggestions 143 Clear jams ...144 Clear paper jams ...144 Avoid paper jams ...146 A HP supplies and accessories Order printing supplies online 147 Supplies ...147 HP media ...147 B Support and - HP J4680c | User Guide - Page 10
period 151 Additional warranty options 152 HP Quick Exchange Service (Japan 152 Call HP Korea customer support 152 Prepare the device for shipment 153 Remove the ink cartridges before shipment 153 Pack the device ...154 C Device specifications Physical specifications ...156 Product features - HP J4680c | User Guide - Page 11
(Windows). The Toolbox is typically installed with the device software as an available installation option. HP Printer Utility (Mac OS) Contains tools to configure print settings, calibrate the device, clean the ink cartridges, print the configuration page, order supplies online, and find support - HP J4680c | User Guide - Page 12
HP Web sites HP telephone support HP photo and imaging software help Control Panel Guide Description Location • Ink levels • Ink cartridge health status Provide the latest printer software, and product and support information. www.hp.com/support www.hp.com Lists information to contact HP - HP J4680c | User Guide - Page 13
(continued) 4 Scanner glass 5 Automatic document feeder Printing supplies area 1 Front access door 2 Ink cartridges Back view 1 Rear universal serial bus (USB) port 2 Power input 3 1-LINE (fax) 4 2-EXT (phone) Understand the device parts 9 - HP J4680c | User Guide - Page 14
menu opens a help window on your computer screen. Start: Initiates a copy, fax, or scan job. Pressing Start exits a menu, or exits settings. Scan function indicator Copy Color function indicator Copy supplied. To completely disconnect the power supply, turn the device off, and then unplug the power - HP J4680c | User Guide - Page 15
USB connection Printer sharing Recommended number of connected computers for best performance Supported software features One computer supported. Only print is supported from the other computers. Setup instructions Follow the setup poster guide for detailed instructions. Follow the instructions - HP J4680c | User Guide - Page 16
control-panel message types • Change device settings • Use the HP Solution Center (Windows) • Use the HP photo and imaging software • Load originals • Select print media • Load media • Print on special and custom-sized media • Print borderless • Set up speed-dial entries Use device control panel - HP J4680c | User Guide - Page 17
to continue printing. If the service is required. For more information, see Support and warranty. Change device settings You can change the device settings from these places: • From the device control panel. • From the HP Solution Center (Windows) or HP the option that you want to change, use one of - HP J4680c | User Guide - Page 18
, click an item that you want to change. Use the HP Solution Center (Windows) On a Windows computer, the HP Solution Center is the entry point for the HP Photosmart Software. Use the HP Solution Center to change print settings, order supplies, and access the onscreen Help. The features available in - HP J4680c | User Guide - Page 19
window appears. 3. Select your device from the Device drop-down menu. From here, you can scan, import documents, and perform maintenance procedures such as checking the ink levels for the ink cartridges. NOTE: On a Macintosh computer, the features available in the HP Photosmart Studio software - HP J4680c | User Guide - Page 20
to the guide along the edge of the glass. 3. Close the lid. Load an original in the automatic document feeder (ADF) You can copy, scan, or fax a one-sided, an original in the document feeder tray 1. Load your original, with the print side up, into the document feeder tray. Place the pages so that - HP J4680c | User Guide - Page 21
in the document feeder tray. 2. Slide the width guides inward until they stop at the left and right edges HP media for optimum print quality. Visit the HP Web site at www.hp.com for more information about HP media. • Tips for selecting and using print media • Understand specifications for supported - HP J4680c | User Guide - Page 22
document. If not, set the size in the print driver. You might need to reformat existing documents to print them correctly on custom-sized media. Understand specifications for supported media Use the Understand supported sizes and Understand supported media types and weights tables to determine the - HP J4680c | User Guide - Page 23
Understand supported sizes Media size Standard media sizes 8.5 x 13 inches (216 x 330 mm) U.S. Legal (216 x 356 mm; 8.5 x 14 inches) A4 (210 x 297 mm; 8.3 dimension as 5 x 7 inches) Borderless (13 x 18 cm), same dimension as 5 x 7 inches Borderless (8.5 x 11 inches) Main tray Select print media 19 - HP J4680c | User Guide - Page 24
Chapter 2 (continued) Media size B7 ISO 10 x 15 cm (tab) 4 x 6 inches (tab) 10 x 20 cm (tab) 4 x 8 inches (tab) HV Cabinet 2L (same dimension as 5 x 7 inches) 13 x 18 cm (same dimension as 5 x 7 inches) Envelopes U.S. #10 Envelope (105 x 241 mm; 4.12 x 9.5 inches) Monarch Envelope (98 x 191 mm; 3.88 - HP J4680c | User Guide - Page 25
plain and inkjet hagaki from Japan Post only. It is not compatible with photo hagaki from Japan Post. Understand supported media types and weights Tray Main tray Type Paper Weight 60 to 105 g/m2 (16 to 28 lb bond inch stacked) Up to 100 sheets (17 mm or 0.67 inch stacked) Select print media 21 - HP J4680c | User Guide - Page 26
supported media Weight 75 to 90 g/m2 (20 to 24 lb bond envelope) Up to 200 g/m2 (110 lb index) Capacity Up to 30 sheets (17 mm or 0.67 inch stacked) Up to 80 cards Up to 100 sheets of plain paper (text printing running Windows, click the Advanced tab in the print driver, and select Minimize Margins. - HP J4680c | User Guide - Page 27
provides instructions for loading media into the device. To load main tray 1. Insert the media print- guides in the tray to adjust them for the media size that you have loaded. 3. Pull out the tray extender. Print on special and custom-sized media To print on special or custom-sized media (Windows - HP J4680c | User Guide - Page 28
: Open the file in a software application and assign the image size. Make sure the size corresponds to the media size on which you are printing the image. You can also gain access to this feature from the Printing Shortcuts tab. Open the printer driver, select the Printing Shortcuts tab, and select - HP J4680c | User Guide - Page 29
: Borderless printing is not supported on plain media. To print a borderless document (Windows) 1. Load the appropriate media. For more information, see Load media. 2. Open the file that you want to print. 3. From the application, open the print driver: a. Click File, and then click Print. b. Click - HP J4680c | User Guide - Page 30
that are set up, see Print and view a list of speed-dial entries. • Set up speed-dial entries • Set up a speed-dial group Set up speed-dial entries • HP Solution Center (Windows): Open the HP Solution Center and follow the instructions in the onscreen Help. • HP Device Manager (Mac OS): Launch - HP J4680c | User Guide - Page 31
• HP Solution Center (Windows): Open the HP Solution Center and follow the instructions in the onscreen Help. • HP Device Manager (Mac OS): Launch HP Device Manager you want to delete, and then press OK. Print and view a list of speed-dial entries You can print or view a list of all of the speed- - HP J4680c | User Guide - Page 32
configured in the driver. NOTE: To set print settings for all print jobs, make the changes in the printer driver. For more information about the features of the Windows printer driver, see the online help for the driver. For more information about printing from a specific application, see the - HP J4680c | User Guide - Page 33
click OK or Print. Cancel a print job You can cancel a print job using one of the following methods. Device control panel: Press (Cancel button). This clears the job that the device is currently processing. It does not affect jobs waiting to be processed. Windows: Double-click the printer icon that - HP J4680c | User Guide - Page 34
variety of paper types and sizes. NOTE: Copying from the HP photo and imaging software is only available on the Mac OS. NOTE: If you more information, see Load originals. 3. Use the left arrow or right arrow to select one of the following functions: • Copy B&W: To select a black-and-white copy job. - HP J4680c | User Guide - Page 35
set the number of copies that you want to print by using the No. of Copies option on the device control panel. To set the Start. NOTE: Copy functions can also be performed using the HP Photosmart Studio Software (Mac OS). See the software's Help for more information. Set the copy paper size You - HP J4680c | User Guide - Page 36
Chapter 4 NOTE: Copy functions can also be performed using the HP Photosmart Studio Software (Mac OS). See the software's Help for more information. Set the copy paper type You can set the paper type on the device. To set the paper type for copies - HP J4680c | User Guide - Page 37
HP Photosmart Studio Software (Mac OS). See the software's Help for more information. Change copy speed or quality The device provides three options might be lower quality. The Fast setting uses less ink and extends the life of your ink cartridges. To change the copy quality from the device control - HP J4680c | User Guide - Page 38
arrow until Full Page 91% appears, and then press OK. 6. Press Start. NOTE: Copy functions can also be performed using the HP Photosmart Studio Software (Mac OS). See the software's Help for more information. Copy a legal-size document onto letter paper You can use the Legal > Ltr 72% setting to - HP J4680c | User Guide - Page 39
your copy You can use the Lighter / Darker option to adjust the contrast of the copies you make. Lighter / Darker appears, and then press OK. 5. Do one of the following: • Press right arrow to darken the be performed using the HP Photosmart Studio Software (Mac OS). See the software's Help for more - HP J4680c | User Guide - Page 40
Chapter 4 The Mixed enhancement is the default option. Use the Mixed enhancement to sharpen edges of most originals. To copy a blurred document from the device control panel 1. Make sure you have paper loaded - HP J4680c | User Guide - Page 41
on your computer prior to scanning. To verify that the printer software is running on a computer running Windows, look for the device icon in the system tray at the lower-right side of the screen, near the clock. To verify this on a computer using the Mac OS, open the HP Device Manager, and click - HP J4680c | User Guide - Page 42
to a program on a computer from the HP photo and imaging software 1. On the computer, open the HP photo and imaging software. For more information, see Use the HP photo and imaging software. 2. See the onscreen Help for further instructions. To send a scan to a program on a computer from the device - HP J4680c | User Guide - Page 43
Manager (Mac OS): Launch HP Device Manager, click Information and Settings, and then select Scan Preferences from the drop-down list. • Windows: Open the device software, select Settings, select Scan Settings and Preferences, then select from the available options and make your selections. Cancel - HP J4680c | User Guide - Page 44
, you can also set a number of fax options, such as resolution and the contrast between lightness and , you can use the HP photo and imaging software to perform fax procedures that are sending the fax. • Send a basic fax • Send a fax manually from a phone • Send a fax using monitor dialing • Send - HP J4680c | User Guide - Page 45
printed confirmation that your faxes were successfully sent, enable fax confirmation before sending any faxes. TIP: You can also send a fax manually from The Speed Dial and Redial buttons are only available with the HP Officejet J4660 All-in-One. To send a basic fax from the device control panel - HP J4680c | User Guide - Page 46
you hear the fax tones from the receiving fax machine. To send a fax manually from an extension phone 1. Load your originals. For additional information, see Load soon and cause your PIN not to be recognized by the calling card service. If this is the case, you can create a speed dial entry - HP J4680c | User Guide - Page 47
when the receiving fax machine answers. Send a fax from memory You can scan a black-and-white fax into memory and then send the fax from memory The device automatically sends your fax at the specified time. You can only schedule one fax to be sent at a time. You can continue to send faxes normally, - HP J4680c | User Guide - Page 48
by using the keypad, press Speed Dial to select a speed dial, or press Redial/Pause to redial the last number dialed. 7. Press Start. The device scans all pages and the scheduled time appears on the display. The fax is sent at the scheduled time. To cancel a scheduled fax 1. Press the left - HP J4680c | User Guide - Page 49
can press the Speed Dial button repeatedly (HP Officejet J4660 only). 4. Press Start. If the and white, because of memory limitations. The device scans the fax into memory then dials the first number 's fax machine only supports black-and-white faxes, the HP All-in-One automatically sends the fax - HP J4680c | User Guide - Page 50
fax machine does not support the resolution you have chosen, the HP All-in-One sends faxes at the highest resolution supported by the receiving fax transmission with the lowest quality. When you exit the Fax menu, this option returns to the default setting unless you set your changes as the default - HP J4680c | User Guide - Page 51
NOTE: The Lighter / Darker setting applies to black-and-white faxes only, not color faxes. When you exit the Fax menu, this option returns to the default setting unless you set your changes as the default. To change the Lighter / Darker setting from the device control panel 1. Load - HP J4680c | User Guide - Page 52
manually. If you turn off the Auto Answer option, you must receive faxes manually. If you turn on the Auto Answer option disabled the Automatic Reduction feature, the device prints the fax on two pages. NOTE: to as manual faxing. Use the instructions in this section to receive a manual fax. NOTE - HP J4680c | User Guide - Page 53
you are currently on the phone with the sender, instruct the sender to press Start on their fax machine. off Backup fax for security purposes. If an error condition occurs that prevents the device from printing (for example, the device runs out of paper), the device stops answering incoming fax - HP J4680c | User Guide - Page 54
condition or not. NOTE: After the memory becomes full, the oldest, printed faxes are overwritten as new faxes are received. If all the stored faxes for polling and have a fax ready to send. NOTE: The HP All-in-One does not support polling pass codes. Polling pass codes are a security feature that - HP J4680c | User Guide - Page 55
black and white, the device prints the fax in black and forwarded in black and white. HP recommends that you verify the prints the fax. If you set up the device to print error reports for received faxes, it will also print main tray. Faxes can be printed on letter, A4, or press OK to print the fax. - HP J4680c | User Guide - Page 56
an option, and then press OK. Set automatic reduction for incoming faxes The Automatic Reduction setting determines what the HP All-in-One does if subscribe to a caller ID service through your phone provider, you can block specific fax numbers so the device does not print faxes received from those - HP J4680c | User Guide - Page 57
list, select Select no. - or To manually enter a fax number to block, select select it. 6. When the Delete Another? prompt appears, do one of the following: • If you want to remove another faxes are printed instead of being saved to the computer. NOTE: Fax to PC is only supported on Windows. NOTE: - HP J4680c | User Guide - Page 58
be on at all times. Only one computer can act as the Fax HP Solution Center (Windows). 2. Select Settings, and then select Fax to PC Setup Wizard. 3. Follow the onscreen instructions Print: Choose this option to print faxes as they are received. If you turn off printing, color faxes will still print - HP J4680c | User Guide - Page 59
For more information, see Use the HP Solution Center (Windows). 2. Select Settings, and then select options • Set the fax speed Configure the fax header The fax header prints your name and fax number on the top of every fax you send. HP recommends that you set up the fax header by using the software - HP J4680c | User Guide - Page 60
want to receive faxes manually. You must be available set the answer mode to manual or automatic via the device Press right arrow to select Answer Options, and then press OK. 4. Press right arrow to select Answer Options, and then press OK. 4. Press one phone line. When you subscribe to this service - HP J4680c | User Guide - Page 61
one ring pattern to voice calls and another ring pattern to fax calls. HP service, use the default ring pattern, which is All Rings. NOTE: The HP correction only if you are having trouble sending or receiving a fax, and dialing. NOTE: The pulse-dialing option is not available in all countries/regions. - HP J4680c | User Guide - Page 62
is Fast. If you use one of the following, setting the fax speed to a slower speed might be required: • An Internet phone service • A PBX system • Fax over Internet Protocol (FoIP) • An integrated services digital network (ISDN) service If you experience problems sending and receiving faxes, you - HP J4680c | User Guide - Page 63
device prints a report with the results of the test. If the test fails, review the report for information on how to fix the problem and rerun the test. To test fax setup 1. Set up the device for faxing according to your particular home or office setup instructions. 2. Make sure the ink cartridges - HP J4680c | User Guide - Page 64
faxing. • If the test fails, review the report for more information on how to fix any problems found. Use reports You can set up the device to print error reports and confirmation reports automatically for each fax you send and receive. You can also manually print system reports as required; these - HP J4680c | User Guide - Page 65
select one of the following, and then press OK. Off On Fax Send On Fax Receive Send & Receive Does not print a Prints a fax confirmation report for every fax you receive. Prints a fax confirmation report for every fax you send and receive. TIP: If you choose On Fax Send or Send & Receive, and scan - HP J4680c | User Guide - Page 66
see Use the HP photo and imaging software. 2. See the onscreen Help for the HP photo and imaging software for further instructions. The log lists faxes that have been sent from the device control panel and the HP photo and imaging software and all faxes that have been received. To print the fax log - HP J4680c | User Guide - Page 67
tools. NOTE: Specific procedures might include other methods. Windows • Device control panel • Printer driver • Toolbox Mac OS • Device control panel • HP Printer Utility • Monitor the device • Administer the device Monitor the device This section provides instructions for monitoring the - HP J4680c | User Guide - Page 68
Chapter 7 (continued) Use this tool... HP Printer Utility (Mac OS) to obtain the following information... Ink cartridge information: Open the Information and Support panel and click Supplies Status. * * Ink level warnings and indicators provide estimates for planning purposes only. When you - HP J4680c | User Guide - Page 69
order supplies for the device. Telephone numbers are not available for all countries/regions. • Cartridge Details: Shows order numbers and expiration dates of the installed ink cartridges. Printer Information: Shows the device hardware. Information tab options include: Hardware information • Print - HP J4680c | User Guide - Page 70
HP Web site where you can find support for the device, register the device, and find information about returning and recycling used printing supplies. Understand the self-test report Use the self-test report to: • View current device information and ink cartridge status • Help troubleshoot problems - HP J4680c | User Guide - Page 71
Test, and then press OK. • HP Printer Utility (Mac OS): Click Device Information from the Information and Support panel, and then click Print Configuration Page. Set up faxing for the device After completing all the steps in the getting started guide, use the instructions in this section to complete - HP J4680c | User Guide - Page 72
Windows) or HP Fax Setup Utility (Mac OS) through the software you installed with the device. After you run the Fax Setup Wizard (Windows) or HP your country/region uses. The instructions for fax setup differ depending phone system, HP recommends you use the 2-wire phone cord supplied with the device - HP J4680c | User Guide - Page 73
) • Case B: Set up the device with DSL • Case C: Set up the device with a PBX phone system or an ISDN line • Case D: Fax with a distinctive ring service on the same line • Case E: Shared voice/fax line • Case F: Shared voice/fax line with voice mail • Case G: Fax line shared with computer modem (no - HP J4680c | User Guide - Page 74
several phone numbers on one phone line. When you subscribe to this service, each phone number and receive faxes directly to and from your computer software applications through a dial-up connection? • Do you on your phone system. Step-by-step instructions are included for each case in the sections - HP J4680c | User Guide - Page 75
use the phone cord supplied in the box to connect one end to your telephone wall jack and the other end to the port labeled 1-LINE on the back of the device. If you use another phone cord, you might experience problems sending and receiving faxes. Other equipment/services - HP J4680c | User Guide - Page 76
-type phone systems Voice calls, computer dial-up modem, and voice mail service (You answered Yes to questions 4, 5, and 7 only.) Case K: device with a separate fax line 1. Using the phone cord supplied in the box with the device, connect one end to your telephone wall jack, then connect the other - HP J4680c | User Guide - Page 77
If you have a DSL service through your telephone company, and do not connect any equipment to the device, use the instructions in this section to connect you might already have in your home or office. As only one phone cord is supplied, you may will need to obtain additional phone cords for this - HP J4680c | User Guide - Page 78
specific phone equipment. For example, you might have assigned one port for telephone and Group 3 fax and another port for multiple purposes. If you have problems your PBX phone system for instructions on how to turn off the . • Make sure you use the supplied cord to connect from the telephone wall - HP J4680c | User Guide - Page 79
up the device with a distinctive ring service 1. Using the phone cord supplied in the box with the device, connect one end to your telephone wall jack, then voice calls and fax calls or it might not answer at all. 4. (Optional) Change the Rings to Answer setting to the lowest setting (two rings). 5. - HP J4680c | User Guide - Page 80
3 Telephone (optional) To set up the device with a shared voice/fax line 1. Using the phone cord supplied in the box with the device, connect one end to your if you have a voice mail service at the same phone number you use for fax calls. You must receive faxes manually; this means you must be - HP J4680c | User Guide - Page 81
with voice mail 1. Using the phone cord supplied in the box with the device, connect one end to your telephone wall jack, then connect incoming fax calls, or the device cannot receive faxes. You must initiate the manual fax before voicemail picks up the line. Case G: Fax line shared with computer - HP J4680c | User Guide - Page 82
of the device. 3. Using the phone cord supplied in the box with the device, connect one end to your telephone wall jack, then connect reception setting in your modem software, the device will not be able to receive faxes. 5. Turn on the Auto Answer setting. 6. (Optional) Change the Rings to Answer - HP J4680c | User Guide - Page 83
you have a DSL line and use that phone line to send faxes, follow these instructions to set up your fax. 1 Telephone wall jack 2 Parallel splitter 3 DSL/ADSL filter Connect one end of the phone jack that was supplied with the device to connect to the 1-LINE port on the back of the device - HP J4680c | User Guide - Page 84
you use your phone line for both fax and telephone calls, use these instructions to set up your fax. There are two different ways to set you begin, check your computer to see if it has one or two phone ports. • If your computer has only one phone port, you will need to purchase a parallel splitter - HP J4680c | User Guide - Page 85
splitter. 5. Using the phone cord supplied in the box with the device, connect one end to your telephone wall jack, software is set to receive faxes to your computer automatically, turn off that setting. NOTE: If you do not turn off the automatic fax reception setting in your modem software, the HP - HP J4680c | User Guide - Page 86
Auto Answer setting. • If you set up the device to answer faxes manually, you must be available to respond in person to incoming fax calls or these instructions if your computer has a DSL/ADSL modem 1 Telephone wall jack 2 Parallel splitter 3 DSL/ADSL filter 4 Phone cord supplied with the - HP J4680c | User Guide - Page 87
the home/office sharing the same phone number with DSL service will need to be connected to additional DSL filters, otherwise you will experience noise when making voice calls. 2. Using the phone cord supplied in the box with the devices, connect one end to the DSL filter, then connect the other end - HP J4680c | User Guide - Page 88
1-LINE port on the back of the device 3 Answering machine 4 Telephone (optional) To set up the device with a shared voice/fax line with answering faxes with the device. 3. Using the phone cord supplied in the box with the device, connect one end to your telephone wall jack, then connect the - HP J4680c | User Guide - Page 89
Optional device to the maximum number of rings supported by your device. (The maximum different ways to set the HP device with your computer one or two phone ports. • If your computer has only one phone port, you will need to purchase a parallel splitter, as shown below. (A parallel splitter has one - HP J4680c | User Guide - Page 90
has one phone port, set up the HP device as described below. Figure 7-11 Back view of the device 1 Telephone wall jack 2 Telephone cord connected to the parallel splitter 3 Parallel splitter 4 Telephone (optional) 5 Answering machine 6 Computer with modem 7 Use the phone cord supplied - HP J4680c | User Guide - Page 91
supplied in the box with the HP device, connect one end to your telephone wall jack, then connect the other end to the port labeled 1-LINE on the back of the HP device. NOTE: If you do not use the supplied If your modem software is set to HP device to the maximum number of rings supported by your HP - HP J4680c | User Guide - Page 92
connected to the 1-LINE port on the back of the device 5 DSL/ADSL modem 6 Computer 7 Answering machine 8 Telephone (optional) NOTE: You will need to purchase a parallel splitter. A parallel splitter has one RJ-11 port on the front and two RJ-11 ports on the back. Do not use a 2-line phone - HP J4680c | User Guide - Page 93
service will need to be connected to additional DSL/ ADSL filters, otherwise you will experience noise when making voice calls. 2. Using the phone cord supplied in the box with the device, connect one maximum number of rings supported by the device. modem, follow these instructions to set up your - HP J4680c | User Guide - Page 94
voice mail service at the same phone number you use for fax calls. You must receive faxes manually; this to see if it has one or two phone ports. • If your computer has only one phone port, you will need wall jack 2 Use the phone cord supplied in the box with the device to connect to the - HP J4680c | User Guide - Page 95
supplied in the box with the device, connect one your modem software, the hp.com/at/faxconfig www.hp.com/de/faxconfig www.hp.com/ch/fr/faxconfig www.hp.com/ch/de/faxconfig www.hp.com/uk/faxconfig www.hp.fi/faxconfig www.hp.dk/faxconfig www.hp.se/faxconfig www.hp.no/faxconfig www.hp.nl/faxconfig www.hp - HP J4680c | User Guide - Page 96
printer driver on Windows 2000, Windows XP, or Windows Vista. When setting up the device, HP recommends that you connect it after you install the software 3. On the CD menu, click the appropriate installation option and follow the onscreen instructions. 4. When prompted, turn on the device and - HP J4680c | User Guide - Page 97
the printer driver, select the Advanced option, and Windows, use the computer running Windows XP as the server. Use this configuration only in small groups or when usage is low. The connected computer is slowed down when many users print to the device. Only the printing function is shared. Scan - HP J4680c | User Guide - Page 98
then double-click Printers. 2. Right-click the device icon, click Properties, and then click the Sharing tab. 3. Click the option to share the device, and give it a share name. 4. To share the device with client computers that use other versions of Windows, click Additional Drivers to install those - HP J4680c | User Guide - Page 99
after you have reinstalled the software. 2. Press the Power button to turn off the device. 3. On the Windows taskbar, click Start, select Programs or All Programs, select HP, select Officejet J4500 Series, and then click Uninstall. 4. Follow the onscreen instructions. 5. If you are asked whether - HP J4680c | User Guide - Page 100
instructions. When the software installation is complete, the HP Digital Imaging Monitor icon appears in the Windows system tray. To uninstall from a Windows . 2. Select HP Officejet All-in-One Series, and then click Change/Remove or Uninstall/Change. Follow the onscreen instructions. 3. Disconnect - HP J4680c | User Guide - Page 101
your computer. 5. To reinstall the software, insert the device Starter CD into your computer's CD- ROM drive. 6. On the desktop, open the CD-ROM, and then double-click HP All-in-One Installer. 7. Follow the onscreen instructions and also see To install the software. Uninstall and reinstall the - HP J4680c | User Guide - Page 102
printing problems • Poor print quality and unexpected printouts • Solve paper-feed problems • Solve copy problems • Solve scan problems • Solve fax problems • Troubleshoot installation issues • Clear jams Work with ink cartridges This section contains the following topics: • Supported ink cartridges - HP J4680c | User Guide - Page 103
printing problems, or even permanent damage. Replace the ink cartridges Follow these instructions when the ink level is low. NOTE: When the ink level for an ink cartridge is low, a message appears on the display. You can also check the ink levels by using the printer Toolbox (Windows) or the HP - HP J4680c | User Guide - Page 104
carriage moves to the far right side of the device. 3. Wait until the print carriage is idle and silent, and then lightly press down on an ink cartridge to release it. If you are replacing the tri-color ink cartridge, remove the ink cartridge from the slot on the left. 100 Maintain and troubleshoot - HP J4680c | User Guide - Page 105
gray photo ink cartridge, remove the ink cartridge from the slot on the right. 4. Pull the ink cartridge toward you out of its slot. 5. If you are removing the black ink cartridge in order to install the photo or gray photo ink cartridge, store the black ink cartridge in the ink cartridge protector - HP J4680c | User Guide - Page 106
or discard the ink cartridge alignment sheet. Align the ink cartridges The HP All-in-One prompts you to align cartridges every time you install or replace an ink cartridge. You can also align the ink cartridges at any time from the device control panel or by using the software you installed with - HP J4680c | User Guide - Page 107
or discard the ink cartridge alignment sheet. To align the ink cartridges from the HP Photosmart Software (Windows) 1. Load letter, A4, or legal unused plain white paper into the input tray. 2. In the HP Solution Center, click Settings, point to Print Settings, and then click Printer Toolbox. NOTE - HP J4680c | User Guide - Page 108
Software (Mac OS) 1. Load letter, A4, or legal unused plain white paper into the input tray. 2. HP Printer Utility (Mac OS): Open the HP Printer Utility. For more information, see HP Printer Utility (Mac OS). Click Align and follow the onscreen instructions. The HP All-in-One prints an ink cartridge - HP J4680c | User Guide - Page 109
contacts before replacing the affected ink cartridge. HP Printer Utility (Mac OS) 1. Open the HP Printer Utility. For more information, see HP Printer Utility (Mac OS). 2. Click Clean and follow the onscreen instructions. Clean the ink cartridge contacts Clean the ink cartridge contacts only if you - HP J4680c | User Guide - Page 110
as described here. NOTE: Clean the area around the ink nozzles only if you continue to see streaks and smudges on your printed pages after you have already cleaned the ink cartridges by using the device control panel or the software you installed with the HP All-in-One. 106 Maintain and troubleshoot - HP J4680c | User Guide - Page 111
on the device and open the ink cartridge door. The print carriage moves to the far right side of the device. 2. Wait until the print carriage is idle and silent, and then unplug the power cord from the back of the device. NOTE: Depending how long the HP All-in-One is unplugged, the date and - HP J4680c | User Guide - Page 112
the ink cartridge protector. For example, store the black ink cartridge in an ink cartridge protector if you are removing it so you can print high-quality photos with the photo and tri-color ink cartridges. NOTE: If you do not have an ink cartridge protector, you can order one from HP Support. For - HP J4680c | User Guide - Page 113
place. To remove the ink cartridge from the ink cartridge protector ▲ Press down on the top of the ink cartridge protector to release the ink cartridge, then gently remove the ink cartridge out of the ink cartridge protector. Clean the device This section provides instructions for keeping the device - HP J4680c | User Guide - Page 114
cover to access the pick assembly inside the automatic document feeder, clean the rollers or separator pad, and then close the cover. 110 Maintain and troubleshoot - HP J4680c | User Guide - Page 115
If you have lines or dust appearing on scanned documents or faxes, clean the mylar strip in the ADF. To clean the rollers or separator pad 1. Remove all originals from the document feeder tray. 2. - HP J4680c | User Guide - Page 116
stops, and then gently pry the cover to release the catch. 3. Continue lifting the automatic document feeder cover to the vertical position. 112 Maintain and troubleshoot - HP J4680c | User Guide - Page 117
you still see dust or lines on scans after cleaning the plastic strip, you may need to order a new plastic strip. For more information, see Support and warranty. General troubleshooting tips and resources Try these when you begin troubleshooting a printing problem. • For a paper jam, see Clear paper - HP J4680c | User Guide - Page 118
attempting the task again. Troubleshooting topics • Solve printing problems • Poor print quality and unexpected printouts • Solve paper-feed problems • Solve copy problems • Solve scan problems • Solve fax problems • Troubleshoot installation issues Solve printing problems This section contains the - HP J4680c | User Guide - Page 119
the print speed, select different print settings in the device driver. For more information, see Change print settings. Blank or partial page printed Clean the ink cartridge Complete the ink cartridge cleaning procedure. For more information, see Clean the ink cartridges. Solve printing problems 115 - HP J4680c | User Guide - Page 120
you select the correct print quality settings in the printer driver for the media loaded in the trays. • Make sure the page settings in the printer driver match the page size of media loaded in the tray. More than one page is being picked For more information on paper-feed problems, see Solve paper - HP J4680c | User Guide - Page 121
the software manufacturer for specific help. The device prints half a page, then ejects the paper Check the ink cartridges Make sure the correct ink cartridges are installed and the ink cartridges are not low on ink. For more information, see Manage the device and Work with ink cartridges. HP cannot - HP J4680c | User Guide - Page 122
Work with ink cartridges. HP cannot guarantee the quality of non-HP ink cartridges. Check the paper quality The paper might be too moist or too rough. Make sure the media meets HP specifications, and try to print again. For more information, see Understand specifications for supported media. Check - HP J4680c | User Guide - Page 123
, see Understand specifications for supported media. Check the ink cartridges Make sure the ink cartridges are not low on ink. For more information, see Manage the device and Work with ink cartridges. HP cannot guarantee the quality of non-HP ink cartridges. Poor print quality and unexpected - HP J4680c | User Guide - Page 124
information, see Manage the device and Work with ink cartridges. HP cannot guarantee the quality of non-HP ink cartridges. Colors are printing as black and white Check the print settings Make sure Print in Grayscale is not selected in the printer driver. For information on changing this setting, see - HP J4680c | User Guide - Page 125
with ink cartridges. HP cannot guarantee the quality of non-HP ink cartridges. Solve paper-feed problems Media is not supported for the printer or tray Use only media that is supported for the device and the tray being used. For more information, see Understand specifications for supported media - HP J4680c | User Guide - Page 126
device and reload the media properly, making sure that the paper guides are properly aligned. • Load media into the device only when it is not printing. Multiple pages are being picked up • Fan the media before loading. • Make sure the paper guides are set to the correct markings in the tray for the - HP J4680c | User Guide - Page 127
efficiency. Solve copy problems If the following topics do not help, see Support and warranty for information about HP support. • No copy came out • Copies are blank • Documents are missing or faded • Size is reduced • Copy quality is poor • Copy defects are apparent • The device prints half a page - HP J4680c | User Guide - Page 128
for the HP photo and imaging software for more information. Copy quality is poor • Take steps to improve the copy quality ◦ Use quality originals. ◦ Load the media correctly. If the media is loaded incorrectly, it might skew, causing unclear images. See Understand specifications for supported media - HP J4680c | User Guide - Page 129
device prints half a page, then ejects the paper Check the ink cartridges Make sure the correct ink cartridges are installed and the ink cartridges are not low on ink. For more information, see Manage the device and Work with ink cartridges. HP cannot guarantee the quality of non-HP ink cartridges - HP J4680c | User Guide - Page 130
scan problems If the following topics do not help, see Support and warranty for information about HP support. NOTE: If you are starting the scan from a computer, see the software Help for troubleshooting information. • Scanner did nothing • Scan takes too long • Part of the document did not scan - HP J4680c | User Guide - Page 131
scanning. ◦ If you are using the HP photo and imaging software, the default settings in the HP photo and imaging software might be set to automatically perform a specific task other than the one that you are attempting. See the onscreen Help for the HP photo and imaging software for instructions scan - HP J4680c | User Guide - Page 132
of the original photograph, which degrades the quality. Often, the ink dots form unwanted patterns that can be detected when the image is scanned or printed or when the image appears on a screen. If the following suggestions do not solve the problem, you might need to use a better-quality version of - HP J4680c | User Guide - Page 133
or dark or might be printed on colored paper. • Unwanted lines Ink, glue, correction fluid, HP software settings might be set to reduce the scanned image. See the product software Help for more information about changing the settings. Solve fax problems This section contains fax setup troubleshooting - HP J4680c | User Guide - Page 134
the test fails again, continue reviewing the troubleshooting information in this section. • Try to send or receive a test fax. If you can send or receive a fax successfully, there might not be a problem. • If you are running the test from the Fax Setup Wizard (Windows) or HP Fax Setup Utility (Mac - HP J4680c | User Guide - Page 135
problems faxing, contact HP Support. Go to www.hp.com/ support. If prompted, choose your country/region, and then click Contact HP for information on calling for technical support wall jack. Using the phone cord supplied in the box with the device, connect one end to your telephone wall jack, - HP J4680c | User Guide - Page 136
again. • If you are using a phone splitter, this can cause faxing problems. (A splitter is a two-cord connector that plugs into a telephone wall jack cord supplied in the box with the device to connect to the telephone wall jack. One end of the phone cord should be 132 Maintain and troubleshoot - HP J4680c | User Guide - Page 137
jack, as shown below. 1 Telephone wall jack 2 Use the phone cord supplied in the box with the device to connect to the "1-LINE" port If Test passes without the other equipment, then one or more pieces of the equipment is causing problems; try adding them back one at a time and rerunning the test - HP J4680c | User Guide - Page 138
cord supplied in the box with the device, connect one end This will not cause a problem sending or receiving faxes. you might have problems sending and receiving do not use the supplied phone cord to connect you resolve any problems found, run the supplied in the box with the device, connect one - HP J4680c | User Guide - Page 139
them back one at a time and rerunning the test each time, until you identify which piece of equipment is causing the problem. ◦ If the Fax Line Condition Test fails without the other equipment, connect the device to a working phone line and continue reviewing the troubleshooting information in - HP J4680c | User Guide - Page 140
HP cord supplied in the box with the device to connect to the telephone wall jack. One end a dial tone, call your local telephone company for service. • Other equipment, which uses the same phone computer for an error message providing information about the problem and how to solve it. If there is - HP J4680c | User Guide - Page 141
If the device shares the same phone line with a DSL service, the DSL modem might not be properly grounded. If provider for support. • If you are using a phone splitter, this can cause faxing problems. (A wall jack. The device is having problems sending a manual fax Solution: NOTE: This possible - HP J4680c | User Guide - Page 142
phone cord supplied in the box with the device to connect to the "1-LINE" port 3 Telephone • If you are sending a fax manually from your service, see Case F: Shared voice/fax line with voice mail. For information on receiving faxes manually, see Receive a fax manually. 138 Maintain and troubleshoot - HP J4680c | User Guide - Page 143
phone line with the device, check to make sure that the software that came with your modem is not set to receive faxes automatically answering machine on the same phone line with the device, you might have one of the following problems: ◦ Your answering machine might not be set up properly with the - HP J4680c | User Guide - Page 144
the other equipment, one or more pieces of the other equipment is causing problems; try adding them back one at a time and service could be interfering with the recipient's phone line. You can also ask the recipient to check the receiving fax machine for any problems. 140 Maintain and troubleshoot - HP J4680c | User Guide - Page 145
one end to the coupler, then connect the other end to the port labeled 1-LINE on the back of the device. 2. Connect another phone cord to the open port on the coupler and to the telephone wall jack. Color faxes do not print Cause: The Incoming Fax Printing option is turned off. Solution: To print - HP J4680c | User Guide - Page 146
faxes and one of them may be switched off. Solution: If the computer receiving faxes is different from the one used for Troubleshoot installation issues If the following topics do not help, see Support and warranty for information about HP support. • Hardware installation suggestions • Software - HP J4680c | User Guide - Page 147
, inspect the Starter CD for damage. You can download the device driver from the HP Web site (www.hp.com/support). Check or perform the following • Make sure the computer meets the system requirements. • Before installing software on a Windows computer, ensure all other programs are closed. • If - HP J4680c | User Guide - Page 148
remedies before you attempt to clear the jam. • Make sure that you are printing with media that meets specifications. For more information, see Understand specifications for supported media. • Make sure that you are printing with media that is not wrinkled, folded, or damaged. • Make sure that the - HP J4680c | User Guide - Page 149
2. Gently pull the paper out of the rollers. CAUTION: If the paper tears when you are removing it from the rollers, check the rollers and wheels for torn pieces of paper that might be remaining inside the device. If you do not remove all the pieces of paper from the device, more paper jams are - HP J4680c | User Guide - Page 150
more information, see Understand specifications for supported media. • Do not leave originals on the glass. If you load an original in the automatic document feeder while there is already an original on the glass, the original can jam in the automatic document feeder. 146 Maintain and troubleshoot - HP J4680c | User Guide - Page 151
supplies online • Supplies Order printing supplies online Besides the HP Web site, you may order printing supplies using the following tools: • Toolbox (Windows): On the Estimated Ink Level tab, click Shop Online. • HP Printer Utility (Mac OS): Click Supplies Status from the Information and Support - HP J4680c | User Guide - Page 152
and warranty The information in Maintain and troubleshoot suggests solutions to common problems. If your device is not operating correctly and those suggestions did not solve your problem, try using one of the following support services to obtain assistance. This section contains the following - HP J4680c | User Guide - Page 153
Hewlett-Packard limited warranty statement Hewlett-Packard limited warranty statement 149 - HP J4680c | User Guide - Page 154
. • Check for software updates. You can also obtain support from the Toolbox (Windows) or HP Printer Utility (Mac OS), which provide easy, step-by-step solutions to common printing problems. For more information, see Toolbox (Windows) or HP Printer Utility (Mac OS). Support options and availability - HP J4680c | User Guide - Page 155
online support specialists • Software and driver updates for the HP All-in-One • Valuable troubleshooting information for common problems • Proactive device updates, support alerts, and HP newsgrams that are available when you register the HP All-in-One 3. Call HP support. Support options and - HP J4680c | User Guide - Page 156
options Extended service plans are available for the HP All-in-One at additional costs. Go to www.hp.com/ support, select your country/region and language, then explore the services and warranty area for information about the extended service plans. HP Quick Exchange Service (Japan) For instructions - HP J4680c | User Guide - Page 157
the device for shipment If after contacting HP Customer Support or returning to the point of purchase, you are requested to send the device in for service, make sure you remove and keep the following items before returning your device: • The ink cartridges • The power cord, USB cable, and any - HP J4680c | User Guide - Page 158
thumb and forefinger and pulling it firmly toward you. 4. Place the ink cartridges in an airtight plastic container so they will not dry out, and put them aside. Do not send them with the device unless the HP customer support call agent instructs you to. 5. Close the front access door and wait a few - HP J4680c | User Guide - Page 159
shipping label on the outside of the box. 3. Include the following items in the box: • A complete description of symptoms for service personnel (samples of print quality problems are helpful). • A copy of the sales slip or other proof of purchase to establish the warranty coverage period. • Your - HP J4680c | User Guide - Page 160
speed device Ink cartridges Black and tri-color ink cartridge Supply yields Visit www.hp.com/pageyield/ for more information on estimated ink cartridge yields. Device languages HP PCL 3 GUI Duty cycle Up to 3000 pages per month Device control panel language support Language availability - HP J4680c | User Guide - Page 161
requirements, visit http://www.hp.com/support/ Operating system compatibility • Windows 2000, Windows XP Home, Windows XP Professional, Windows XP Professional x64, Windows Vista, Windows Vista x64 NOTE: For Windows 2000 and Windows XP x64, only printer drivers, scanner drivers, and the Toolbox are - HP J4680c | User Guide - Page 162
Fine (dpi) 300 x 300 Fine (dpi) 196 x 203 200 x 200 200 x 200 Standard (dpi) 196 x 98 200 x 200 Scan specifications • Image editor included • Integrated OCR software automatically converts scanned text to editable text • Scan speeds vary according to the complexity of the document 158 Device - HP J4680c | User Guide - Page 163
Power supply Universal power adapter (external) Power requirements Input voltage: 100 to 240 VAC (± 10%), 50/60 Hz (± 3Hz) Output voltage: 32 Vdc, LPS (600 mA min) Power consumption 17 watts printing Acoustic emission specifications (print in Draft mode, noise levels per ISO 7779) Sound - HP J4680c | User Guide - Page 164
D Regulatory information The device meets product requirements from regulatory agencies in your country/region. This section contains the following topics: • FCC statement • Notice to users in Korea • VCCI (Class B) compliance statement for users in Japan • Notice to users in Japan about the power - HP J4680c | User Guide - Page 165
and used in accordance with the instructions, may cause harmful interference to is encouraged to try to correct the interference by one or more of the following measures: • Reorient the made to this device that are not expressly approved by HP may void the user's authority to operate the equipment - HP J4680c | User Guide - Page 166
Appendix D VCCI (Class B) compliance statement for users in Japan Notice to users in Japan about the power cord RoHS notices (China only) Toxic and hazardous substance table Noise emission statement for Germany Geräuschemission LpA < 70 dB am Arbeitsplatz im Normalbetrieb nach DIN 45635 T. 19 162 - HP J4680c | User Guide - Page 167
when your number is called. Too many devices on one line might result in failure to ring in response service. If you experience trouble with this equipment, please contact the manufacturer, or look elsewhere in this manual software. Notice to users of the U.S. telephone network: FCC requirements 163 - HP J4680c | User Guide - Page 168
FCC Partie 68, le numéro REN de ce produit est 0.0B. This equipment meets the applicable Industry Canada Terminal Equipment Technical Specifications. This is confirmed by the registration number. The abbreviation IC before the registration number signifies that registration was performed based on - HP J4680c | User Guide - Page 169
or Hewlett-Packard Company if additional product support is necessary. This equipment has been loop disconnect dialing. In the unlikely event of problems with loop disconnect dialing, it is recommended to des HP All-in-One enthalten ist, an die Wandsteckdose (TAE 6) Code N an. Dieses HP-Fax - HP J4680c | User Guide - Page 170
the marketing name (HP Officejet J4500 All-in-One series) or product Options: Power Adapter: Hewlett-Packard Company 16399 West Bernardo Drive San Diego, CA 92127-1899, USA HP Officejet J4500 series SDGOB-0831 All 0957-2242 DoC#: SDGOB-0831-rel.1.0 conforms to the following Product Specifications - HP J4680c | User Guide - Page 171
.com/hpinfo/globalcitizenship/environment/recycle/ HP inkjet supplies recycling program HP is committed to protecting the environment. The HP Inkjet Supplies Recycling Program is available in many countries/regions, and lets you recycle used ink cartridges and ink cartridges free of charge. For more - HP J4680c | User Guide - Page 172
more information about where you can drop off your waste equipment for recycling, please contact your local city office, your household waste disposal service or the shop where you purchased the product. Évacuation des équipements usagés par les utilisateurs dans les foyers privés au sein de l'Union - HP J4680c | User Guide - Page 173
a voluntary program established to encourage the development of energyefficient office products. ENERGY STAR is a U.S. registered service mark of the U.S. EPA. As an ENERGY STAR partner, HP has determined that this product meets ENERGY STAR guidelines for energy efficiency. For more information on - HP J4680c | User Guide - Page 174
OS 25 Windows 25 broadcast faxing send 44 buttons, device control panel 10 C cancel copy 36 print job 29 scan 39 scheduled fax 44 Cancel button 10 capacity ADF 16 tray 21 cards guidelines 18 sizes supported 20 tray supporting 21 clean automatic document feeder 110 exterior 110 ink cartridge contacts - HP J4680c | User Guide - Page 175
copies 125 dots, troubleshoot scan 129 driver settings 28 version 150 warranty 149 DSL, fax setup with parallel phone systems 73 duty cycle 156 E ECM. See error correction mode edit scanned images 39 text in OCR program 39 electrical specifications 159 envelopes guidelines 18 sizes supported 20 tray - HP J4680c | User Guide - Page 176
3 HP Photosmart Software send scans to programs 38 HP Photosmart Studio send scans to programs 38 HP Printer Utility (Mac OS) administrator settings 64 opening 66 panels 66 HP Solution Center 14 humidity specifications 159 I Information tab, Toolbox (Windows) 65 ink cartridge door, locating 9 ink - HP J4680c | User Guide - Page 177
replace ink cartridges 99 manual faxing receive 48 send 41, 42 margins setting, specifications 22 media ADF capacity 16 borderless printing 25 clear jams 144 HP, order 147 load tray 23 print on custom-sized 23 selecting 17 skewed pages 122 specifications 18 supported sizes 19 troubleshoot feeding - HP J4680c | User Guide - Page 178
copy 124 print 117 scan 128 R readme 7 rear access panel clear jams 144 illustration 9 receive faxes auto answer mode 56 automatically 48 blocking numbers 52 forwarding 51 manually 48 polling 50 rings to answer 56 troubleshoot 135, 138 recycle ink cartridges 167 redial options, setting 58 - HP J4680c | User Guide - Page 179
copy 125 print 122 scan 128 slow print, troubleshoot 115 software connection types 11 HP Photosmart 14 installation on Mac OS 94 installation on Windows 92 OCR 39 uninstall from Mac OS 97 uninstall from Windows 95 warranty 149 Solution Center 14 sound pressure 159 specifications acoustic emissions - HP J4680c | User Guide - Page 180
95 customer support 150 environmental programs 167 order supplies and accessories 147 supply yield data sheet 156 white bands or stripes, troubleshoot copies 124, 125 scans 128 WIA (Windows Image Application), scan from 38 Windows borderless printing 25 HP Photosmart Software 14 HP Solution Center - HP J4680c | User Guide - Page 181
- HP J4680c | User Guide - Page 182
© 2008 Hewlett-Packard Development Company, L.P. www.hp.com/support Podręcznik użytkownika
-
 1
1 -
 2
2 -
 3
3 -
 4
4 -
 5
5 -
 6
6 -
 7
7 -
8
-
9
-
10
-
11
-
12
-
13
-
14
-
15
-
16
-
17
-
18
-
19
-
20
-
21
-
22
-
23
-
24
-
25
-
26
-
27
-
28
-
29
-
30
-
31
-
32
-
33
-
34
-
35
-
36
-
37
-
38
-
39
-
40
-
41
-
42
-
43
-
44
-
45
-
46
-
47
-
48
-
49
-
50
-
51
-
52
-
53
-
54
-
55
-
56
-
57
-
58
-
59
-
60
-
61
-
62
-
63
-
64
-
65
-
66
-
67
-
68
-
69
-
70
-
71
-
72
-
73
-
74
-
75
-
76
-
77
-
78
-
79
-
80
-
81
-
82
-
83
-
84
-
85
-
86
-
87
-
88
-
89
-
90
-
91
-
92
-
93
-
94
-
95
-
96
-
97
-
98
-
99
-
100
-
101
-
102
-
103
-
104
-
105
-
106
-
107
-
108
-
109
-
110
-
111
-
112
-
113
-
114
-
115
-
116
-
117
-
118
-
119
-
120
-
121
-
122
-
123
-
124
-
125
-
126
-
127
-
128
-
129
-
130
-
131
-
132
-
133
-
134
-
135
-
136
-
137
-
138
-
139
-
140
-
141
-
142
-
143
-
144
-
145
-
146
-
147
-
148
-
149
-
150
-
151
-
152
-
153
-
154
-
155
-
156
-
157
-
158
-
159
-
160
-
161
-
162
-
163
-
164
-
165
-
166
-
167
-
168
-
169
-
170
-
171
-
172
-
173
-
174
-
175
-
176
-
177
-
178
-
179
-
180
-
181
-
182
 |
 |
OK
#
#
-
*
0
7 pqrs
8 tuv
9 wxyz
5 jkl
4 ghi
6 mno
HP Officejet J4500 All-in-One series
User Guide