HP J8773A User Manual
HP J8773A Manual
 |
View all HP J8773A manuals
Add to My Manuals
Save this manual to your list of manuals |
HP J8773A manual content summary:
- HP J8773A | User Manual - Page 1
ProCurve Series 4200vl Switches Installation and Getting Started Guide www.procurve.com - HP J8773A | User Manual - Page 2
- HP J8773A | User Manual - Page 3
ProCurve Switch 4200vl Series Installation and Getting Started Guide - HP J8773A | User Manual - Page 4
-48G ProCurve Switch 4202vl-72 ProCurve Switch 4204vl-48GS Bundle ProCurve Switch 4208vl-64G Bundle ProCurve Switch 4208vl-96 Bundle ProCurve Switch 4208vl-72GS Bundle (J8770A) (J8773A) (J8771A) (J8772A) (J9064A) (J8774A) (J8775A) (J9030A) Disclaimer HEWLETT-PACKARD COMPANY MAKES NO WARRANTY OF - HP J8773A | User Manual - Page 5
2-7 2. Install Switch vl Modules 2-8 3. (Optional) Install Second Power Supply 2-10 4. Verify the Switch Passes Self Test 2-12 LED Behavior 2-13 5. Mount the Switch 2-14 Rack or Cabinet Mounting 2-14 Horizontal Surface Mounting 2-17 Wall Mounting 2-18 6. Connect the Switch to a Power Source - HP J8773A | User Manual - Page 6
21 Telnet Console Access 2-21 Hot Swapping Switch Modules 2-22 Adding or Replacing Modules 2-22 Changing the Module Type 2-22 Example Network Topologies 2-23 Basic Connectivity 2-23 Legacy Connectivity 2-24 Use as an Edge Switch 2-25 Used as an Aggregation Switch 2-26 3 Getting Started With - HP J8773A | User Manual - Page 7
Downloading New Code 4-14 HP Customer Support Services 4-14 Before Calling Support 4-14 A Specifications Physical A-1 Electrical A-1 Environmental A-2 Acoustic A-2 Switch 4208vl, and its bundles A-2 Switch 4204vl, 4202vl-48G, and 4202vl-72 and it's bundles: . . . . A-2 Network Connectors - HP J8773A | User Manual - Page 8
C Safety and EMC Regulatory Statements Safety Information C-1 Informations concernant la sécurit C-2 Hinweise zur Sicherheit C-3 Considerazioni sulla sicurezza C-4 Consideraciones sobre seguridad C-5 Safety Information (Japan C-6 Safety Information (China C-7 EMC Regulatory Statements C-8 - HP J8773A | User Manual - Page 9
J8773A chassis with four pre-installed ProCurve Switch vl 24-port 10/100-TX Modules (J8765A), providing 96 10/100-TX ports. • ProCurve Switch 4208vl-72GS (J9030A), consists of a J8773A Chassis with three pre-installed ProCurve Switch vl modules. Two 24-port Gig-T modules (J8768A) and one 20-port Gig - HP J8773A | User Manual - Page 10
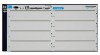
MAC Address SG12345678 00-01-e7-12-34-56 Fault A B C D Figure 1-1. ProCurve Switch 4204vl (J8770A) ProCurve Switch 4208vl J8773A Power Fault Console Self Test Reset Clear Auxiliary Port Status 1 2 ABCDE F GH Fan Power Modules Spd mode: off = 10 Mbps flash = 100 Mbps on = 1000 Mbps - HP J8773A | User Manual - Page 11
70 72 Two slots for vl Modules 72 fixed ports of 10/100-TX with HP Auto MDI-X Figure 1-3. ProCurve Switch 4202vl-72 (J8772A) ProCurve Switch 4202vl J8771A Power Fault Console Reset Self Test Clear Auxiliary Port Status 12AB Fan Power Modules Use vl Modules only Spd mode: off = 10 Mbps - HP J8773A | User Manual - Page 12
4200vl Series Introducing the ProCurve Switch 4200vl Series Switch 4200vl Options and Bundles Supported Modules: As of this printing, the supported vl modules are: • 12-port 100-FX vl Module (J8763A) • 16-port 10/100/1000-T vl Module (J8764A) • 24-port 10/100-TX vl Module (J8765A) • 1-port 10-GbE - HP J8773A | User Manual - Page 13
Reset and Clear buttons Status LEDs for the Fans, Power Supplies, and Switch Modules LED Mode Select button and indicator LEDs ProCurve Switch 4204vl J8770A Power Console Reset Self Test Clear Auxiliary Port Status 12ABCD Fan Power Modules Spd mode: off = 10 Mbps flash = 100 Mbps on - HP J8773A | User Manual - Page 14
. The normal state; indicates that there are no fault conditions on the switch. A fault has occurred on the switch, one of the switch modules, an individual port, a power supply, or a fan. The Status LED for the module or other component with the fault will flash simultaneously. On briefly at the - HP J8773A | User Manual - Page 15
, the port is operating at 1000 Mbps. ! Indicates that specific error packets are being detected on the port. In this mode connected to the port • the port is not receiving link beat or sufficient light • the port has been disabled through the switch console, the web browser interface, ProCurve - HP J8773A | User Manual - Page 16
ProCurve Switch 4202vl J8772A Power Console Fault Link 1 Mode 3 Reset Self Test Clear Auxiliary Port Status 12AB Fan Power Modules Use vl Modules only 10/100Base-TX Ports - all ports are HP lit, the port LEDs behave as follows to indicate the connection speed for the port: • Off = 10 Mbps - HP J8773A | User Manual - Page 17
cable supplied with the switch. This connection is described under "Connecting a Console to the Switch" in chapter 2, "Installing the Switch 4200vl Series". The console is a full-featured interface that can be used to configure, monitor, and troubleshoot the switch. It can be run on a PC, laptop - HP J8773A | User Manual - Page 18
Power Supply A second, load-sharing redundant power supply (ProCurve switch RPS, J4839A) can be installed in the back of the Switch 4200vl Series. To provide true redundancy, this second power supply should be connected to a different AC power source from the other supply. Then, if one AC power - HP J8773A | User Manual - Page 19
the ProCurve Switch 4200vl Series Switch Features Switch Features The features of the Switch 4200vl Series include: ■ 2, 4 or 8 slots for installing any of the available Switch vl Modules. the modules can be installed in any order and in any combination and can be "hot swapped". ■ the supported mini - HP J8773A | User Manual - Page 20
: • IP static routes • IRDP • DHCP relay ■ support for many other advanced features to enhance network performance, security, and control- for a description, see the Management and Configuration Guide and the Advanced Traffic Management Guide for your switch, available on the ProCurve Web site. 1-12 - HP J8773A | User Manual - Page 21
Guide, this manual ■ ProCurve Manager - CD ROM and booklet ■ Customer Support/Warranty booklet ■ Accessory kit 5065-6521 for the: • 8-slot Switch 4208vl • Switch 4208vl-64G • Switch 4208vl-96 • Switch 4208vl-72GS ■ Accessory kit 5064-9943 for the: • 4-slot Switch 4204vl • Switch 4202vl-48G • Switch - HP J8773A | User Manual - Page 22
Installing the Switch 4200vl Series Included Parts ■ Power cord, one of the following: Australia/New Zealand China Continental Europe Denmark Japan 8120 Hong Kong/Singapore United States/Canada/Mexico 8120-6807 8120-8709 8121-0605 Japan Power Cord Warning Installing the Switch 4200vl Series 2-2 - HP J8773A | User Manual - Page 23
" though, so they can also be installed and removed after the switch is powered on. Make sure you use only ProCurve Switch vl Modules in your Switch 4200vl Series. 3. (Optional) Install second power supply (page 2-10). The Switch 4200vl Series have a slot in the back for installing a second, load - HP J8773A | User Manual - Page 24
mechanical hazards, never allow any part of your body, jewelry, tool, or other foreign object to enter any module or power supply slots. ■ Ensure that for any switch slot into which no module is installed, the cover plate is installed to cover the slot. A cover plate is required for safe operation - HP J8773A | User Manual - Page 25
properly grounded, then use the power cord supplied with the switch to connect it to the power source. If your installation requires a different power cord than the one supplied with the switch and power supply, be sure the cord is adequately sized for the switch's current requirements. In addition - HP J8773A | User Manual - Page 26
: The ProCurve Gig-T vl Modules are compatible with the IEEE 802.3ab standard including the "Auto MDI/MDI-X" feature, which allows use of either straight-through or crossover twisted-pair cables for connecting to any network devices including end nodes, such as computers, or to other switches, hubs - HP J8773A | User Manual - Page 27
fiber 62.5/125 μm (core/cladding) diameter, multimode Fiber ribbon cable is also supported. Length Limits ■ 62.5 μm cable: • 160 Mhz/km = 2-26 Specifications Shielded twisted-pair cables complying with the 802.3ak standard. Connector Type CX4 Installation Location Before installing the switch - HP J8773A | User Manual - Page 28
, see the instructions in the manual that comes with the module. Caution Module Installation Notes Make sure you install only ProCurve Switch vl Modules. Switch gl/xl Modules will fit into your Switch vl slots, but they will not operate. Avoid any electrostatic discharge problems by handling the - HP J8773A | User Manual - Page 29
Installing the Switch 4200vl Series insert module into the guides and slide it in until it is fully inserted Installing the Switch 4200vl Series Installation Procedures "Low-force" connector. High insertion force is not needed and should not be used Figure 2-1. Installing a module the module is - HP J8773A | User Manual - Page 30
) Install Second Power Supply A second, load-sharing redundant power supply (ProCurve Switch gl/xl/vl RPS, J4839A) can be installed in the back of the switch. To provide true redundancy, this second power supply should be connected to a different AC power source from the other supply. Then, if - HP J8773A | User Manual - Page 31
way in until it connects to the switch. The power supply face plate will be flush with the back face of the switch. Installing the Switch 4200vl Series Installation Procedures Installing the Switch 4200vl Series Figure 2-3. Installing a power supply Once the power supply is installed, ensure you - HP J8773A | User Manual - Page 32
on when the power cord is connected to the switch and to a power source. If your installation requires a different power cord than the one supplied with the switch, please see the "Installation Precautions" on page 2-5. 2. Check the LEDs on the switch and on each of the switch modules. The LED - HP J8773A | User Manual - Page 33
the devices installed: one for each switch module installed, one for each power supply installed, and one for all the fans. ■ The Fault and Self Test LEDs are off. ■ The port LEDs on the switch modules go into their normal operational mode: • If the ports are connected to active network devices, the - HP J8773A | User Manual - Page 34
Series Installation Procedures 5. Mount the Switch After the modules and optional power supply are installed and you have verified the switch passes self test, you are ready to mount the switch in a stable location. The Switch 4200vl Series can be mounted in these ways: ■ in a rack or cabinet - HP J8773A | User Manual - Page 35
Installing the Switch 4200vl Series Installing the Switch 4200vl Series Installation Procedures 10 mm M4 screws Figure 2-7. Attaching brackets to a 3U chassis 10 mm M4 screws Figure 2-8. Attaching brackets to a 5U chassis 2-15 - HP J8773A | User Manual - Page 36
upright. . partially install a screw into the top hole of a close (0.5-inch) pair on both sides of the rack Figure 2-9. Installing the Rack Screw 3. Place the switch in the rack and lower it so the notches in the bottom of the bracket slide onto the screws, then tighten these screws. lower the - HP J8773A | User Manual - Page 37
screws If you are installing the switch in an equipment cabinet, in place of the 12-24 screws supplied with the switch, use the clips and screws that in an uncluttered area. You may want to secure the networking cables and switch power cord to the table legs or other part of the surface structure to - HP J8773A | User Manual - Page 38
show mounting a Switch 4208vl. All other 4200vl Switches would be mounted in a similar way. For safe operation, do not install the switch with the vents or fans facing downward. The only recommended and supported wall mounting orientation is with the unit upright and the modules facing out, as - HP J8773A | User Manual - Page 39
a redundant power supply module into the switch, it should be connected to a separate AC power source. Then, if there is a power outage from one of the AC sources, the switch will continue to operate by power coming from the other source. See the ProCurve Switch gl/xl/vl RPS Installation Guide for - HP J8773A | User Manual - Page 40
to help in troubleshooting ■ Download new software to the switch ■ Add passwords and other security features to control access to the switch from the console, web browser interface, and network management stations The console can be accessed through these methods: ■ Out-of-band: Connect a PC or VT - HP J8773A | User Manual - Page 41
cable supplied with the switch PC's power and, if using a PC, start the PC terminal program. 3. Press the Enter key two or three times and you PC running a terminal emulator program, or a VT-100 terminal will see the copyright page and the message "Press any key to Figure 2-14. Connecting the - HP J8773A | User Manual - Page 42
two power supplies are installed, both power cords would have to be unplugged. ■ Issuing the reload command from the switch console CLI, or selecting the Reboot Switch option from the switch console menu, the web browser interface, or ProCurve Manager. Until the switch is rebooted, the module will - HP J8773A | User Manual - Page 43
implemented. For more topology information, see the ProCurve Web site, www.procurve.com. Basic Connectivity server connected by a Gigabit link switch 4202vl-72 B twisted-pair straight-through or crossover cables Installing the Switch 4200vl Series PCs and peripherals Figure 2-15. Basic Topology - HP J8773A | User Manual - Page 44
Connectivity switch 2524 hp procurve 25 26 1 2 3 4 5 6 13 14 15 16 17 18 Link Transceiver Ports 25 ( ! See manual for supported transceivers) 26 10/100Base-T Ports (1-24) (all ports are HP Auto-MDIX) 1 2 3 4 5 6 switch 2524 Mode j4813a 7 8 9 10 11 12 19 20 21 22 23 24 Link Power - HP J8773A | User Manual - Page 45
ProCurve Switch 4208vl J8773A Power Console Fault Link 1 Mode 3 Reset Self Test Clear Auxiliary Port Status 1 2 ABCDE F GH Fan Power Modules 10/100Base-TX Ports - all ports are HP Module for local connections, and the availability of Gigabit speeds through the Gig-T vl Module, the Switch - HP J8773A | User Manual - Page 46
with a 10-GbE uplink connection (expected throughput is 2.5 to 7 Gbps, depending on packet size). Traffic from a single MAC SA to a single MAC DA will be limited to at most 1 Gbps. Each Switch 4200vl Series can support up to 4 J8766A modules. The 10-GbE module supports trunking - however, it can - HP J8773A | User Manual - Page 47
only through a direct console connection. To manage the switch through inband (networked) access, you should configure the switch with an IP address and subnet IP Addressing Affects Switch Operation" in the Management and Configuration Guide for your switch, available on the ProCurve Web site. For - HP J8773A | User Manual - Page 48
. 1. Using the method described in the preceding section, connect a terminal device to the switch and display the switch console command (CLI) prompt (the default display). The CLI prompt appears displaying the switch model number: ProCurve Switch 4208vl# 2. At the prompt, enter the setup command to - HP J8773A | User Manual - Page 49
IP Config to Manual, then enter an IP address compatible with your network. Note: The IP address and subnet mask assigned for the switch must be compatible on IP addressing, see the Management and Configuration Guide for your switch, available on the ProCurve Web site. Subnet Mask xxx.xxx.xxx.xxx - HP J8773A | User Manual - Page 50
a result, with the proper network connections, you can now manage the switch from a PC equipped with Telnet, a web browser interface, or from an SNMP-based network management station using a tool such as ProCurve Manager. Some basic information on managing your switch is included in the next section - HP J8773A | User Manual - Page 51
program on a PC that is on the same subnet as the switch and connect to the switch's IP address. 3. You will see the copyright page and the message "Press any key to continue". Press a key, and you will then see the switch console command (CLI) prompt, for example: ProCurve Switch 4208vl# Enter help - HP J8773A | User Manual - Page 52
Remote Switch Management ProCurve Switch 4204vl - Sxtal tus: Information J8770A ProCurve Switch 4204vl xl PoE Status 05 Figure 3-2. Example of a Web Browser session For more information on using the web browser interface, please see the Management and Configuration Guide for your switch, available - HP J8773A | User Manual - Page 53
management tool. For more information, see the chapter on "Troubleshooting" in the Management and Configuration Guide, for your switch, available on the ProCurve Web site www.procurve.com. This chapter describes the following: ■ basic troubleshooting tips (page 4-2) ■ diagnosing with the LEDs (page - HP J8773A | User Manual - Page 54
problems after recent changes Tree Protocol support on the switch. This ensures connection without causing a data path loop. See the Management and Configuration Guide for your switch, available on the ProCurve Web site, for more information on Spanning Tree and on Trunking. 4-2 Troubleshooting - HP J8773A | User Manual - Page 55
the Management and Configuration Guide for your switch, available on the ProCurve Web site, for more information. For more information on possible network problems and their solutions, refer to the technical note "Troubleshooting LAN Performance and Intermittent Connectivity Problems", which can be - HP J8773A | User Manual - Page 56
Brief Problem Tips Description Power Fault Self Test Fan Status Power Status (one LED per power supply) Module Status (one LED per module) Port Link Off with 1 power cord plugged in 1 1 1 1 1 A No power On Prolonged Prolonged 1 1 1 On On 1 B Self test fail - entire switch - HP J8773A | User Manual - Page 57
outlet or try a different power cord. If the power source and power cord are OK and this condition persists, the switch power supply may have failed. Call your HP-authorized LAN dealer, or use the electronic support services from HP to get assistance. See the Customer Support/ Warranty card for more - HP J8773A | User Manual - Page 58
error indication reoccurs after the supply is reinstalled, the power supply may be faulty. Call your HPauthorized LAN dealer, or use the electronic support services from HP to get assistance. See the Customer Support/Warranty card for more information. The switch has experienced a backplane failure - HP J8773A | User Manual - Page 59
remove and replace the module without having to power down the switch. Call your ProCurve authorized LAN dealer, or use the electronic support services from ProCurve to get information on supported Switch vl modules. The vl modules that are available as of the printing of this manual are listed on - HP J8773A | User Manual - Page 60
until you clear the security violation through the switch console. In the console, you can view the identity of the connected device that committed the security violation. Once the , see the Management and Configuration Guide, for your switch, available on the ProCurve Web site. Troubleshooting 4-8 - HP J8773A | User Manual - Page 61
Troubleshooting Diagnosing with the LEDs Tip Letter M Problem The network connection is not working properly. Solution Try the following procedures: • For the indicated port, verify both ends of the cabling, at the switch and the connected device, are securely connected. • Verify the connected - HP J8773A | User Manual - Page 62
console port. The cable to make that connection is provided with your switch. The console interface is also accessible through a telnet connection. See the "Troubleshooting" chapter in the Management and Configuration Guide for your switch, available on the ProCurve Web site, for more information on - HP J8773A | User Manual - Page 63
, web browser interface, or ProCurve Manager. Power cycling the switch, pressing the Reset button, and the software reset or reboot options all cause the switch to perform its power-on self-test, which almost always will resolve any temporary operational problems. These reset processes also cause - HP J8773A | User Manual - Page 64
tests can be performed through the switch console interface from a terminal connected to the switch or through a telnet connection, or from the switch's web browser interface. See the Management and Configuration Guide for your switch, available on the ProCurve Web site, for more information. These - HP J8773A | User Manual - Page 65
reset and resolution of the original problem, you can restore the saved configuration to the switch. For both the save and restore processes, you can use the console copy command. See the Management and Configuration Guide for your switch, available on the ProCurve Web site, for more information on - HP J8773A | User Manual - Page 66
on the ProCurve Web site, www.procurve.com. HP Customer Support Services If you are still having trouble with your switch, Hewlett-Packard offers support 24 hours a day, seven days a week through the use of a number of automated electronic services. See the Customer Support/Warranty booklet that - HP J8773A | User Manual - Page 67
Specifications A Specifications Physical Width: Depth: Height: • All 4208vl Switches • All 4204vl and 4202vl Switches Weight: • Switch 4208vl • Switch 4208vl-64G • Switch 4208vl-72GS • Switch 4208vl-96 • Switch 4204vl • Switch 4202vl-48G • Switch 4204vl-48GS • Switch 4202vl-72 44.2 cm (17.4 in) - HP J8773A | User Manual - Page 68
Specifications Specifications A-2 °F) 4.6 Km (15,000 ft) 4.6 Km (15,000 ft) Acoustic Switch 4208vl, and its bundles: Geräuschemission LwA=63.1 dB am fiktiven Arbeitsplatz nach 100/1000 Mbps RJ-45 twisted-pair ports on the Gig-T vl Module are compatible with the IEEE 802.3u 100Base-TX and IEEE 802 - HP J8773A | User Manual - Page 69
Switch 4200vl Series, including minimum pin-out information and specifications for twisted-pair cables. Incorrectly wired cabling is the most common cause of problems for LAN communications. ProCurve ■ The MT-RJ connector ports on the 100-FX vl module and the LC-type connector port on the 100-FX SFP - HP J8773A | User Manual - Page 70
ohm differential UTP or STP cable, complying with IEEE 802.3u 100Base-TX specifications, fitted with RJ-45 connectors. 1000 Mbps Operation Category 5 100-ohm testing your cabling, be sure to include the patch cables that connect the switch and other end devices to the patch panels on your site. - HP J8773A | User Manual - Page 71
Switch Ports and Network Cables Fiber-Optic Cables Port Type Gigabit-SX Gigabit-LX Gigabit-LH 100BaseFX 10-GbE SR Cable Specifications the Installation Guide that came with your module for more connections: 2 kilometers • half-duplex connections: 412 meters Note: MT-RJ connector is on the module - HP J8773A | User Manual - Page 72
12 fiber 62.5/ 125 μm (core/cladding) diameter, multimode Fiber ribbon cable is also supported. Copper Cables Port Type CX4 Cable Specifications Speed 3.125Gbx4 (Cables compliant with the 802.3ak standard) Connector Type CX4 Supported Length 0.5-15 meters Switch Ports and Network Cables B-4 - HP J8773A | User Manual - Page 73
use crossover cables, although crossover cables can also be used for any of the connections. The Gig-T vl Module supports the IEEE 802.3ab standard, which includes the "Auto MDI/MDI-X" feature, which operates the same way. HP Auto MDI-X was developed by Hewlett-Packard and shared with the IEEE for - HP J8773A | User Manual - Page 74
and Network Cables Switch Ports and Network Cables Twisted-Pair Cable/Connector Pin-Outs ■ For 1000Base-T connections, all four as supported by the IEEE 802.3u 100Base-TX standard. ■ For 1000 Mbps connections, Category 5 or better 100-ohm differential UTP or STP cable only, as supported by the - HP J8773A | User Manual - Page 75
Through Twisted-Pair Cable for 10 Mbps or 100 Mbps Network Connections Because of the HP Auto MDI-X operation of the 10/100 ports on the switches, for all network connections, to PCs, servers or other end nodes, or to hubs or other switches, you can use straight-through cables. If any of these ports - HP J8773A | User Manual - Page 76
Twisted-Pair Cable for 10 Mbps or 100 Mbps Network Connection The HP Auto-MDIX operation of the 10/100 ports on the switches also allows you to use crossover cables for all network connections, to PCs, servers or other end nodes, or to hubs or other switches. If any of these ports are given a fixed - HP J8773A | User Manual - Page 77
Twisted-Pair Cable/Connector Pin-Outs Straight-Through Twisted-Pair Cable for 1000 Mbps Network Connections 1000Base-T connections require that all four pairs of wires be connected. Cable Diagram Switch Ports and Network Cables Note . Pins 1 and 2 on connector "A" must be wired as a twisted pair - HP J8773A | User Manual - Page 78
- HP J8773A | User Manual - Page 79
of the network with caution. Servicing There are no user-serviceable parts inside these products. Any servicing, adjustment, maintenance, or repair must be performed only by service-trained personnel. These products do not have a power switch; they are powered on when the power cord is plugged in - HP J8773A | User Manual - Page 80
Safety and EMC Regulatory Statements Informations concernant la sécurité Informations concernant la sécurité ! WARNING Caution Symbole de référence à la documentation. Si le produit est marqué de ce symbole, reportez-vous à la documentation du produit afin d'obtenir des informations plus détaillé - HP J8773A | User Manual - Page 81
Safety and EMC Regulatory Statements Hinweise zur Sicherheit Hinweise zur Sicherheit ! WARNING Caution Symbol für Dokumentationsverweis. Wenn das Produkt mit diesem Symbol markiert ist, schlagen Sie bitte in der Produktdokumentation nach, um mehr Informationen über das Produkt zu erhalten. Symbol - HP J8773A | User Manual - Page 82
Safety and EMC Regulatory Statements Considerazioni sulla sicurezza Considerazioni sulla sicurezza ! WARNING Caution Simbolo di riferimento alla documentazione. Se il prodotto è contrassegnato da questo simbolo, fare riferimento alla documentazione sul prodotto per ulteriori informazioni su di - HP J8773A | User Manual - Page 83
Safety and EMC Regulatory Statements Consideraciones sobre seguridad Consideraciones sobre seguridad ! WARNING Caution Símbolo de referencia a la documentación. Si el producto va marcado con este símbolo, consultar la documentación del producto a fin de obtener mayor información sobre el producto - HP J8773A | User Manual - Page 84
Safety and EMC Regulatory Statements Safety Information (Japan) Safety Information (Japan) Japan Power Cord Warning C-6 Safety and EMC Regulatory Statements - HP J8773A | User Manual - Page 85
Safety and EMC Regulatory Statements Safety Information (China) Safety Information (China) C-7 Safety and EMC Regulatory Statements - HP J8773A | User Manual - Page 86
environment. This equipment generates, uses, and can radiate radio frequency energy and, if not installed and used in accordance with the instruction manual, may cause interference to radio communications. Operation of this equipment in a residential area may cause interference in which case the - HP J8773A | User Manual - Page 87
Regulatory Statements Taiwan Regulatory Model Identification Number For regulatory identification purposes, the ProCurve Switch 4200vl Series are assigned a Regulatory Model Number. The Regulatory Model Number for these switches is RSVLC-0202. This regulatory number should not be confused with the - HP J8773A | User Manual - Page 88
U.S.A. declares, that the product Product Name2: HP ProCurve Switch 4204vl, 4208vl, 4208vl-64G(Bundle) 4208vl-96 (Bundle), 4202vl-48G, 4202vl-72, 4208vl-72GS, 4204vl-48GS Product Number(s): J8770A, J8773A, J8774A, J8775A, J8771A, J8772A, J9030A, J9064A Regulatory Model Number1: RSVLC-0507 - HP J8773A | User Manual - Page 89
more information about where you can drop off your waste equipment for recycling, please contact your local city office, your household waste disposal service or the shop where you purchased the product. Likvidace zařízení soukromými domácími uživateli v Evropské unii Tento symbol na produktu nebo - HP J8773A | User Manual - Page 90
d'informations sur les centres de collecte et de recyclage des appareils mis au rebut, veuillez contacter les autorités locales de votre région, les services de collecte des ordures ménagères ou le magasin dans lequel vous avez acheté ce produit. Entsorgung von Altgeräten aus privaten Haushalten in - HP J8773A | User Manual - Page 91
Recycle Statements Waste Electrical and Electronic Equipment (WEEE) Statements Smaltimento delle apparecchiature da parte di privati nel territorio dell'Unione Europea Questo simbolo presente sul prodotto o sulla sua confezione indica che il prodotto non può essere smaltito insieme ai rifiuti - HP J8773A | User Manual - Page 92
o ambiente e a saúde das pessoas. Para obter mais informações sobre locais que reciclam esse tipo de material, entre em contato com o escritório da HP em sua cidade, com o serviço de coleta de lixo ou com a loja em que o produto foi adquirido. Likvidácia vyradených zariadení v domácnostiach v Eur - HP J8773A | User Manual - Page 93
-pair cable specifications ... B-2 A Act LED ... 1-7, 1-8 aggregation switch, example topology as ... 2-26 auto MDI/MDI-X operation ... B-7, B-9 HP Auto MDI-X feature ... B-5 auxilary port ... 1-5 B back of switch description ... 1-10 power connector ... 1-10 slot for redundant power supply ... 1-10 - HP J8773A | User Manual - Page 94
3-3 IP address, manually ... 3-2 manager password ... 3-2 restoring factory defaults ... 1-9, 4-13 subnet mask ... 3-3 Switch Setup screen ... 3-2 connecting the switch to a power source ... 2-19 connector specifications ... A-2 console checking messages during troubleshooting ... 4-11 displaying - HP J8773A | User Manual - Page 95
redundant power supply ... 1-10, 2-10 resetting the switch for new module type ... 2-22 switch modules ... 2-22 HP Auto MDI-X feature description ... B-5 I in-band console access, types of ... 2-20 managing the switch ... 3-1 included parts ... 2-1 installation connecting the switch to a power - HP J8773A | User Manual - Page 96
... 2-6 fiber-optic, specifications ... B-3 HP Auto MDI-X feature ... B-5 required types ... 2-6 twisted-pair connector pin-outs ... B-5 twisted-pair, specifications ... B-2 twisted-pair, wiring rules ... B-5 network devices connecting to the switch ... 2-19 network ports connecting to ... 2-19 LEDs - HP J8773A | User Manual - Page 97
Networking tools diagnostics with ... 4-10 R rack mounting the switch in ... 2-14 rebooting the switch to initialize changed module type ... 2-8 recycle statements ... D-1 redundant power connections ... 2-19 redundant power supply installation cautions ... 1-10, 2-10 installing ... 2-10 slot for - HP J8773A | User Manual - Page 98
as an edge switch ... 2-25 tranceivers hot swap feature ... 1-11 transceivers supported types ... 1-4 troubleshooting ... 4-1 basic tips ... 4-2 checking port configuration ... 4-3 checking the console messages ... 4-11 checking the LEDs ... 4-11 common network problems ... 4-2 connecting to fixed - HP J8773A | User Manual - Page 99
-through cable pin-out ... B-7, B-9 switch-to-computer connection ... B-7, B-9 switch-to-switch or hub connection ... B-8 testing ... 4-12 twisted-pair ports HP Auto MDI-X feature ... B-5 V VT-100 terminal serial cable connection for ... 2-21 W wall mounting switch on ... 2-18 wiring rules for - HP J8773A | User Manual - Page 100
© Copyright 2005 - 2007 Hewlett-Packard Development Company, L.P. September 2007 Manual Part Number 5991-8601 *5991-8601*
-
 1
1 -
 2
2 -
 3
3 -
 4
4 -
 5
5 -
 6
6 -
 7
7 -
8
-
9
-
10
-
11
-
12
-
13
-
14
-
15
-
16
-
17
-
18
-
19
-
20
-
21
-
22
-
23
-
24
-
25
-
26
-
27
-
28
-
29
-
30
-
31
-
32
-
33
-
34
-
35
-
36
-
37
-
38
-
39
-
40
-
41
-
42
-
43
-
44
-
45
-
46
-
47
-
48
-
49
-
50
-
51
-
52
-
53
-
54
-
55
-
56
-
57
-
58
-
59
-
60
-
61
-
62
-
63
-
64
-
65
-
66
-
67
-
68
-
69
-
70
-
71
-
72
-
73
-
74
-
75
-
76
-
77
-
78
-
79
-
80
-
81
-
82
-
83
-
84
-
85
-
86
-
87
-
88
-
89
-
90
-
91
-
92
-
93
-
94
-
95
-
96
-
97
-
98
-
99
-
100
 |
 |

Installation and
Getting Started Guide
www.procurve.com
ProCurve Series
4200vl Switches