HP J9028B User Manual - Page 18
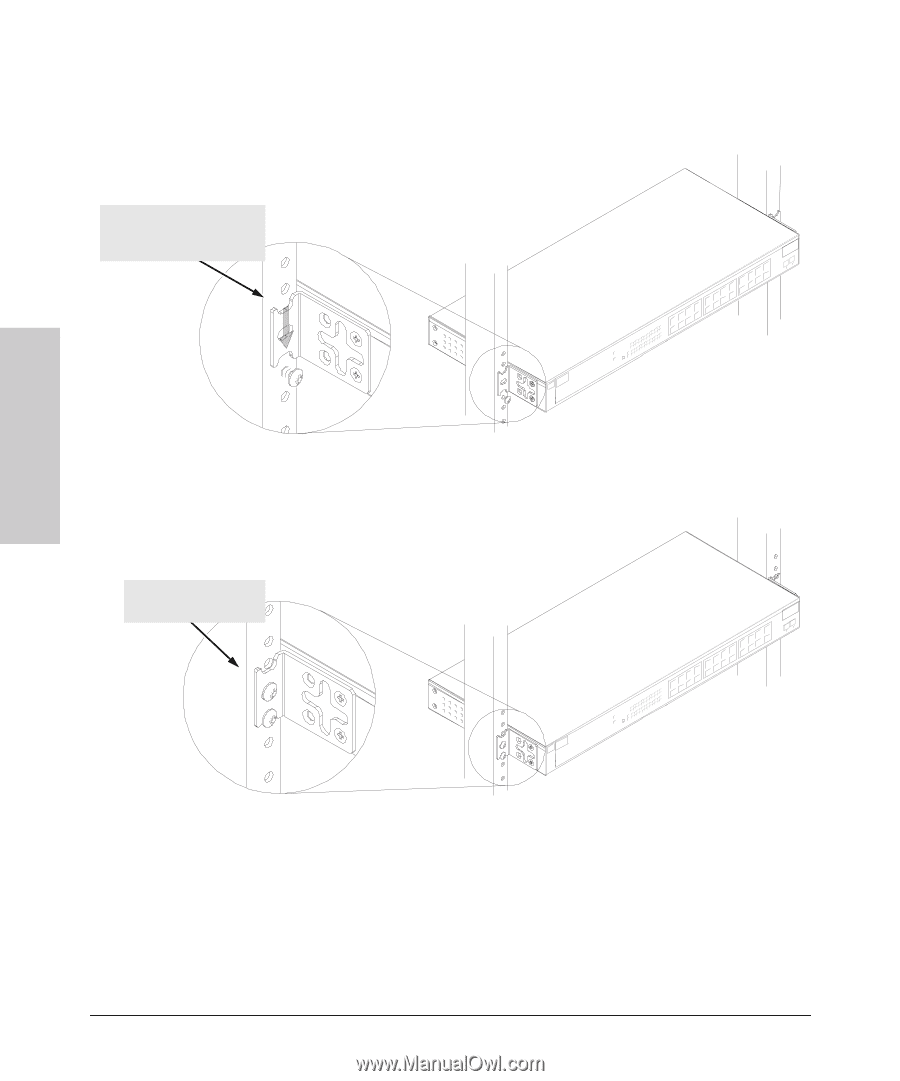
Tighten these screws., the bracket slide onto the screws
 |
View all HP J9028B manuals
Add to My Manuals
Save this manual to your list of manuals |
Page 18 highlights
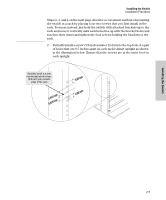
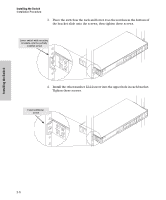
Installing the Switch Installing the Switch Installation Procedure 3. Place the switch in the rack and lower it so the notches in the bottom of the bracket slide onto the screws, then tighten these screws. Lower switch with mounting brackets onto the partially installed screw 4. Install the other number 12-24 screw into the upper hole in each bracket. Tighten these screws. Install additional screw 2-8
-
 1
1 -
2
-
3
-
4
-
5
-
6
-
7
-
8
-
9
-
10
-
11
-
12
-
 13
13 -
 14
14 -
 15
15 -
 16
16 -
 17
17 -
 18
18 -
 19
19 -
 20
20 -
 21
21 -
 22
22 -
 23
23 -
24
-
25
-
26
-
27
-
28
-
29
-
30
-
31
-
32
-
33
-
34
-
35
-
36
-
37
-
38
-
39
-
40
-
41
-
42
-
43
-
44
-
45
-
46
-
47
-
48
-
49
-
50
 |
 |
2-8
Installing the Switch
Installation Procedure
Installing the Switch
3.
Place the switch in the rack and lower it so the notches in the bottom of
the bracket slide onto the screws, then tighten these screws.
4.
Install the other number 12-24 screw into the upper hole in each bracket.
Tighten these screws.
Lower switch with mounting
brackets onto the partially
installed screw
Install additional
screw