HP L1745 HP Display Assistant User Guide
HP L1745 - 17" LCD Monitor Manual
 |
UPC - 883585080953
View all HP L1745 manuals
Add to My Manuals
Save this manual to your list of manuals |
HP L1745 manual content summary:
- HP L1745 | HP Display Assistant User Guide - Page 1
HP Display Assistant User Guide - HP L1745 | HP Display Assistant User Guide - Page 2
herein is subject to change without notice. Microsoft, Windows, and Windows Vista are either trademarks or registered trademarks of Microsoft Corporation in the United States and/or other countries. The only warranties for HP products and services are set forth in the express warranty statements - HP L1745 | HP Display Assistant User Guide - Page 3
...11 Modifying Presets ...11 Loading Presets ...11 Deleting Presets ...11 6 Plug-Ins Plug-ins Tab ...12 Asset Management ...12 Color Calibration ...13 Using HP Display Assistant Color Calibration 13 Calibrated Target 14 Uncalibrated Target 15 Theft Deterrence ...16 7 Tips & Troubleshooting iii - HP L1745 | HP Display Assistant User Guide - Page 4
Graphics Card Compatibility 18 HP Display Assistant Software Update 18 Asset Management (Select HP Display Models Only 19 Cautions for Theft Deterrence Function Operation (Select HP Display Models Only 19 If HP Display Assistant Is Not Working 19 Laptop Users ...20 Technical Support ...20 iv - HP L1745 | HP Display Assistant User Guide - Page 5
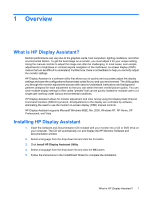
are controlled by software, eliminating the need to use the monitor on-screen display (OSD) manual controls. HP Display Assistant supports Microsoft Windows 98SE, Me, 2000, Windows NT, XP Home, XP Professional, and Vista. Installing HP Display Assistant 1. Insert the Software and Documentation CD - HP L1745 | HP Display Assistant User Guide - Page 6
select Settings, then select Control Panel. (For Windows XP, select Control Panel from the Start menu). 2. In the Control Panel, click the Add/Remove Programs icon. 3. From the Add/Remove Programs window, click HP Display Assistant to highlight it. 4. Click the Remove button to uninstall the program - HP L1745 | HP Display Assistant User Guide - Page 7
image used to tune the display in OSD mode. To close the adjustment image, click the Pattern button again. Undo: Restores the monitor value for the active adjustment pane to its previous setting. Reset: Restores the monitor value for the active adjustment pane to its factory setting. Common - HP L1745 | HP Display Assistant User Guide - Page 8
settings. If there still appears to be movement in the patterns, use the Pitch slider to reduce any noise on the screen. Then use the Phase slider to completely eliminate residual noise. Resolution: Opens the Resolution adjustment pane. Click the Preferred button to set the display to the - HP L1745 | HP Display Assistant User Guide - Page 9
image then click the control buttons on the monitor graphic above the Pattern button to position the grid so that all edges are visible. RGB: Opens the RGB color adjustment pane. Click the Pattern button to load the adjustment image, then use the red, green, and blue color sliders to increase or - HP L1745 | HP Display Assistant User Guide - Page 10
will be compromised. NOTE: The Color Calibration feature requires the display to be set to the preferred resolution. Focus: (This adjustment is not available if you are using the digital connection of your graphics card and monitor.) Opens the Focus adjustment pane. Click the Auto Setup button to - HP L1745 | HP Display Assistant User Guide - Page 11
adjustment pane. Click the control buttons on the monitor graphic to position the grid so that all edges are visible. White Point: Opens the White Point adjustment pane. Click the Reset button then select a white point value (sRGB, 6500, or 9300). Use a white point value that makes the display match - HP L1745 | HP Display Assistant User Guide - Page 12
for that option. Preferences: Opens the Preferences pane. To turn on or off any preference, click the check box next use. ❑ Tune Display: Opens the HP Display Assistant control panel. ● Enable task tray menu: Shows a complete list of menu items for HP Display Assistant when rightclicking on the HP - HP L1745 | HP Display Assistant User Guide - Page 13
the Help pane. The User Manual button displays the online help user manual for HP Display Assistant. The Tech. Support button opens a link to an automated online Technical Support form that can be sent to Portrait Displays for resolution of a problem. The Tech. Support button requires an Internet - HP L1745 | HP Display Assistant User Guide - Page 14
the desktop or set to automatically load each time the computer is restarted. Presets can be saved for any combination of adjustments made with HP Display Assistant. You can load the factory default preset to restore the monitor to the manufacturer recommended settings or select a customized preset - HP L1745 | HP Display Assistant User Guide - Page 15
There are two ways to load a saved preset: from within HP Display Assistant or from the desktop. To load a preset from within HP Display Assistant, click the File tab, select a preset from the Select Preset name drop-down menu and click the Use Preset button. To load a preset from the desktop, right - HP L1745 | HP Display Assistant User Guide - Page 16
. To use a plug-in feature, click on the desired button on the left side of the tab. Asset Management NOTE: The Asset Management feature is available on select models. Asset Management provides the IT Manager the necessary components to remotely view and control the monitor. It supports WMI, TCP - HP L1745 | HP Display Assistant User Guide - Page 17
LCD. sRGB color is used to display images from Web sites and specifies a color matching technique to provide consistent monitor and output device color. HP button to launch the color calibration window. 4. Adjust the display's outer color ring until the tint is removed. For example, if the square has - HP L1745 | HP Display Assistant User Guide - Page 18
gray as possible. Alternate between removing tint from the square and using the slider to get the Plug-ins tab. 2. Click the Quick View button. HP Display Assistant will load the color target. 3. Click turn color calibration off). 5. Click the View Calibrated button from the target (this will turn - HP L1745 | HP Display Assistant User Guide - Page 19
Uncalibrated Target Color Calibration 15 - HP L1745 | HP Display Assistant User Guide - Page 20
and computer configuration. Dual-monitor use is not supported. The HP Display Assistant's Theft Deterrence feature minimizes theft or unauthorized relocation of the display. Theft deterrence does not prevent the display from being stolen, but hinders the operation of the display once it is removed - HP L1745 | HP Display Assistant User Guide - Page 21
a theft condition or install HP Display Assistant on the new computer and enter your PIN when prompted the first time you turn on power to the computer. Overriding Theft Deterrence Mode To override Theft Deterrence, press the + and - buttons on the front panel of the monitor at the same time and - HP L1745 | HP Display Assistant User Guide - Page 22
7 Tips & Troubleshooting HP Display and Graphics Card Compatibility HP Display Assistant is a Windows-based software utility designed for select HP displays that support the Display Data Channel/Command Interface (DDC/CI) communications channel defined by the Video Electronics Standards Association - HP L1745 | HP Display Assistant User Guide - Page 23
and establish communication with the display. If HP Display Assistant was installed using a supported HP display model and you switch the display, you may have problems running HP Display Assistant on the replacement display. Confirm that HP Display Assistant is compatible with the replacement - HP L1745 | HP Display Assistant User Guide - Page 24
. 4. Click on the Clean Registry button to remove the old display information from the Microsoft Windows registry files. 5. The computer will restart and store the new display information in the Microsoft Windows registry files. Laptop Users If HP Display Assistant is installed on your laptop and
-
 1
1 -
 2
2 -
 3
3 -
 4
4 -
 5
5 -
 6
6 -
 7
7 -
8
-
9
-
10
-
11
-
12
-
13
-
14
-
15
-
16
-
17
-
18
-
19
-
20
-
21
-
22
-
23
-
24
 |
 |

HP Display Assistant
User Guide